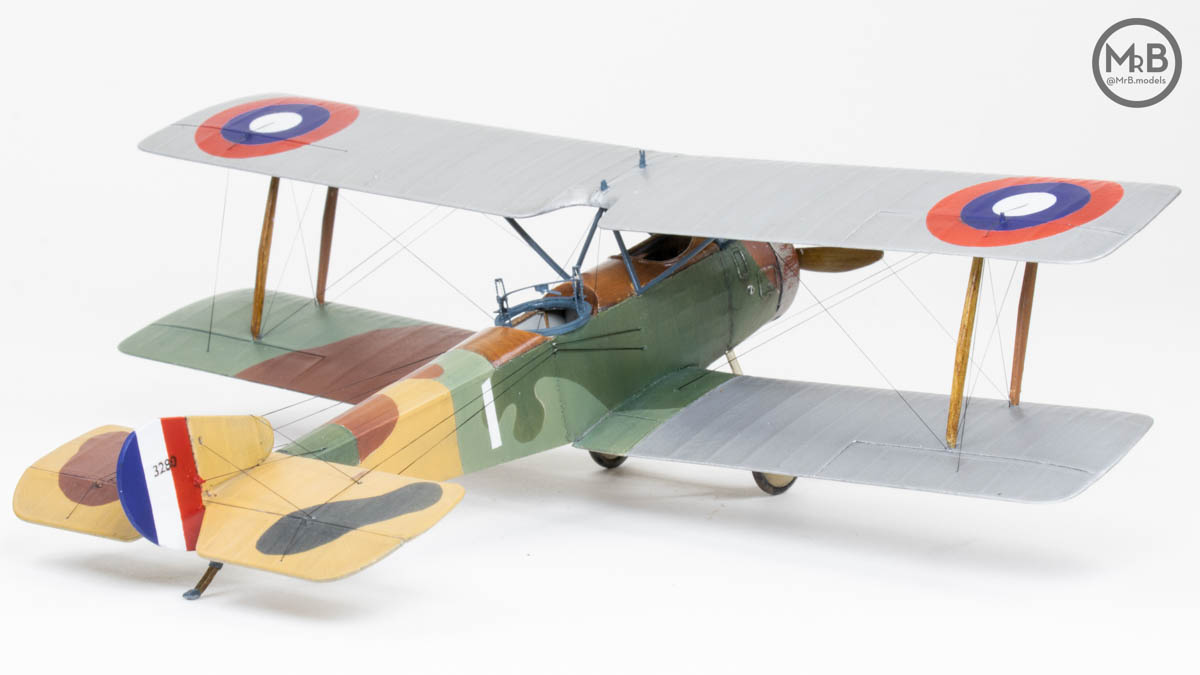
Eastern Express 1/72 Sopwith 1 ½ Strutter
By M.R. Bentley
History
While the British built Strutters are perhaps more known, the French produced more than 4500 Strutters, most of which reached the front lines when the type was already obsolete. When the AEF arrived in early 1918, they purchased a little over 500 of these French machines to be used as trainers.
Despite the high production numbers, there is little documentation regarding and photographic evidence of the 5-color camouflage applied to French Strutters. What choice little photographic evidence exists only adds to the confusion, as there seem to have been many different factory or field-applied patterns.
The Kit
Eastern Express released their Strutters in 2000, and were a rebox of Toko's 1998 tooling. There are 57 parts arranged over three grey styrene sprues. The decal sheet provides decals for four different machines: two RNAS, one captured by the Germans and one Latvian machine. There is no rigging diagram provided, so you will have to dig through your references to figure it out yourself. Fun!
Each of the four EE/Toko boxings have a top deck part unique to the version advertised on the box, my boxing being the two-seater reconnaissance version (SOP 1A.2 in French parlance).
The kit is nice, but very much of its time. There is flash on some parts, and some details, such as fuel tanks or an instrument panel, are missing. Absent is the characteristic fuselage upsweep just forwards of the tail, as well as some details on the underside of the fuselage nose. This kit can be built out of the box, but a lot of small interior details will be missing. The biggest problem, however, are the landing gear struts, which I will talk about in detail later.
Construction
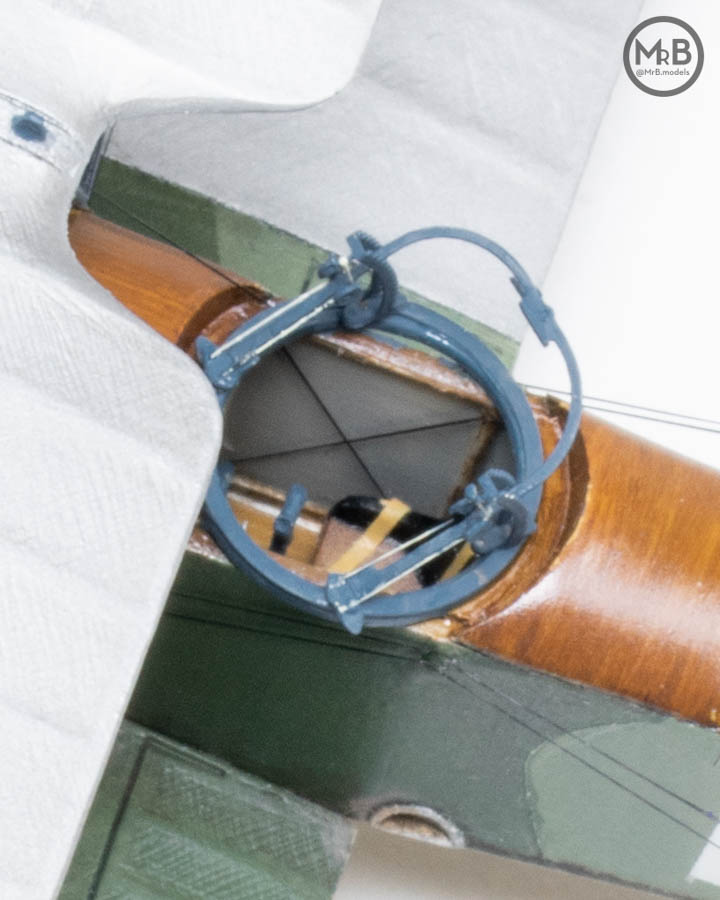
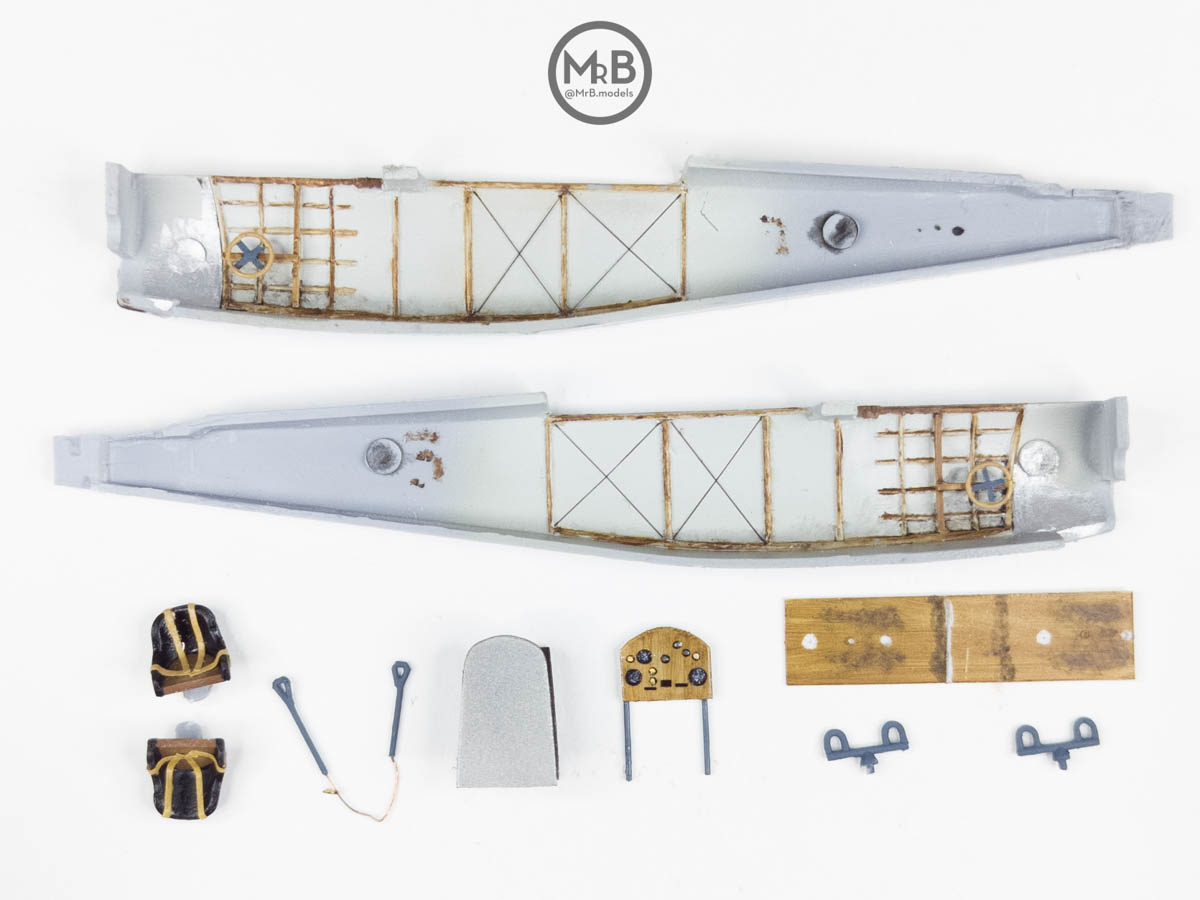
As always, the build starts with the interior. I opted to not use the ladder frame of the kit, and ended up cutting out a floorboard, as well as an instrument panel and front and back fuel tank plates, from styrene sheet. The fuel tank plates were glued together with a 5mm spacer between them. The tank was painted Duraluminum, and the floorboard and instrument panel were painted to replicate wood grain using Deck Tan and burnt umber oil paints. I also made a simple decal for the instrument panel and dry-brushed white and brass paint to represent the dial faces.
The cockpit sides were painted Deck Tan, and the frames experimentally painted with oil paints. The result of this was sloppy and unconvincing to my eye, so I won't repeat it in the future.
|
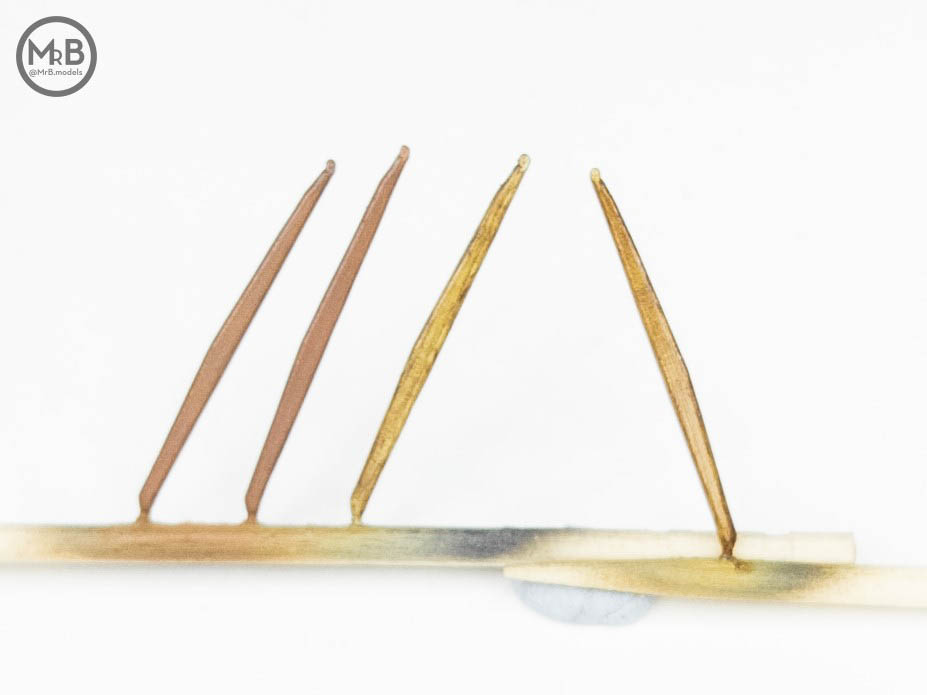
As this machine is a two-seat trainer, it needs two sets of controls. To this end, I made a pair of control columns by scoring and bending sections of 0.5mm brass tube. The airbrake and trim wheels were made of rings of 0.3mm copper wire, connected with thin strips of scotch tape. The ring was painted a wood color, and the strips, control columns and rudder pedals Medium Blue. The seats were painted gloss black and leather brown, and have simple masking tape seatbelts.
|
|
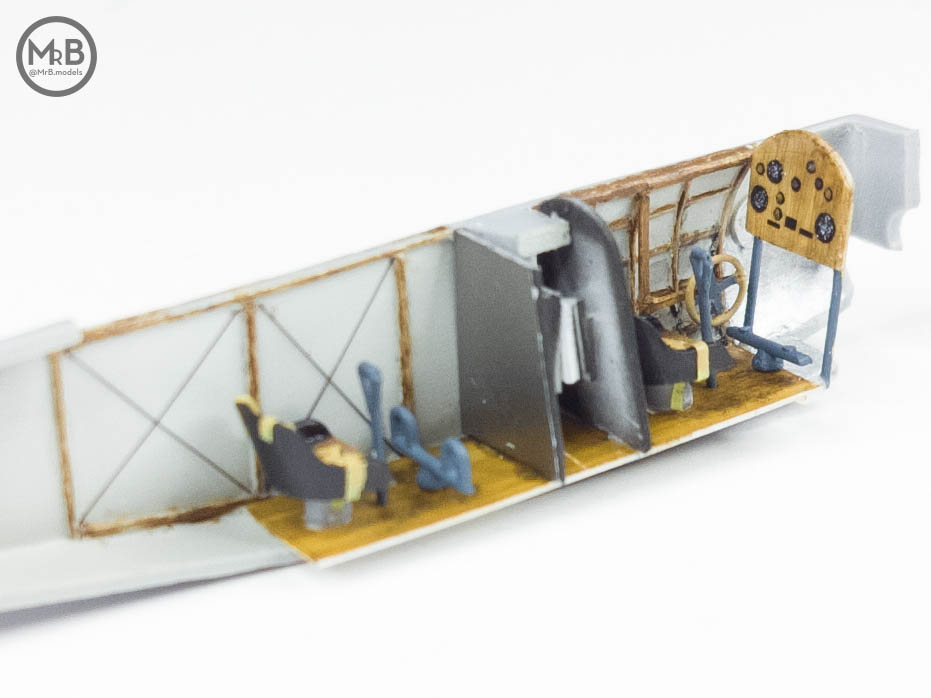
The interior pieces were glued together, then into the port fuselage half. The fuselage was then put together and the lower wings attached. The butt join of the lower wings were strengthened with short lengths of 0.4mm brass rod in order to provide a better mechanical connection. The horizontal and vertical stabilizers were then added without much fuss beyond widening the kingpost hole in the horizontal stabilizer. While the glue was drying during this assembly process, I cleaned up the rest of the part in preparation for painting.
|
Painting
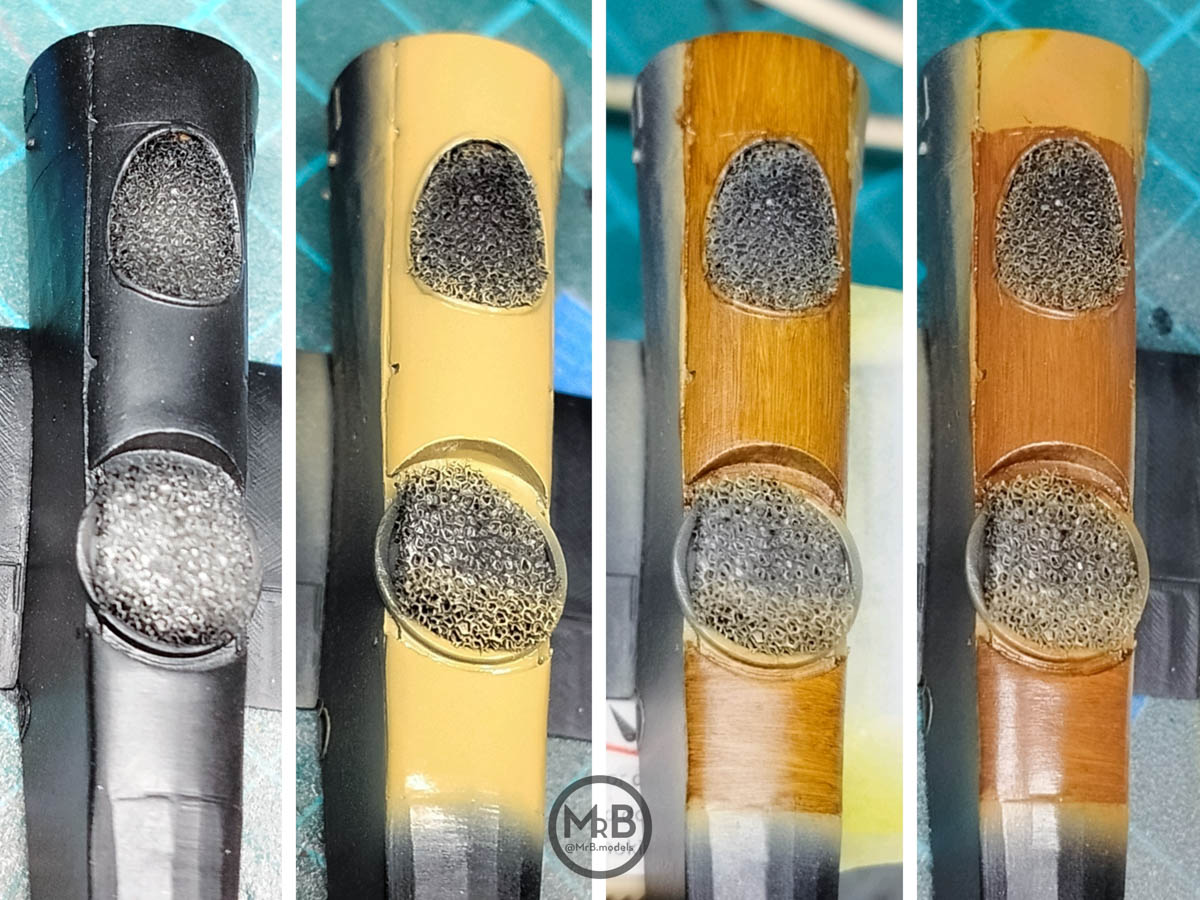
All parts were primed black. First, I based the wooden parts (interplane struts, turtledeck, prop and tail skid) in Desert Yellow, Buff or Deck Tan. As this machine was a trainer, I decided to vary the wood tones to give the sensation of a 'Frankenstein' airplane with various parts taken from other 'donors'. All these wood parts were then hit with burnt umber oil paints. Some parts received a thin brown, yellow or orange filter to give it more visual interest.
|
|
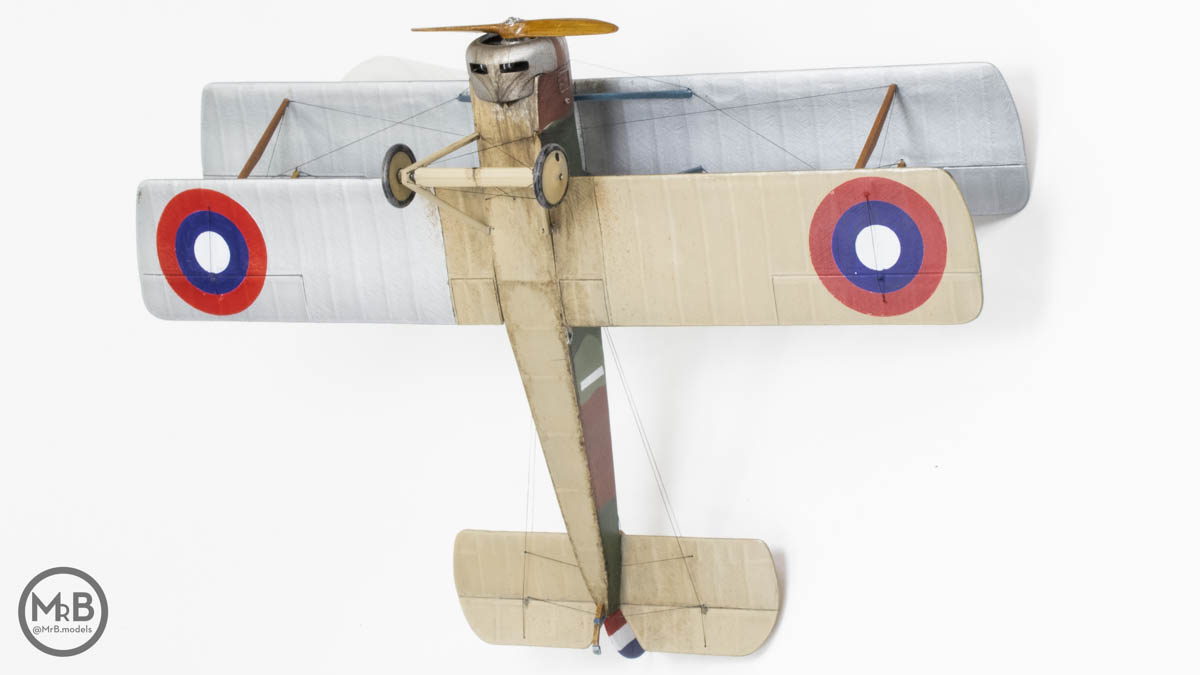
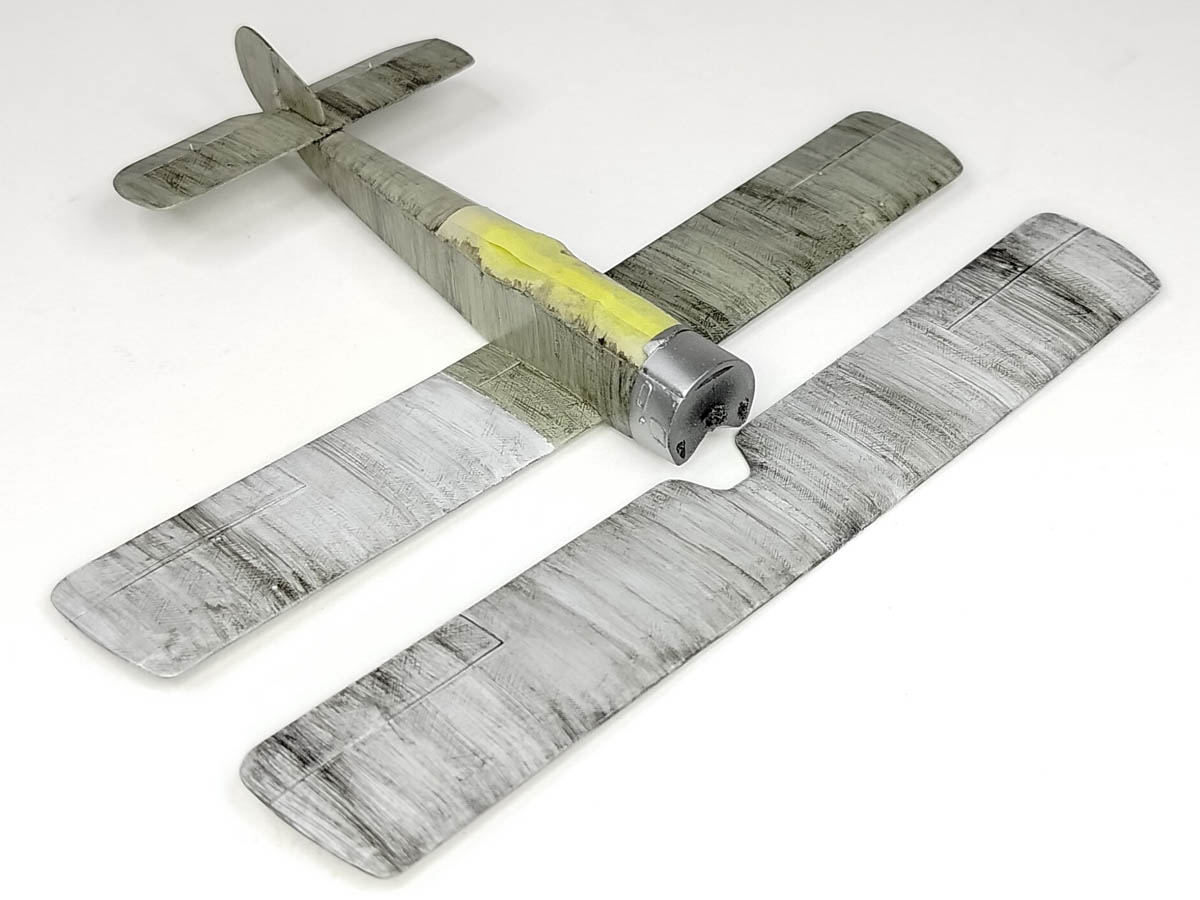
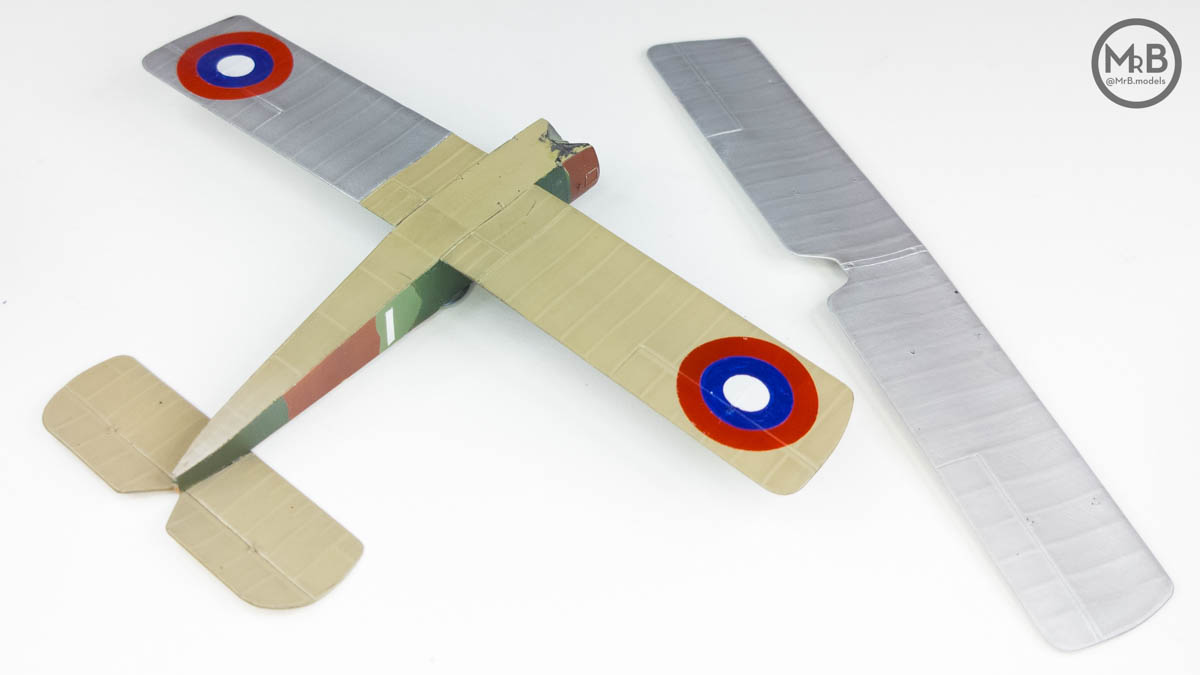
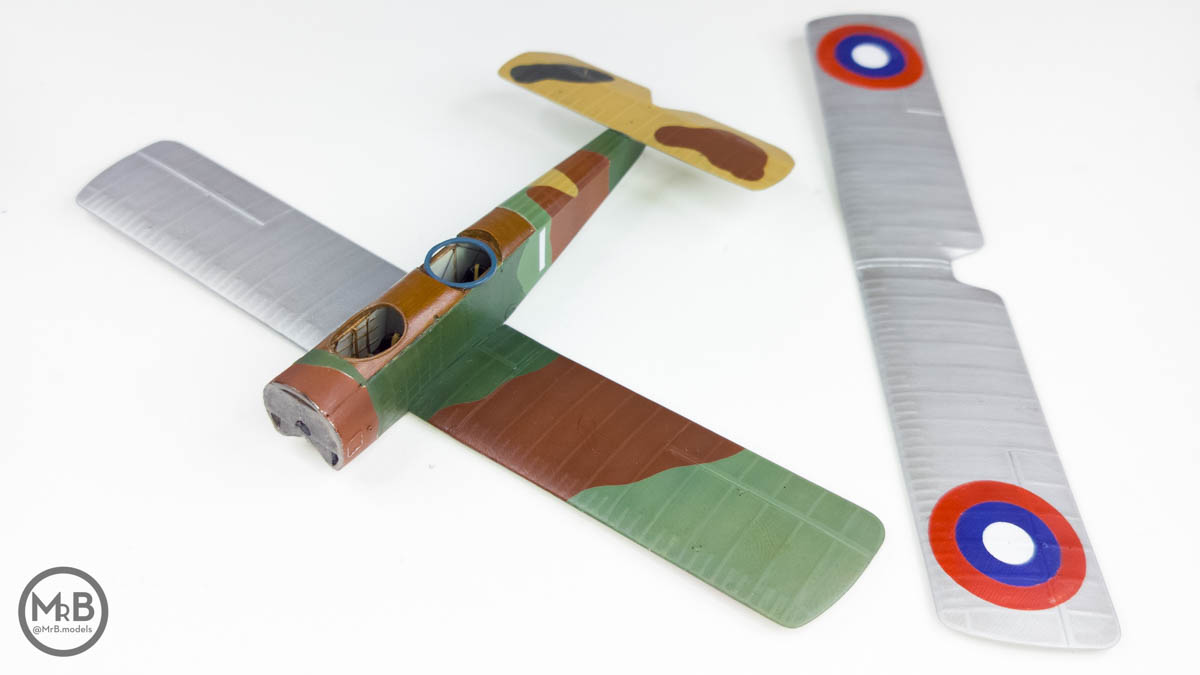
While the oil paints were drying in the previous step, I painted the metal panels Duraluminum, the upper wing and starboard lower wing white and the rest of the airplane Deck Tan. I then streaked on black oil paint as a weathering pre-base.
|
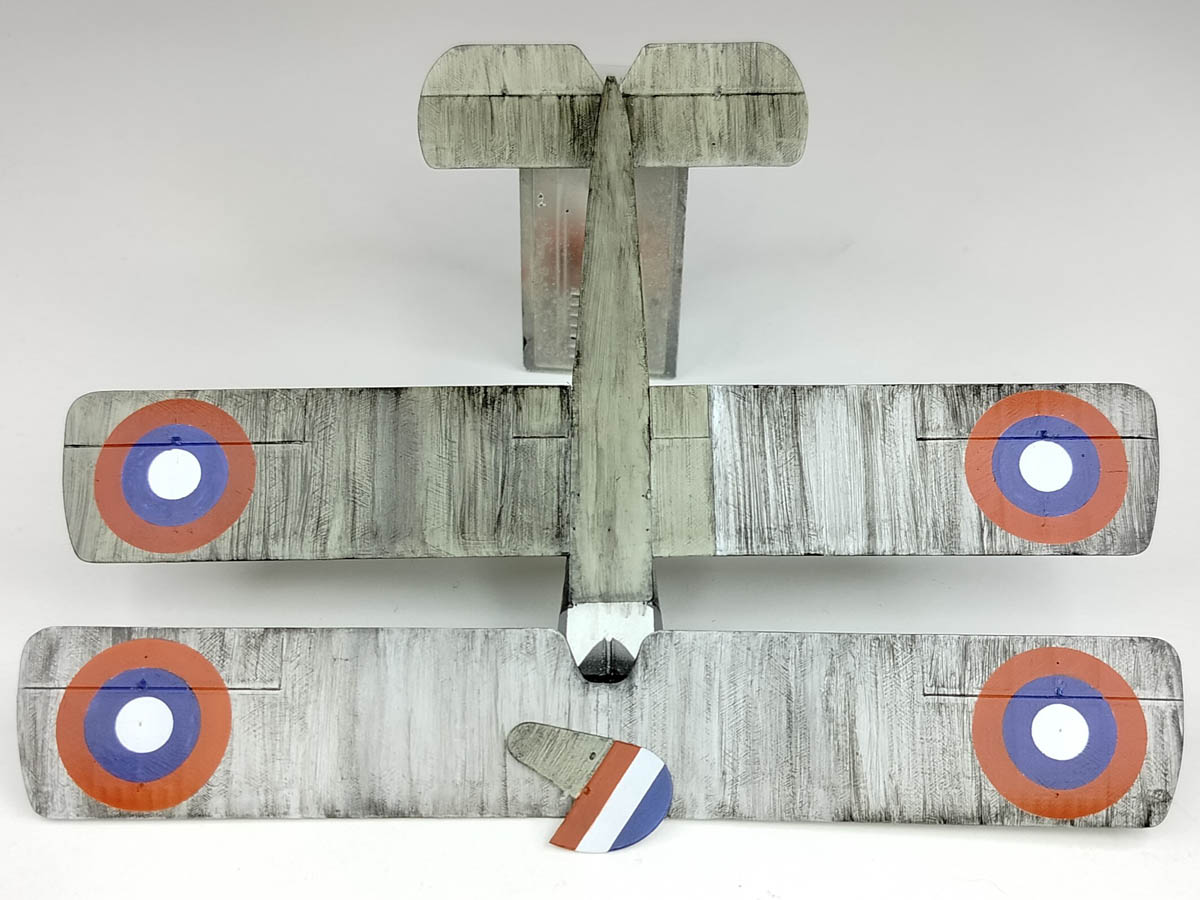
Next up were the roundels and rudder flag, which I painted using vinyl masking rings and masking tape, as I couldn't find any USAS red-blue-white decals that were the right size for the strutter. First, I based the roundel area white. Next, I masked off the center and outer ring and painted the middle ring a slightly desaturated blue. Lastly, I masked the blue area and painted the outer ring a slightly darkened red.
|
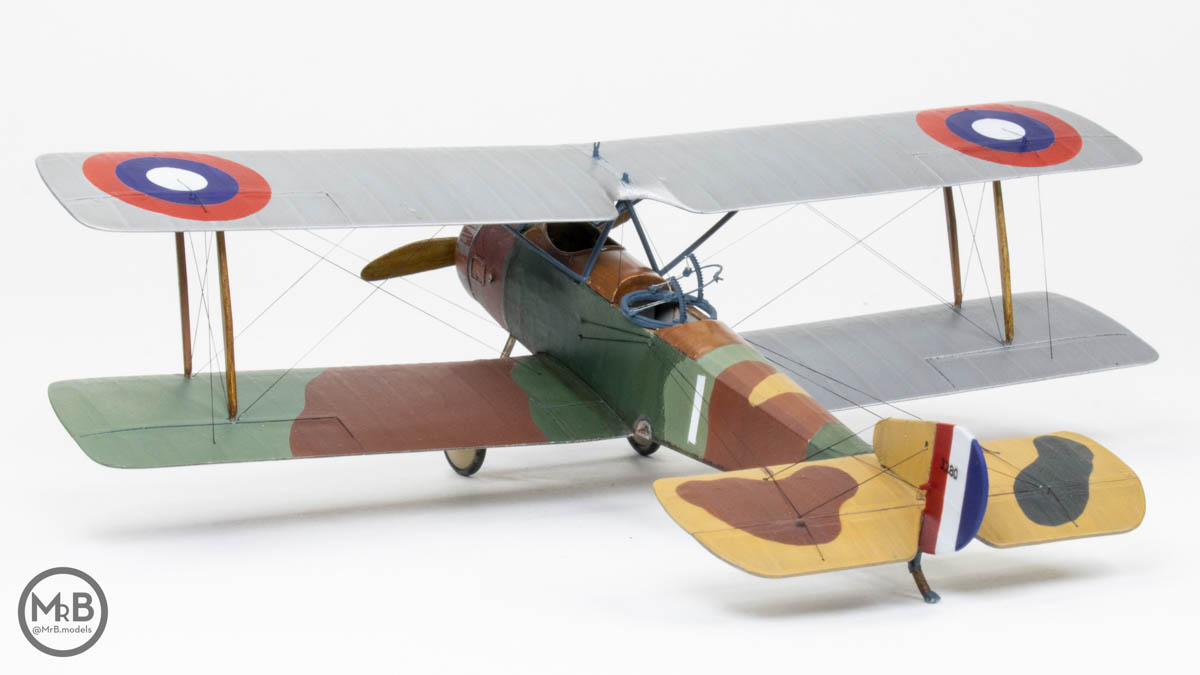
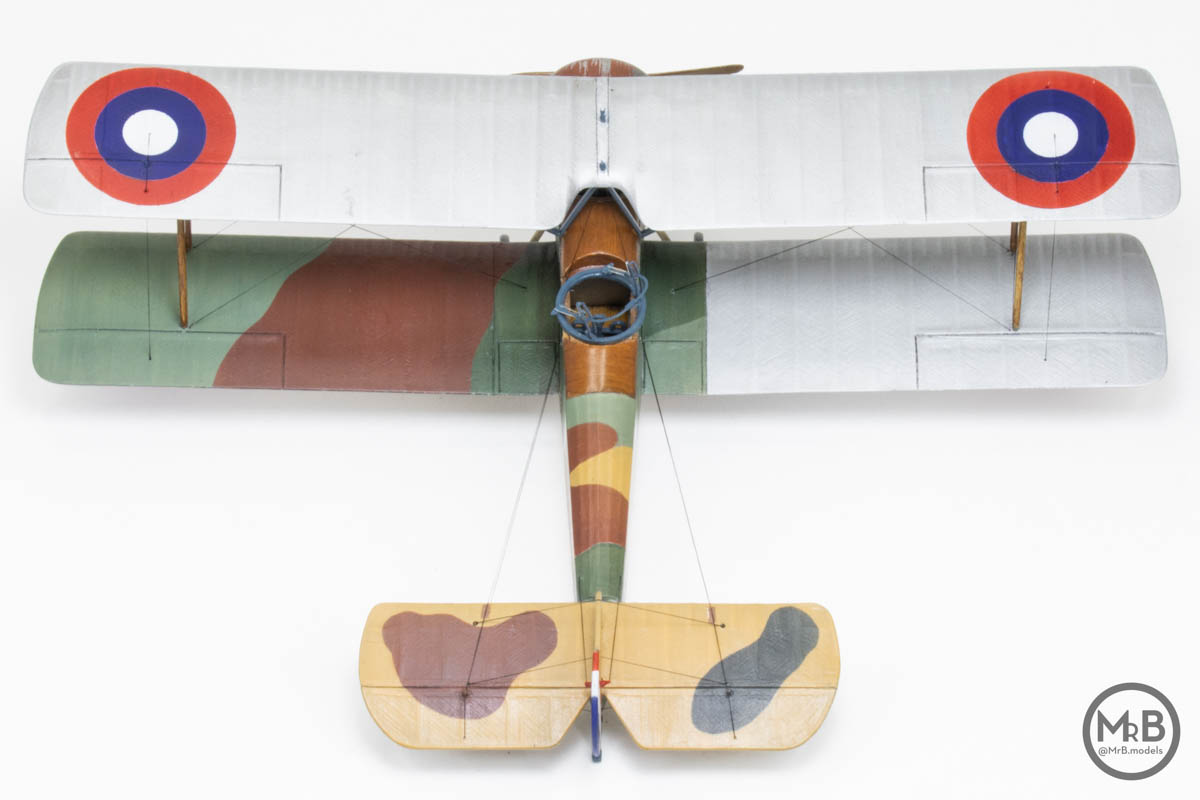
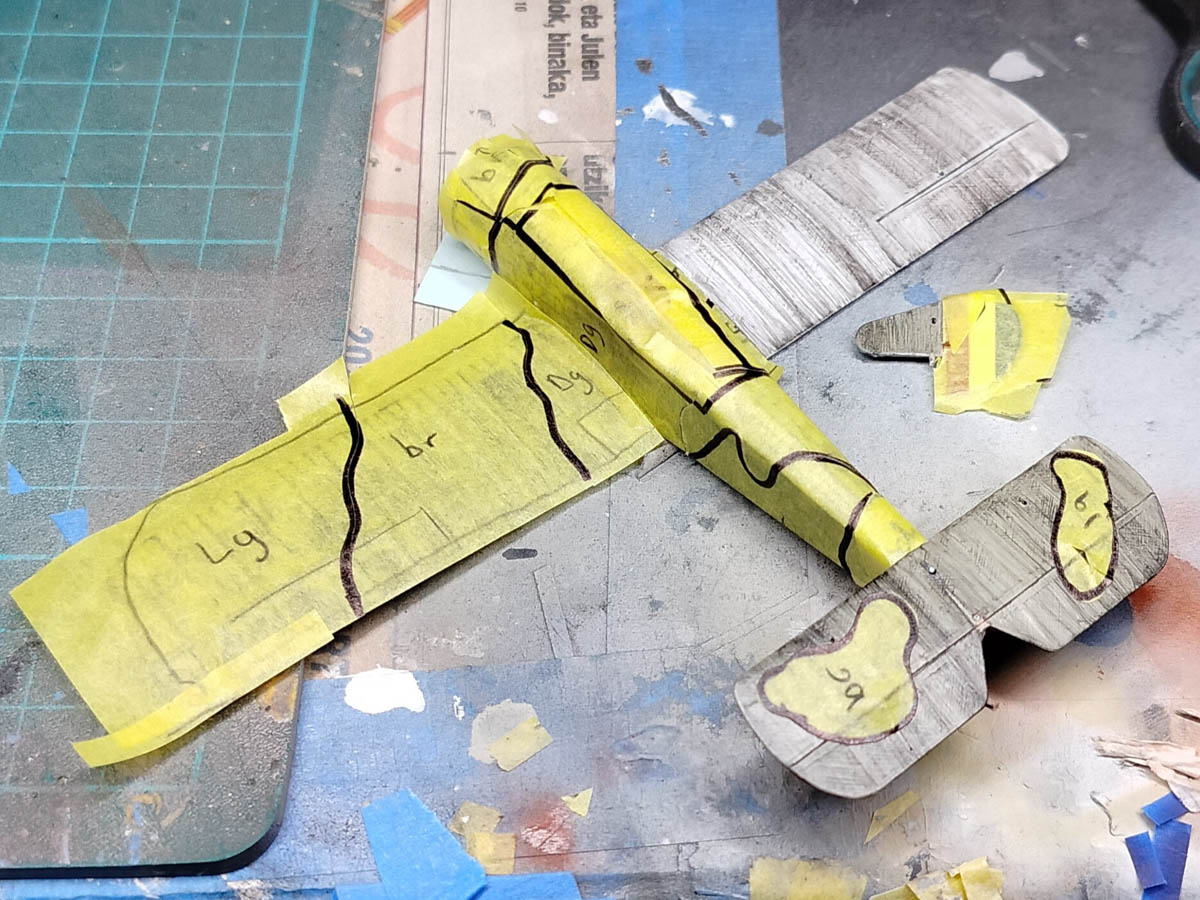
The trickiest part of this whole build was the 5-color camouflage. As mentioned before, the exact pattern was hard to pin down, so I did a best guess and extrapolation based on the two images we have of the specific machine I am making. I traced the wing, stabilizer and fuselage shapes onto paper, then transferred this tracing to a big sheet of masking tape, where I blocked out the various color sections. Once I was happy with the layout, I cut the masking tape and carefully applied all of it to the model.
|
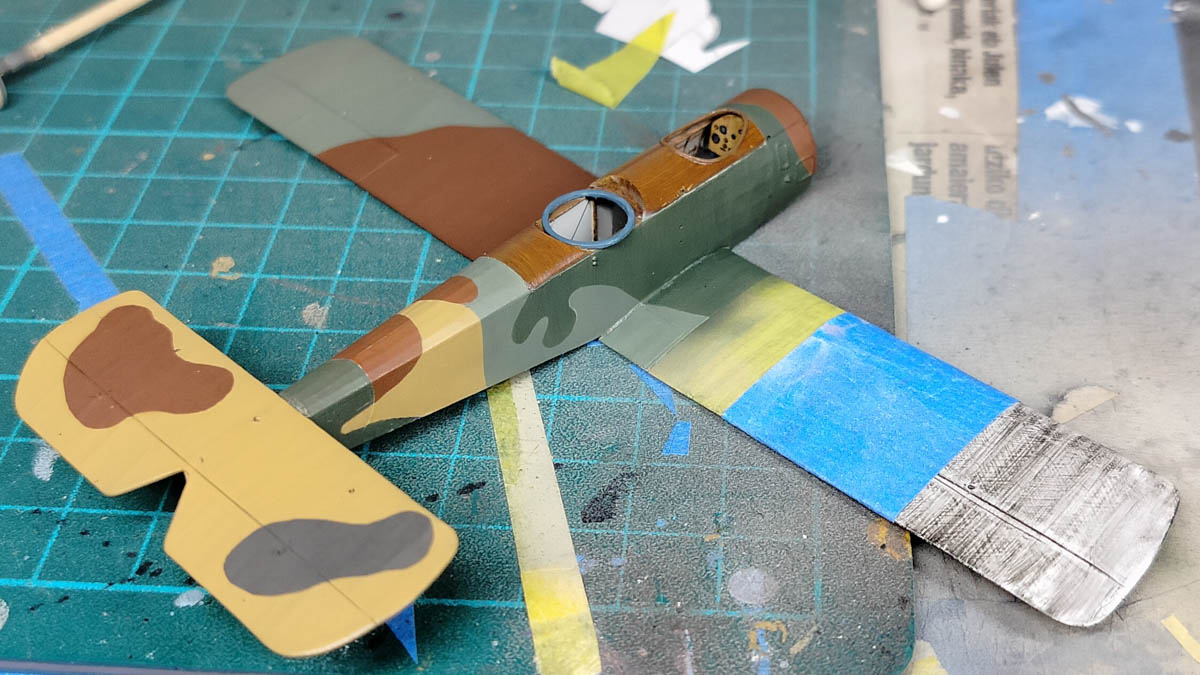
Painting the model was a slow process of carefully removing the masks of one color, spraying that color, then placing the mask back in place and moving on to the next color. In the end, I painted the airplane in the following order: Desert Yellow, Light Green, NATO Black, NATO Brown, Field gray. After finishing the camo, I noticed a few mistakes, so I had to strip a good section of the fuselage and re-paint it, repeating the whole process from primer to field gray.
|
With the tricky part finished, I painted the undersides Buff and the starboard lower wing and upper wing aluminum dope made from Super Fine Silver and White.
After all this, I went around masking all of the ribs with 0.5mm masking tape and spraying a thin layer of Smoke to give the model a bit more dimension.
|
|
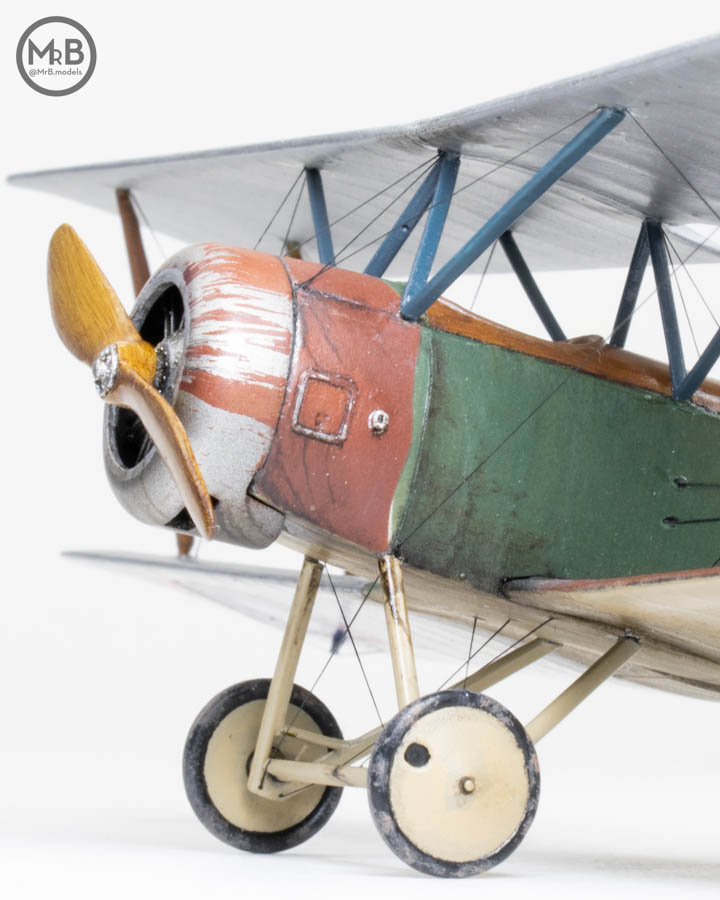
Throughout this whole masking and painting process, I often switched between the camo painting and painting other smaller parts. I painted the cabane struts Medium Blue, the undercarriage Buff and the engine Duraluminum with a heavy black-brown wash. The wheels were painted Buff and Rubber Black.
Lastly, I painted the cowling Duraluminum, gave it a good coat of lacquer gloss and sprayed on NATO Brown mixed with isopropyl alcohol. As soon as it was dry, I chipped it away with a toothpick and an old airbrush needle.
Once all the paint was dry, I gave the entire model a good coat of semigloss lacquer varnish, then drilled out the various holes for the rigging with a 0.3mm drill bit. I then went about weathering the airplane using various oil paints, focusing primarily on the oil stains underneath the engine.
Final Construction
I began final construction by installing the engine and cowling, then moving on to the struts. I glued the cabane struts into their holes in the top wing using slow-acting cyanoacrylate (CA) glue and carefully pushed them into the correct orientation. Once they were more or less set, I glued the interplane struts into their holes in the bottom wing and joined the wings together. Thankfully, the 'w' design of the cabane struts allows for a relatively stress-free (for a biplane) alignment process.
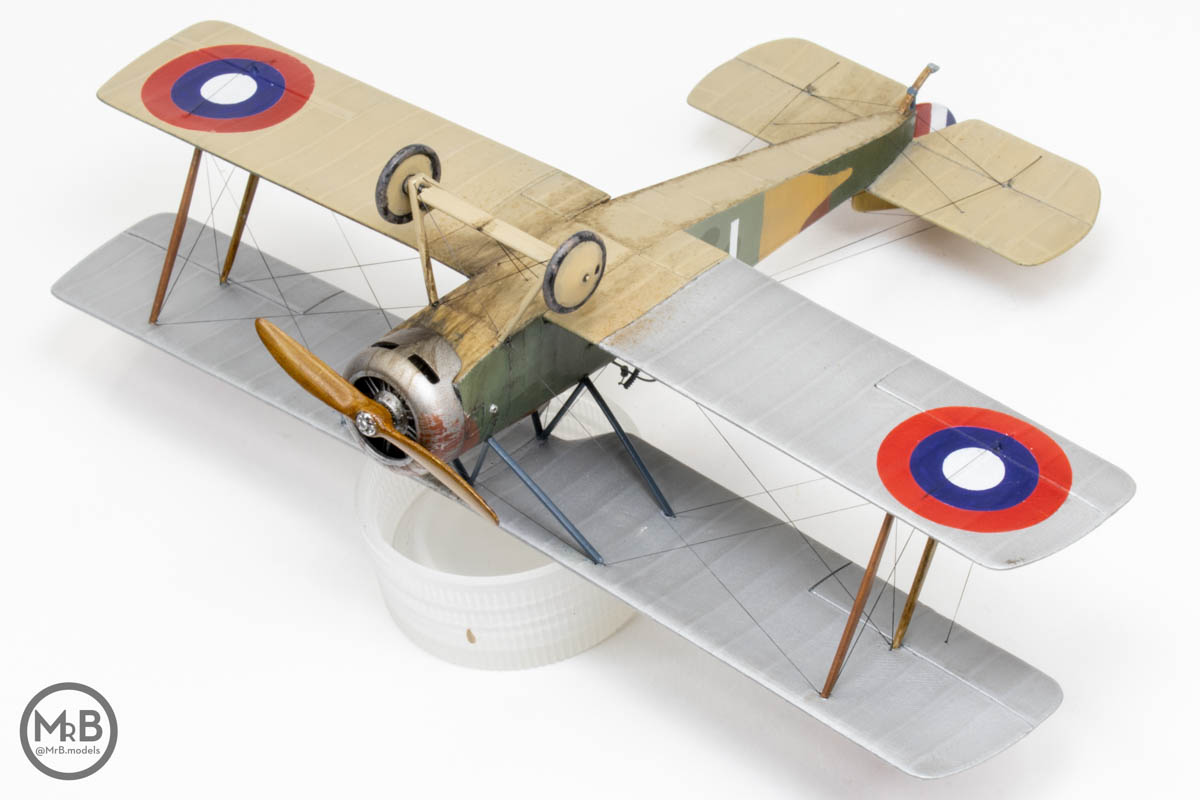
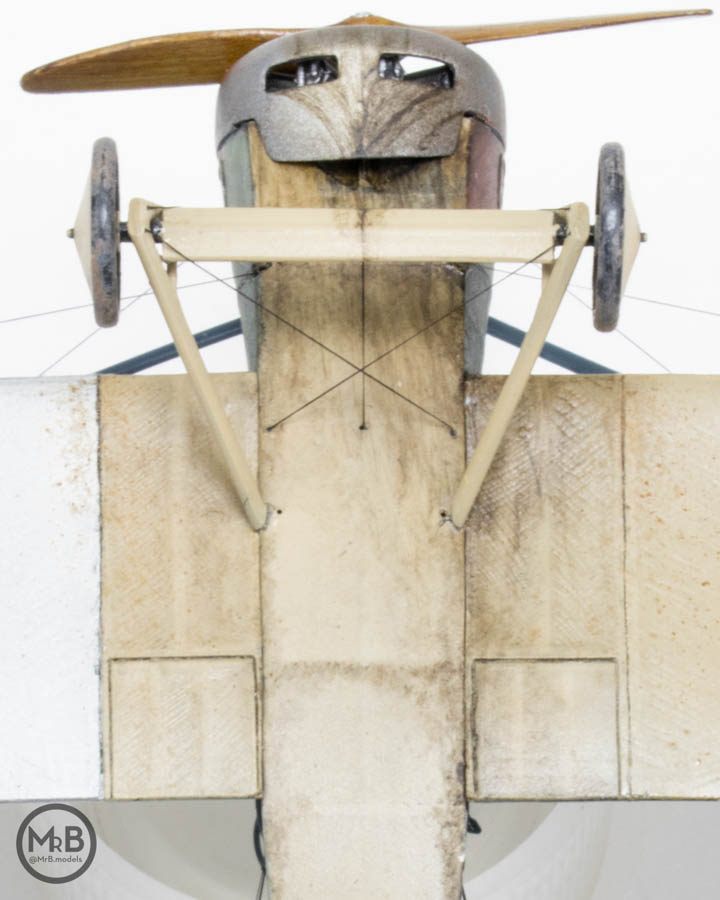
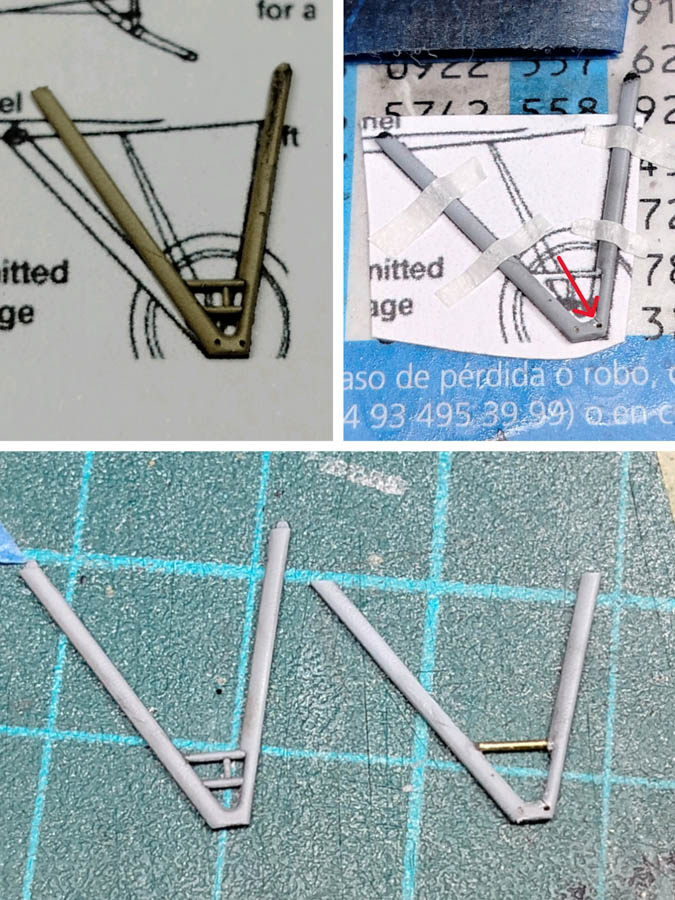
As I was dry-fitting the undercarriage I noticed that something was just...off. It seemed as though it was sitting too high. I looked at other builds of this kit and noticed the same thing. I confirmed my suspicions after comparing the struts to some scale plan I adjusted and printed off.
Fixing the error wasn't very hard, all I had to do was remove the cross bars, make a small incision at the red line, then add bits of brass rod as the cross bars, which conveniently guaranteed the correct angle. The last step was to shorten each strut leg according to the plans.
|
With this done, I repainted the struts and glued the undercarriage in place, installing a bit of 0.2mm wire into the strut ends to guarantee alignment.
Rigging then commenced using ultra-fine rigging elastic. There are a lot of wires on the plane, some of which in tricky places. Thankfully, the stagger in the wings allowed ready access to all of the wires. In some cases, I used one long, continuous bit of elastic to make the process easier.
The last pieces of the puzzle were a photoetched Scarff ring set which I put together, painted Medium Blue and glued to the observer's ring, and the overwing Lewis gun mount which I made from small styrene triangles and a spare bit of photoetch.
Conclusion
This was a very enjoyable build, especially considering the age of this tooling. The errors and omissions of the kit are not difficult to correct and the rigging is not terribly complicated, providing this isn't the first time you've rigged a biplane. Researching the paint schemes was an interesting challenge, and one that forced me to push my inner rivet counter to the side.
References
Sopwith 1 ½ Strutter: Datafile No.34; Albatros Productions Ltd., 1992