
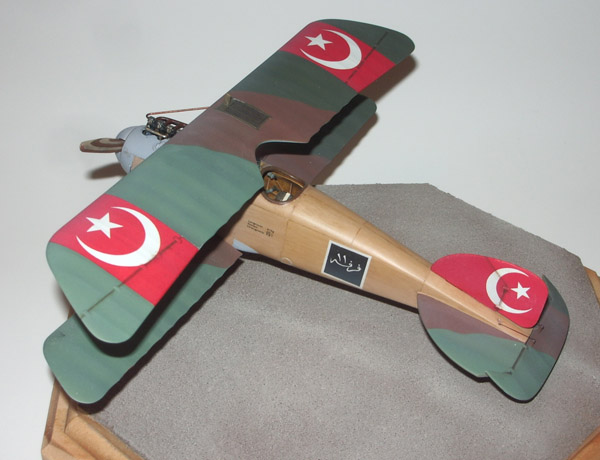
Do it Yourself Decals: Eduard's 1/48 Albatros D.III in Turkish Markings
By Ken Murphy
The Beginning
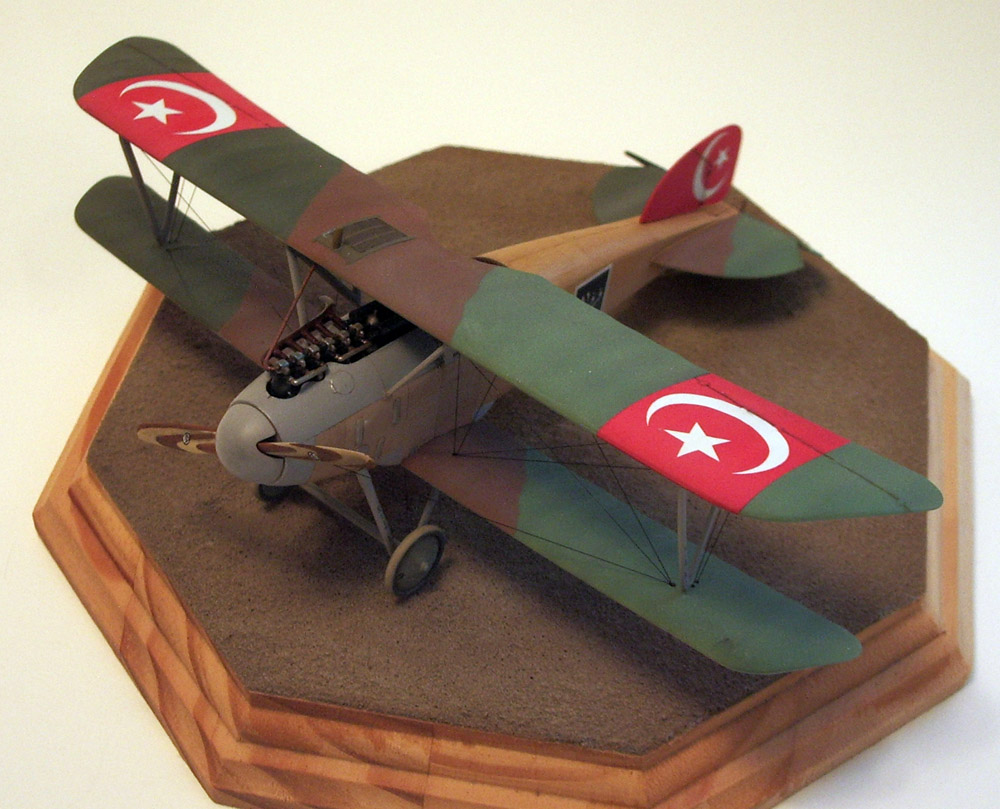
Each December, Seattle IPMS holds a group build contest. The subject for this year was the WWI Albatros. A great choice I thought since the colors and schemes are endless.
The Plan
It’s not as though I hadn’t done it before. I had just recently made decals for a Romanian MiG-21 with Testors Custom Decal System using decal paper for ink jet printers. They turned out okay, but I was less than thrilled with the sharpness and density – as in basically there isn’t any. Ink jet inks are transparent and they are just that on the decal. In order to get the kind of density I needed, I printed up the roundels on white decal paper first, and then placed two more copies printed on transparent over them to finally get a “solid” color. They look okay at a normal distance, but close up, they look a bit soft and you can see the dithering pattern (dithering being the dot pattern created by the printer to blend and overlap the primary colors to create other shades and tones. The coarser the resolution of the printer, the more pronounced the dither).
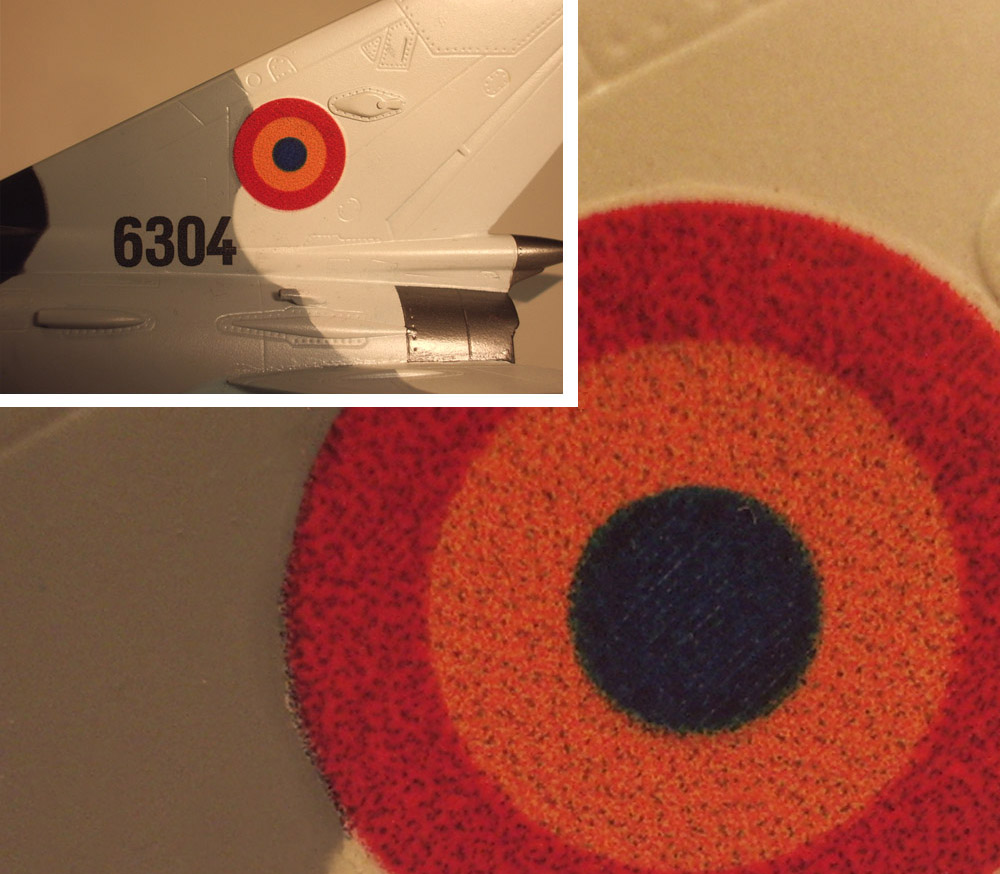
If you have tried the Testors system yourself, you’ve probably had mixed reactions as well. It seems to be fine for basic colors, solid red, blue, yellow and black, in other words, colors that can be made up of 100% cyan, magenta, yellow or black. The trouble comes when you have a color such as orange that’s composed of say, 100% yellow and 50% magenta. The printer “dithers” a dot pattern of 50% magenta in the yellow, which at most printer resolutions is plainly visible. I found that overlapping copies such as I did for the MiG will blur the dithering a bit and deepen the color, but it also makes for a more blurry edge to the image.
I certainly considered these issues when I contemplated creating the decals for the Albatros. Since I was going to be doing something in solid red (100% magenta, 100% yellow), I thought I might just get away with using the Testors system, but just as I was about to take a deep breath and give it a go, my modeling buddy Scott Kruize (author of our own Internet Modeler column: Modeling Now and Then) turned me on to a new product: BEL INC laser print decal paper.
Wow! Something you could run through a laser printer! I was excited for two reasons: much higher printer resolutions and much denser, more opaque print.
As the site declares:

The paper works with Alps printers, laser printers and color copiers and comes in:
* Clear Paper: White backing paper with clear lacquer film.
* Blue Paper: Blue backing paper with clear lacquer film.
* White Paper: White paper with white film.
They are sold in packs of 25, 50 and 75 at about a dollar a sheet, less for the larger packs and you can select any combination of papers in your order.
You can use clear decal paper for most lettering. However, most printers or copiers do NOT print white except for the ALPS 5000 printer. If you are using an ALPS and printing white they suggest their blue decal laser paper (with clear coat) so that the white print will be easier to see on the blue background. The ALPS MD-5000 printer utilizes dry ink to print single colors or multiple combinations of white, gold, silver and many other colors. However, if you do not have an ALPS printer, you can use their "white" paper for graphics that have a white color background.
Note: the paper is slightly thicker than normal copier paper, so be sure to feed it into the printer one sheet at a time. Be sure to mention this fact if you go to Kinko’s or some other print shop. Also I recommended that you test a couple of sheets with your printer or copier to ensure compatibility prior to producing multiple copies, and make sure you’re printing on the correct side of the paper! After the prints are made, I use a light coating of clear lacquer or acrylic clear to seal and protect the decals. The manufacturer suggests Krylon Crystal Clear finishing spray. Further instructions on how to use the paper are on the website.
Drawing the Decals
Before I could try it out of course, I would have to create the artwork. Not a problem in my case. I’m a professional graphic designer by trade and I have the kind of tools I would need. But how do you do it? Well, there are a number of ways to get started in the Do It Yourself Decal industry. In fact, you don’t even need a computer. If you can find an image of the graphic you want to use, you could take it to Kinko’s and make a copy. Of course, you’d want to size it correctly. My method for this is to measure the model as accurately as possible, then copy the image in several sizes, going about 5-10% larger and smaller than my measurement. I then make a copy on plain paper, cut out the image and place it on the model. I often find that it’s one of the other sizes that fit best. Once I’ve identified the winners, I make a copy of them on the decal paper and I’m on my way. The advantage of this method is that it is cheap and fast. The downside is that the images are copies of copies and quality suffers accordingly. For that reason alone, I prefer to do my own artwork. So how do you do it?
First of all, be aware that YOU DO NOT NEED TO BE AN ARTIST to do this! Building roundels, crosses, numbers or stencils requires no artistic skills or ability. All you need is access to some tools.
First of course, you need a computer. It doesn’t have to be super hot, most of this stuff is not memory intensive. It helps if you have a scanner, or access to one. I have one of those combo scanner/printers: an Epson Stylus CX4800. It’s an ink jet printer so I can do the Testors stuff here at home and the scanner does a very nice job up to letter size. We’ll see why that’s handy in a moment. Again, you don’t have to own these things, your library has computers available and maybe you have a relative (say your hyper-computer savvy son or granddaughter) who can help you out.
Next, you’ll need a graphics program to draw with. I use Adobe Illustrator, which is a very capable professional tool. Unless you plan on going into the business, I don’t recommend it, as it is quite expensive at $600! Corel Draw is another great program with tons of features, but it too is pricey at nearly $400. But what if you’d rather spend that kind of money on models rather than software? Well there are a lot of alternatives from cheap to down right free. Many computers these days come with some sort of drawing program in their software package. Check to see if you have one and if it’s easy to use. But if you want to get a program more powerful than the Etch-o-Sketch that came with your computer, you can take a look at what’s available out there. Wikipedia gives a nice list of programs.
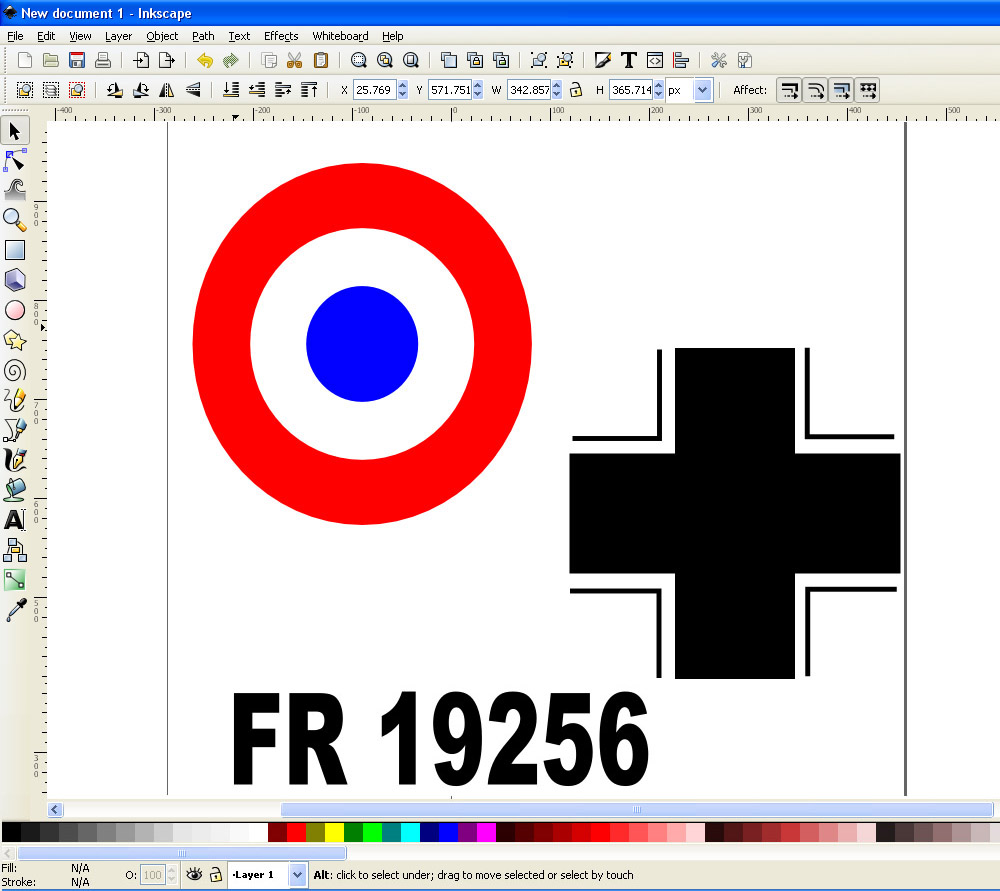
I was able to draw the roundel, cross and serial number in just a few minutes of fiddling around with it. It helps to be familiar with these types of programs, but even if you aren’t, I’m sure you will be able to figure it out with the Help feature and some trial and error.
Another recent “find” of mine is a FREE web application call Sumo Paint. You don’t download it, but use it right off the web, so it doesn’t take up space on your computer. You can find it at their website.
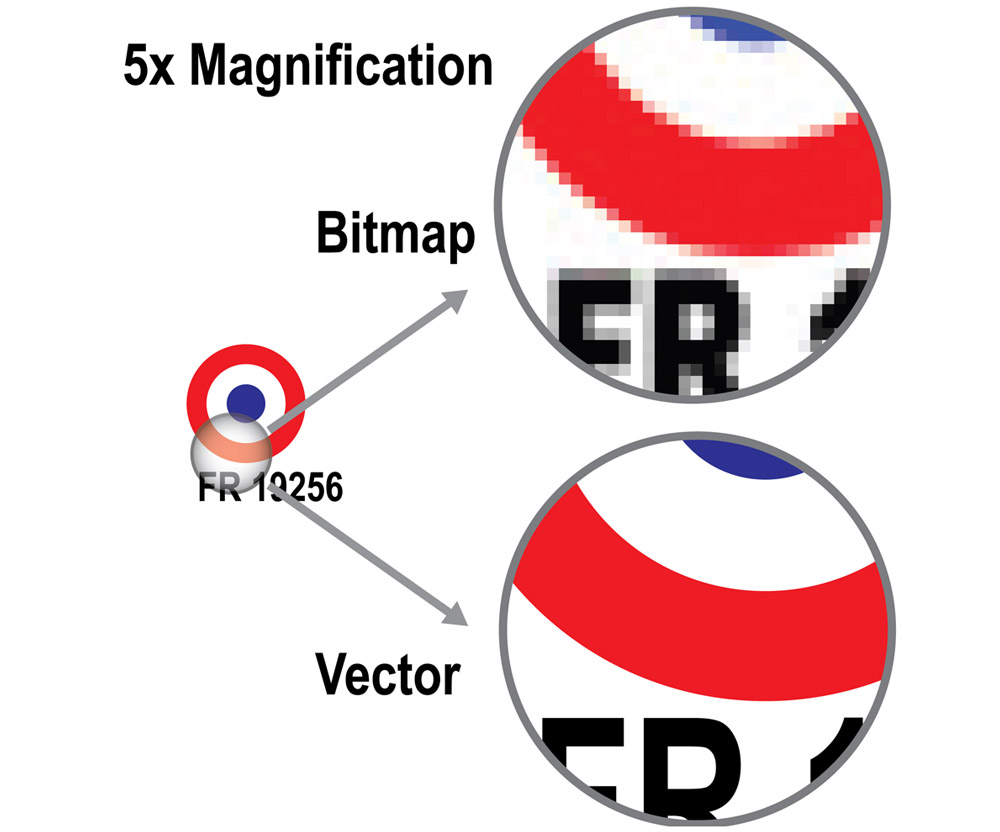
This is a bitmap editor program much like Photoshop. If you prefer to “paint” rather than “draw,” this might be a better choice. If you don’t know the difference between bitmaps (paint) and vectors (draw), perhaps a short explanation will help.
Now that you have the equipment, the software and materials, what’s next?
Here are the steps I took to create my decals:
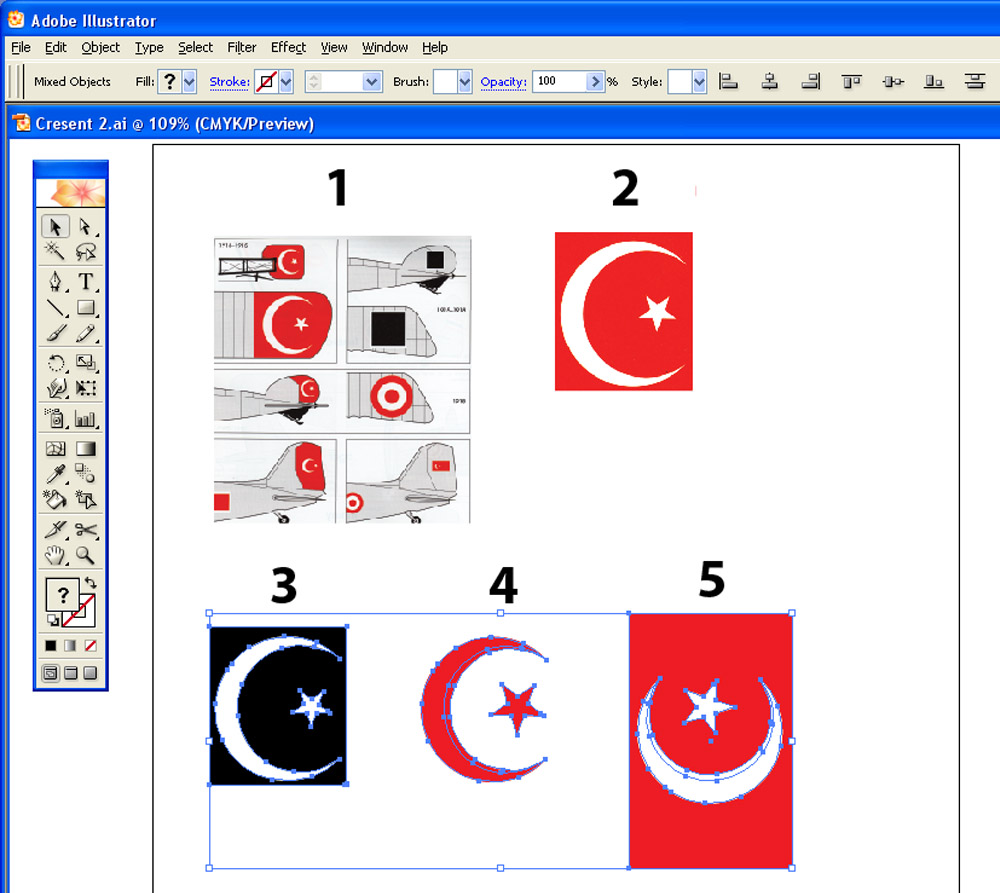
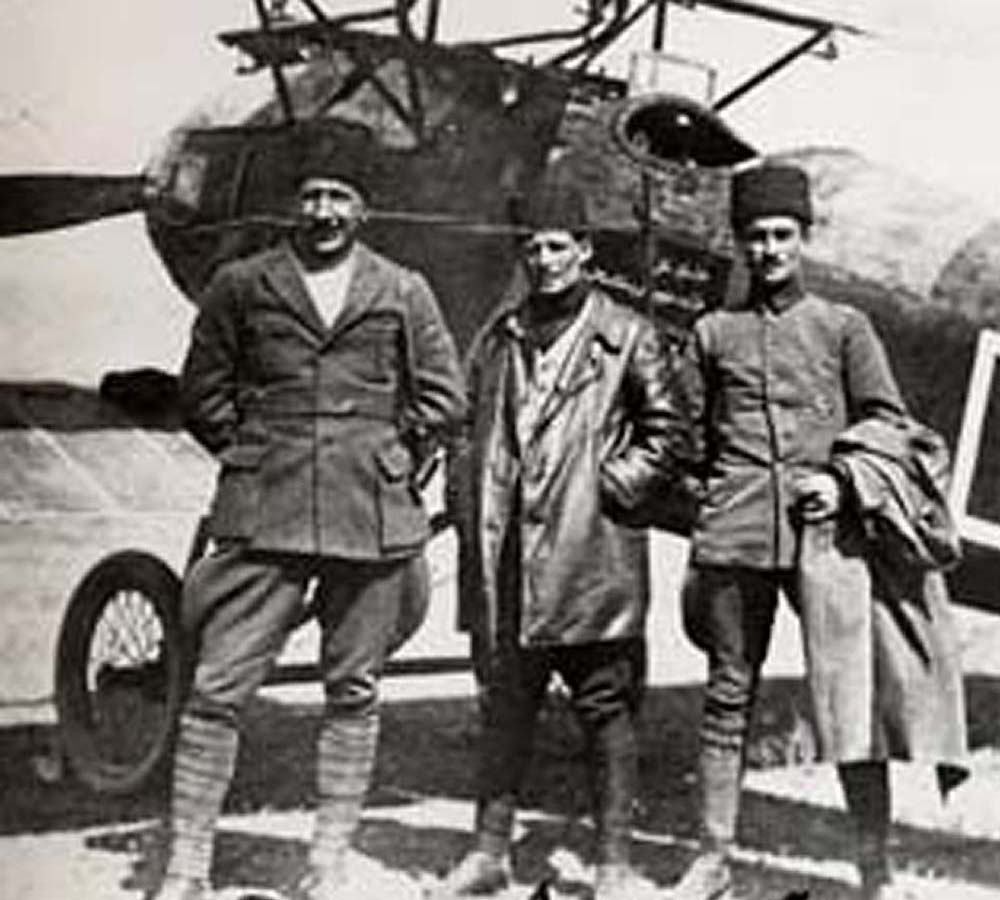
1.) I did my research – finding this illustration in “Military Aircraft Insignia of the World” by John Cochrane & Stuart Elliot, which I scanned, then
2.) cropped the part of the insignia I wanted and placed it in Illustrator.
3.) I was able to use Illustrator’s tracing function to trace the crescent and star creating a vector graphic (as indicated by the blue lines and squares that represent the curves and lines of the vector).
4.) I removed the background square and changed the fill color to red (just to check that I had what I was looking for, I could have used any color), after which I
5.) rotated the image, drew a box around it, colored it red and changed the red crescent to white to complete the image.
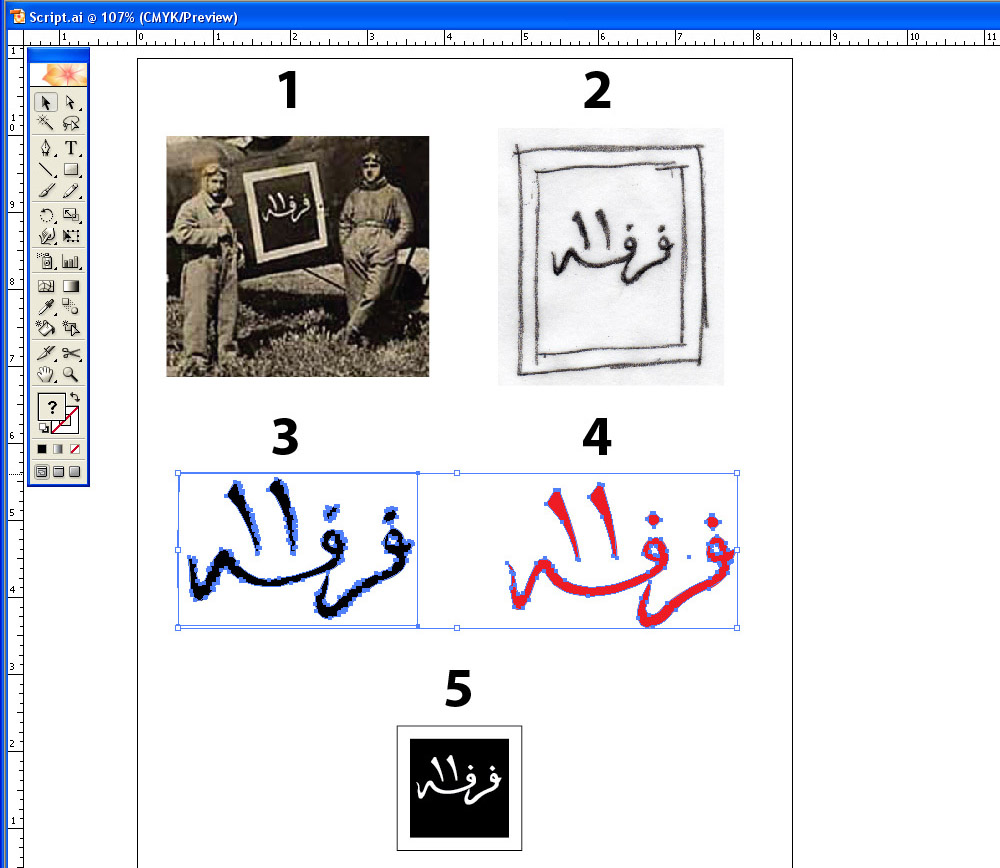
1.) I enlarged the photo,
2.) made a print and traced it with tracing paper and pencil and scanned the results
3.) which I the traced using the tracing function.
4.) I cleaned up the image to smooth the lines using a smoothing tool, then
If you were using a raster or bit map editor instead of a vector program, you can use the scanned image to “paint” over it, creating your graphic. If you already have a scanned image, why can’t you just use that? Of course, you can – if the image is of acceptable quality. Most images you may want to use may be of poor quality, due to printing dot patterns, lack of color (black and white pictures such as I was working from) or just generally not a crisp copy. The whole point of doing this process outlined above is to give you a clean, sharp image.
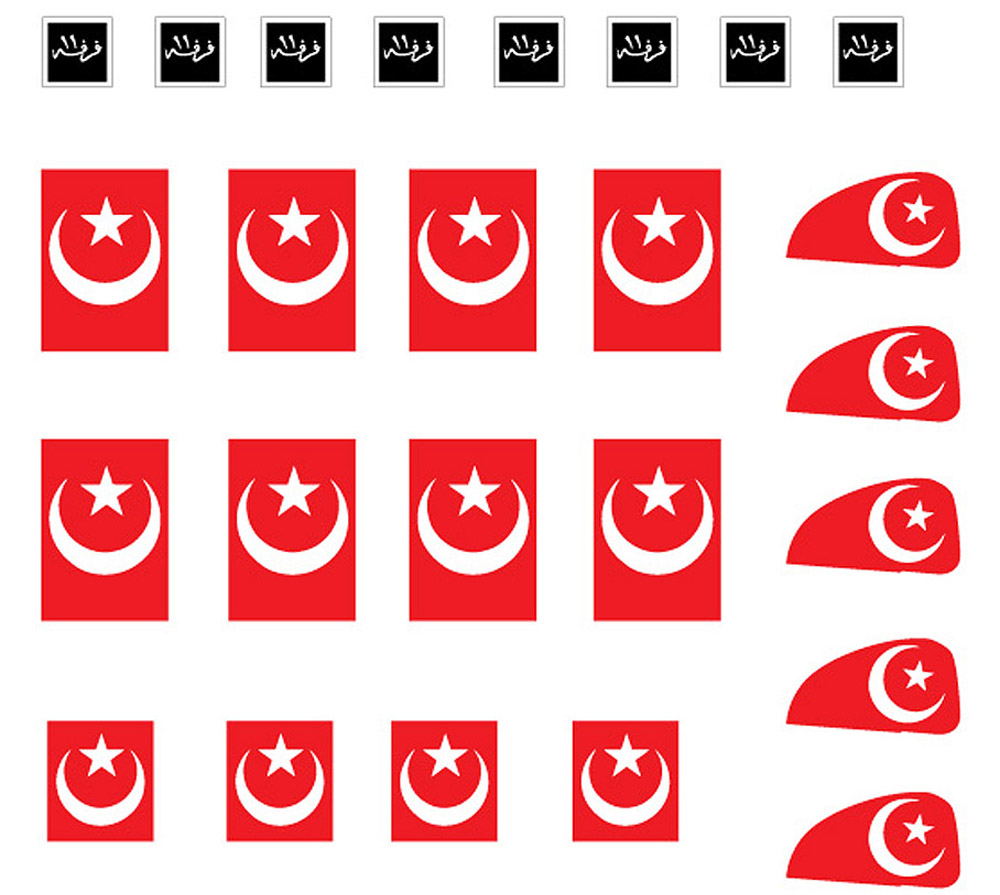
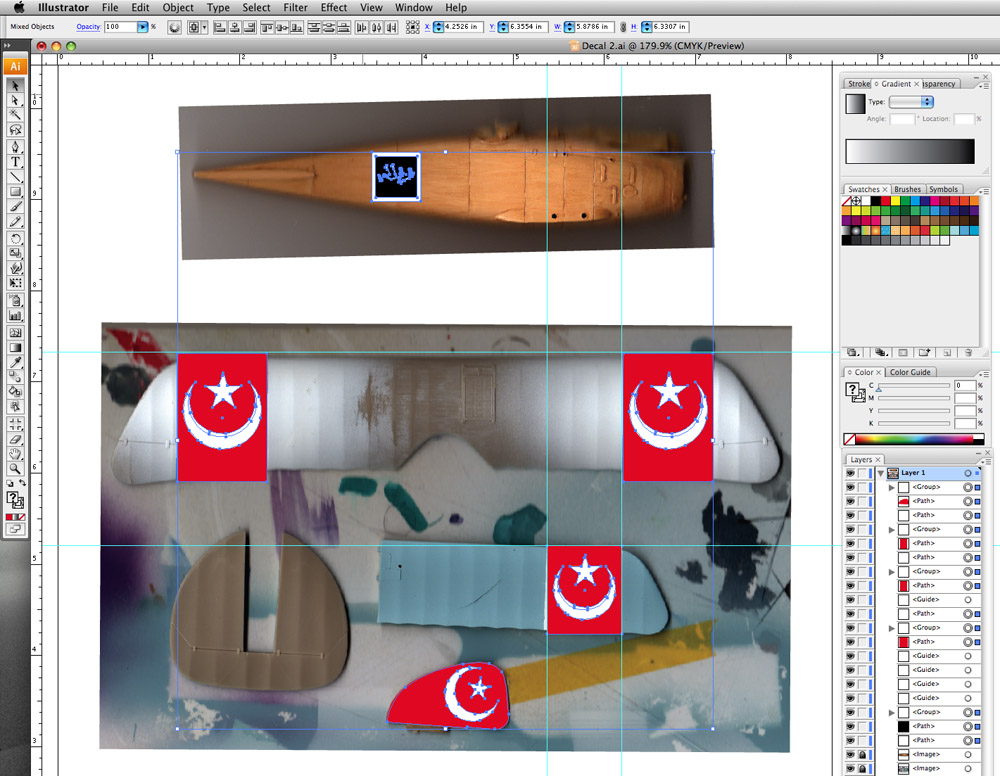
Then it was just a matter of making the copies on the laser decal paper. I used clear film, so I had to paint the areas under the decals white, which created one last problem. The decals were just a hair wider than the white areas on the wing, leaving a dark edge. I solved this by aligning the decal exactly on one edge of the white, then took a X-acto knife and gently rocked it along the other edge to cut off the excess.
Conclusion
Postscript
I was recently contacted by web developer Peter Vukcevic, who wrote the following:
"Hello Ken, I'm Peter from First Site Guide and I came upon your post on how to make decals on your own, where I liked how you pointed out that vector graphics is formed from geometrical shapes which allow for easy image resizing. I wanted to inform you about our cheat sheet aimed at beginners where we've explained what are vector and raster graphics together with their pros and cons.
You can check it out here: https://firstsiteguide.com/vector-image-creation-cheat-sheet/
Would you consider including our cheat sheet in your post in order to help your readers learn more about vector and raster graphics and then follow the tips you provided?
Looking forward to hearing from you,
Peter Vukcevic, First Site Guide"