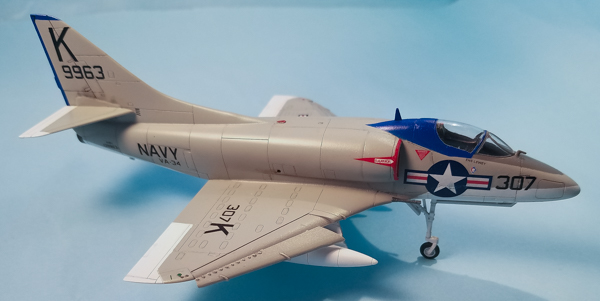
Converting an Airfix 1/72 A-4B into an A4D-1 using Wolfpak Decals
By Matt Bittner
Introduction
During this unprecented time with a pandemic in the world, we - three editors of Internet Modeler - decided to try a group build to help with motivation. It sort-of worked: for me personally, the last time I finished a model was December 2017 so with nowhere to go it was easy to model. And having the "support" of fellow modelers and editors was a good boost.
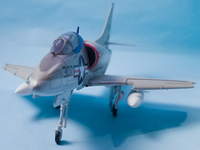
Our first Group Build was the Airfix A-4B and I was looking for aftermarket decals I could use with the kit. The only one I had came from a Wolfpak Decal sheet and it was for an A4D-1, the earlier version of what came in the Airfix box. So, I decided "what the heck" and went for it. Granted, I didn't accomplish all the conversions needed but I think I covered the biggest ones, especially the smooth rudder and lack of refueling probe. There was one site I used primarily: Tommy H. Thomason's Tail Hook Topics on the kit, which specifically talks about how the modify the kit into an A4D-1.
That page leads to another, more detailed analysis of everything that's wrong with the Airfix A-4B. Unfortunately I didn't pay attention to that analysis and missed quite a few things with my kit. Also keep in mind that the Airfix A-4B has its accuracy issues again, better outlined in the pages linked above.
Construction
As the Airfix A-4B has been around for some time, and there are other reviews on the web talking about how it builds, I will forgo a full-blown full-build article and instead concentrate on the areas I had difficulty with, as well as the conversion itself.
|
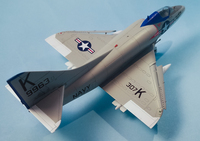
Naturally, as with most aircraft models, construction starts in the cockpit. Out-of-the-box it's pretty decent but of course could always be better. One thing I definitely had to do was try and convert the kit's ejection seat to the earlier mark. I was able to kind-of do it. It's not perfect - which is why there isn't a photo of it - but it's good enough behind a closed canopy. What I did was fill in the headrest then sand it to look like the earlier seat. Since I didn't have any photoetch speficially for the A-4 what I had was a set for the A-7 that I "kind of" used to make the seat look better. Again, trust me. I not only used the seat belts from the A-7 set, but also the ejection handle at the top of the headrest. Again, it's not perfect but looks okay with the closed canopy. With the cockpit finished I could assemble the fuselage halves.
Now with the fuselage together, it was time to concentrate on the major conversion points: remove the refueling probe along with the entire area around the probe, and fill in the rudder to make it smooth. For that last one I used Apoxie and it took a couple of applications to look good. For the refueling probe I cut off the peg from the kit's probe that was to fit into the slot in the fuselage to fill it, then sanded that area and filled in any imperfections.
|
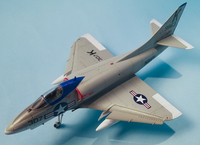
Construction continues. The two major problem areas for me was the assembly of the wings together and adding the separate intakes. On one side of the wing, where the lower section fits into the upper section, I ended up with a step. But only on the one side. The other side came out near-perfect but the starboard left a step. Which I didn't entirely elimitate, unfortunately. In regards to the intakes, the fit was decent enough, but the where the intake fits into the fuselage is actually a panel line and mine was a little too wide. I did fill it with putty but it came out a bit "soft". If I have that issue next time I will completely fill in the seam and re-scribe.
Those were the only two major problems I had with construction. Now for the rest of the modifications I made, which weren't enough but I know better for the future.
|
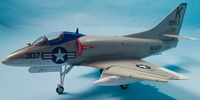
First, I sanded the scoop on the starboard fuselage side away, along with the "strengthing panels" that only appeared on the Argentinian birds. I also made the vent a little more oval than round. I think I could have gone a little bit more in that regard, though.
On the port side of the fuselage I also sanded the raised scoop away, but forgot to add the exhaust port but opted for a round decal in the end. However, that is wrong for the A4D-1 as it was actually a rectangular port with rounded corners.
I fashioned a new blade antenna for the top of the fuselage.
For the nose-gear leg I created a new "angle of attack" indicator and rounded the fork over the wheel.
I drilled a hole in the nose which was used for avionics cooling.
|
The light on the top of the fuselage was a bit more "flush" than the A-4B so I sanded that down. Maybe not enough, but it was still sanded.
On the wings I sanded away the vortex generators on the wings but left the ones on the slats. These aren't totally accurate for an A4D-1 but I was still trying to figure out how to replicate them when I decided I just wanted to finish the kit "as is". I'll figure it out because I also didn't add the vortex generators to the fuselage, another prominent feature to the A4D-1.
Other items I missed which were pointed out on the above two links: I neglected to fill in the panel on the starboard nose (it only existed on the port side); I didn't fill in the trim tab on the starboard aileron (it only existed on the port aileron); the attachment bolt recesses between the forward and after fuselage I also didn't add; I neglected to fill in the recessed vent on the top of the fuselage between the canopy and fin; I missed the round fuel tank filler cap on the starboard wing, near the fuselage; and no doubt more. Read the links I provided in the Introduction for everything.
Another change I wanted to show was the wing tanks. The earlier Skyhawks flew with 150 gallon tanks and the ones that are in the kit are the 300 gallon type. Freightdog Models has the 150 gallon so these were purchased and added. While overall the tanks where nicely molded, one of them had some pinholes that needing filling. Something that happens in resin so it's definitely not a distractor. Note that VA-34 normally flew with tanks that had a flash of blue on them but I couldn't figure out how to add that when I was first working on the kit so left them white. Since that time I acquired the Cut Then Add (CTA) decal sheet "Early Scooters" and they include that blue flash as a decal. At some point I will scan the decal and use its outline as a mask for these tanks. Not difficult to do since I only glued them on with white glue.

|
I first primed the model with the Vallajo spray can white. I will not use this product anymore because with any type of sanding, the paint becomes - and remains - tacky. To that I sprayed the overall model with Model Air white and after curing the white was masked and the gray sprayed, this time it was with Hataka Light Gull Grey. After that cured then the area around the canopy was masked and sprayed with Hataka Dark Gull Gray for the anti-glare panel. Once that was dried then it was masked - along with the rudder and fin - and the blue sprayed, which was Model Air French Blue.
Once all masking was removed then the model was sprayed with Future prior to decaling. I used the VA-34 A4D-1 decals from the Wolfpak Decals set "Rattling Sabers" and they worked really well. I had only one issue with the decals and that was all my fault. After I applied the decals to the nose of the starboard side, I immediately hit them with Agama's Hypersol. And then put my fingers on the decals. Not good as I managed to remove all the ink from the '307' so I had to find replacements, which came from the CTA sheet. Not perfect, but unless you look close up they're "good enough". So note to self: do not use Hypersol on Fantasy Printshop decals.
There were also some of the kit's decals I used, including those on the intakes. For that area I now wish I should have sprayed the majority of the red and just used the "Danger" triangles as they were provided on the Wolfpak sheet.
Conclusion
This is a far from perfect build of a far from perfect kit, but I'm glad I did it and - most importantly - finished it. Sure, there are items I wish I would have done (or done better), but the model looks good to me in any event. And now I have plenty of fodder to work on the next one, if I acquire more Airfix Skyhawks, I've decided that all of my early Skyhawk builds will be VA-34. I just like the blue on these birds.
Huge thanks to Wolfpak Decals for the review set. My condolences to Mark Bilas' family on his passing.
