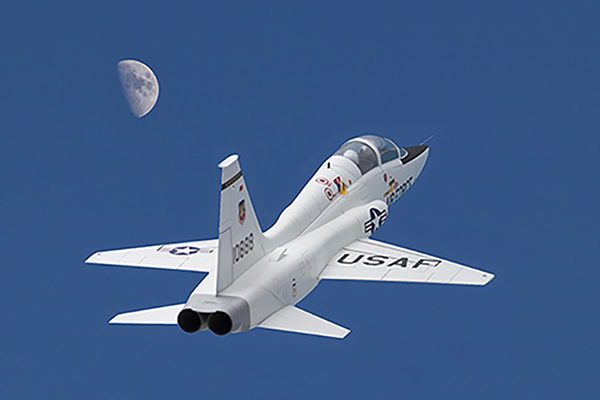
Building the Wolfpack 1/48 T-38A Talon
By Gary Meinert
Introduction
In January 2014, I submitted a first-look review of this kit. See the review for the kit description and history of the subject. Rather than repeat any of that, I'll jump into the build.
Construction Notes
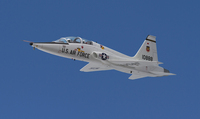 It wasn't long before I was bogged down in fit problems:
- The front instrument panel (part B8) sits too high and had to be trimmed to fit under the shroud (A4). The shroud itself is too short and has a flimsy fit--I supported it with a plastic bar underneath. This whole area is a major engineering goof.
- The rectangular ventral fuselage panel (A3) had a poor fit and needed a lot of filling and sanding when I joined it to the main fuselage.
- In instructions step 6, the bottom fuselage piece (B14) had a very poor fit with the main fuselage halves. I inserted two plastic spreader bars in the rear fuselage to improve the fit, but this area still required considerable filling and sanding.
- As with most jet kits, the air intakes had internal seams to fill and seams where the intake units meet the fuselage sides.
Canopy Confusion
Another frustration was the closed canopy (step 14). The instructions show the placement of folded hinge parts (B37 & B38) for the rear canopy, but these sit too high and do not allow the canopy to close. I therefore discarded these parts. Strangely, there is no mention of corresponding folded hinge parts for the front canopy. These could be parts B33 & B34, but they are labeled as "not for use" on the parts map. I also discarded them.
I was not satisfied with the fit of the canopy parts but did the best I could with them. On a positive note, the kit-supplied canopy masks worked very well during the painting phase.
In-Flight Model
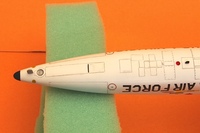 I built my model with the gear up, which means I could toss away the landing gear and simply glue all the gear doors in the retracted position. Wrong. None of the doors fit properly - they all had to be tweaked and modified with underlying plastic supports to achieve the correct positions. Ditto for the speed brakes. This was followed by more filling, sanding, and rescribing. The prominent landing light (C4) also had a bad fit in the retracted position and required filling and sanding.
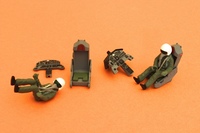 A flying model obviously requires an aircrew. I spoke to my Hasegawa pilots and persuaded two of them to fly my T-38. As usual, some anatomical modifications were required to properly position them in the cockpit.
The model was attached to metal pins on a post via plastic tubes inside the lower fuselage. The base is a wood plaque.
Omissions and Improvements
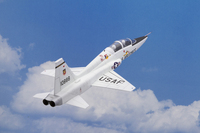 Additional issues were discovered and dealt with during the build:
- A glaring omission is the small windscreen between the front and rear cockpits. (This is designed to protect the rear seat occupant if the front-seater loses his canopy or ejects first.) I made this windscreen from clear plastic sheet.
- The left side of the vertical tail has an erroneous small bulge and some nearby panel lines that I had to remove. The rectangular red beacon light on the left tail surface was molded at an angle instead of being straight, but I left it alone. (The right side beacon is OK as is, though.)
- The kit lacks the Angle-of-Attack (AoA) vane on the right side forward fuselage. I could have robbed one of my Hasegawa F-104 kits for the AoA vane, but decided not to.
- The air intake splitter plates do not have the correct shape, and the tiny standoff inlets between the air intakes and the fuselage are missing. I left these problems alone because it was impractical to try to fix them.
- I drilled holes in the model to insert MV lenses. These represent the round navigation lights and position lights much better than the lumps of plastic provided by the kit. (The ventral position light was completely omitted by the kit.)
- The kit's molded-on throttles are set in the off position, so I removed them and made my own throttles. These were placed in a more realistic position for a flying aircraft.
- Curiously, the kit provides the canopy breaker strut for the front seat (B41) but omits the strut for the rear seat. I made the rear breaker strut from plastic strip and installed it.
Markings
The year is 1974. My T-38A, No. 61-0888, is a member of the 465th Tactical Fighter Training Squadron at Holloman AFB, New Mexico. The 465th had recently joined the 49th Tactical Fighter Wing at Holloman, which was equipped with the F-4D Phantom.
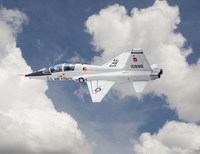 The 465TFTS was the first unit involved in the Lead-In Fighter Training (LIFT) program. The idea was to provide new pilots with extensive training in fighter tactics before they were assigned to front-line squadrons. LIFT was later expanded with more T-38 squadrons at Holloman; a new wing (the 479th) was created for this purpose.
I used a combination of the kit decals and decals from Furball Aero Design Sheet 48-028. All the decals performed well and gave me no trouble at all. I simply had to cut out and arrange numbers from the Furball sheet to create the proper tail number for my aircraft.
Painting
Most modelers would paint a model like this gloss white, but I utilized my usual method of flat paint (Testors Model Master white enamel) and pencils to highlight the panel lines. I also made some subtle stains with weathering powders to give the airframe a used appearance. This was followed by a series of thin Alclad clear gloss coats to serve as a base for the decals. The last step was to spray on a coat of Metalizer sealer to blend in the decals and create a nice semi-gloss shine.
Conclusion
The White Rocket is finally ready to join my collection. Wolfpack's T-38 has the correct shape and dimensions-- it results in a pleasing model. However, the numerous errors, omissions, and fit problems diminished my enjoyment of the project.
References
- My own color slide collection
- F-5/T-38 In Action No.38 by Squadron Signal
- Warbird Tech No. 44. F-5/F-20/T-38 by Frederick Johnsen
- various issues of Air International and Combat Aircraft magazines
