

Building the Airfix 1/72 Boulton Paul Defiant
By Alberto Casirati
After all those years of WW1 aircraft modelling, and a long pause of some 20 years, when I decided to go back to the workbench again it was to build all those models I had always wanted to but, for some reason, actually never built.
One of those marvelous subjects (to my eyes, at least) is the Boulton Paul Defiant. The happy owner of an old 1970s Airfix kit in the original blister package, I was nevertheless glad enough to see the renowned British manufacturer releasing their new tool kit in January 2015.
The kit is a very good one, extremely good value for money. It captures the nice lines of the original aircraft very well and offers some fine detail, although wing trailing edges are thick, the reason of which escapes me.
With nicely detailed cockpit and wheel wells, the kit promises to be an enjoyable build.
History
I chose the day fighter version, to honor, albeit in such a small way, the memory of those gallant crews who fought bravely to defend the United Kingdom (and indeed all the civilized world) from Nazi fury back in 1940. Lest we forget.
On the 29th May 1940, Defiants of 264 Sqn (F) achieved a brilliant success over Dunkirk, claiming no less than 37 German machines shot down in a single action. The success was made possible by the fact that they found themselves in the correct situation to do their kind of job, which was to destroy enemy bombers, not to fight against Me 109s or 110s.
German fighter pilots quickly found the Defiant weak spots and life became hard for British crews, as their mounts were easily outperformed by the Messerschmitt Bf 109E.
The Defiant was a good airplane, well-engineered, but since it operated from the south of England (instead of from the east coast, where Luftwaffe bombers came unescorted) it had no chances to do its job (for which it was intended and conceived) before being tackled by superior enemy fighters.
75 years on, it is pretty clear that the airplane itself was not fully understood by the Fighter Command, which forced it to be flown in unsuitable conditions. Not surprisingly, the Defiant performed well as a night fighter.
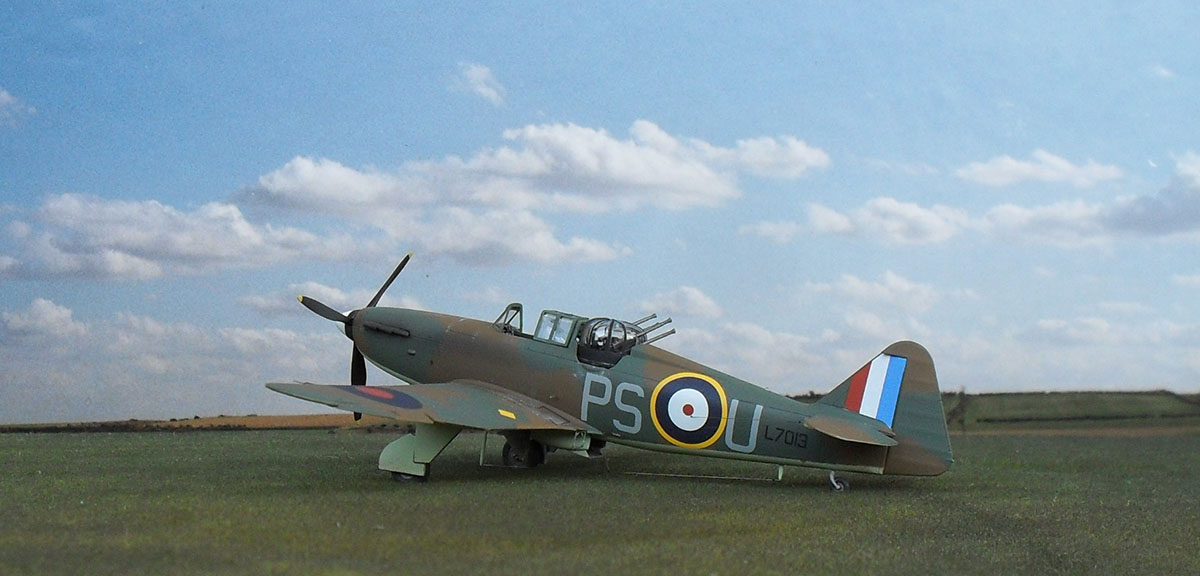
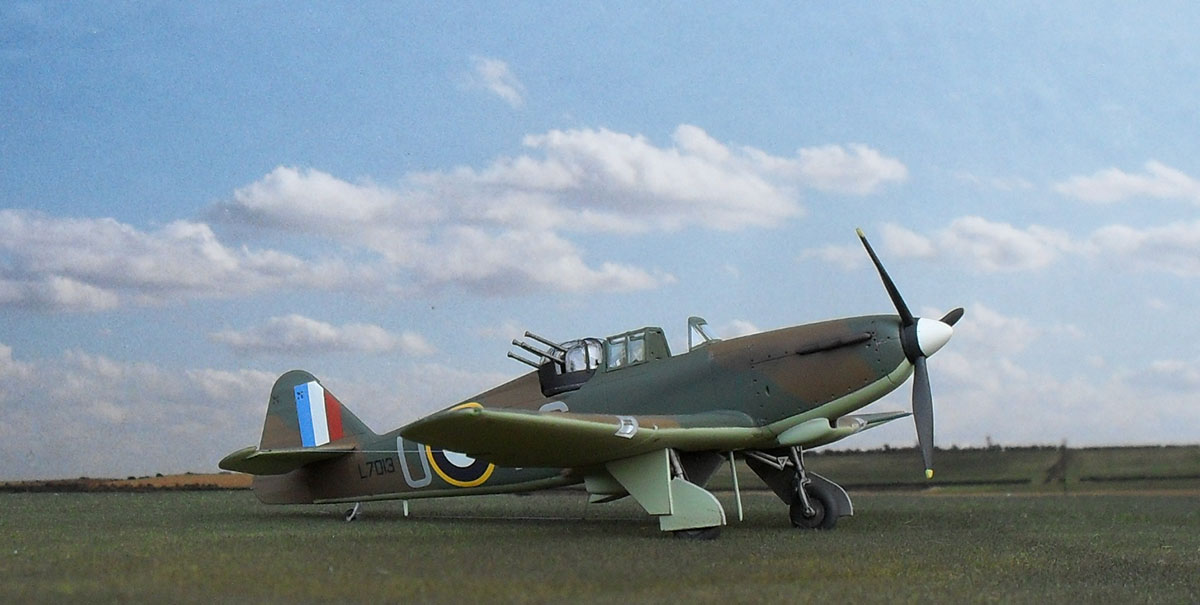
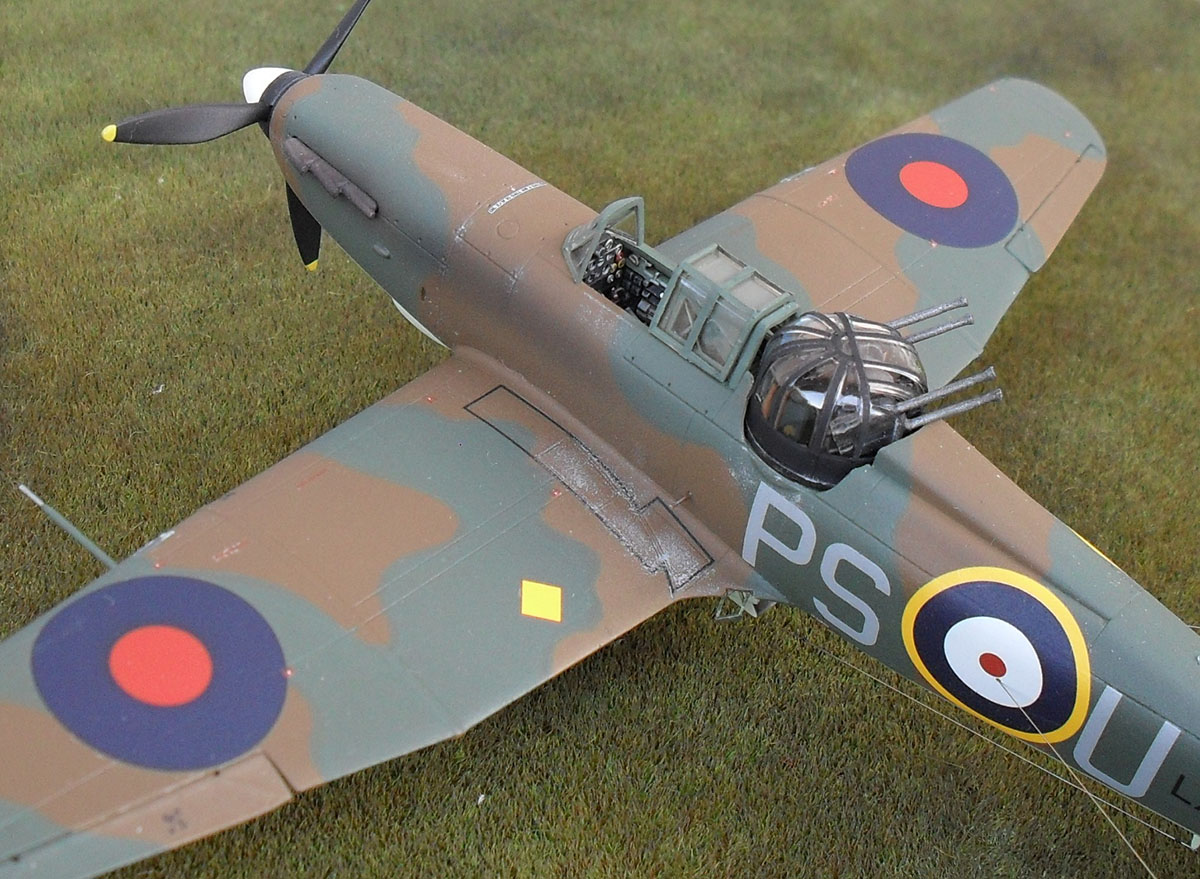
Boulton Paul Defiant "PS U" belonged to 264 Sqn (F) RAF, the first unit to bring the Defiant in combat in May 1940. It force landed at Manston after having been attacked by three Bf 109 Es on 24th August 1940. Pilot and gunner (Campbell-Colquhoun and Robinson) were luckily unhurt. Later, the aircraft was strafed while refueling at Hornchurch, during a bombing raid on the airfield. Again, aircraft and crew escaped without injuries. They survived the Battle of Britain and continued service elsewhere until the end of the war.
The Build
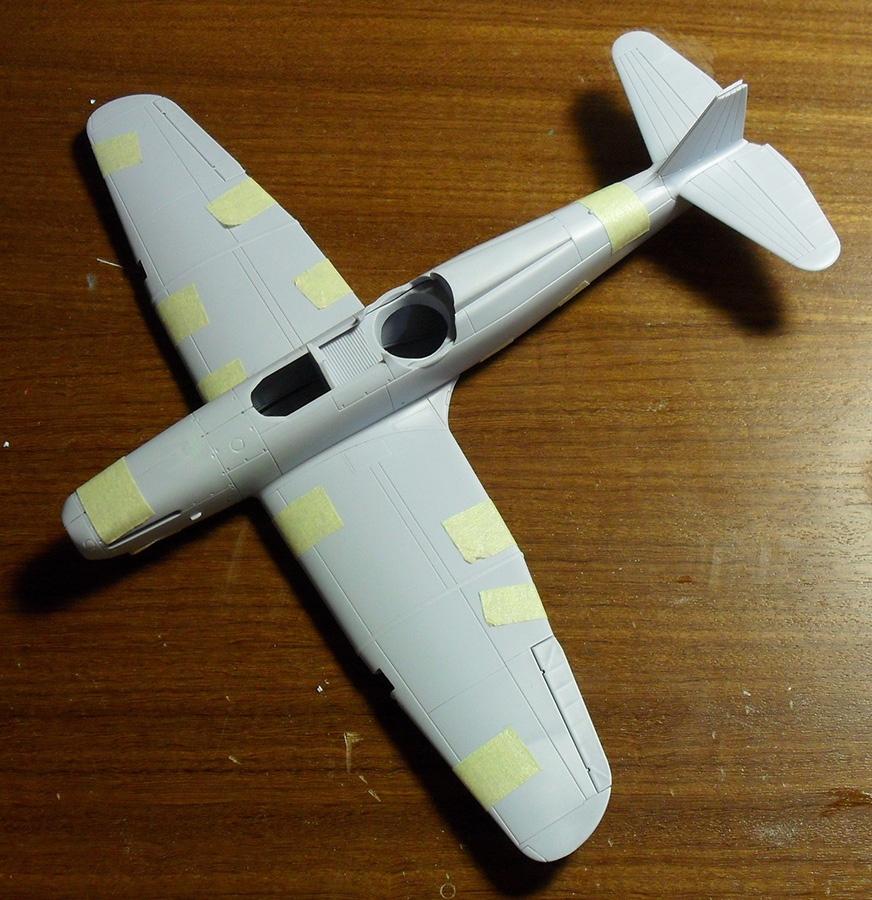
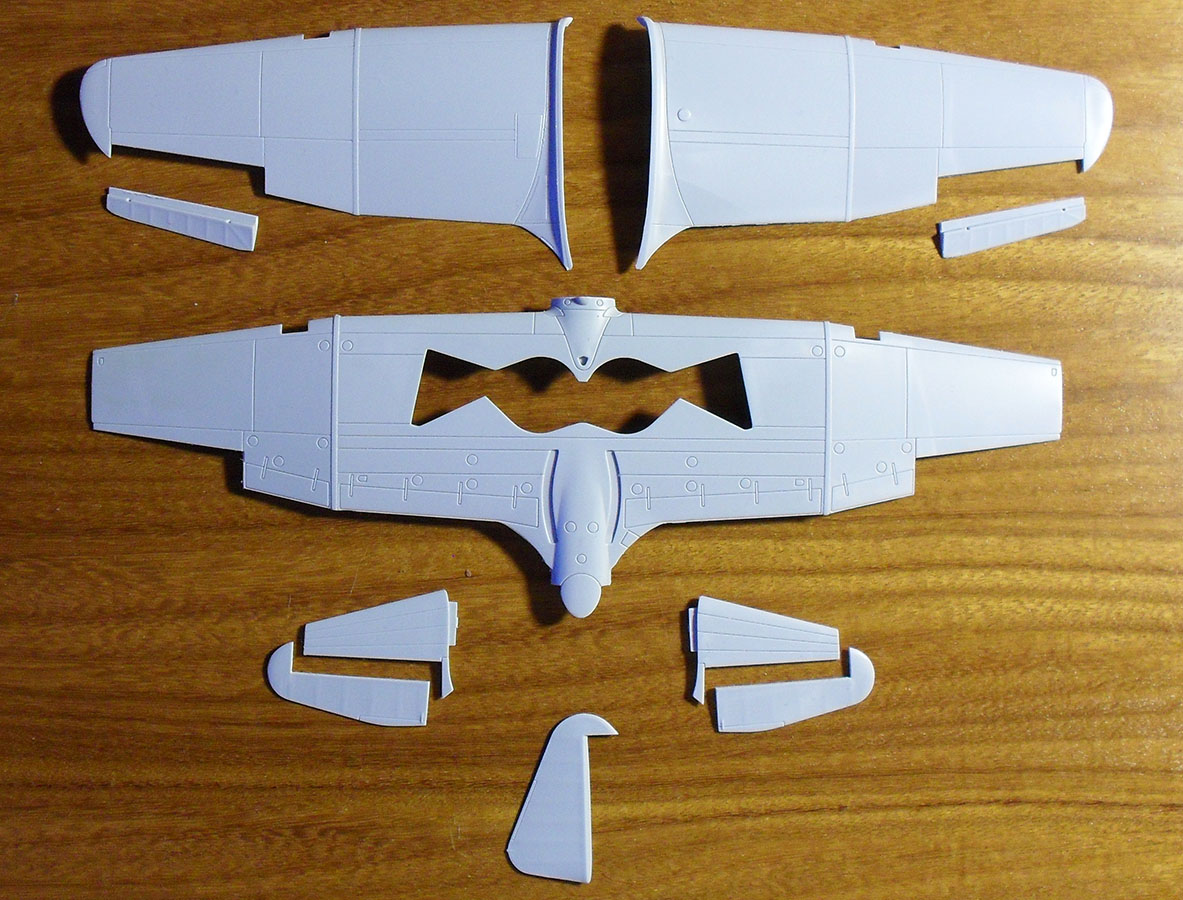
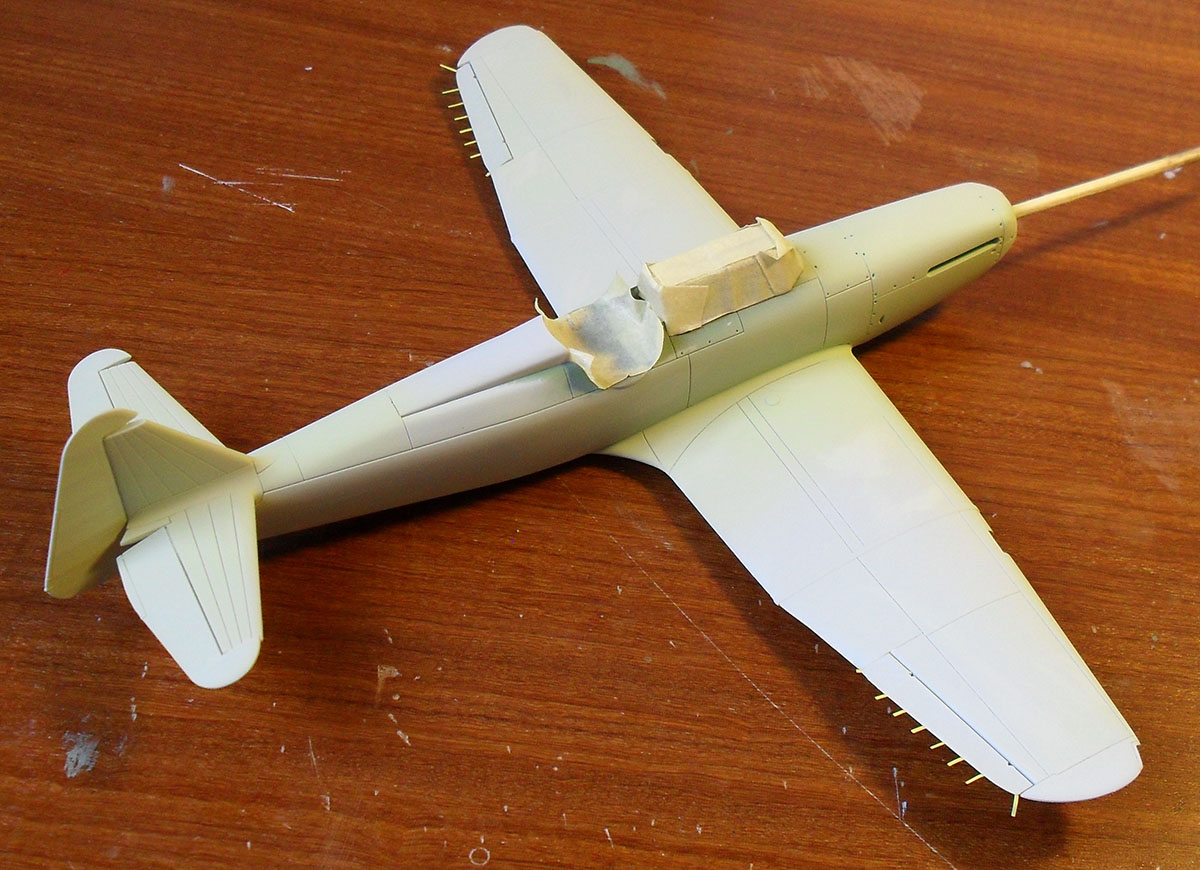
As a wise first step, a complete dry run of major parts was done and this showed very good fitting overall, even in the fuselage/wing mating area, which is often a critical point.
|
|
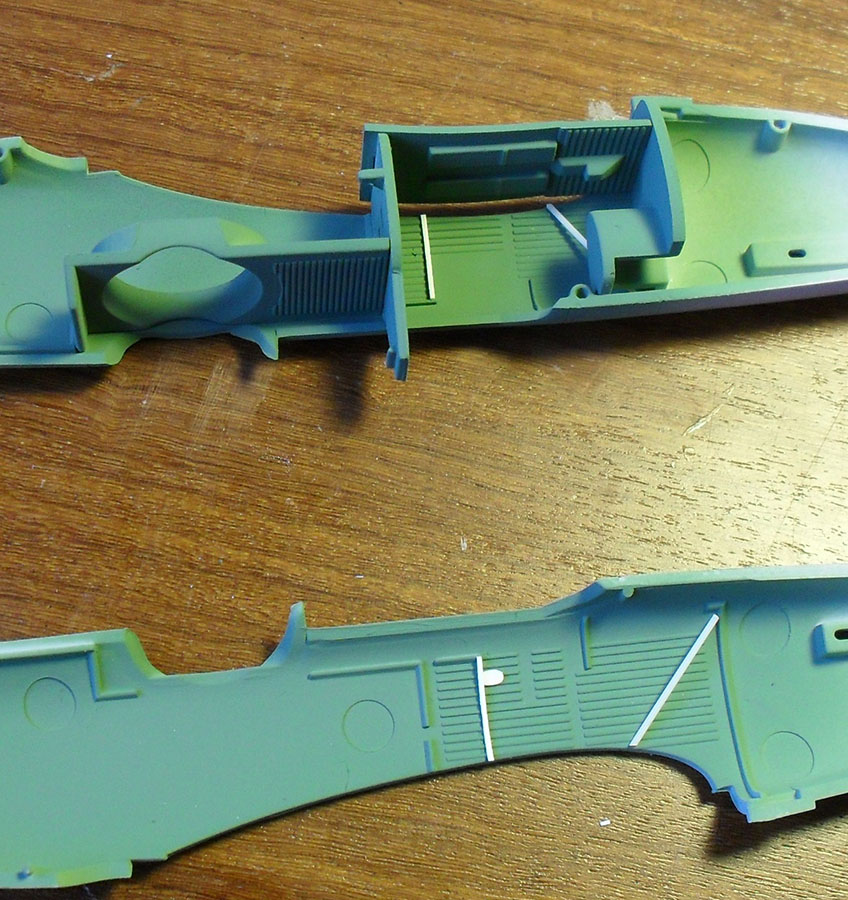
To get perfect alignment between fuselage halves, I erased the relevant locating pins.
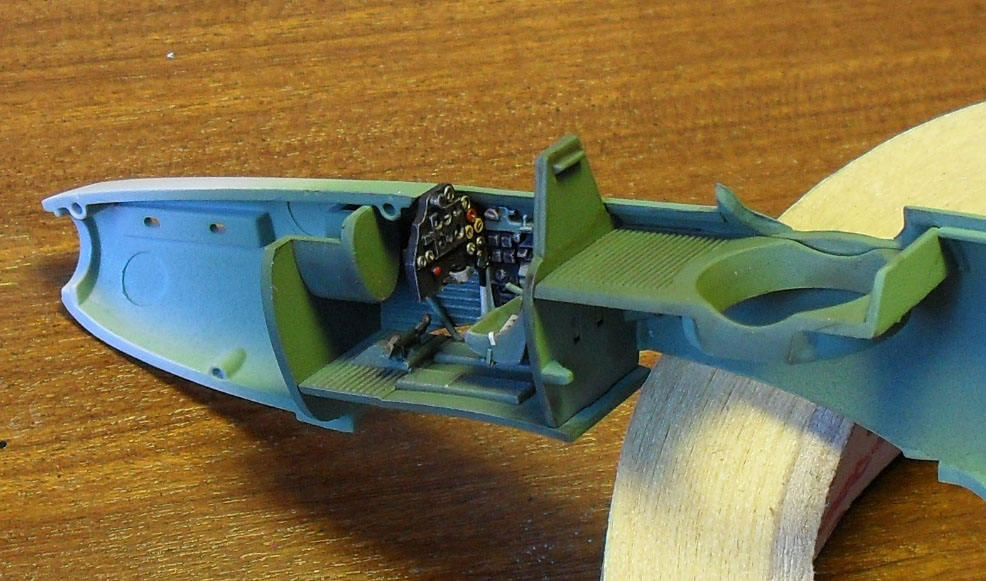
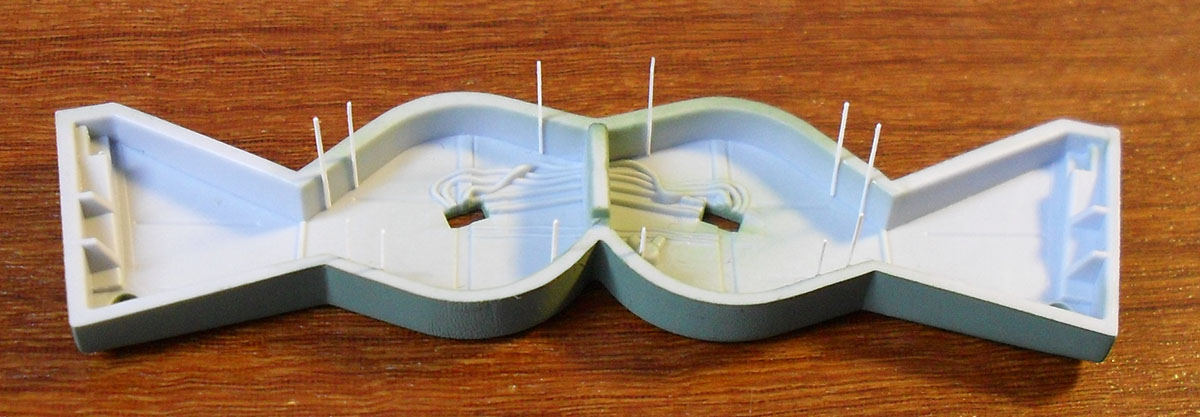
After a careful wash with dish soap, cockpit main parts were glued in place and interior green was sprayed.
|
Cockpit parts offered by the kit are nice and well molded, but they can be improved by careful painting and by adding some small details here and there.
|
|
Although aftermarket items available for interiors are very well done and of course of a high degree of precision and detailing, I always prefer scratchbuilding. My hands and eyes cannot compete with photo etching machines, but at least I know I did those details myself and this is part of the fun for me.
A few details were added to the cockpit sides, seat belts were made from paper and the control column was replaced by a new scratchbuilt item.
|
|
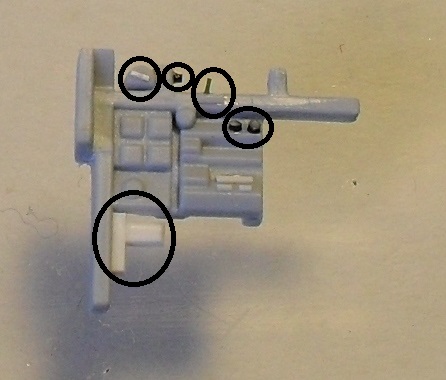
The raised, central rectangular part of the instrument panel was cut from 0.1 mm plastic card and holes were drilled for the instruments, as in this area the latter were built in.
Wire segments were straightened by rolling them under a wooden plate and rolled around nails of suitable diameters. Once cut with a sharp blade, they were glued on the panel as instruments frames. Dials were cut from 0,065mm stainless steel wire, previously painted white and glued with a drop of Humbrol Clear varnish. The other dashboard details were cut or carved from plasticard sheet or stretched sprue.
The compass as supplied by the kit is too small and was replaced by two sections of heat stretched sprue.
The final result is not too bad.
|
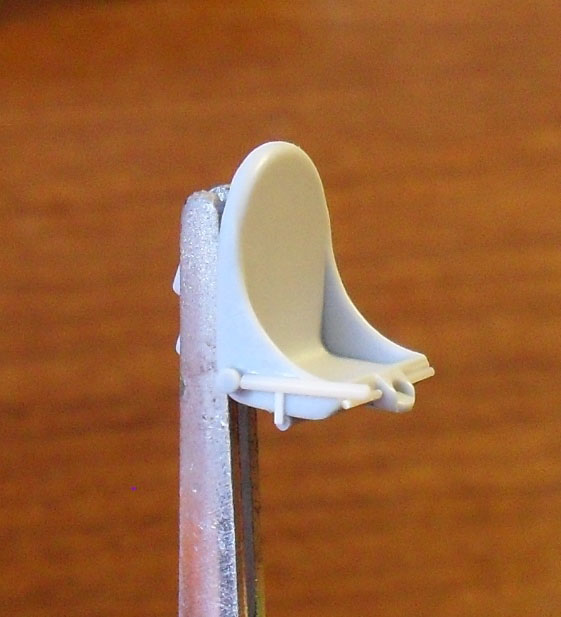
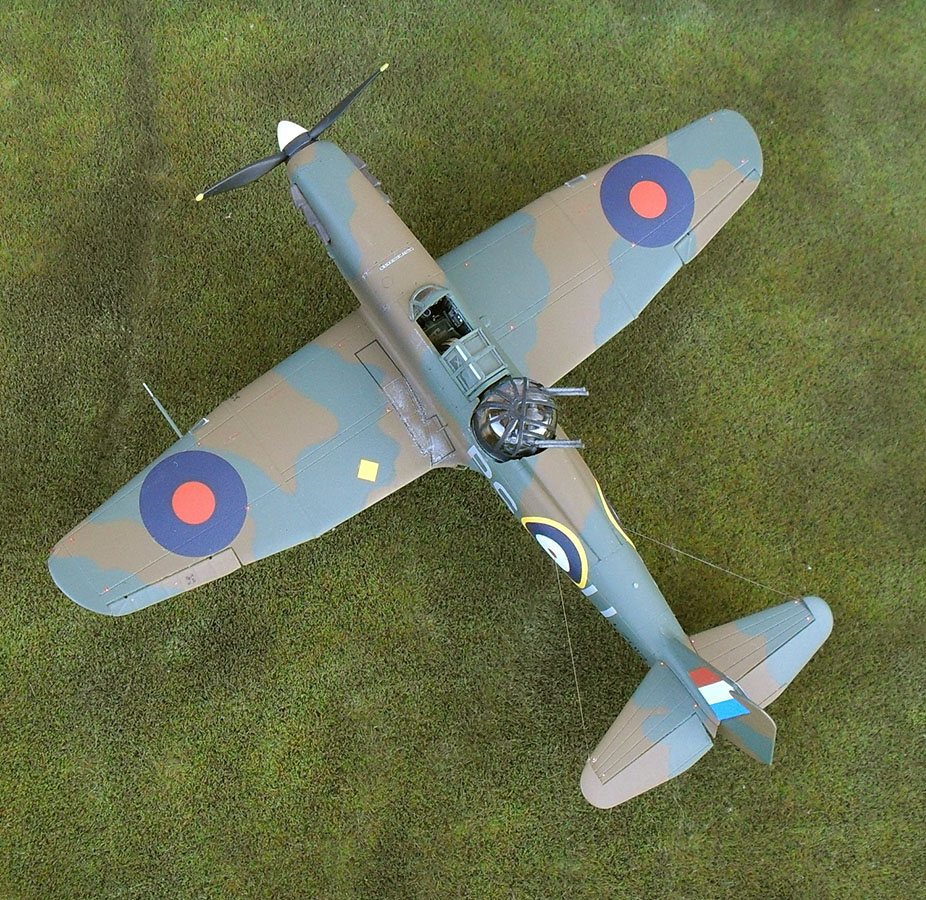
Once fuselage halves are glued together, a few additional details can be added to the turret interiors, such as a new seat with straps and the gun butts. 9
|
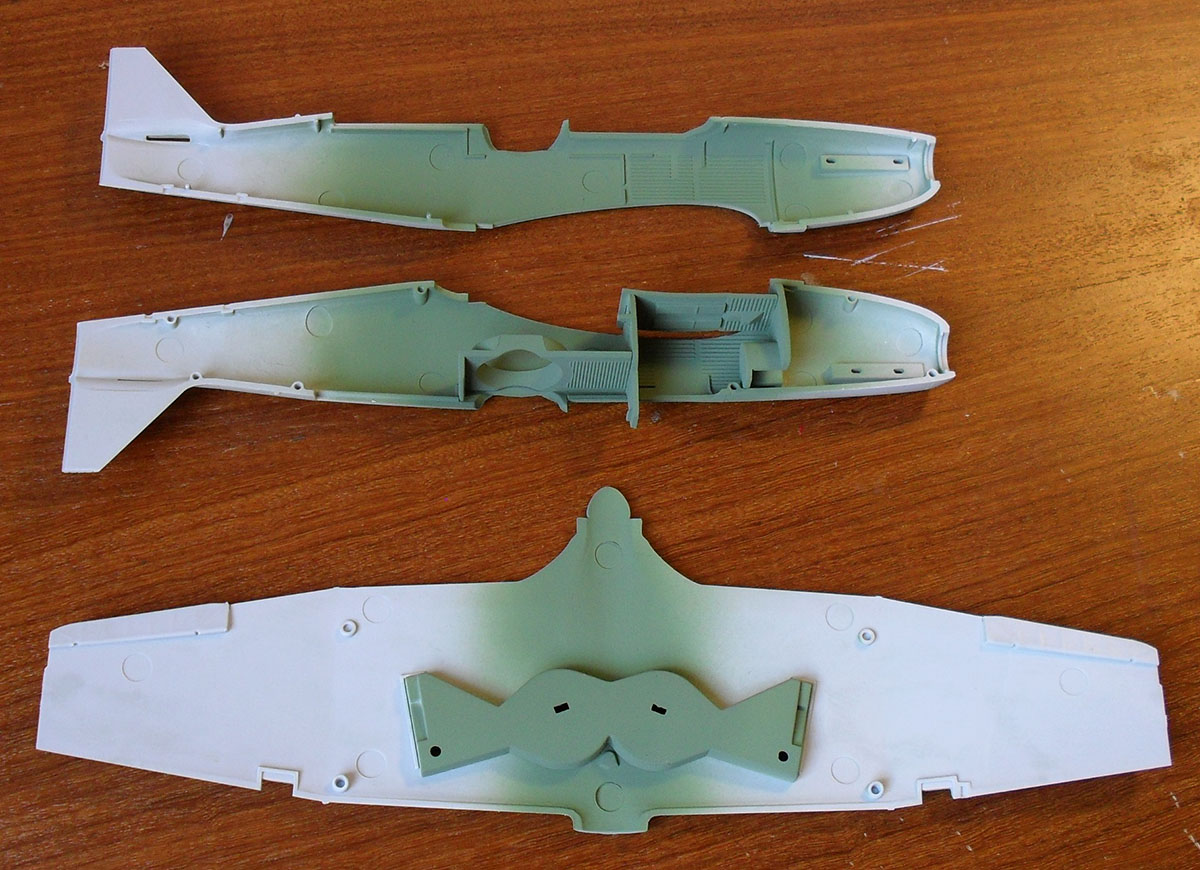
And now to the wings. As already mentioned, they need their trailing edges to be thinned down considerably and this was done from the inside, by scraping with a sharp blade.
Ailerons, which were cut from the wing, were reworked on their undersurfaces only and new ribbing was added by means of decal strips.
|
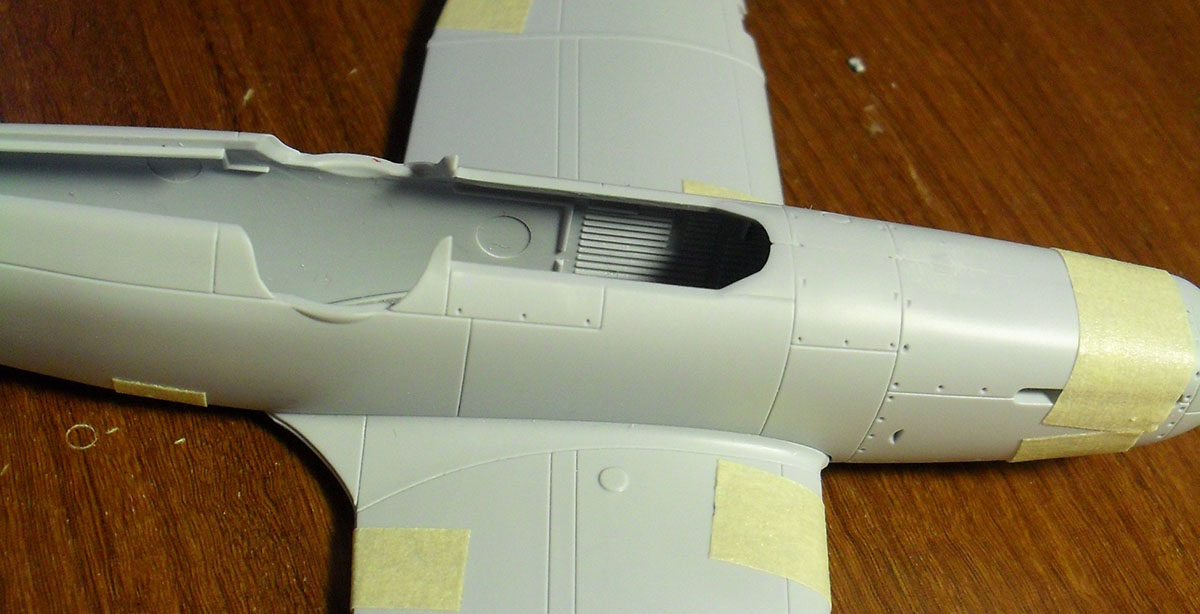
The wheels well is well detailed but again a few more items can make it even better.
|
Once wing main parts are glued together, the well can be painted aluminum, drybrushed and washed.
Wing lights can then be added from clear sprue and major assembly can take place.
Only a minimum of filler was required to finish the model, so the painting stage was reached quickly.
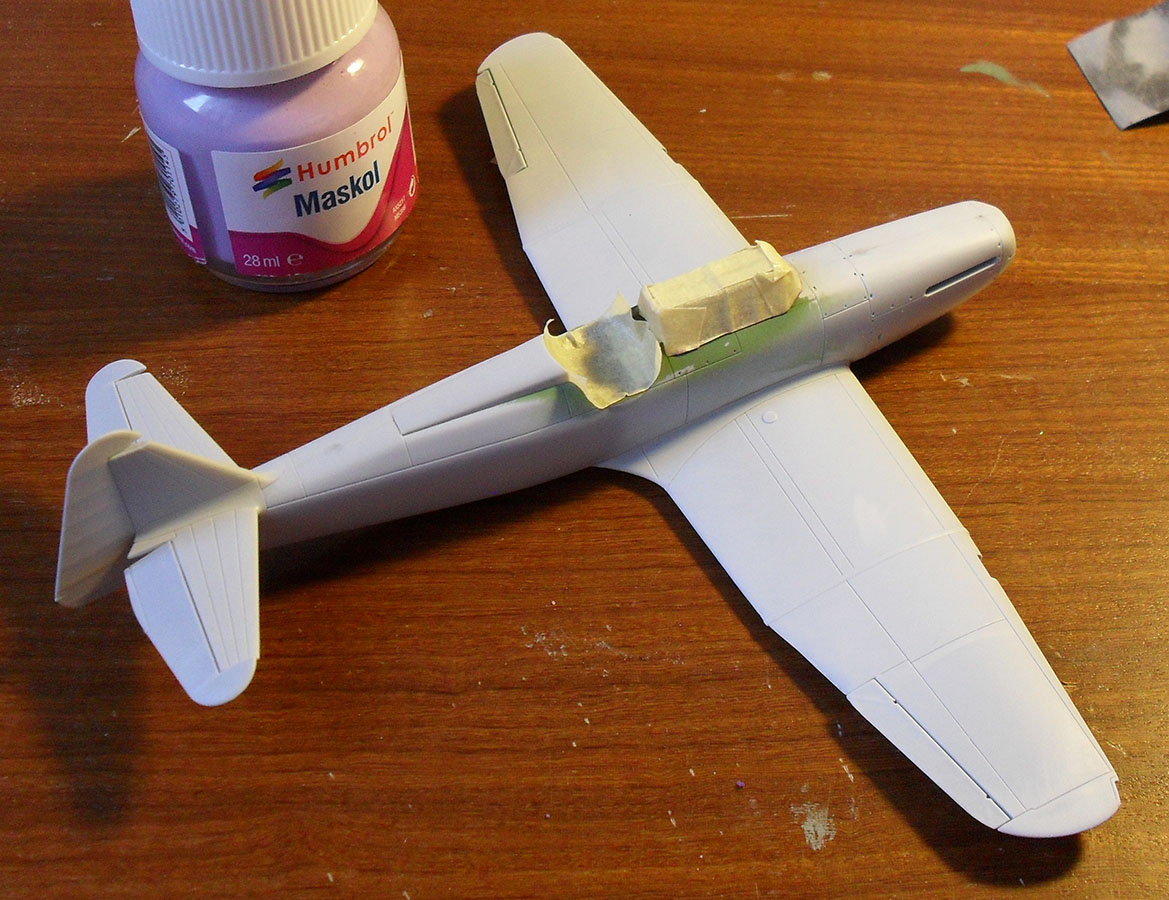
|
The model was primed using Humbrol 90 sky. Then it was the turn of dark earth (Humbrol 29). "PS U" was painted in the Temperate Land Scheme B. Dark Green (Humbrol 149) was painted by brush, thinned down to 33%.
|

|
Three light coats of Livax (Future is more common) acrylic wax, applied by brush, made the model ready for decaling, which was a pleasant phase, as Cartograph decals, which comes with Airfix kits, are of excellent quality and react well both to Humbrol Decalfix and to Microsol/set liquids. The decal sheet is very complete (about 65 items in all) and includes stencils. After some light weathering, a satin coat sealed the complex.
The undercarriage posed no problems. One must take care, as parts are necessarily thin, but this is all that's needed to end up with a nice reproduction of the peculiar Defiant retracting system, which is intended for a parked aircraft of course (thus with compressed undercarriage legs). As usual, a couple of tiny details, including brake pipes, were added.
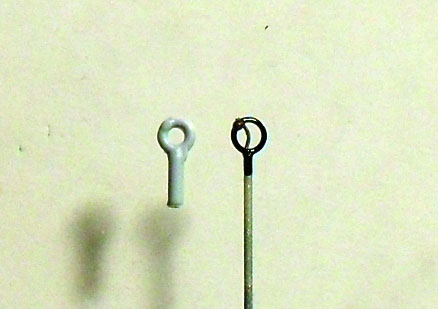
After the usual series of bits and pieces, also in the area behind the pilot's cockpit 20, antenna wires and isolators were added as a final touch.
|
|
|
|
Conclusion
All in all, this was a thoroughly enjoyable project, mainly thanks to the kit's excellent quality. It may well not be my last Airfix Defiant. And now, for that old Fairey Battle.