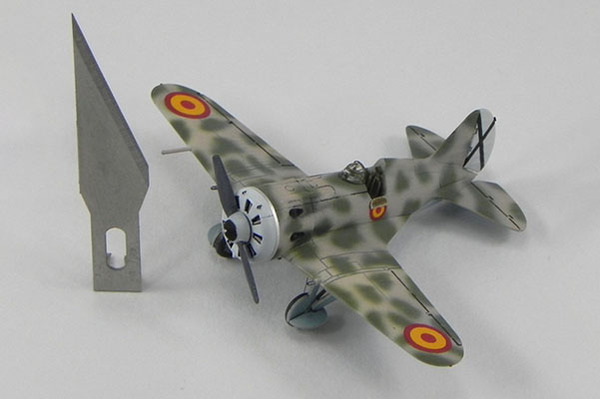
Airbrushing Tips, Tricks, and Techniques: Zvezda 1/144 Polikarpov I-16 Rata
By John Miller
Introduction
In this installment of our airbrushing series I’m going to describe some basic fine-line airbrushing techniques and the use of lacquer paint all while finishing a 1/144 scale aircraft. The same techniques could be used to spray fine lines on a model of any scale. They could be used for example, to spray the mottled camouflage on a 1/72, 1/48, or 1/32 German, Italian, or Japanese aircraft. The same could be said about airbrushing exhaust and/or weathering stains. All require basic fine line techniques. As always the mixes for the various paint and clear coats are provided as is airbrushing pressures and set up. I’ve also included “The Bench” sections, which provides the exact procedure I use on my workbench when preparing paints and clear coats. I hope you find something useful.
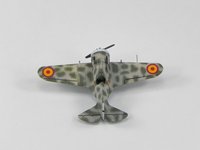
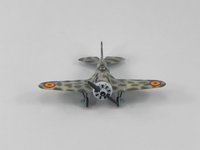
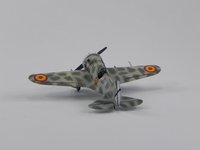
This little Rata was painted in a Spanish Civil War scheme using Akan Lacquers. Akan is similar to Gunze Mr. Color lacquers however the Akan range is difficult to find (Linden Hill Imports) and rather limited. It is, however, the nicest paint for fine-line work I’ve ever used. And yes, I’m hedging my bet in choosing Akan lacquers for this job. The chosen scheme of tan with irregular blotches of green would require the use of fine-line techniques in 1/48 or 1/72 -- much more so in 1/144. Although this build was painted with a lacquer, have no fears Vallejo, Tamiya, and LifeColor users: 1/144 scale aircraft finished completely in acrylics are in the works for future articles.
|
Construction
I have to start by stating that 1/144 is not my normal scale. After completing my first kit in this scale, my modelers’ hat is off to all you 1/144 scale guys. I initially spent a lot of time figuring out how to remove the tiny parts from the sprues without damaging them. I found that a fine-toothed razor saw or one made of photo-etch is perfect for the job. Once removed the next challenge of parts clean up proved more difficult in this scale as well. Here is where I found great use of the 1,000 and 2,000 grit abrasive sheets from Alpha. I like to cut and fold sandpaper into handy sized shapes for small work and the abrasive sheets from Alpha are ideal for this application. Unlike normal sandpaper, Alpha abrasive sheets don’t crack when folded allowing you to use the folded edge as a sanding surface. Most importantly, the various grits are finer than sandpaper and if used with a little water-detergent solution, don’t scratch plastic as readily as does conventional sandpaper.
Once removed and cleaned up, the kit parts were glued together using Tamiya thin cement. Since there’s all of 5 major parts, assembly took about 2 hours. The kit comes together without filler and the fit is near perfect. For something a little different, the cockpit door was carefully removed with a sharp X-Acto blade and the resulting area was smoothed with micro files and 1,000 grit Alpha abrasive. A replacement door was made from thin bass sheet. Seat belts were fashioned from thin strips of Tamiya tape and a decal that would suffice for an instrument panel was sourced from the spares box. With the kit assembled, I set about getting this hummer into primer.
|
Primer
Prior to painting, the model was wiped down with a Kimwipe buffing tissue saturated with Denatured Alcohol (Crown). Denatured alcohol is a good, cheap degreaser, evaporates quickly, and is available at most hardware stores. The model was then sprayed with Gunze Mr. Color White lacquer (#1) diluted to 10-15% paint in Mr. Color Leveling Thinner. That’s a paint to thinner ratio of 1:10.
The Bench
To Dilute Gunze White for Spraying:
-With a 3.5ml pipette, deliver 0.9 ml of Mr. Color Gunze Leveling Thinner to a spin tube.
-To the 0.9ml of thinner, add Mr. Color Gunze White up to the 1ml mark on the spin tube using a 0.5ml pipette.
-Cap and shake vigorously--ready to spray.
The diluted Gunze White was sprayed at ~12 psi with a Harder&Steenbeck Infinity dual-action airbrush fitted with a 0.2mm tip. I prefer to use Mr. Color Leveling Thinner as opposed to Mr. Color Thinner when I spray Gunze lacquers. The Leveling Thinner flows better (less needle build up) and produces a smoother finish than does Mr. Color Thinner, which I use just for cleaning. Gunze white lacquer paint serves as a great primer: drying fast producing a smooth tough finish. While spraying this is lacquer, I wore a filter mask and the model was shot while in a paint booth. This is true for all subsequent painting steps. After about 30 minutes drying time, the model was buffed with a small micro fiber swab and fine inscribed details were blown clean with a Harder&Steenbeck micro parts blower fitted with an air restrictor for maximum force. This is a real handy tool for this job whatever the scale.
Those areas of the model destined to be white (cowl and rudder) were then masked off with Tamiya tape: another new challenge to working in this scale. My approach was to cut thin strips and squares of Tamiya tape and place them on the model in an over-lapping manner for better stability. These were then burnished down with a burnishing tool (wooden handle) or a slightly moistened toothpick.
To Pre-Shade or Not, That Was The Question
This is usually the point at which I spray pre-shading along major panel lines in preparation for the first coat of primary paint. However, upon close inspection of the primer coat two things became readily apparent: 1) those panel lines sure are mighty small J and 2) the panel lines and surface details of this kit are so fine that a lot would be lost with too many coats of paint. With this in mind, I opted instead to accentuate all the panel lines and details with Black Panel Line Accent Color (#87131) by Tamiya. This is an enamel-based panel wash that I applied sparingly to panel lines and details with a small, elongated brush. After about 10 minutes the excess was gently wiped away with a cotton bud slightly damp with Mons Lisa Odorless Paint Thinner (Speedball Art Products). Use of Mona Lisa for this is crucial, as stronger thinners will quickly affect the underlying coat of Gunze lacquer. With the major panel lines accented, it was time for some color.
|
Primary Coat
The undersurfaces were sprayed with Akan AIIG Blue (#63042) lightened with ~20% Akan White (#63146) (ratio of 1:5). This mix was diluted to ~10 paint (ratio of 1:10) in Akan lacquer thinner (#64001) producing a paint mixture less viscous than milk.
The Bench
Lightening Akan AIIG Blue:
-With a 0.5ml pipette deliver ~0.8ml of Akan AIIG Blue to a spin tube.
-To the 0.8ml of blue, add Akan White up to the ~1ml mark on the side of the tube using a 0.5ml pipette.
-Cap and shake vigorously (Lightened AIIG).
To Dilute for Spraying:
-With a 3.5ml pipette deliver ~0.9 ml of Mr. Color Gunze Leveling Thinner to a spin tube.
-To the 0.9ml of thinner add the lightened AIIG Blue up to the ~1ml mark on the side of the tube using 0.5ml pipette,
-Cap and shake vigorously--ready to spray.
The lightened blue was sprayed at ~12 psi with a Harder&Steenbeck Infinity dual-action airbrush fitted with a 0.2mm tip. After drying for about 20 minutes (these lacquers dry fast!), the belly was masked using the same technique of overlapping strips and squares (see above). The upper surface was then sprayed with a 1:1 mix of Akan Sand (#63080) and Akan White (#63146). This was diluted to ~10-15% paint in Akan lacquer thinner (#64001)(ratio of 1:10) and sprayed at ~12 psi with a Harder&Steenbeck Infinity dual-action airbrush fitted with a 0.2mm tip.
The Bench
Lightening Akan Sand:
-With a 0.5ml pipette deliver ~0.5ml of Akan Sand to a spin tube.
-To the 0.5ml of Sand add Akan White up to the ~1ml mark on the side of the spin tube using a 0.5ml pipette.
-Cap and shake vigorously (Lightened Sand).
To Dilute for Spraying:
-With a 3.5ml pipette deliver ~0.9 ml of Mr. Color Gunze Leveling Thinner to a spin tube.
-To the 0.9ml of thinner, add the Lightened Sand mix up to the 1ml mark on the side of the spin tube using a 0.5ml pipette.
-Cap and shake--ready to spray.
|
It’s Time for Some Fine Line
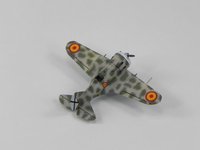
The biggest challenge of shooting this scheme wasn’t spraying the irregularly shaped blotches of green but figuring out how to hold the model AND get access to its surface for painting. My solution was to mount the model in a small, swivel headed vise made by PanaVise. A small platform fashioned from sheet plastic was held in the vice while the model was affixed to the platform by a wad of white putty. Test runs showed this would work for the model but my hand needed additional bracing. Luckily, I happened to have my fathers’ old shooters hand brace, which both steadied and elevated my hand to a good working level.
Now it was time to practice. That may sound strange but prior to shooting a complicated scheme, I set aside time to practice and “get the touch” before reaching for the model. To mimic painting the model as closely as possible, I traced the outline of the models’ wing on a sheet of plastic and once cut out, this was an ideal “canvas” on which to practice outlining the shape of each blotch then doing the fill-in.
The green blotches were painted (and practiced) with Akan green (#63055). This is described on the bottle as the shade green appropriate for a Mig-23, -27 or Sukhoi-17, -22, or -25. It was lightened with ~25% Akan White (#63146)(ratio of 1:4). For spraying, this mix was diluted to ~10% paint in Akan lacquer thinner (#64001) (ratio of 1:10).
The Bench
Lightened Akan Green:
-With a 0.5ml pipette deliver ~0.75ml of Akan Green to a spin tube.
-With a 0.5ml pipette, add Akan White up to the ~1ml mark on the side of the tube.
-Cap and shake vigorously (Lightened Green).
To Diluting for Spraying:
-With a 3.5ml pipette deliver ~0.9 ml of Mr Color Gunze Leveling Thinner to a spin tube.
-With a 0.5ml pipette, add the Lightened Green to the 0.9ml of thinner up to the ~1ml mark.
-Cap and shake vigorously--ready to spray.
The blotches were sprayed with two airbrushes: The Harder&Steenbeck Infinity fitted with a 0.15mm tip and a Harder&Steenbeck Grafo T.1 also fitted with a 0.15mm tip. Air pressure was adjusted at the compressor (Iwata Studio Series) for ~20 psi. This was reduced to ~5 psi using a Harder&Steenbeck fPc valve for the Infinity and a Harder&Steenbeck In-Line Control Valve for the Grafo T.1. While shooting the blotches, each brush was held ~1cm or so from the surface of the model. Yup, that close. Having been designed for touch-up artists and illustrators, the Grafo was ideal for some of the more challenging areas such as the wing root-fuselage fillets and the juncture of the horizontal and vertical stabilizers: all were tight shots onto surfaces with ~900 angles. The rest of the scheme was applied with the Infinity. Touch up work was again done with the Grafo T.1. I simply love the T.1. Nothing beats the fine-line performance of this brush.
Applying the blotches took ~3 hours to complete. While spraying, the exposed portion of the needle was wiped clean every 30 seconds to 1 minute of spraying time. I usually set up a small container with some of the thinner I’m spraying and a micro brush. I keep this close at hand to facilitate quick and easy cleaning of the needle. I do this for whatever type of paint I’m spraying lacquer, enamel, or acrylic. Repeated cleaning of the needle was especially needed in this situation where even the slightest build up of paint would degrade the spray pattern considerably. With the blotches completed, the tapes were removed and model prepped for a gloss coat.
Gloss Coat #1
For a gloss coat, my go-to product is Alclad Aqua Gloss (#ALC 600). It’s superior to Future floor wax (or “Pledge with Future Finish”) in practically every way. It sprays easier, dries faster and is more tolerant of decal solvents than is Future. I sprayed the Aqua Gloss straight from the bottle at ~15 psi with a Harder&Steenbeck Evolution fitted with a 0.2mm tip. Being aqueous (not lacquer as are most Alclad products) clean up is easy using Vallejo Thinner (#71.161) or Iwata Medea Airbrush cleaner. Aqua Gloss dries rapidly (~30 minutes) but I usually wait ~24 hours before beginning the decaling process.
Decals
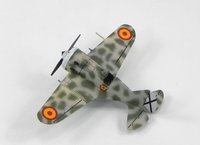
Well, unfortunately, I didn’t have any decals. I contemplated masking and spraying the yellow/red roundels but quickly came to my senses. Especially when I calculated the size of the fuselage roundels: mighty small. Instead, appropriately sized discs were removed from yellow and red decal sheet using a punch and die set from UMM-USA. When stacked, these discs formed a roundel. And were applied using Micro-Set/-Sol and conventional methods. The black “X” on rudder was made from thin strips of black decal sheet applied with Micro-Set/Sol. Unfortunately, I could not find sufficiently small decals to replicate the individual aircraft designation “C8-25” that appeared on the upper portion of the vertical stabilizer. Oh, well. The metal cowl ring was replicated with a thin strip of Chromed Metal Foil (Bare Metal).
|
Gloss Coat #2 and Oil Wash
To seal the decals onto the model and blend the edges with the surface, the model was again sprayed with Alclad Aqua Gloss (#ALC 600) as described above. After 24 hours, dark grey artist’s oil (Paynes) diluted in Mona Lisa Odorless Paint Thinner (Speedball Art Products) was used to darken some panel lines and details where the pre-shading had faded due to multiple coats of paint. After an hour, excess stain was carefully removed with a cotton bud lightly moistened with Mona Lisa Thinner.
Final Coat
The model was given a final coat of Vallejo Satin Varnish (#70.552) diluted to ~10% in Vallejo thinner (ratio of 1:10). This was sprayed at ~15 psi with a Harder&Steenbeck Evolution fitted with a 0.2mm tip. I apply Vallejo Satin in very bright light with the airbrush held back from the model as though I were shooting a dry coat. I angle the model so that light is reflecting off the surface of each section that is being sprayed. By watching the reflected light, I can more easily assess how much shine is being lost with each pass of the airbrush. This permits me to dull the finish gradually thereby achieving the degree of dull I’m looking for without going too far into flat. The small surface area of this kit made that process a challenge. To assist, I shot the final coat directly under my work lamp, wearing a safety mask (as always) and a pair of 3X lenses. My shop door was locked so no one could see, or worse, photograph this. One has to be careful.
The Bench
10% Vallejo Satin Varnish:
-With a 3.5ml pipette deliver ~0.9ml of Vallejo Thinner to a spin tube.
-Shake the Vallejo Satin thoroughly.
- To the 0.9ml of thinner, add Satin Varnish up to the ~1ml mark on the side of the tube using a 0.5ml pipette.
-Cap and shake vigorously--ready to spray.
-3X lenses and locked shop door optional.
After the satin coat had dried, exhaust stains were applied using pastel chalks and a micro brush. I’m a big fan of pastels for weathering especially in smaller scales where control is key to not over doing it. The slightly rough surface of a satin coat (versus a gloss coat) is a good finish on which to apply pastels. These were then sealed with a final pass of Vallejo Satin Varnish.
Finishing Up
The propeller hub of this I-16 had a white base with a black tip: attractive but difficult to pull off in this scale. To tackle this, the prop was primed with Gunze Lacquer White (see above) and then held in place on a photo-etch scribing stencil with a wad of white putty. The tip of the spinner was thereby held in an appropriately sized hole and shot with Gunze Mr. Color Black lacquer (#92) diluted to 10% paint in Mr. Color Leveling Thinner (ratio of 1:10). This was sprayed at ~15 psi using a Harder&Steenbeck Evolution fitted with a 0.2mm tip. To be sure wet paint didn’t wick under the stencil, the black was shot with the brush held far back and the paint flow adjusted to deliver a dry coat with each pass. This is a great trick for propeller spinners of larger scales as well as the tips of drop tanks and ordinance. Once dry, the blades were hand painted using LifeColor Gloss Black (LC52).
The Bench
To Dilute Gunze Black for Spraying:
-With a 3.5ml pipette, deliver 0.9 ml of Mr. Color Gunze Leveling Thinner to a spin tube.
-To the 0.9ml of thinner, add Mr. Color Gunze Black up to the 1ml mark on the spin tube using a 0.5ml pipette.
-Cap and shake vigorously--ready to spray.
The canopy was dipped in Future floor wax, allowed to dry for 24 hours, hand painted with the lightened Akan green (#63055), and applied using Model Master Clear Parts Cement (#8876C). The liner for the cockpit door (fashioned from brass sheet) was made from Tamiya tape. The liner and the door were hand painted and glued in place with CA glue (Bob Smith). The gear retraction cables that extend from the center of each wheel hub to the center of each well were replicated with Super Fine Rigging Thread from Uschi (#4007).
Conclusion
Ok, I enjoyed that. My favorite part of a build is usually airbrushing so getting to shoot paint after only a few hours of cutting, sanding, and gluing was a joy. Yea, you need spectacles to see it, but let’s not quibble. Most importantly, I hope the build demonstrated some basic fine-line airbrushing techniques and strategies for diluting lacquer paints that you found useful. You may not ever spray Akan lacquers but you can use the same approach to spray fine lines with other lacquers such as Gunze or Tamiya. Additional 1/144 scale articles describing techniques for diluting and spraying fine lines with acrylic paints are in the works. Vallejo, LifeColor, Tamiya, Model Master?
Hmmmmmmm....
Now go paint something!
