A Swedish Mustang: Building Arma Hobby's 1/72 P-51B Mustang
By Chris Banyai-Riepl
How Did We Get Here?
This is the story of that one project that has followed me, taunted me, annoyed me, for literally decades. It all started all the way back in the late 70s/early 80s, when as a child I discovered an inordinate fascination with the Swedish Air Force. This interest was fueled by Heller, who had come out with 1/72 (my scale of choice) kits of a whole slew of classic Saab aircraft, including my favorite aircraft: the Saab J-35 Draken. These Saab aircraft kindled my interest, but once I started looking into the Swedish Air Force, it wasn't long before I found other, more common aircraft that wore the three crowns.
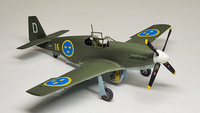 Enter the P-51 Mustang. At the time, references were slim, and the internet was decades away from being relevant, but I managed to come across a photo of a Swedish P-51B. My interest skyrocketed, and with a Monogram 1/72 P-51B on my bench, it was a no brainer to try and build up this unique aircraft. The photo I had was poorly printed and not very clear, but I did my 11-year-old best to figure it out. I painted the kit in olive drab and neutral gray (standard USAAC colors) and attempted to use the Heller decals I had stockpiled. Unfortunately, it was with those that I was let down, as they didn't work well and ended up not being the right size anyway. So, project shelved as quickly as it started, as only a child modeler can do.
Take two came years and years later. This time, things seemed to be lining up right. We're now into the late 1990s, the internet is just starting to flourish, and Revell Germany has just released a new-tool P-51B Mustang. This kit has it all, with recessed panel lines, a nice interior, and overall was a big step up from the old Monogram kit. Likewise, my interest in Swedish markings had been fueled by aftermarket companies, with Flying Colors creating decal sheets for both the Swedish national insignia and the unique Swedish code letter/number typeface in both white and yellow. So, I returned to the goal of building this plane.
At this point, the research material helped me immensely. Bjorn Karlstrom's books on Swedish aircraft, plus better color research, gave me far more information on this P-51B, so I was set. Second time around, filled in the guns on the wings (they were removed), chose the correct dark green and blue gray colors, and everything seemed to fall into place. Until once again, the decals let me down. The yellows of the roundels and the numbers didn't match, and nothing seemed to go right in their application either. So, once again, the whole project went back on the shelf, not done but never forgotten.
The (Hopefully Last) Build
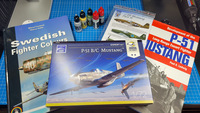
Fast forward another twenty-odd years, and once again the stars seemed to align. This time, it started with the decals. A company out of Sweden, Moose Republic Decals, came out with far too many (for my budget) and far too few (for my interest) decal sheets dedicated to Swedish subjects, including the P-51B Mustang. This sheet included not only the scheme I've been trying to build for decades, but it also provided the markings for both of the interned P-51Bs that landed in Sweden (along with a few P-51Ds, just for added benefit). With the decals printed by Cartograf and the research absolute top notch, the markings were finally all set.The second part was the release of the Arma Hobby 1/72 P-51B Mustang kit. It only took one look at the plastic in the box and I knew that the time was now. This project was going to happen, as this kit had the looks of being one of the best out there, bar none. Amazing detail throughout, and finally a wheel well that actually looks like you retract the landing gear into it. The research Arma put into this kit is superb, and the result is a kit that won't need any aftermarket to become a showstopper. So, with all these pieces in place, I decided to run some timers and see just how long it takes to build this thing up. So, here we go.
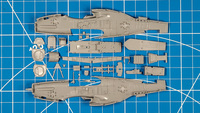
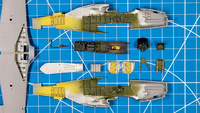
After chopping a bunch of parts out and doing some quick test fitting, I soon recognized that this was going to be a painter's model. The fit was as close to perfect as possible, leaving the majority of work to the painting and finishing, and kicking that job off was all the interior parts. For the interior, you'd expect cockpit details, but this kit has a lot more than that. There's tailwheel inserts and radiator details that just take things to the next level. For the first time in a very long while I had to figure out how to mask the insides of a fuselage to paint it different colors. Luckily, the instructions have very clear painting instructions, which helped immensely.
|
|
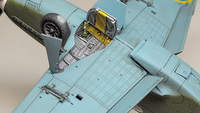
On the cockpit itself, this is the first Mustang kit I've seen that not only has separate boxes for behind the seat, but the instructions document several different layout orientations for these boxes and which decal scheme gets which layout. This is great for building the out-of-the-box schemes, but I had the challenge of trying to figure out which setup Z-Hub (the interned P-51B) had. Also, the kit comes with two types of seats, a Warren-McArthur type and a Schick-Johnson type. Luckily, newer research on Swedish Mustangs gave me enough information to figure all of that out, and after getting the right seat and box layout set right, painting followed.
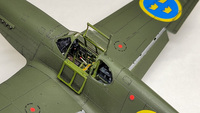
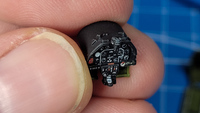 Most of the cockpit is interior green, but there's lots of black parts as well, and the instructions clearly mark that out. What's really nice, though, is the decals for the interior. In fact, counting them all up I applied around three times as many decals in the cockpit than I did on the exterior. That, coupled with a bit of weathering, and I was left with a superb interior, one I'd be proud to show off through an open cockpit. Which is something this kit allows, and I believe is the first P-51B that had that option out of the box. The interior isn't done, though, as next up is everything that isn't the cockpit. The tailwheel well has two separate inserts for added detail, which looks good in the fuselage halves but is all but invisible once the fuselage is together.
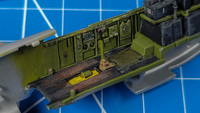 The biggest difference between this and other Mustang kits is the radiator innards. The under-wing radiator on the Mustang has always been a challenging area to mold for kit makers, and the way Arma engineered this area has all but eliminated the problematic seams in this area. It also includes the radiator, which can be seen from the back if you have the back flap fully open. There are two photoetch parts as well for the front face of the radiator and oil cooler, but no matter how much I maneuver the finished model, I cannot see the radiator PE grill and only barely see the oil cooler front. So if you wish to save those parts for some other project, it's probably safe to do so.
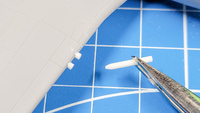
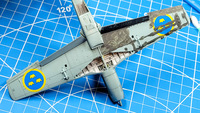
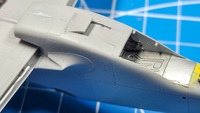 With all that interior stuff assembled, painted, decaled, and weathered, you can button up the fuselage and move on to the wings. So far, I've assembled 32 parts, used six different colors, and applied 37 separate decals. At this point, half of the kit parts are together, so the remaining work should go fast, or at least one would think. But, once again the high level of detail gives you more painting and masking in the wheel well. The separate wing spar and center divider get a coat of interior yellow, while the rest is silver (although the instructions suggest painting the stringers interior yellow as well). In a departure from the kit instructions, I did not use the wing guns, as the Swedish aircraft had its guns removed and faired over. After far more painting time than assembly time, the wings are together and things really start to speed up.
|
|
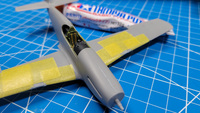
Once again, the engineering of Arma Hobby shows up here, as the wings are complete upper and lower halves, ensuring the proper dihedral. A similar treatment is given to the stabilizer, which is one piece (two are provided: one standard and one with the fillet). The assembly instructions have the wings and tailplanes added in the same step, but the order makes a difference. I went with the tailplanes first and then the wing, and only after everything was together did I notice that the stabilizers were slightly off in alignment. Had I put the wings on first, and then the stabilizer piece, I would have had a clearer reference. It was a simple matter to gently bend them into the proper position, though, and after adding the chin scoop, radiator scoop front, and the two cowl side inserts (three options are included), I was ready for some masking.
The kit includes a set of masks, so I started out by masking the windscreen and rear side windows prior to gluing them in place. Unfortunately, as others have noted about this kit, these masks are the weakest link, with not nearly enough adhesive. As a result they did not stay in place easily, even with repeated burnishing. Still, I made the best of it, and after masking them off I glued them in place. A quick airbrushing of interior green over those parts to provide the inside color, and I was set to paint the rest of the model.
|
|
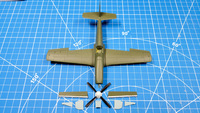
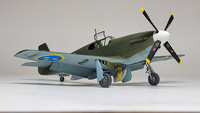
As I had noted, new color research has clarified the colors used on the Swedish P-51B, which works out to where RLM 65 and FS 34079 are very close matches for the underside and topside colors, respectively. So I grabbed my Vallejo ModelAir paints and in no time at all I had the model painted up. I masked off the exposed flap and radiator scoop sections and painted them silver, and painted the spinner white. A gloss coat and this model was ready for decals on the outside.
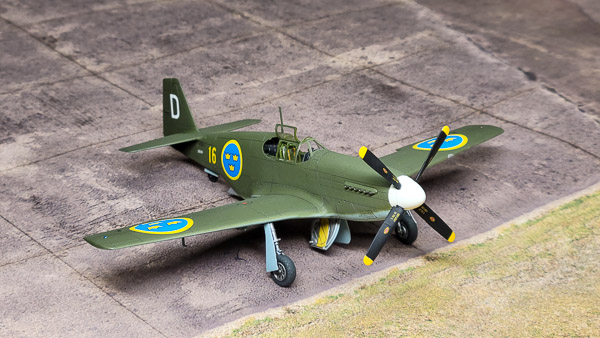
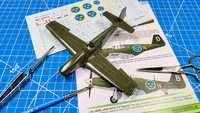
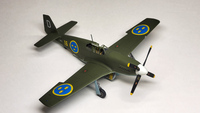
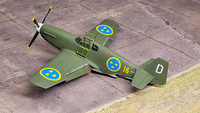
The Moose Republic decal sheet is superb, with outstanding research and high-quality decal printing by Cartograf. As the first J 26 in Swedish service, it was given the serial 26001, which was painted in white on the rear fuselage. The Swedish roundels were in all the usual spots, and the F 16 wing number was on the fuselage behind the roundel. Finally, there is a white D on the tail. It is uncertain but likely that stenciling was minimal, at least initially (as P-51Ds were added to the Swedish Air Force later, common stenciling might have been added). For the first time in all my attempts at building this plane, the decals did not let me down and I finally had successfully decaled a Swedish P-51B.
|
|
The final steps included giving the model a panel line wash with AK Interactive panel liners (first time using this product, and I was impressed with how easy it was), do some detail painting here and there, and add the final pieces. These included the landing gear and gear doors (easily the best detailed I've seen in this scale), the exhaust pipes, propeller, and open canopy pieces. The latter were challenging to finish, as I had to reuse the canopy masks to paint the interior and exterior framing. With some careful burnishing, though, they turned out just fine. Some final detail painting that included the wing lights and at long last I could add 26001 to my shelves.
|
|
Final Notes
Back at the beginning, I mentioned that I ran some timers on building this model, and the final results paint an interesting picture (pun intended). The total time spent on the build, start to finish, was 20 hours, 24 minutes. Three and a half hours were spent airbrushing, almost three hours of decaling, and about an hour and a quarter each for general detail painting and masking. With an hour of weathering, almost half of the total project time was spent on painting and finishing. Given the excellent engineering of this kit and incredible detailing, this is not a surprise, and it was a thoroughly enjoyable build as well.
|
|
Having built many a P-51B over the years (mostly Hasegawa kits), I had thought that after this Swedish one was built I'd be done with the B model. But the enjoyment of this kit has me rethinking that and searching out some new marking potential for the kit. As the Arma Hobby kit comes with the reconnaissance F-6C option, I can see one or two of those making their way onto the workbench as well. My thanks to Arma Hobby for both the review kit and for producing the model in the first place. I am really looking forward to their new releases (which they just announced a new-tool 1/72 Ki-84 Hayate, so time to dig out those Japanese references!).

