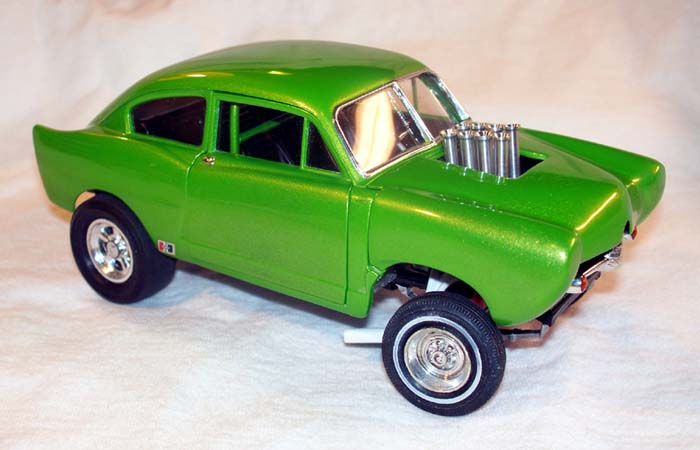
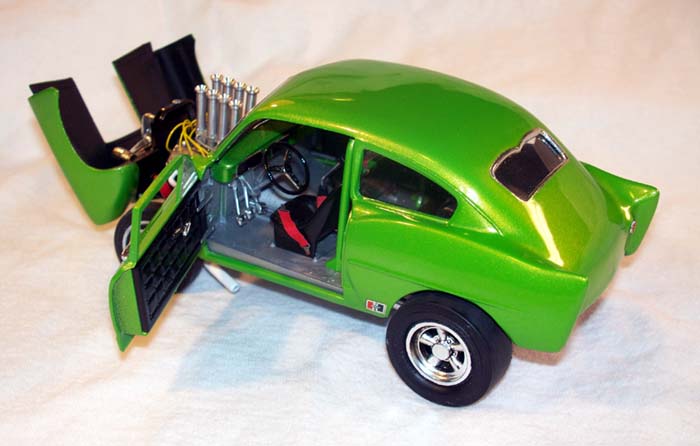
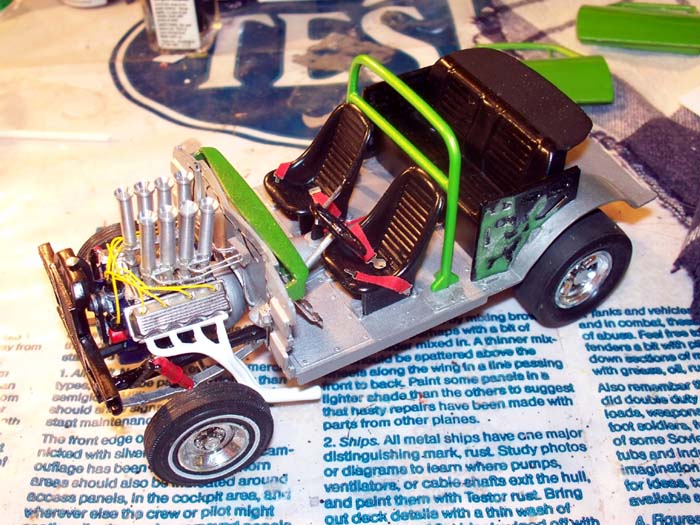
When I was a kid I built this same kit, although the previous results were much less noteworthy than this one turned out to be. So follow along as we build up a classic, circa 1969, ‘51 Henry J Gasser kit...
The Kit
This model was built from one of the classic, original issue Henry J kits rather than one of the newer releases. I did this intentionally as I wanted the original look and feel of the parts. By today's standards, this kit is a nightmare to build.It has a LOT of casting marks, a lot of flash, very poor chrome coverage and generally poor fit of parts. These parts required a lot of cleanup and even more fit checks. I worked to correct the visible problem areas. I decided that I would focus on these areas at the expense of things under the body.
Engine
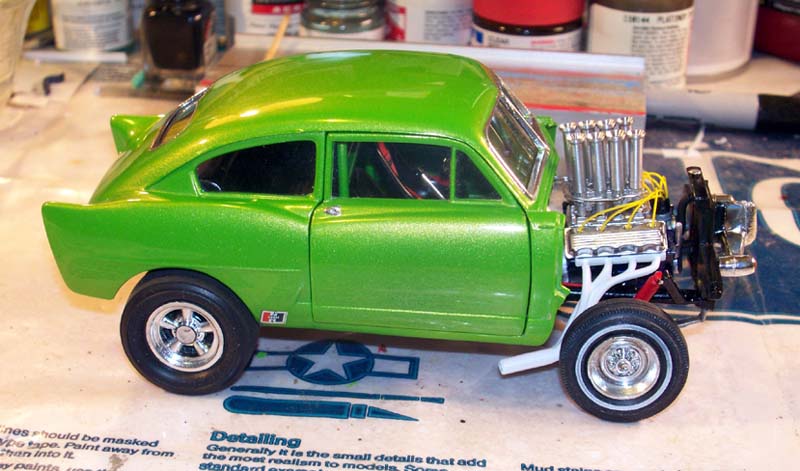
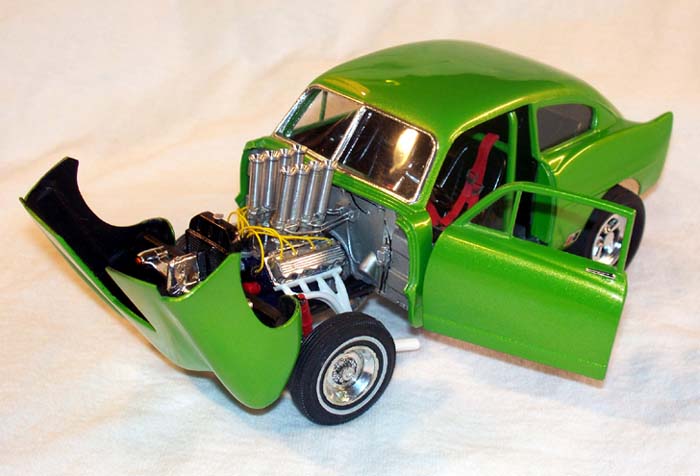
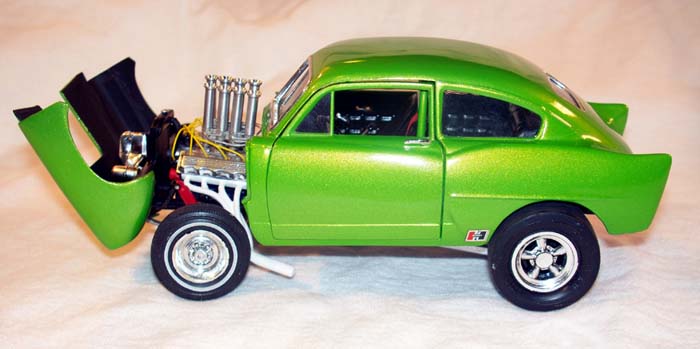
The engine in this kit is the generic supercharged 427 Ford included in most Revell gasser kits from this era. I wanted a different look. I used the block and heads from the original kit, which I painted dark blue, and substituted a different induction system for the supercharger. Most of the engine parts in this kit are both chromed plated and in poor condition, which made my decision to change to a different induction system easy to make. The only chrome engine parts from the kit that I ended up using were the valve covers. I stripped the chrome from them and re-sprayed them using Alclad.This was my first time using that product, and I must say that it turned out even better than I expected. I do not (yet) use an airbrush, but I found "Alclad for Lexan" in a spray can at one of the local hobby shops that I frequent.
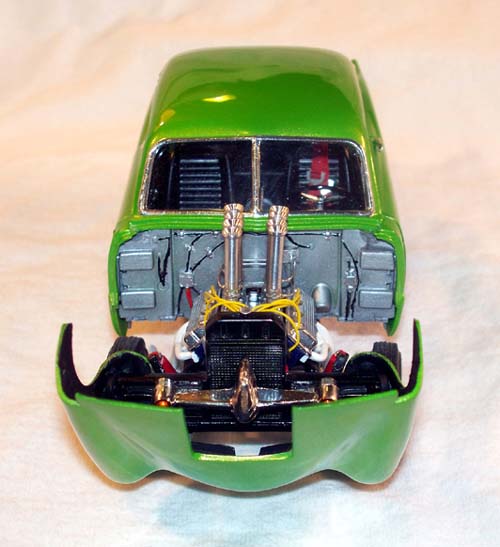 Most people will never notice, but if you look closely at the intake assembly you will notice that the fuel injection is actually quad Weber carburetors, instead of injectors. I took them from a Sand Shark kit that I bought for parts for a different project. I had to use some strip styrene and liberal sanding on the intake to make it wide enough to fit well on the engine block from the Henry kit. I installed the Webers, but I cut off the velocity stacks and replaced them with real aluminum stacks from Arrowhead Aluminum Accessories. I also ran a fuel line from each Weber to a styrene fuel block that I added to the firewall.
I built a front cover on the engine from more styrene scrap and installed a distributor, again from Arrowhead Aluminum Accessories, along with a scratch-built coil, a water pump and pulleys and a fan belt. The headers are from one of the original Bigfoot Monster truck kits. I stripped the chrome, drilled the ends and painted them flat white.
Chassis
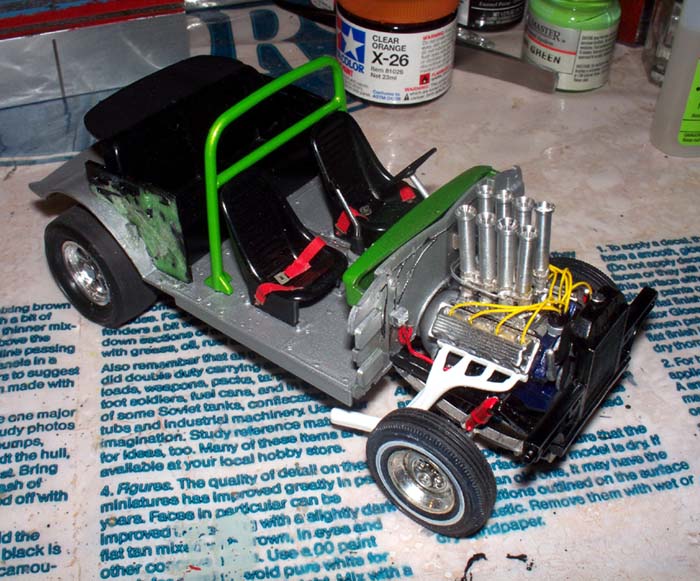
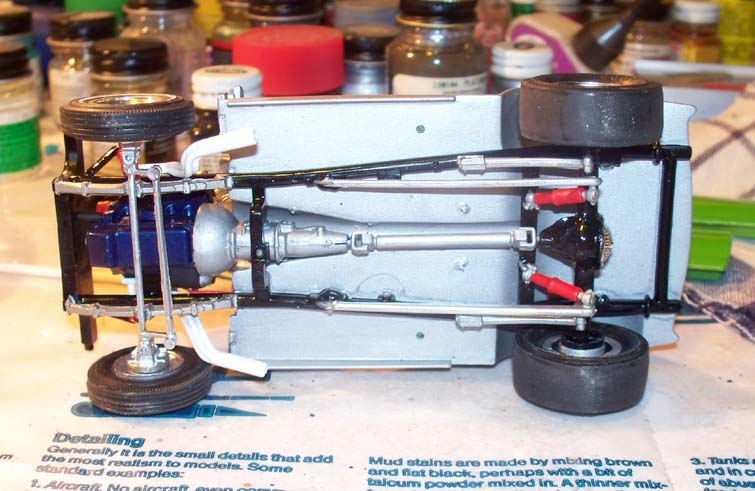
With the exception of a few small modifications the chassis was built per the kit directions. I spent quite a bit of time cleaning up molding marks in this area, both on the bottom of the floor pan and on the frame itself. I painted the frame gloss black, the floor pan aluminum and used a couple of different metallic colors for variety. I wanted a little something flashy to look at from the rear, so I cut off the rear of the axle housing and replaced it with a chromed cover from the Sand Shark kit. I found this cover was slightly oversize, but with detail painting it's not noticeable unless you look VERY close! The only other variation was with the wheels and tires. Actually, the rears are correct for this kit, except they are the same ones from the Henry J kit I built all those years ago as a kid. Somehow they have been in my parts box all those years. I used front wheels from an old Revell 57 Chevy that I also built as a kid, and the white walls came off of an old promo that I had way back then as well. Other than some paint detailing on shocks and springs, these is nothing else that I did out of the ordinary on this area.Interior
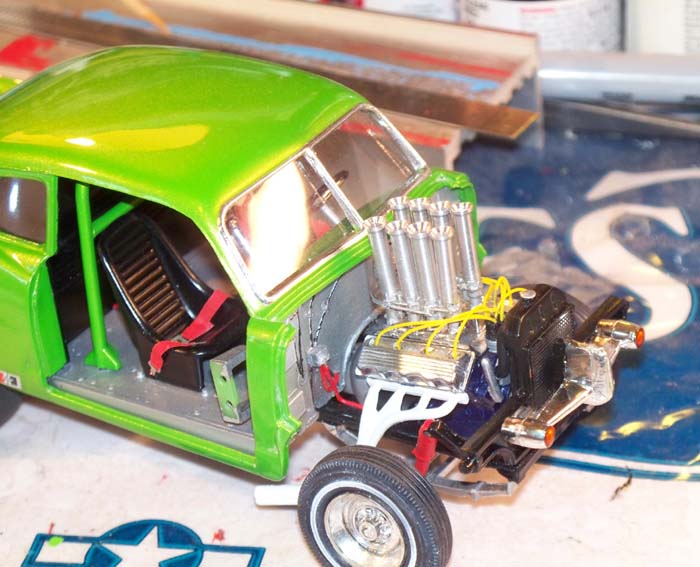 The interior was built per the kit directions, with the following exceptions. I modified the kit roll bar, which was just a hoop, by adding a crossbar that I could use to attach the shoulder harness on the drivers side. I made the belts from paper surgical tape, which were cut in 7/64" strips and then painted flat red. I used Arrowhead Aluminum Accessories photo etched buckles. The original kit had a "foot" gas pedal and one other pedal (brake or clutch, I was not sure) that was way too big, in my opinion.
I substituted a set of pedals from a parts donor NASCAR kit. I painted the pedal assembly using Alclad, but applied an extra coat to depict a highly polished metal appearance, rather than chrome. To add a little more interest to the interior I ran two wires from under the back seat to the front and then out through the firewall. I painted one red and ran it to a block that I added to the firewall. I ran an extra red wire from that block to the starter. The second wire I painted silver and ran it to the fuel block that I mentioned earlier. I painted the dash body color and used bare metal foil and paint detailed it a bit.
Body
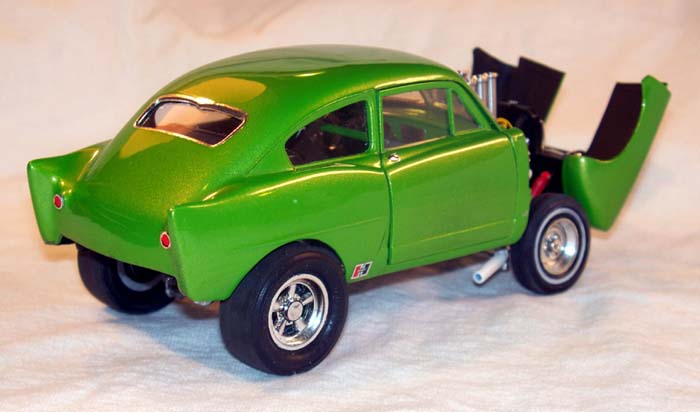
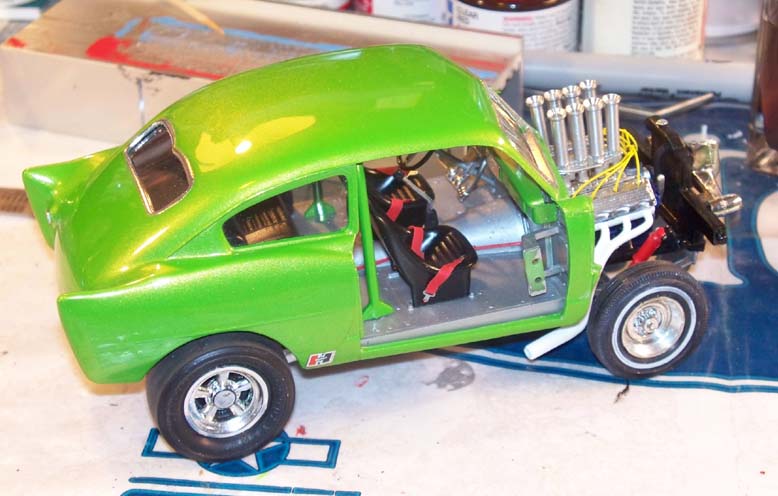 The body for this kit has opening doors and a tilting front end. The door fit is okay, but using only the kit hinges, they droop very badly. I will be taking them back off and re-hinging them to try and fix that problem in the near future. The tilt front end is made up from 5 kit pieces, plus two hinge parts. I wanted it to look like a one piece front end so I glued it all together and filled in all the seams then sanded everything smooth before I painted it. I primed all of the body parts, dash and roll bar with Dupli-color gray primer. The main color is Testor's Lime Ice, a very nice metallic color. I wanted to emphasize the green color even more, so I added three coats of Tamiya Kandy Lime Green before finishing up with two coats of Dupli-color clear. I purchase my Testors and Tamiya paints from Skyway Models, which has a larger selection of these paints than most shops I frequent.
A painting tip that I discovered is that if I warm the paint cans in hot water for about ten minutes before I spray them, the paint will go on much smoother. I am therefore able to start the polishing phase of the paintwork with a 4000 grit sanding pad rather than 2400. I feel that I have a lot easier time avoiding big scratches by starting with the finer pad. I find that I don't sand completely though the clear coat into the color coats, and I end up with a smoother finish. I wax my models with a good automotive carnuba wax from Meguiar's.
The kit came with orange material to make tinted windows. I contemplated using that as many of the gassers I saw in the 60's had tinted windows. However, I finally decided that I would go with clear to make it easier to see the interior details. Even though there was not a template for it, I also cut out a full window for the passenger side door, and the wing window for the driver's side. The widows were all carefully attached with Testor's clear window cement. Even though it dries clear, it is VERY noticeable if you get it out on the window. The door panels were painted the same semi-gloss that the rest of the black interior parts were painted and detailed with a little BMF (Bare Metal Foil) on the door handles and window cranks.
Final Assembly and Final Thoughts
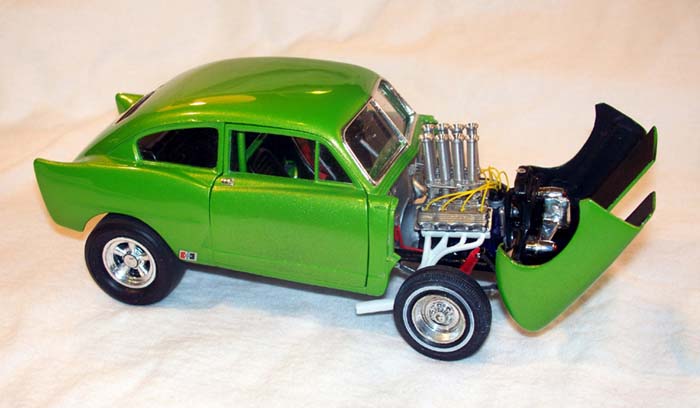 I wrapped things up by gluing the interior pan onto the chassis, and then attaching the body. I took care to line up the body to ensure that the doors open and close as well as possible. The tilt front end attaches to two pins on the radiator support.
All in all, this is not a kit that I would recommend to a beginner. Looking back, I am amazed that mine turned out so well when I was ten, although it certainly fit the term "glue bomb" at that time J There is a lot of cleanup required and test-fitting is a must here, even more so than with many newer kits. Still, I must say that I am very satisfied with the result and it looks great in my display case. This project allowed me to relive a simpler time in my youth and if that was the only good thing to come out of it, then that still would have been enough for me.
Happy Modeling !!!!
