Revell 1/25 '07 Shelby GT500
By Tommy Vanness
The Car
The Shelby name goes back several decades and is a part of racing history. Carroll Shelby was known for putting big horsepower into little light cars. This was revolutionary at the time and Ford capitalized on it and had Carroll Shelby work his magic on the Mustang. Thus, the Shelby GT 350 and GT 500 were born. This was only the beginning and it helped fuel the Muscle Car craze of the late 1960's. Unfortunately, the energy crisis of the 1970's basically killed off the muscle car for a few decades and we were left with the Mustang II and the Gremlin.
Fast forward to today, where the muscle car war is back and fiercer than ever. In 2007, with the Camaro out of production and no "Pony" car from Chrysler, Ford revived the Shelby name and produced the Shelby GT500. In keeping with the theme of having big horsepower, Ford slapped a supercharger onto the 5.4 liter V8 which produced a whopping 500 horsepower. This made it the most powerful factory built Mustang in history.
The Kit
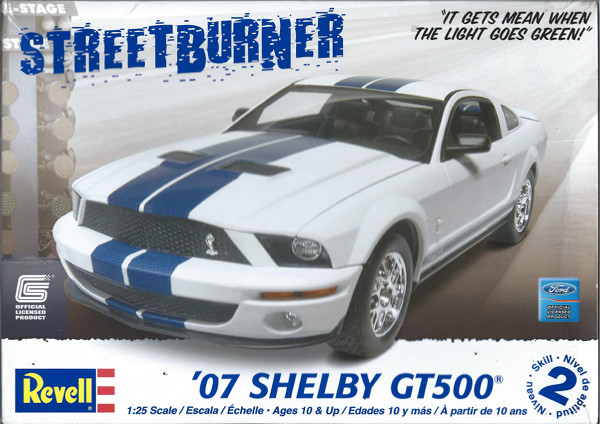
The kit contains 116 pieces, not all of which are used in building the kit, and is molded in white plastic. It is a Skill Level 2 kit and it comes with water slide decals which allow for several different paint schemes. The two sets of decals are for the traditional Shelby stripes that the GT500 is known for. One set is white and the other is blue, which allows for several stock versions or, if you want to use your imagination, custom color combinations. I went in a different direction and didn't use the stripes at all. The rest of the decal sheet provides all of the engine labels, SVT badging and of course, the iconic snakes that represent the Cobra.
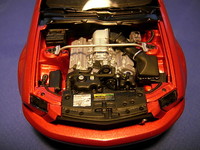
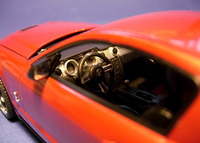
The instructions are done very well and have good detail for the entire build process. The paint guide is also done well and if you follow it you get a really good representation of a stock Shelby GT500. All of the parts have good detail and they fit together nicely. The engine bay is of course a little tight, which is normal. But with a little patience, everything will fit where it is supposed to. The interior was also fun to build and accurately represents the GT500. I hand painted chrome silver onto the dash and steering wheel to attain the desired effect.
As for the ride height, I knew going into this that I would eventually have to deal with it. Revell has done a good job with their Mustang models on everything but the ride height. Even on the box art, you can see that the Mustang looks as though it has been lifted, and the tires look like they should be on a truck. So, I did a little homework and saw that with some very simple modification, the car can be lowered. The modification for this on the back axle was to cut the springs a little.
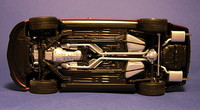
This is something you can do evenly on both sides, and the top of the springs tuck nicely into the chassis where the cutting will never be found. I roughly chopped about 1.5 millimeters off the springs. A cheap caliper for measuring helps to ensure accuracy. It results in a tight fit of the rear axle pumpkin, but a little sanding helped it fit. On the front end, the frame has 2 mounds where the front suspension mounts. These were also chopped by about 1.5 mm which brought the car down.
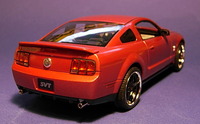
There was only one other modification that was needed to make this work. When you trim the mounts, this brings the front suspension closer to the bottom of the engine. The oil pan sits into the front suspension, and a little trimming was needed on suspension piece to house the oil pan. Shaving a little bit off and everything fit nice and tight. As I said, I wasn't a big fan of the tires because of how big they were. So, I went with a set of Racing Hart Type CR wheels. Aoshima makes these and I had them in my stash. They are a scale 19 inch wheels in which the centers were primed and painted with Tamiya TS-14, which is a gloss black.
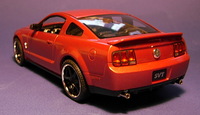
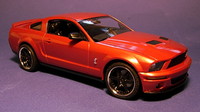
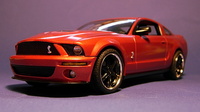
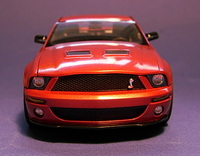
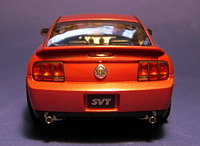
I painted the car body with Tamiya TS-39 Mica Red. I like the look of it with the black hood vents and black wheels. I didn't use a clear coat; the TS-39 is gloss paint and it looks great with a little polishing. I have heard some rumors that Tamiya TS-13 is no longer in production. I tend to believe this because I was unable to find it in my local hobby shop. I sprayed the TS-29 Semi-gloss black, which I feel gives it a leather-type look. I also use it on the bottom chassis for that "off the showroom floor" look.
Conclusion
I really enjoyed building this kit. The instructions were clear and easy to follow, but it also helped to have built a similar kit in the past. I had built Revell's Mustang GT, which shares a lot of the same tooling as the Shelby GT500, the Bullitt and Hertz Mustangs. This was also the first kit I have ever lowered. I was nervous about it at first, but if you are careful and patient, you can get the look you want. And that is what I take away from this kit. It was a very fun build and with the lowering of the car, I felt a little more confident with my build skills. So, when you are on the fence about lowering a car, or making a specific modification, just go for it. Go slow, take your time and keep checking the fit as you go along and you will be happy at the end. This kit was fun to build and I recommend it to those who love the muscle cars. Thanks for reading and happy modeling.
