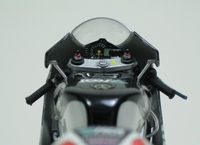
Hasegawa 1/12 Honda RS250RW 2009 WGP 250 Racing Champion
By Jon Fincher
Back in March 2011, I had the opportunity to do a First Look at Hasegawa's RS250RW 2009 WGP 250 Racing Champion kit, right here in this magazine. Now, many months later, what started as a fun build of a cool looking kit slowly turned to concern, then outright pain, then finally frustrated resignation. Only now can I finally tell the true story of the mangificent burning agony of building this kit.
Our story beings, as it were, at the beginning...
ENGINE
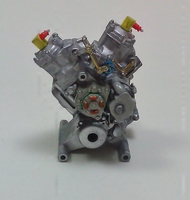
As with most auto and bike kits, assembly begins with the engine. Since motorcycle engines are almost always exposed for viewing, taking time to detail them properly almost always pays off. In order to do that, you'll need to break out the metallic paints.
The painting instructions for this kit are given in GSI Creos and Mr. Color - since I'd be referring to them a lot during the build, I wrote them a separate piece of paper to use while building. There are a lot of places where mixes of colors are called for - half silver and half steel, half silver and half gold (I used brass instead), 80% silver and 20% olive drab (yes, metallic and OD, really). Be ready to do some brush painting with your metallizers - it's not as difficult as it sounds. I used Model Master paints, and despite the warning, you can brush paint them if you work quickly, put lots of paint on the brush, and don't trying to cover large areas.
There are some oddities with the engine build. Two engine halves come together well, but there is a third piece which closes up the bottom of the engine as well that can be tricky to get into place. There are some fiddly bits that are best left for the very end, such as spark plugs and throttle linkages. However, once everything's cleaned up, painted, washed and dry-brushed, the result is a beautiful looking engine.As the build progress, you wind up coming back to the engine to add new fiddly parts - spark plug wires (which are made from provided black vinyl tubing, but have to be painted blue), an intake manifold (which has to connect with an inlet on the rear body panel much later), and exhaust system are just a few of the items that come later.
Throughout the engine build, you are instructed to add hoses and other soft lines - the kit comes with a long length of vinyl tubing for this, and the instructions provide length indicators to allow you to cut them appropriately. My advice is to cut them longer than specified - there is plenty of tubing for you to add a centimeter or more to every cut and still not run out. Doing this will prevent problems later (remember the "concern" mentioned above?)...
One note on the exhaust system - the mufflers on this bike are Kevlar (which is similar to carbon fiber, but is a yellow weave rather than black), and represented by decals. When I put them on, they wrinkled, even with setting solution. I wound up sanding them down and replacing them with Scale Motorsports Kevlar decal material in a 1/12th scale pattern. Comparing this to the kit decals, I think the kit patterns are 1/24th, as the weave on the Scale Motorsports decals is much bigger.
CHASSIS
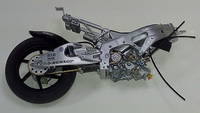
The chassis comes together in two halves, with some smaller bits in between. I recommend assembling the whole thing (except for the under-seat shock absorber) and painting it as one piece - the flat black shields and pads can be picked out with a brush easily later.
The engine gets inserted into the chassis from underneath, and is held in with four small bolts. Note these aren't screws, but injected pieces which need to be removed from the sprue and cleaned up. Hasegawa could have done a better job here with engineering, as the bolt heads are where the sprue attachment point is. In any case, my suggestion is to not paint them right away - put a drop of glue in the hole, insert the bolt, and let it set. You can hit it with paint (clear blue to simulate an anodized bolt) later. The rest of the chassis assembly comes together easily.
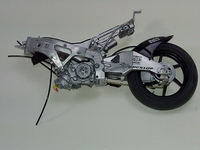 One thing I noted during the intial assessment was that the lack of chrome on the chassis pieces was a good thing, as it allowed the builder to control the sheen and color of the part. However, in practice, this is less than desirable, as the continual handling of the parts resulted in the metallizer rubbing off in key places. Touching this up was difficult to do, so I regretfully have to reverse my opinion on this aspect of the kit (there's more of that "concern").
WHEELS, TIRES, AND SUBASSEMBLIES
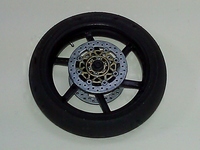
The wheels are billet five spoke racing wheels, painted black with a simple silver nipple. The "flash" comes from the brake discs, which are, as with the engine, an exercise in metallic detail painting. Shades of silver and gold highlight the drilled out brake discs. Rubber tires stretch easily over the rims to complete the look - sanding the tires down to remove the mold line will also help give them the appearance of having been onthe road. These wheels and tires are assembled into a rear swing arm assembly, and a front fork assembly - make sure the wheels are pointing the right direction when you insert them, as the spokes are directional. There are some decals on the wheels you should get now while they're off the bike.The rear swing arm goes together well. The two halves require paint and decals - some nice carbon fiber decals are provided, although the placement of top and bottom panels seems a bit odd. Fiddly bits like a rear brake caliber and brake line are added before the rear tire and chain are inserted - everything is held together with a screw through the rear tire. The chain is well engineered with a split near the front sprocket - it can be inserted into the gap in the swing arm with no problems, and glued down once the swing arm is in place.
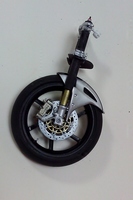
The front forks were a little trickier for me. There's a part in step 12 of the instructions that is glued on after the forks are assembled, although it's painted the same color as the forks. In order to save time, I glued this part in place before painting and assembly - however, by doing so, I was unable to slide the front mud guard over the forks during assembly. As I couldn't remove it cleanly, I wound up filing the part down. There's nothing that attaches to it, so the effect is detail loss, but this was the start of an itch that swelled into the "pain" mentioned earlier.
Both the rear swing arm and front forks are attached to the main chassis with screws. Be careful when attaching the front forks this way - if the glue on the top cross piece of the triple tree is not set, there is the tendency to push it off as the screw tries to set in the bottom piece. I wound up using CA on the top cross piece, and using a bit of force to hold in place as the screw seated itself. There is a small cap that covers the screw head - like the engine bolts, this is an injected piece with the attachment point on the exposed edge. And as with the engine bolts, glue it in place first, then paint it.
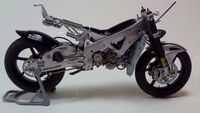
After the front forks are attached, you can put the bike on the stand and then get busy with the fiddly bits - stand-offs for the body work, foot pegs and pedals, hand grips, and the instrument panel cluster. And here's where cutting the hoses long comes in handy - step 14 instructs you to connect the RCV cables (attached to the engine in step 4) to a meter on the instrument panel. Mine would not stretch to fit that far - they each needed about five more millimeters to make the connection. Cutting the hoses long would have allowed me to connect them properly, rather than just stuffing them into the front fairing and hoping the judges miss it...
BODY WORK
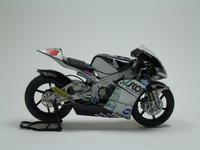
This kit comes with two sets of body panels - one clear to show off all the intricate body work, and one opaque to allow the body paint and decals to shine. I opted to built this with the body painted and decalled, which presented it own set of challenges - here's where my earlier concern and pain grew an flourished into a full-fledged migraine of issues.
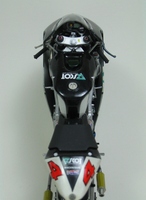
To summarize these challenges, let's focus on the front fender - it's a three color scheme, with silver on the outer edges, white in the middle, and a black stripes separating them. On other kits I've done, this would be done with either a black and silver decal for the outer edge, or better, a black and white decal for the center. This allows you to paint the fender one color, and let the decal edges define the borders between colors. Hasegawa, however, went with a simple black decal for the separator, relying on the builder to find the line between the silver and white. This is much tricker, as you don't really know where the decal is going to lie until it's on the part.
My first try at getting this right was fairly straightforward - I photocopied the decal sheet, then cut out the black stripes and layed them down on the fender using tape. This gave me the proper layout, which I used to find the boundary between the white and silver. Throughout the build, I used Tamiya tape, and some 1mm pin striping tape, to locate edges and mask everything, which seemed work well - some light sanding and a few coats of Future later, I had a nice looking front fender.
However, this feeling of accomplishment was not to last, and the front fender was the last piece of bodywork I touched which came out good. The issue of decals and paint edges was a recurring theme throughout the finish of the body work, and my handling of them seemed to get worse as the build progressed. Apparently, throughout this build, I regressed from a competant modeller who can execute a decent finish to a rank amateur who can't tell the difference between primer and clear-coat. For the record, here's the sordid tale:- On the seat pan, the line between silver and black rides the lip around the rear portion, which was tough to mask. The white portion was a decal that sat over top of it, which meant trying to keep the black gap between the white decal and painted silver underneath steady. For this, I wound up using some black pinstripe decal, which needed a lot of work and setting solution to curve properly. Even then, I had paint issues that needed touching up (which are visible in the pictures).
- A single decal spans the belly pan and the front fairing (seen in light blue in the pictures). This required painting both body panels silver, attaching them to each other temporarily, placing the decal, then cutting it. However, beneath this decal the belly pan is black, following the bottom edge of the decal. I tried using my paper cutout idea from the front fender to mask this demarcation, but the line was off by half a degree, which meant I needed to remask that line and repaint. Knowing I couldn't mask over the decal directly, I clearcoated it with 3 coats of Future and let it cure a week before masking. And here is where the pain truly began to become an separate entity identifiable to science.
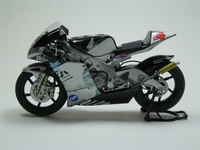 In the left hand view, you can see where bottom half of the decal is torn - the other half, complete with three coats of Future, is attached to the tape I used to mask off the black. Apparently, the Future stuck to the decal much better than the decal stuck to the silver paint. But my tale ends not here, good reader...
 - The front fairing has a few places where decals and paint meet that can only be found by applying the decals first. The Scot logo band is white with a black bottom stripe, but black paint above it. Again, on the left side, the tape claimed part of the Scot decal with it's Future topcoat "sealer" as I tried to paint the black area.
Above the black area is a white area which also has to be painted - you can see the issues I had with paint bleed through that I failed to properly correct. In my defense, by this time of the project, the pain of decal loss and Future failure has eased into a general feeling of frustration - above all else, I wanted it to be done. I was not going to spend any more time fighting the finish on this model than I had to, so the bleed through stayed. But even as I resigned myself to a poor finish, the finish had not yet resigned itself to leaving me alone... - The last bits to be done were the silver decals on the front, which went on top of the white paint and decided to wrinkle badly when hit with Solvaset. This gave my frustrated resignation that last little oomph it needed to be born new and whole to the world.
Above the silver decals are areas to be painted black. By this time, I had lost all confidence in my Tamiya tape, my multiple coats of Future, and my ability to execute a decent finish, so I decided to brush paint the black areas. This is where my resignation took on it's own life and began feeding on my common sense - I applied the paint too soon, as the Future under it was still curing, and it cracked. After waiting a week for everything to cure, I applied more paint to cover the cracks, Future'd the devil out of it, sanded to get rid of the surface cracks, and repeated this until I was numb.
OVERALL
I told friends and club members as I was building this, that this was 90% of a Tamiya motorcycle kit - if you've ever built a Tamiya MC kit, you'll understand as you take on this one. Unfortunately, I was wrong - it's less than 90%. The plastic engineering is wonderful in places (rear chain, engine and chassis detail), but odd in others (engine bolts, intake). The body colors are stunning, but very difficult to pull off due to the poor paint and decal engineering. The final effect is great, but you really have to work for it, and work a lot harder than you would for a Tamiya bike kit.While definitely a buildable kit, and a very nice looking one, it's not for everyone. In short, if you don't like doing intricate body painting and decalling, I would find another kit.
EPILOG
On the finish of this kit, I rate myself as a two (I'd be a one, but the front fender turned out OK). There are a lot of things I'd do differently if I had this to do over again:
- Don't use Future - I'd use lacquer clears. My color coats were all lacquers, but using Future meant I could only touch up with acrylics.
- Clear coat the silver areas before applying decals so they'd have something better to which to bond.
- Apply more metallizer to the chassis, clear coat it, and handle it less.
- Cut all the hoses longer than necessary.
- Mask with Bare-Metal foil to get crisp edges.
- Use Micro-Sol and Micro-Set rather than Solvaset on the decals.
- When finished, conveniently "misplace" the first model.
Or I could just move on to another model...
My thanks to Hasegawa USA for the review kit.

