
1941 Plymouth Convertible Conversion
By Tom Ruprecht
Overview
I have limited interest in civilian car modelling. Although I grew up in the greater Motor City area, I never caught the bug. My father (his friends called him "R.B.") however, had some good stories about his early driving days around Detroit. I took good notes when he talked about his first showroom-new car, the 1941 Plymouth convertible coupe, and secretly decided to model that car. As always, I didn't know what I was doing to myself. My modelling has always been driven by subject, not through choosing good kits in the first place. That is my illness, and I do not wish it on anyone.
References consisted of a few old family photos of R.B. with the car and the internet. Fortunately, there is a restoration of an identical vehicle in the original color, images of which helped greatly with color and details.
The Build
|
|

|
The kit was the 1/25 AMT offering from around 1975 with rudimentary interior details.
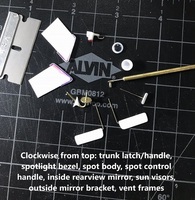
The interior required scratch-built door handles, rear view mirror and foot pedals. The dashboard had a large gap where it met the bottom of the windshield, which was filled with Milliput and contoured to fit. Later on, dash details were added using tiny printed items from Michael Hanson of Best Model Car Parts via his eBay store.

|

|
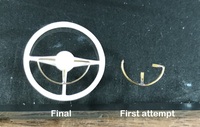
 The steering wheel and column were improved with new brass columns, soldered (butane pencil torch, workpieces pinned to a ceramic fiber pad) with an appropriate spacer. The gear shift lever was of plastic and turned on a Dremel. The kit steering wheel looked good except that the overly thick horn ring was replaced with one fabricated from brass, with the three arms to the middle tapped lightly to flatten and soldered. The pistol grip for the spotlight was brass, lathe-turned with soldered handle.
|
|
|
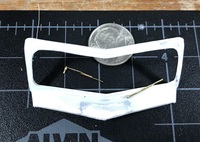
 The biggest problem with the body was the windshield frame, which required removal from the kit body to work on it separately. A mini drill press with an X-Y table and a flat ended cylindrical bur were used to mill two (the windshield is in two pieces at a slight angle) flat edges all around. The roughness in the milling was rectified with a .005" plastic insert all around and puttied. 10 During milling, the frame was protected and held solidly by being glued to a polystyrene box made for the purpose, using "pink glue.*" All this work allowed two pieces of flat acetate to cleanly drop right into place at final assembly, trimmed on the interior by pieces of flat wire. The outside and inside vertical center trim were ½ round polystyrene rod.
Removal of the windshield frame marred the hood vent scribing, which seemed too wide and deep anyhow. A scribing template of thin brass was cut and fixed precisely to the plastic with two small machine screws and clamped to follow the hood contour. Pink glue would have been too weak for this task. Once scribed, the template was unscrewed and the holes puttied over.
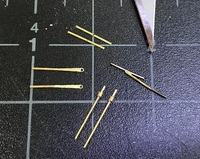
Windshield wipers were made from brass and soldered. The blades are stretched black sprue.
|
|
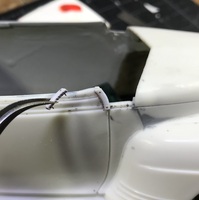
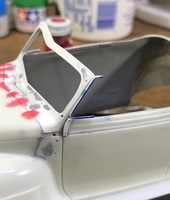
The side vent windows were a particular problem. It appears that Plymouth added them on as part of the modification from the hard top to the convertible design. The frames were cut from flat styrene sheet and the mount was made from thicker styrene, contoured and mounted with brass pins. Acetate sheet was used for the glass.
|
|
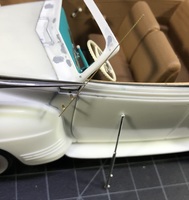
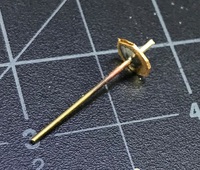
The radio antenna is brass wire with soldered mounting pins and a teeny drop of epoxy at the tip. The spotlight is 2 styrene parts, lathe-turned with a vacuum-formed lens. The driver's side external rear-view mirror is brass sheet, pierced and soldered to brass rod. It was lathe-turned with a large blob of solder on back for the dome. The brass rod was then bent and covered with a styrene fairing.
|
|
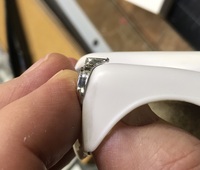
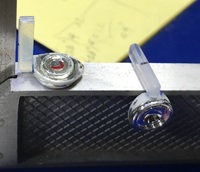
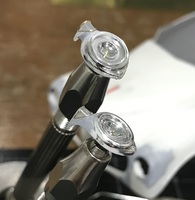
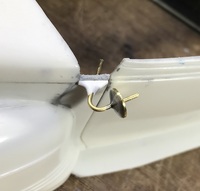 The headlight housings on this vehicle were distinctive and the kit items did not fit the body well. The top lens was replaced with clear plastic of corrected height and trimmed with fine brass wire for a much more pleasing result. A good photo of the combined center tail-light/trunk latch handle was found which allowed modification of the kit part by reshaping and adding a brass handle. New right and left tail-light lenses were made from a clear red toothbrush handle as was the central lens.
|
|
|
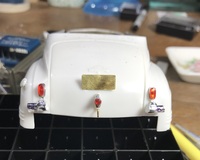
|
The prominent kit-supplied front bumper brackets were far too thick for scale, so new parts were made from brass sheet and soldered.
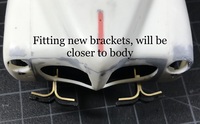
|
The kit tires appear wide and flat, more like a modern car; so a car modelling friend loaned a better one from his spares box to better depict the more ovoid cross-section of period tires. Copies were cast in RTV molds and resin. The wheels/hubs were good, except that they stood too proud of the tire to be in scale, so they were turned on the lathe to reduce.
Dental impression material was used to make a cast resin duplicate of the rear part of the body, and Milliput formed the stowed and covered top.
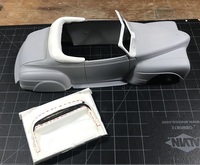
|
Rear fender skirts were made from styrene sheet and burnished from inside to create a slight convexity. Trim was replaced with appropriately sized ½ round styrene and covered with Bare Metal Foil after body painting. Paint was mixed from Tamiya gloss acrylics and airbrushed. All other parts requiring chrome were airbrushed with Molotow liquid chrome. The trunk and grille logos were duplicated in resin from impressions taken of the original kit part before removal. The replacements were sanded appropriately thin, hand-painted and placed after body painting. The correct 1941 Michigan license plates were custom-printed by Best Model Car Parts and mounted on fabricated brass brackets.
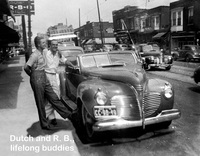
|
The finished model was presented to Dad in a sealed Plexiglas showcase at his 100th birthday party in March of 2019, along with a photoshopped print of him and his lifelong best friend in 1941 with the new vehicle. He made sure that the model was seen by all his visitors thereafter. He died just shy of his 101st birthday, and I feel fortunate to have been able to finish it before then. I am done with car models now- for life. Back to Great War subjects...


