It all started with a sketch and seeing 'sno-cat' pictures online by accident at an Antarctic out-post.

Lately, I've gotten away from modeling more or less out of the box to finally doing more modifications and scratch-building. Don't get me wrong, I still like out-of-the-box modeling, but it does limit what you can build if a model doesn't exist of something you are interested in.
I have been modeling in the category of "Loads", in particular those things carried by trucks, whether through a 5th wheel trailer or a flat bed on the truck frame. I like both military and civilian loads basically in 1/72nd, 1/35th or 1/25th.
I think it's a great challenge to combine different scales in a single project and making the conversion look different than its original form can be a good problem to solve.
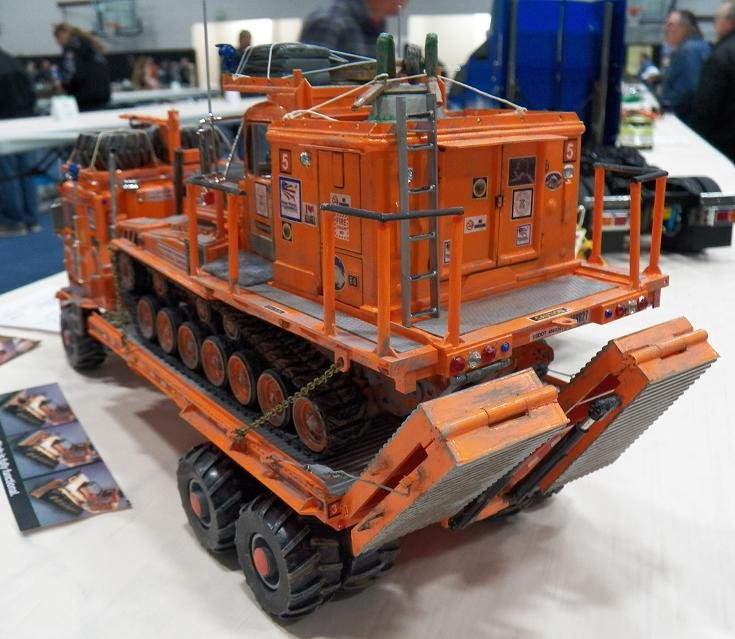
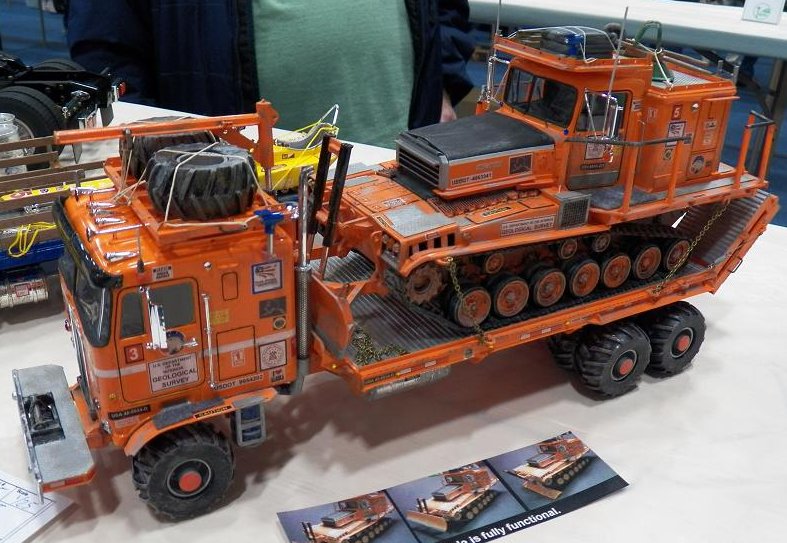
The main cab-over was the easiest to build. Most of the frame, other than stretching it, was used. I added a new flatbed with ramps. I use a lot of Evergreen plastic for most of my conversions. "For Sale" signs are a great source for sheets of styrene plastic.
My local department store had lots of 4 wheel "Monster" type toy trucks to choose from, which were my source for tundra tires. I bought 3 of the same trucks and I used all 12 tires. Two of the spare tires are mounted on a removable tire rack on the roof of the cab. I build a simple crane that would be used to load or offload the tires should the crew need to change one. The engine is complete and the cab also pivots to expose the engine once the roof rack and crane are moved out of the way.
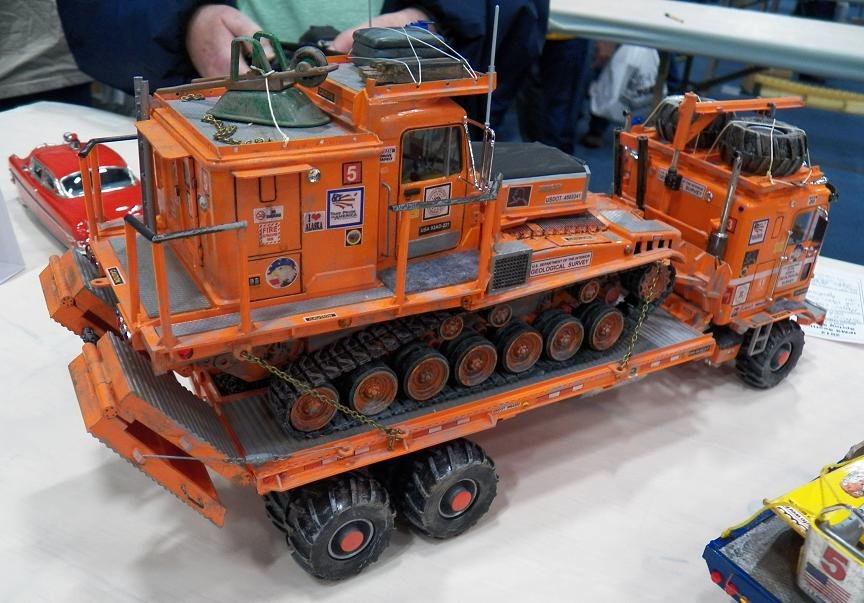
The M-55 chassis for the sno-cat was fun but a little challenging. The rear track section had the perfect down angle to make the sno-cat look more like a snow vehicle people are used to seeing. The sno-cat was in 1/32nd scale and because I wanted to add a 1/25th truck cab to it I used my razor saw more than once. I cut the truck sleeper down below the cab roof and added two areas for storage with 'tread plate' plastic. The back of the M-55 was built up with more Evergreen plastic and "For Sale" signs. I made many adjustments and cuts to get the cab to best fit the M-55. I used lots of filler plastic to blend the truck body onto the chassis. The simple front grill was more plastic scrap.
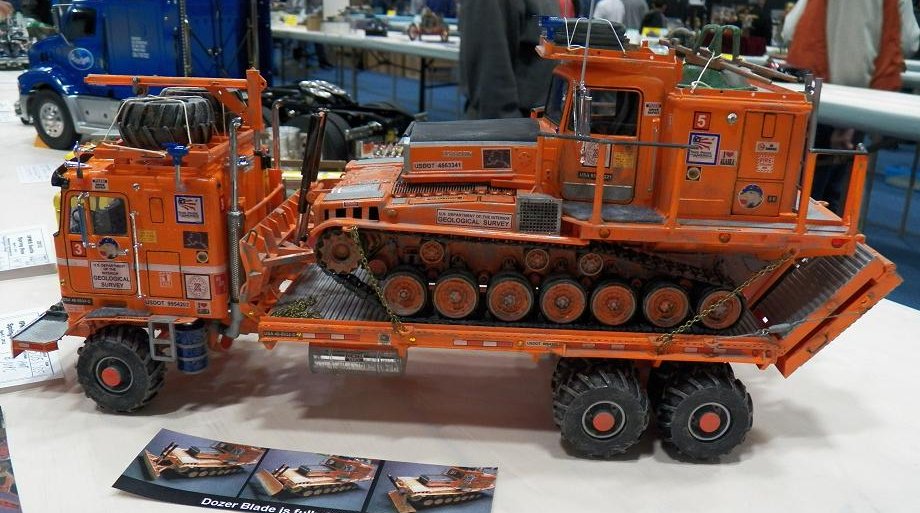
Finally, I added a dozer blade, because I felt that if the Sno-cat was used in a geological survey I expect the operators might have to cut some roads for crews or such. The main part of the blade is a piece of "For Sale" sign, the rest is made from Evergreen plastic.
The hydraulics also works for the blade. It moves up and down freely. I use Evergreen round tubes and real aluminum tube for the hydraulic ram.
The orange paint was straight forward Ace Hardware brand enamel paint. It is their counterpart to the 'Rustoleum" brands. It brushes on beautifully and airbrushes easy as well. The whole rig uses both methods throughout, but most airbrushing is on the major big pieces.
Lastly I made my own decals and had fun especially with the "I Love Alaska" decals on both vehicles.
I spent the better part of a month worth of evenings here and there building it. My goal was to have it for the Seattle IPMS Show held on April 7th, and lo and behold, I literally finished it at 11:57 pm on April 6th........I'm already at work on another creative imagination rig with another load....enjoy!!