Photos by Will Riepl and Gary Meinert
Introduction
 In response to a U.S. Army requirement for a medium armored car, Chevrolet developed a 4-wheeled vehicle designated T17E1. In 1941 the prototype was completed and successfully tested, and an initial order was placed. However, the U.S. Army's Armored Vehicle Board decided that this vehicle was not needed, and the entire production run was allocated to the British Army.
The relatively heavy T17E1 (15 tons) suited the British well and was named Staghound. Most Staghounds were the basic Mk. I with a turret mounted 37 mm cannon. Other variants included a Mk. II 75mm howitzer vehicle, and a Mk.III 75mm gun vehicle with complete turret from a Crusader tank. There was also a command car without the turret, and an anti-aircraft version with 2x50.cal machine guns.
 The Staghound's combat debut was in Italy in 1943. Staghounds excelled in the reconnaissance role and proved to be very rugged and reliable vehicles. They served in British, Belgian, Canadian, New Zealand, and Polish units in the European Theater. After the war, Staghounds were exported to many other countries.
My Staghound
During WWII, the Australian Army Staghounds were used for training purposes only. From 1946-1948 a contingent of Staghounds operated in Japan as the 1st Australian Armored Car Squadron. This was one of the units in the British Commonwealth Occupation Forces (BCOF).
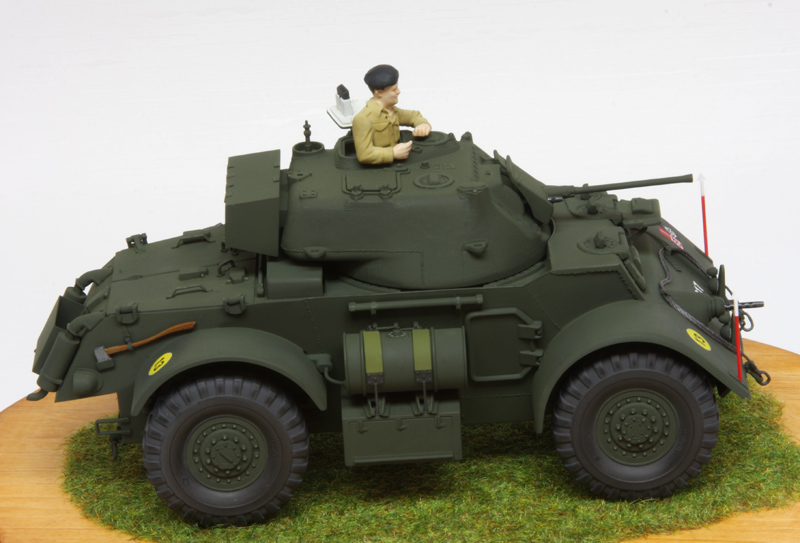
My Australian Staghound is a new vehicle drawn from war reserve stocks and is just beginning its occupation duties in Japan. The model is therefore clean and lacks the weathering, dirt, damage, etc. usually seen on armor models. I did some subtle washing and dry brushing in a few areas, but kept this to a minimum.
Kit Description & Features
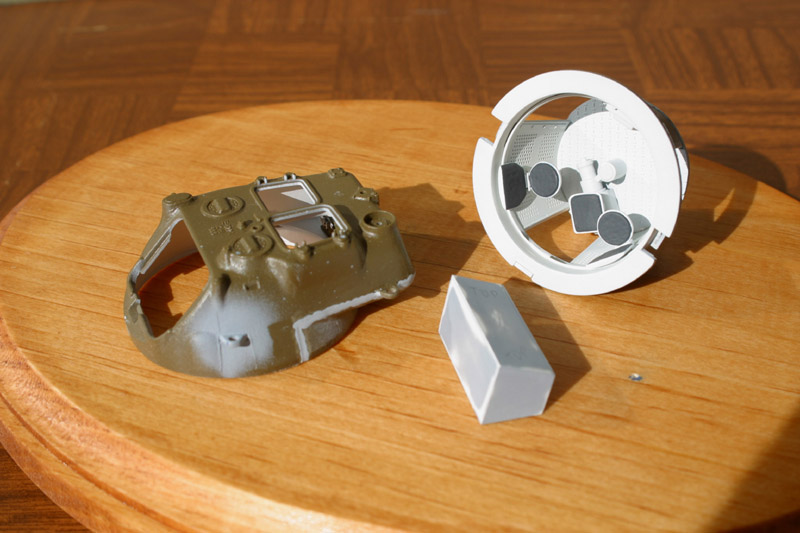
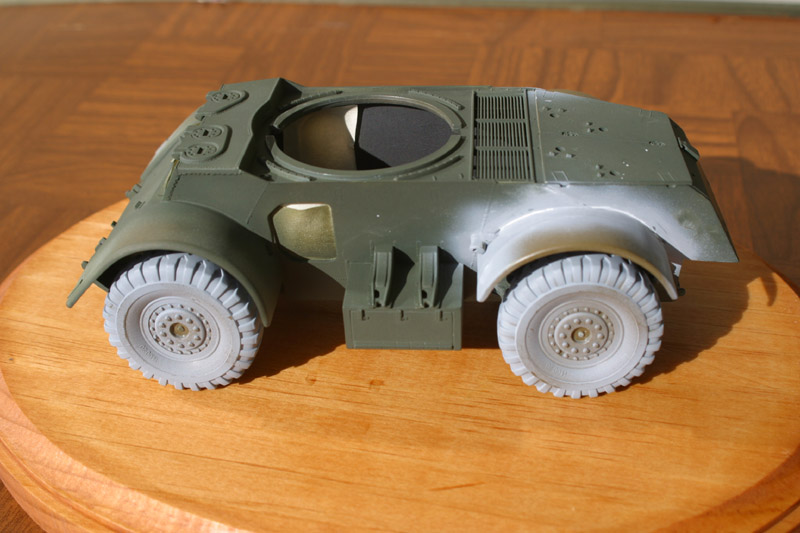
 This kit is Tamiya's reboxed Italeri Staghound. Tamiya has added 3 of their figures and redone the instructions and box art. The kit provides separate, positionable hatches for the front, sides, and turret top. However, there is no interior other than the turret basket and a radio. If either of the front (driver) hatches is in the up position, the modeler must make his own window out of clear styrene sheet, which I did using the template provided in the instructions.
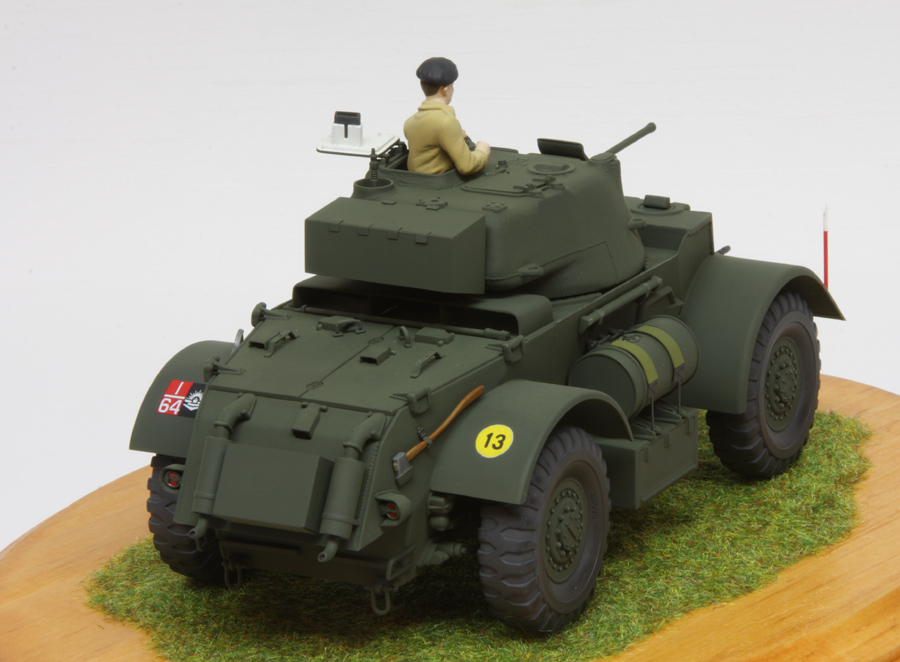
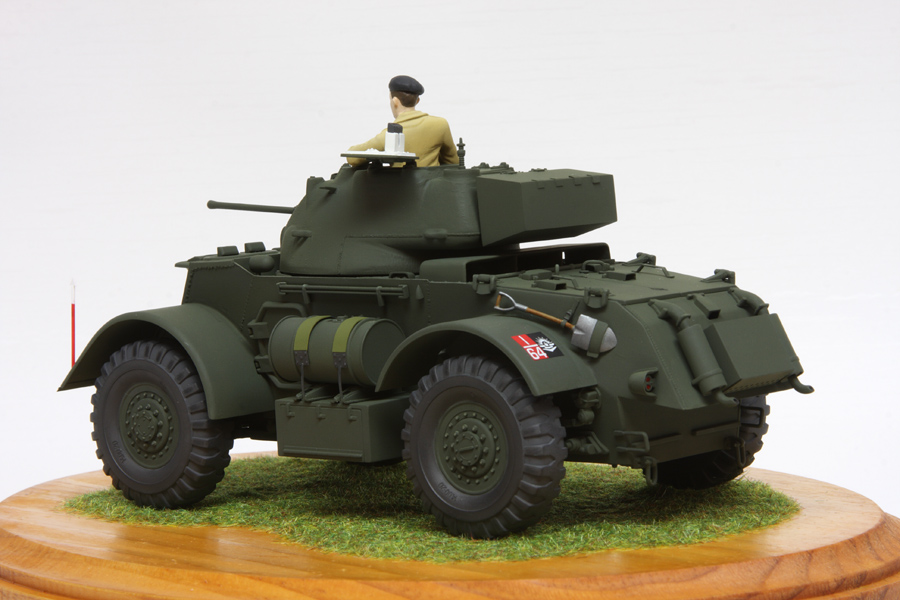
Photo-etched parts are provided for the fuel drum straps, the storage box in the vehicle rear(between the mufflers), headlight guards, front fender edges, and various small items like brackets and straps. These are very effective and add a lot to the model's appearance.
 I appreciate the kit's plastic wheels ( I dislike vinyl tires in kits). Another plus is the tow cable, which is a gray string with realistic texture. ( After I painted the string it was too stiff, so I wiped off most of the paint with thinner and was able to coil it properly). There is a searchlight and an anti-aircraft machine gun for the turret top, but these were not applicable to my vehicle, so I left them off.
Decals are provided for three WW II Staghounds ( British, Belgian, Polish) and two post-war Staghounds( Australian BCOF and Italian).
One of the best features of this kit is Italeri's reference manual, which includes walkaround color photos of a museum Staghound.
Construction Notes
 Building this kit is a straightforward process but it is not quick or easy because of the large number of parts and several fit problems that popped up along the way. I encountered the following fit issues:
--The fenders (especially the front fenders) do not fit snugly against the body . Filler is required here. It is also tricky to align the fenders symmetrically.
--The upper deck piece (part A38) also needs some filler where it meets the main body.
 --The pipe structures (parts B28) linking the fuel drums to the main body do not fit at all, and I eventually cut them off and made solder wire replacements.
--I could not get the right hull side hatch (part A22) to fit and had to enlarge the opening in the right fender to accommodate it.
--I had difficulty getting all four wheels to touch the ground during test fits. I ended up doing some surgery to the suspension parts to lower the front left wheel.
Improvements
 Since the Australian Staghounds were equipped with a storage box attached to the rear of the turret, I had to have one for my model as well. I estimated the box's shape and size from reference photos and scratch built it from sheet styrene. I also scratch built the width indicators for the front fenders.
The construction process damages or eliminates the weld bead detail in several areas of the kit, so I made replacements beads lines with tiny drops of putty.
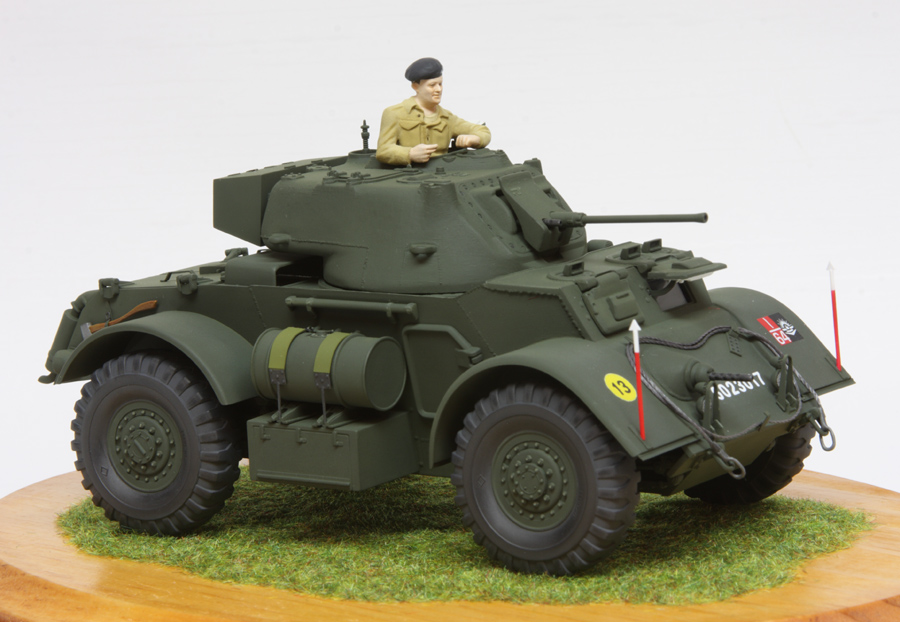
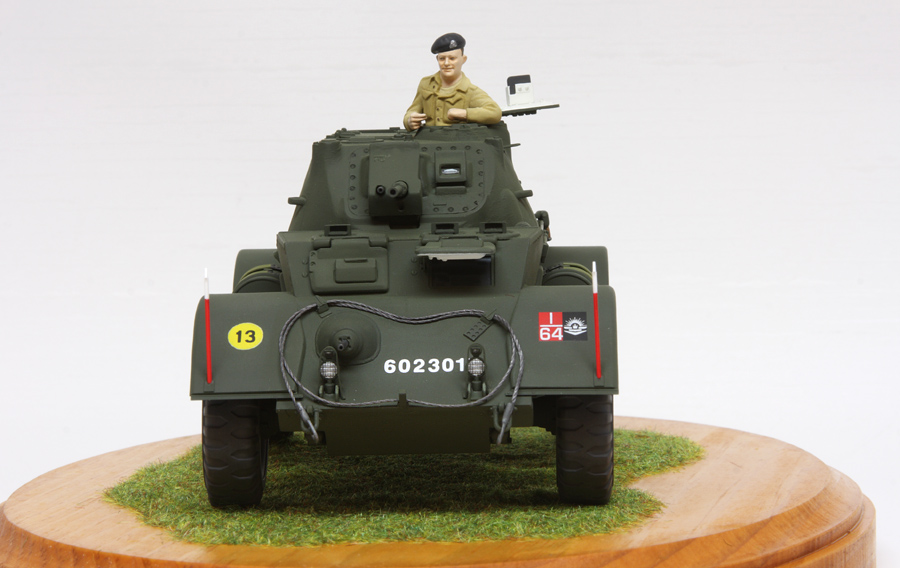
 The kit decals provide the Australian BCOF badge for the fenders, but there were no bridge classification numbers or discs. I made my own yellow discs and used black dry transfer "13" numbers. I also had to create the white serial number on the vehicle front--this was done with dry transfers, carefully placing each number in sequence.
I used Humbrol No. 75 dark green as the overall vehicle color.
Figure Follies
 The kit figures are essentially infantry figures with web gear straps molded on their chests and backs. No, lads and lassies, those won't do. My search for better figures ended in frustration--I could not find what I was looking for in aftermarket land.
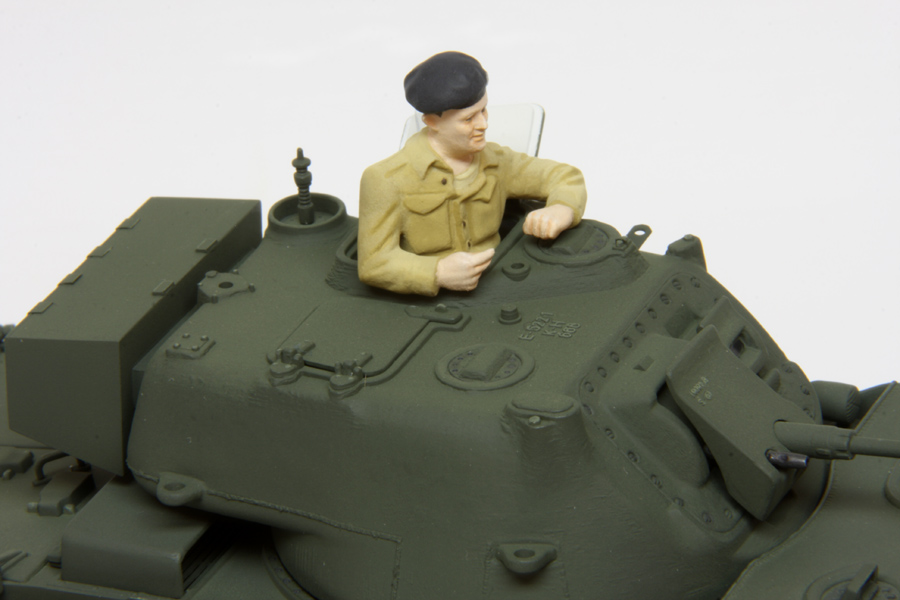
I finally decided to use the kit's car commander figure. At least he had the correct posture and could be easily posed in the commander's hatch opening. I removed the web gear straps from his shirt, but I didn't like the fact that he was bare-headed. So, I cut off the top of his head and installed a beret from one of the other kit figures. At last, a presentable Aussie.
The figure was painted with my beloved Humbrol enamels, plus Windsor & Newton oils for the face and hands.
Conclusion
Except for the fit snags and the figure difficulties, this was an enjoyable build. My principal reference was the Anzac Steel website, where there are two excellent articles by Paul D. Handel: "Australian Armour in Japan 1946-1950" , and "The Staghound Armoured Car in Australian Service".