Summary
It's been a long wait, but Meng has released a French AMX-30 in 1/35th scale, the first example kitted since the old Heller version. The sleek lines and low silhouette of the AMX-30 have long made this one of my favorite tanks, even if the real vehicle fell short of expectations on the battlefield. This brand new kit comes with excellent instructions, a PE folding tool, and separate track links.
Background
The AMX-30 main battle tank was designed by GIAT and it was first delivered to the French Army in 1966. The production version of the AMX-30 weighed 36 metric tons and sacrificed protection for increased mobility. The French believed that it would have required too much armor to protect against the latest anti-tank threats, thereby reducing the tank's maneuverability.
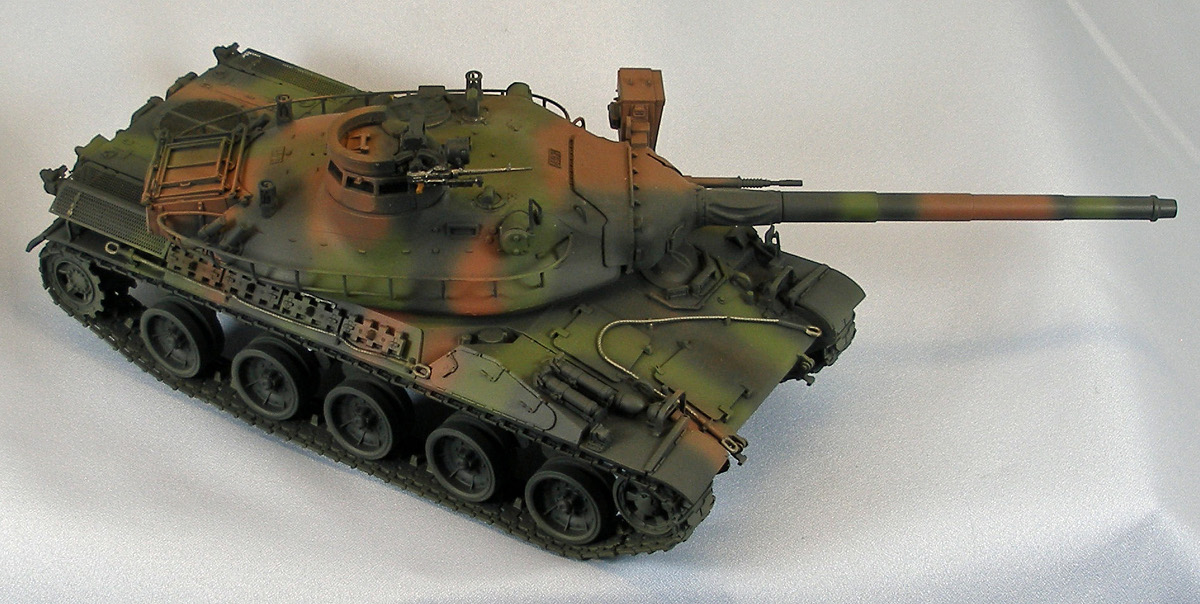
Protection, instead, was provided by the speed and the compact dimensions of the vehicle, including a height of only about seven feet. It had a 105-millimetre main weapon, firing an advanced HEAT warhead known as the Obus G. The Obus G used an outer shell, separated from the main charge by ball bearings, to allow the round to be spin- stabilized by the gun without affecting the warhead inside. Mobility was provided by the 720 horsepower (540 kW) HS-110 diesel, although a troublesome transmission adversely affected the tank's performance.
Due to transmission problems the French Army began to modernize its fleet of tanks to AMX-30B2 standards in 1979. This included a new transmission, an improved engine and the introduction of a new fin-stabilized kinetic energy penetrator, amongst other improvements. Production of the AMX-30 also extended to a number of variants, including the AMX-30D armored recovery vehicle, the AMX-30R anti-aircraft gun system, a bridge-layer, the Pluton tactical nuclear missile launcher and a surface to air missile launcher.
As early as 1969, the AMX-30 and variants were ordered by Greece, soon followed by Spain. In the coming years, the AMX-30 would be exported to Saudi Arabia, Venezuela, Qatar, United Arab Emirates, Cyprus and Chile. By the end of production, 3,571 units of AMX-30s and its variants had been manufactured. Both Spain and Venezuela later began extensive modernization programs to extend the life of their vehicles and to bring their tanks up to more modern standards. In the 1991 Gulf War, AMX-30s were deployed by both the French and Qatari armies, and Qatari AMX-30s saw action against Iraqi forces at the Battle of Khafji.
What's in the Box
The AMX-30 comes with:
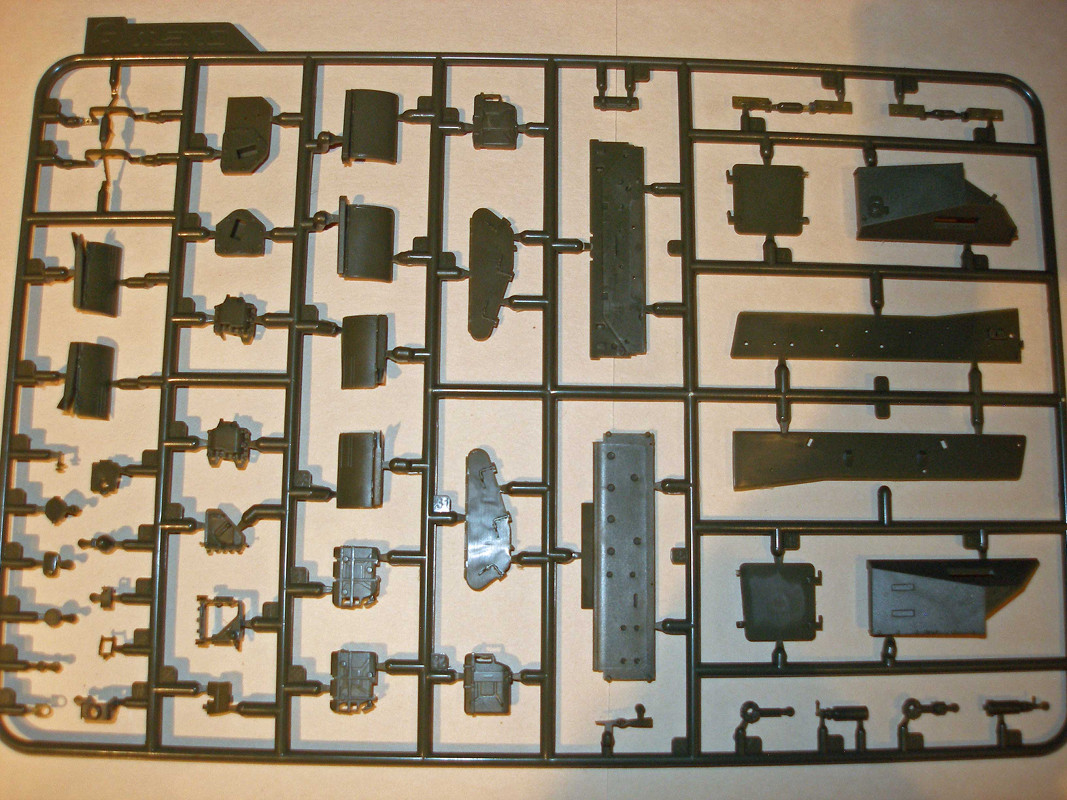
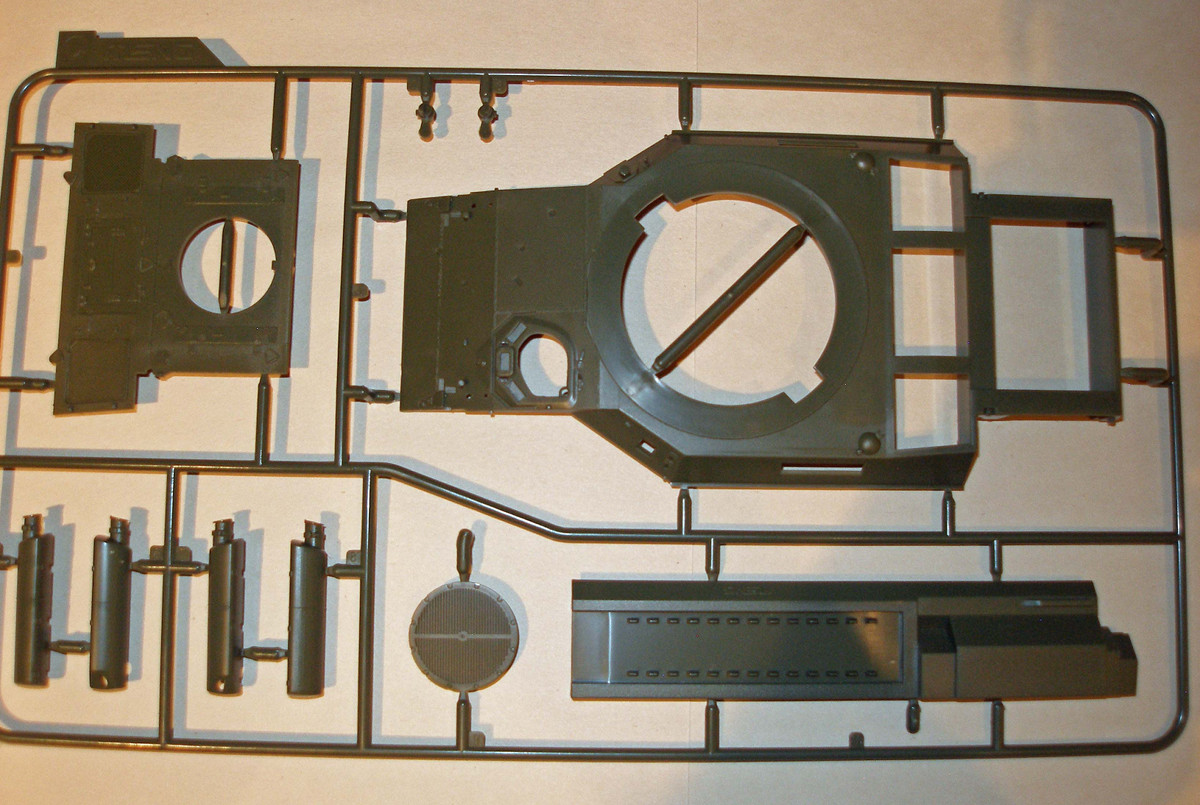
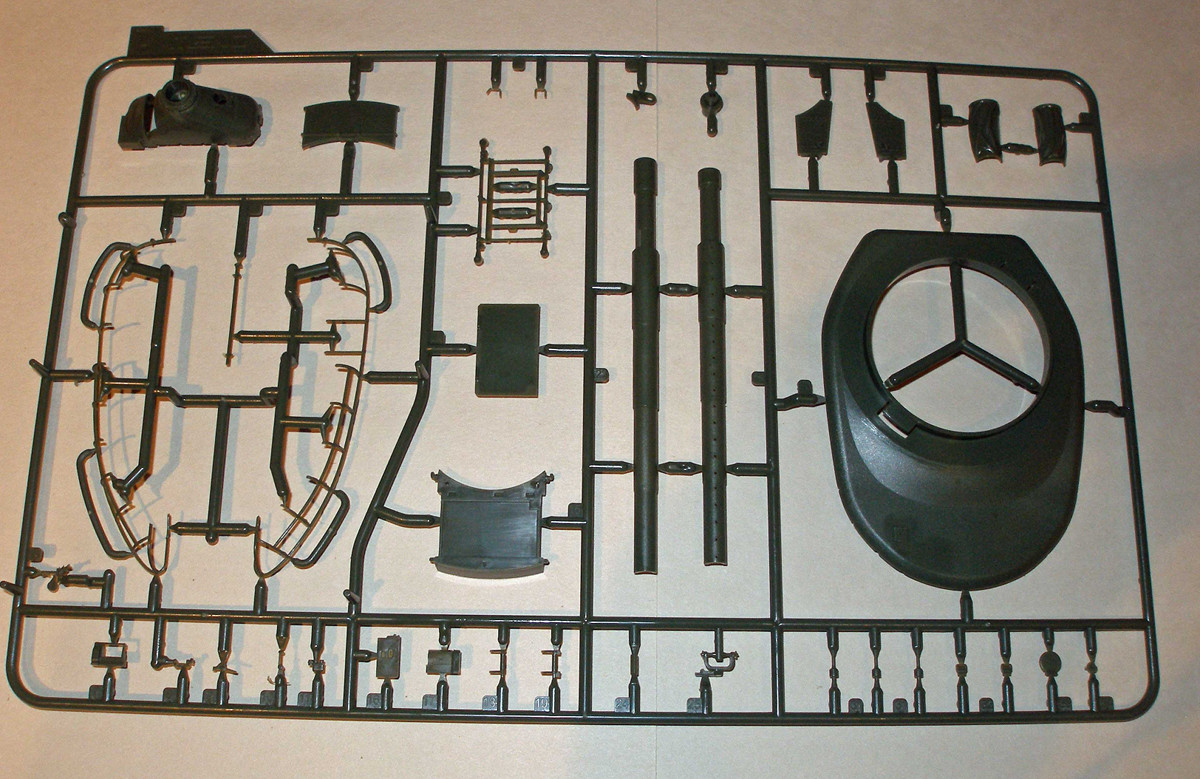
7 sprues of soft, dark green, slightly waxy plastic
5 sprues of soft, tan plastic for the individual track links
1 sprue of clear plastic
1 small sheet of photo-etch
1 small sheet of decals made by Cartograph of Italy
1 piece of rubber material for use over the gun mantlet
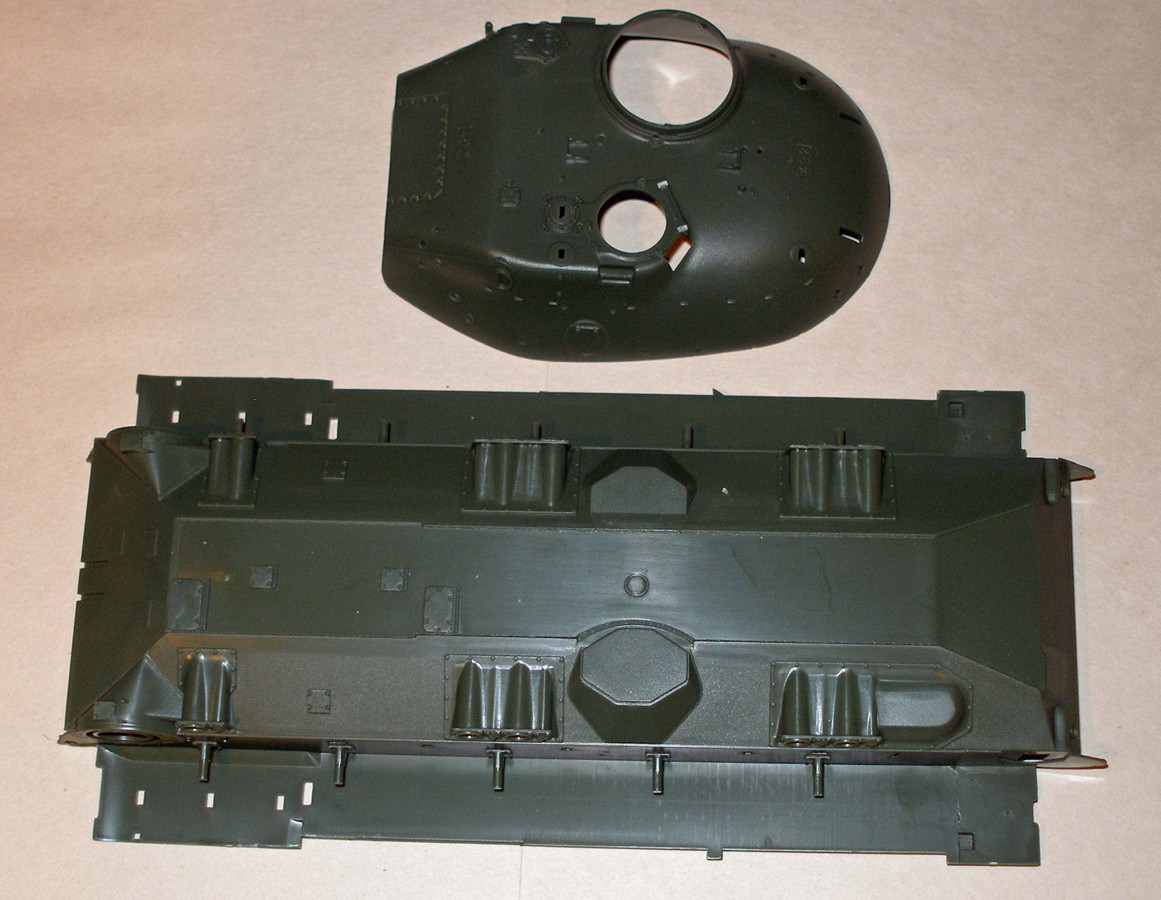
Separate lower hull and upper turret, individually wrapped
Instruction booklet with two color schemes:
(Generic) 'Single Color Scheme' in olive green.
'NATO Camoflage Scheme' in tri-color green, brown, black
The Instructions
This is one area where Meng truly excels above all the other armor kit manufacturers. The instructions are contained in a 20-page color booklet with a history, paint callouts (Gunze Hobby Color and Mr. Color only), tools list, and two five-view color schemes. Additionally, Meng is the first company that I know of to stamp their sprues with large, ¾-inch letters (A, B, C, etc.) that really help with identification, and as far as I know, the first to include a track link assembly jig/PE bending tool in the kit. While this last item has promise, the reality fell a little short in both roles. Still, I really like the direction they are going.
The Plastic
This is the third Meng kit I've had the pleasure to review. I've also built their German VsKfz 617 Minenraűmer, the British Tortoise. Meng used a soft grey plastic for the Minenraűmer which was flash-free and very easy to work with. For whatever reason, they chose to use a different plastic for the Tortoise and the AMX-30. This new plastic is a dark green and tough. It has a slightly waxy/oily surface and, when sanded, tends to turn white-opaque and it becomes difficult to work with. The smaller parts contain flash that has to be removed, with some parts having so much that once you are done it looks more like a resin chunk than a plastic part. The soapy, oily surface tends to attract the residue from sanding so that only a blast of air or water will clean the parts enough for you to check your progress. Finally, some glues, like Testors (black bottle) liquid cement, is slow to 'take': the plastic doesn't dissolve easily. I've had parts fall off by gravity 2-3 minutes after applying the glue - something that would never happen with the grey plastic. With such beautiful engineering, it is a shame to see it rendered in such a poor quality medium. Hopefully we will see Meng bring back their grey plastic in their future releases.

Construction
Construction starts with the hull and main running gear. The only thing to say here is that in several cases, and throughout construction, there were missing 'Option' icons. Sometimes they are there, sometimes not. The optional choices simply show 4, or 6 or 8 part numbers, with parenthesized part numbers for the other side of the vehicle. This is ok, but it is not always clear that these are choices between options.
The fit with some of the smaller parts, like the view ports on the hull hatch in Step Six, is poor, as are the brackets for the PE screens in Step Eleven. I suggest you bend the PE first so you can use it to figure out what angle the brackets need to be for the best result. The bending tool Meng includes in the box is useful for checking the angle of the bend you make, but not for actually bending the parts.
Meng provides exquisitely formed plastic tow cables that conform to all the bumps and corners on the deck perfectly. They did the same with the electric cables on the Tortoise: beautiful work.
In Step Twelve Meng has you use a strange 'rubber mat' to drape over the main gun mantlet. With reservations, I plowed into this part and to my surprise I found that the rubber responds well to Tamiya thin cement and later, it took primer and paint fine. Do not get it wet with water or moisture or it might curl a little. I used a can of compressed air to blow off some of the plastic debris and shavings and a frosty layer of condensation caused an edge of the rubber mat to come up slightly.

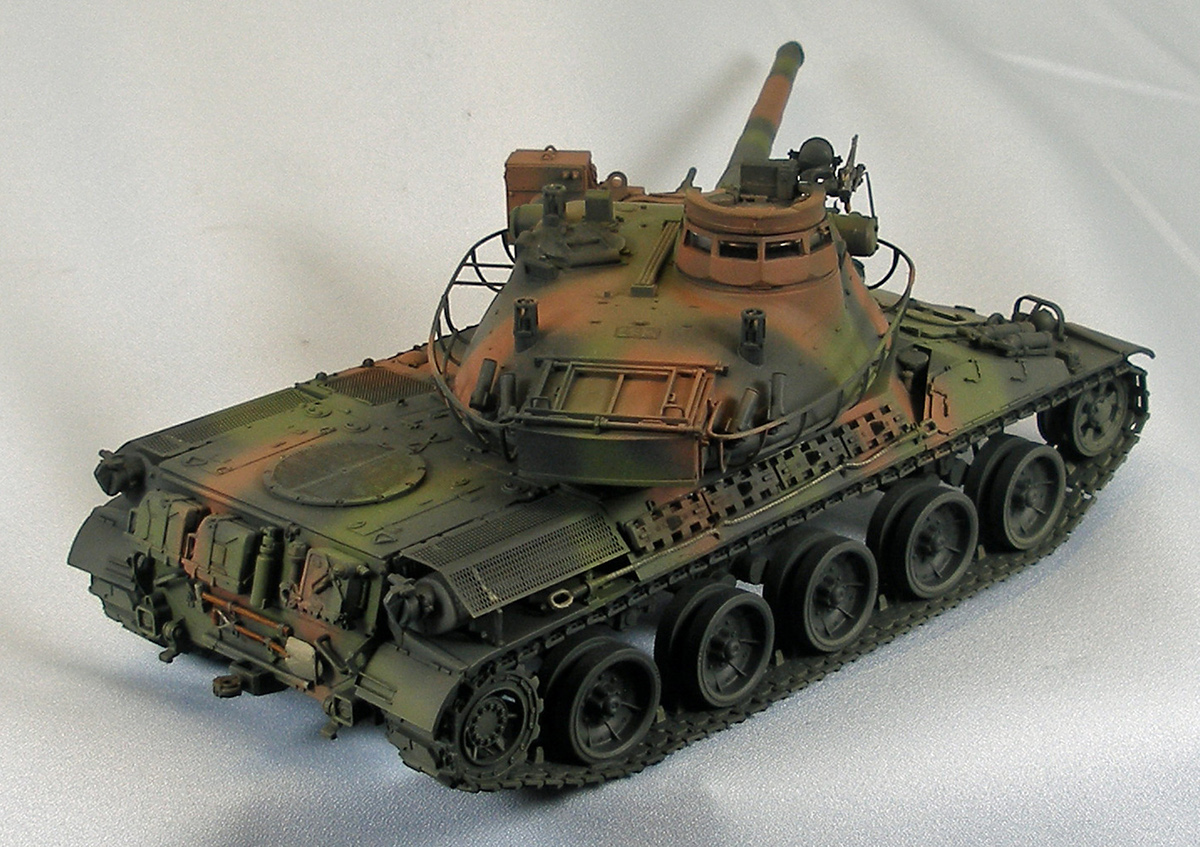
The main gun took some work to remove a side-seam; there is an excellent after-market barrel available. The smoke discharger bases that attach to the turret in Step Twenty-Five must be aligned right. Look at the orientation of the dischargers in the pictures to see which way to attach the bases because they will also 'fit' the wrong way. The IR/Searchlight housing is fiddly, requiring three hands to get right. With the complexity in painting this correctly I decided to shut the front doors, thereby hiding the light and saving my sanity. Likewise, assembling the machine gun and its parts is difficult and plagued with a lot of flash. Once the waxy plastic parts were clean, they looked like a bunch of chunks of white candy. I brought the parts together so that they somewhat resembled a gun and smothered everything with glue. Once painted, it looked ok.
The Track
MENG provides 120 links, 60 per side. I had 18 links left over so maybe 51 per side? I strongly recommend first attaching a section of about 10 links around the rear drive sprockets so that you can attach the remaining runs without having to run them around the sprockets when you attach the rest of the track. The clearance between the sprocket teeth and the hull is extremely small and the fragile nature of the runs will cause problems otherwise. This is because the track, while beautifully executed, suffers from not having enough 'gripping' power between links when the links are laid out prior to gluing. They are supposed to be movable, and each link contains little hooks for that when you assemble them using their track jig. Unfortunately, the hooks are not 'hooked' enough and any run longer than a few links tends to fall apart under the slightest stress. I simply assembled both top and bottom halves of each link and then put the links together like I would any other link & length track.
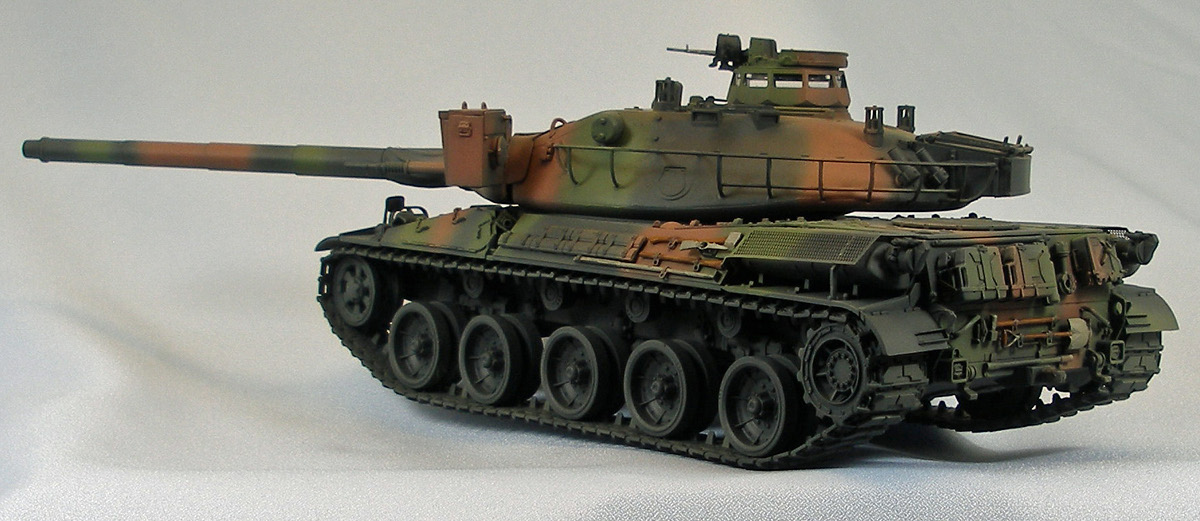
Also, if you use one drop of glue between links, as I did on the first run of the track, you will find that this lack of grip will carry though when installed on the vehicle. The links really want to come apart. As a consequence, I recommend adding two drops of glue between each and every link and maybe giving it an extra 10 minutes to set up. I use Testors 'black bottle' cement for this because it gives me plenty of working time. After about 30-40 minutes the track comes up in a single, nice, bendable piece that can be worked around the wheels and return rollers.
Painting and Finishing the AFV
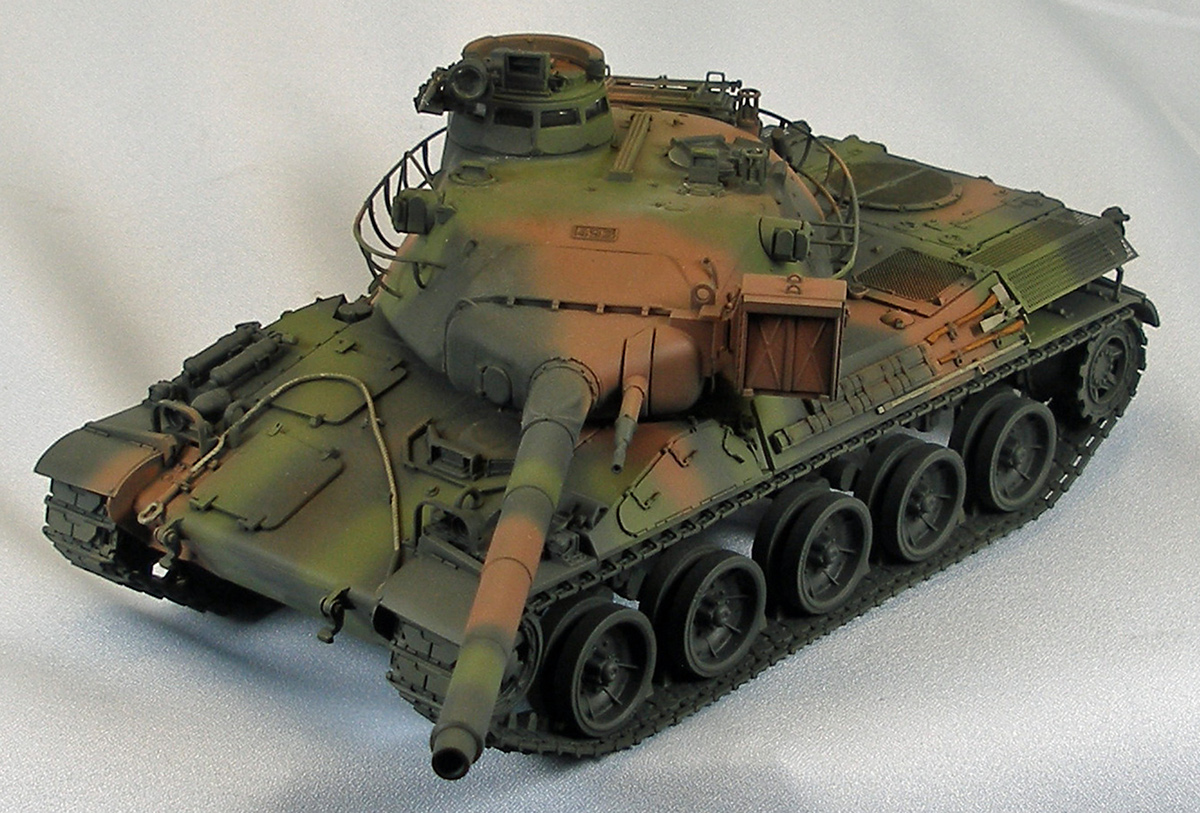
The AMX-30 is a cinch to paint green, and only slightly more difficult to paint in the NATO three-tone finish. I chose the latter by request of a friend and I used the excellent illustrations provided as a go-by. I thin all Tamiya paint and primer products 50/50 with Gunze Mr. Color Leveling Thinner, which has its own retarder for airbrushing. If you haven't tried it, you should. I use a Paasche 'H' Single-Action airbrush with the number 3 tip with 20 lbs. pressure for everything. I use the same thinner for hand-brushing Tamiya paints.
I set the machine-gun cupola aside so I could paint it separately and insert the clear-plastic glass before attaching the whole thing to the turret later. I also covered the machine gun mounted searchlight with a round piece of tape to mask it. Everything else was painted as assembled, which followed these steps:
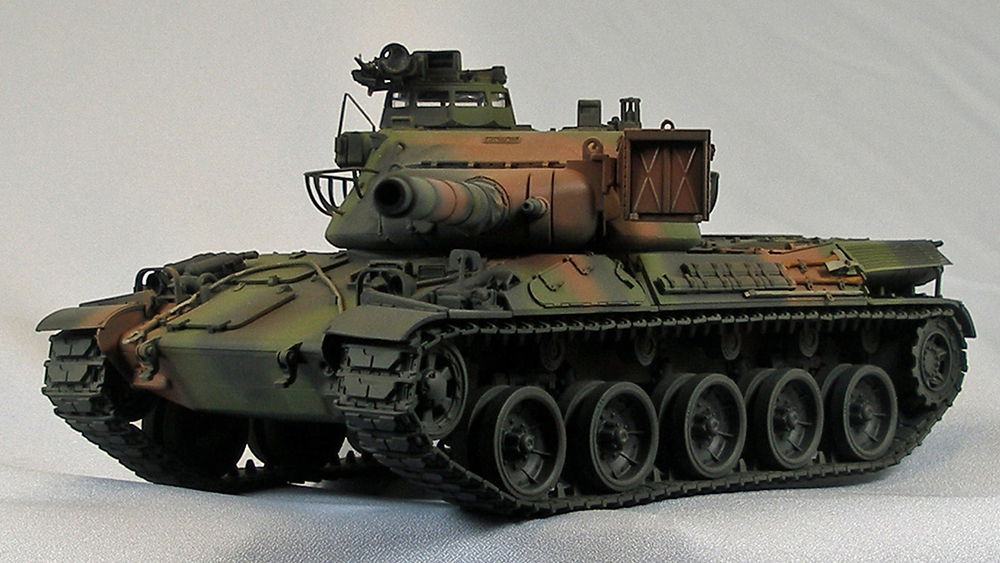
I started with a primer coat of Gunze Mr. Surfacer 1200 thinned 50/50 with Gunze Leveling Thinner, to give the slippery green plastic and PE some bite. I then sprayed an overall pre-shade coat of Tamiya NATO Black (XF-69). I followed this with Tamiya NATO Green (XF-67) and Tamiya NATO Brown (XF-68). I lightened both colors with a few drops of Tamiya Flat White (XF-2). I used the excellent five-view go-by on the back page of the instructions. Pulling off a tri-color NATO pattern is not a simple feat on a tank with this many protuberances – the scheme provided really helped. There are precious few decals for the NATO-painted version, the largest being a tiny 'license plate' number under the shovel on the back of the tank. Unfortunately, Part F21 from Step 11 is sitting in that spot. Consequently, no decals-and no complaints!
Next I shot the whole vehicle with a liberal coat of Future Acrylic to prepare the surface for washes. While the Future was drying, I painted the wooden portions of the pioneer tools Vallejo Acrylics New Wood and all the steel parts Vallejo Oily Steel. For the hand painting I mix a tiny bit of Vallejo Slow Dry and water with each color until it flows smoothly off a 00 Liner Red Sable brush.
I painted the machine gun Tamiya Gun Metal (X-10). The shine would later get covered by a flat coat. To give the wooden parts of the tools more depth, I brushed on a little Mig Wash Brown Oil straight from the tube and let that set overnight. Don't let this paint leach out its oil beforehand, like you would when you are using oils for detailing. The oil helps it stay workable. In the morning I carefully removed most of the oil paint using a brush dampened with Mona Lisa, leaving the areas near the buckles and metal parts darker than the wooden shafts.
I gave the entire vehicle a pin wash using Mig Dark Wash (aka Raw Umber) straight from the bottle. This wash goes on very dark but, on the shiny, acrylic surface, it stays wet and workable for a long time. Using a clean brush, Mona Lisa thinner and a paper towel, I worked the wash around until I had it just the way I wanted it. I let this dry overnight and then gave the model a 'road-dusting' coat of Vallejo Model Air Light Brown, paying special attention to the wheels and track. This very fine paint literally 'whispers' on when thinned 50/50 with Vallejo's Airbrush Thinner. Great stuff! Next I shot the whole vehicle and figures with Vallejo Flat Varnish to kill any remaining shine, again, thinned 50/50 with Vallejo Airbrush Thinner to improve flow. Finally, I inserted the machine gun cupola glass and attached it to the top of the turret with a little spot of Testors 'black bottle' cement and... one more AFV for my case.
Conclusion
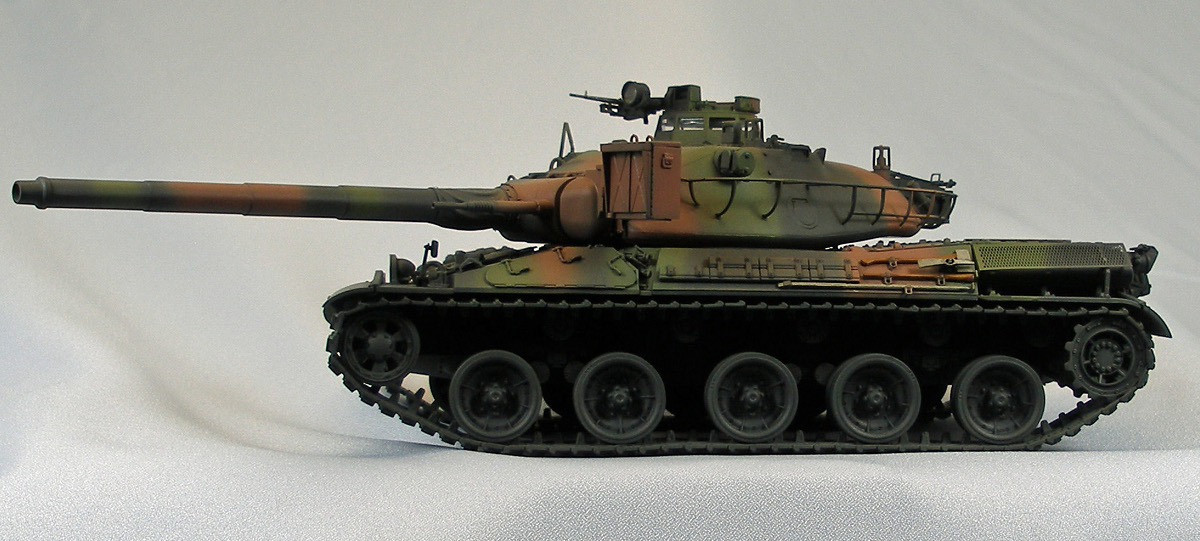
The AMX-30 looks like a tank should look: low, sleek, balanced, menacing. I've always had a place in my heart for this AFV ever since buying a ROCO MiniTank version of it when I was a kid. I jumped at the chance to build it, especially since it was produced by Meng. The plastic was a challenge to work with, however, and the fit of the parts was not as good as their previous releases. Also, the track will give you problems unless you simply go with your experience using link & length track.
Still, the problems are surmountable and result in a fine looking build. I recommend this kit to all modelers who have a little experience solving minor problems. Get yourself a sharp hobby knife and consider the suggestions above.
I would like to thank Meng and Stevens International for providing this kit for review, and to Internet Modeler for giving me the opportunity to build it.