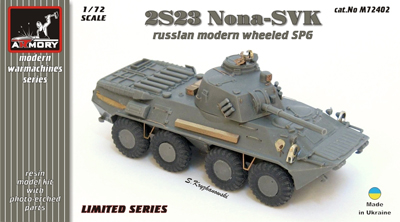
Armory 1/72 2S23 Nona-SVK Build
By Rob Folden
In-Box Review
An In-Box review and background on the Nona SVK can be found HERE.
Construction
The basic, two-part hull was assembled and while the front seam was very small, there ended up being a nice 1.5mm gap at the rear. I used thick CA to fill in the majority of the gap, with a layer of Combi-putty [automotive spot putty] over the CA. After sanding everything smooth, the suspension pieces were dropped in place on the hull. There was some confusion on the parts here, as there is an upper and lower arm difference. I ended up with some of them flipped, however after the wheels are in place you really cannot tell. The back of the wheel hubs have no locating holes to line up with the axles, so I ended up drilling the back of the hubs out larger than the axle pins and then using thick CA glue to fill in the difference. This also helped in making sure all of the wheels touched the ground. I used cribbing to place the model on a level surface, at normal wheel height. I then added CA accelerator to the axles, and CA to the back of the wheel hubs and one by one added the wheels to the chassis. I started with the front two wheels, then the rear two, then added the center. The result is that all 8 wheels touch the ground. The remaining resin and PE pieces were attached to the hull.
The turret construction was a lot easier than the hull. The turret is solid, so there are no seams to fill and sand. I did end up with a broken main gun barrel, so great care was taken in gluing the barrel and making sure it was straight. The hardest part of the entire build was the frame for the remote-controlled machine gun mount. This is created entirely from PE and the instructions are very difficult to follow on parts of it. I managed to work through it, but it would be nice to see this done in fewer pieces in future releases. Painting
I did a quick search online and found several possible paint schemes for the Nona. Most were over-all green with some pattern. I decided to go with a pattern similar to what I had previously done on my MAZ build. The scheme features an over-all Russian armor green base, with dark green spots outlined roughly in white. For this, I started with Yamiya J.A. Green [similar to a faded Russian green]. I added spots from a mix of Tamiya Dark Green and a touch of black. To finish up, I used Tamiya Flat White thi9nned about 50/50 with alcohol. I dialed down the pressure and began freehand outlines of the dark green. I stayed close to the model for a narrow but still soft edge. References show that the outline was not solid, nor was it hard edged [it looks more like a quick outline with a spray can]. The tires received a mix of red-brown and NATO black. After a coat of Future, the model received pin washes of Payne’s Grey. A little “dust” was lightly sprayed on the underside with Tamiya Buff. After some Bragden powder on the underside and wheels, the model received a flat coat of Floquil Lacquer flat.
Conclusion
This was the first time I have worked with an Armory kit, and I must say I am impressed. I am already on my second Armory piece, and look forward to building more in the future. The casting is clean and detailed, the fit is good, and the subject matter is excellent. My sincere thanks to the folks at Armory for providing this kit for review.