1/48 Pro Modeler Me410
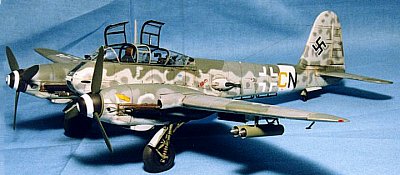
by Will RieplA quarter inch Me410. Ten years ago this was a pipe dream. Now, thanks to the people at Pro Modeler, we have a kit of one, and what a kit it is. When I saw this at the Chicago ’97 show, I knew that it would be worth every penny. Once I got it in my hands, all of my wishes were true. This kit is wonderfully engineered, and I am eagerly awaiting their Ju52. With the last few Pro Modeler releases, Monogram/Revell have proved that they can make kits as nice as Tamiya, Hasegawa, and Accurate Miniatures. Let’s hope this trend continues. 
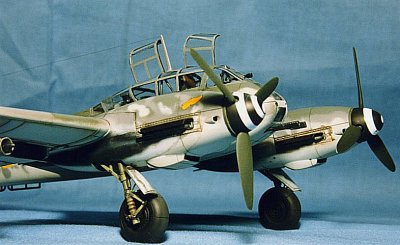
The kit has 143 pieces molded in the typical Pro Modeler light gray. Molding is crisp throughout, with very fine recessed panel lines and raised rivets where applicable. The cockpit is a sight to behold, with almost no room for aftermarket sets. There are decals for three planes: a Me410B-2/R2 of II. /ZG76, a Me410B-1/U2/R4 of II. /ZG26, and a Me410B-1/U2R of 8. /ZG26. The instructions are clear and informative, with colors being given in the proper RLM numbers. Here’s how I did mine. - The cockpit is where we start, and this is a little jewel. Painting all the dials, hoses, wires and such took longer than painting the camouflage! The cockpit is made up of 15 pieces, and when finished looks the part. The only thing I added to the cockpit was a piece of 10 thou card to the back of part 48 (Instrument Panel Right Side) to hold it in place and give it some strength. Paint it RLM 66 and weather away. There are some good pictures in the instructions showing how the real cockpit looks, too.
 - Step two has the last little bits going inside the fuselage and gluing the fuselage together. Don’t forget to put the blast tubes in before you glue the fuselage together. I found this out the hard way. The cockpit fits like a glove inside the fuselage, and really looks good once it’s in there.
- Step three has you add all the little fiddly bits to the upper cockpit deck. I left this step ‘til the end so that none of that stuff would get knocked off in the painting process. This step is also decision time where you get to pick between the 20mm cannons or the 30mm cannons. I went with the 30mm (the "My gun’s bigger than your gun" syndrome) and drilled out the cannons for a more realistic look. I then attached the lower nose cover and fuselage shell ejector panel to the fuselage. Both of these places look like the ideal place for a bad fit, but everything went together snugly, with no problems.
- Guns, guns, and more guns! This is pretty basic, just slap the machine guns in the barbettes and stick them on. If you’re feeling particularly frisky, you could drill out the barrels.
- Step five starts the wing assembly. This is pretty much straightforward, with the upper and lower wings being attached. Make sure that you follow the instructions here regarding the radiators, as it is very difficult to get those parts in after the wings are together. (Maybe I should have slowed down, but it’s a 1/48 Me410!) This is a good time to add those trim tabs.
- Engine time. This is the only place that might have some difficulty in achieving a perfect fit. Do several dry runs first to make sure that everything works before gluing them together and to the wings. It took me a couple of tries, but once I was done, no putty needed.
- Here’s where it all goes together. Wings come on, tail comes on, and the model is ready for some paint. From here on out, things get pretty normal. I decided to use the new Aeromaster decal sheet and finish mine as a Me410B-1/U4 or II. /ZG26. I used Aeromaster Acrylic paints for the 74/75/76 camouflage. After some trouble with my airbrush (did I mention that this is a 1/48 Me410?), the camouflage went on beautifully. After some weathering and decalling, I now have a 1/48 Me410 sitting next to all those other models, gathering dust.

By following the instructions and taking care to dry-fit the parts beforehand, this kit falls together beautifully. It took me only a couple of days to finish mine. The only omissions and/or corrections that I noticed were the lack of trim tabs on the ailerons and the oval shaped supercharger intake. The intake should be round and is easily fixed with a piece of rod. The trim tabs actually look better made out of 10 thou card than they would if they were molded, so that’s probably the best way to go anyway. Overall, it is a great kit and several will find their way onto my shelves. |  
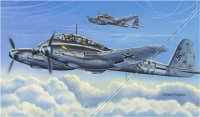
A great reference for the Pro Modeler Me410 kit is this book. Available from Aviation Usk. 
Decals from the kit. |


