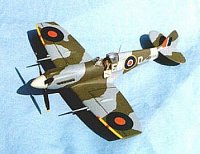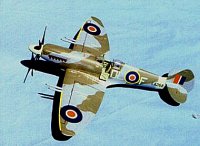
A Spitfire Mk XIV of the Belgian Air Force. For those who don't want to do a conversion, but still want something unique.

At the risk of raising the ire of true Spitfire purists, I will say up front that, to me, the Griffon-powered Spitfires are the most aesthetically-pleasing of the series. I was very, very happy to see Academy bring out their Spitfire XIVc and XIVe, and for Airfix to release the Spitfire 24 and Seafire 47. There are other Spitfires in the Griffon series which are unlikely to be released as separate kits, so here are two relatively-easy conversions for interesting Griffon Spitfires, the Mk.XII and the Mk.21.
GRIFFON SPITFIRE
CONVERSIONS
by
Thomas McKelvey Cleaver
The first operational Griffon-powered Spitfire was the Spitfire XII, developed in late 1942 to take advantage of the low-altitude rating of the Griffon in order "rat-catch" fighter-bomber Fw-190s on "tip and run" raids across the Channel that were outrunning Spitfire Vs sent to counter them. The 100 Mk. XIIs entered service in 1943, first with 41 Squadron, and later also with 91 Squadron, and remained operational until after they were used against the V-1s in the Summer of 1944.
The Mk. XII was originally a Mk.V with a Griffon engine, and that is the key to the conversion. You will use either the Tamiya or Hasegawa Spitfire Mk.V, and the Hobbycraft Seafire XV. It would also be useful to obtain the rudder from an old Otaki Spitfire VIII kit, but a suitable rudder can be made from the Hobbycraft kit.
The Mk. XII used either the Mk.V or Mk.VIII airframe, but in both cases used the assymetric radiator and oil cooler of the earlier Spitfire, with the smaller carburettor intake of the earlier fighter. The only way of knowing which airframe was used is that the Mk.VIII airframes had the retractable tailwheel of that version.
The Mk.XII used the "C" wing, which is the first place to start the conversion. There are two ways to do this: the expensive way and the inexpensive way. Both ways involve a lot of modelling effort. The expensive way is to get the Bringuer Aviation Products cast resin Type C wing in their Tropical Spitfire V conversion, which was what I did. Should you do that, follow their instructions, bearing in mind that you will be cutting off the wingtips. The inexpensive way is to cut off the upper and lower cannon-feed bulges of the Mk.V kit, then glue a sheet of plastic inside the wing to block off the hole, fill it with putty and sand it smooth. You then need to make the upper and lower "C" wing bulges, which can be modelled after what you see on the Otaki Spitfire wing. You can even cut off the bulges from that kit and use them. An alternative, if you are going to do both of these conversions, is to use the wing of the Academy Mk.XIVc kit you will purchase to do the F.Mk.21 below, mated with the inner lower wing of the Mk.V kit (all you need of the Mk.V wing is the center section with teh assymmetric radiator and oil cooler. Cut off the wing outboard of the landing gear wells. However you do it, get a "C" wing with clipped tips (I like the Hasegawa kit for the clipped wingtip it gives). You are now halfway there and have accomplished the most-difficult part of the conversion.
Next, take the Mk.V fuselage, and cut off the engine cowling, following the panel lines. Cut off the engine cowling of the Hobbycraft Seafire, following the panel lines, and mate these two items. You will need to do some cutting and trimming of the Hobbycraft cowling to fit the Tamiya/Hasegawa fuselage, which should be your controlling piece here, since it is more accurate. Do this for each half, making certain the cowling and fuselage fit from the outside, and use some plastic sheet cut and clued inside for added strength of the joint. You will see that the Hobbycraft cowling is a bit wide at the join line. Wait until the parts hve set thoroughly, then sand the Hobbycraft cowling from the centerline, making certain not to take off any at the nose, and giving a nice straight line to the fuselage halves.
At this point, cut off the rudder, to be replaced with either the Otaki rudder or the Hobbycraft rudder with the hook section glued to the rudder and sanded to join into one piece.
You now assemble the cockpit, put in the exhausts, and join the fuselage together as you would normally. You will then need to put a small bulge about the same size as the upper cannon bulge of the "C" wing on the top of the engine cowling, 1/16" back from the front of the cowling on the centerline.
From this point on, assemble the model as you would had it not been modified, and fit the new rudder. Use the Hobbycraft spinner and propeller blades.
Markings: Aeromaster has a Spitfire XIV sheet with a 41 Squadron airplane in the markings, EB-U. The Mk.XII that carried this code was MB794, and happens to be based on the Mk.V airframe. Alternatively, look in the Osprey "Late Marque Spitfire Aces" book and do a mix-and-match out of the decal box for one of the two aces' aircraft shown in the profiles, or do one from the photos in that book.
Spitfire Mk. XII
The Spitfire Mk.21 was so different from all previous Spitfires that at first it was to be named "Victor." The classic elliptical wing was changed, and armament was standardized on four 20mm cannon. Only 91 squadron flew the Spitfire 21 on ops during the Second World War, having replaced their Mk.XIVs with this aircraft during March 1945, and undertaking anti-shipping sweeps off the Dutch coast during the last week of April, 1945. The Spitfire 21 then served with the squadrons of the Auxiliary Air Force until the AAF was disbanded in 1951.
With the Airfix Spitfire 24 available, this is an easy conversion, combined with the Academy Spitfire Mk.XIVc kit, but it is not as simple as mix and match wings and fuselage. That wing is different, and it makes for a different join to the fuselage. This is where you take out your razor saw and get to work. Cut off the engine cowling of the Academy kit, following the panel lines, then section the fuselage along the center side panel line, to the tail section. Cut off the rudder of the Adademy kit, leaving the upper front part of the rudder with the vertical fin and rudder. Cut off the lower fuselage at this panel line. You will use the upper fuselage and vertical fin/rudder of the Academy kit. Then cut the Spitfire 24 fuselage, keeping the engine cowling and lower fuselage, to the tail section join line. Mate the upper and lower sections of each fuselage half, putty as necessary. When sanding and rescribing panel lines, follow the panel lines of the Spitfire XIV kit so far as putting in the radio hatch on the starboard side, etc.
Glue the rudder halves you cut off together. Take a 1/16" thick piece of sheet plastic and glue it to the forward edge of the rudder, to increase the chord. If you cut it properly and sand it smooth, you can then scribe a line right where the pieces join, and the rudder will look fine. Now glue the rudder to the fuselage, and putty the join of the upper parts so it looks like one piece. The wing of the Spitfire 24 is assembled per kit instructions, using the longer cannon barrels. Assemble a cockpit using the best of both kits, and continue assembly as if it were a regular Spitfire model. Use the spinner and prop blades of the Spitfire 24 kit.
For markings, 91 Squadron's code was DL. You would use the Airfix kit insignia and all other markings. Spitfire 21 serial numbers were LA187-236, LA249-284, and LA299-332. A World War II Mk.21 would be in the earlier ranges. Should you wish to do a post-war AAF bird, you can use the small (12" in 1/48 scale) 1/72 Sky codes that MicroScale made and SuperScale may have re-released. You Fleet Air Arm types can also make one of the 50 Seafire Mk.45s used immediately post-war from this conversion.
Spitfire Mk. 21


