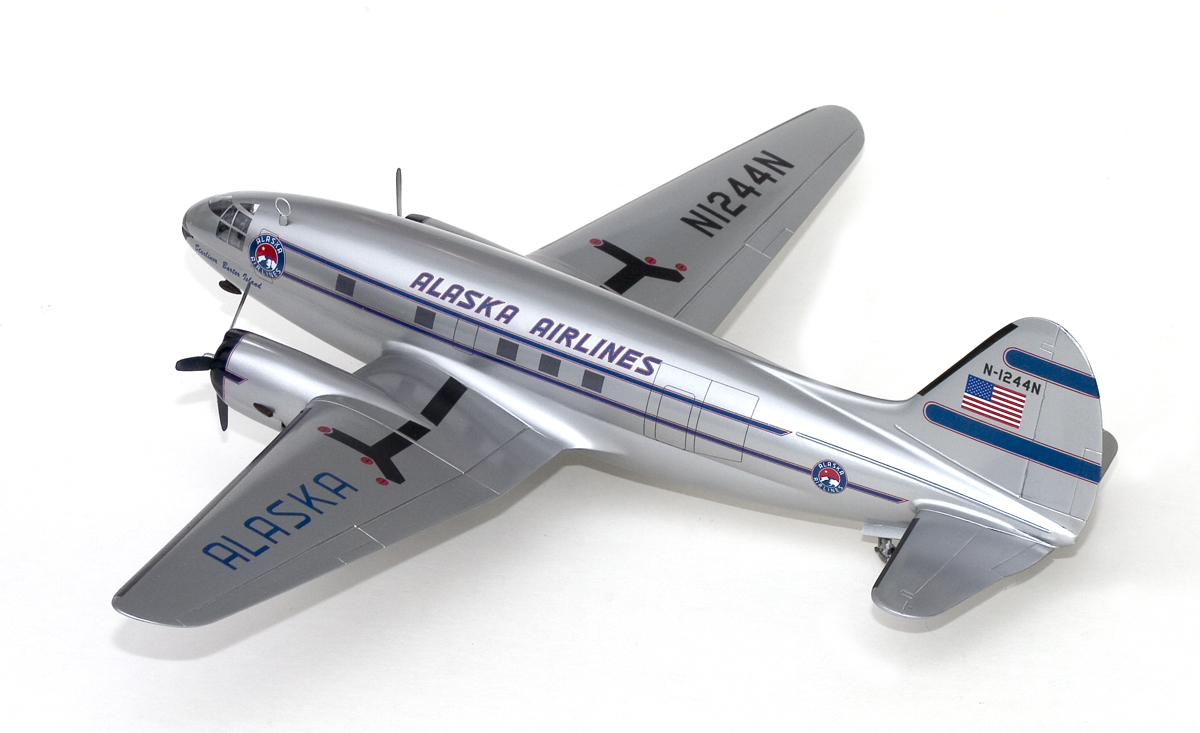
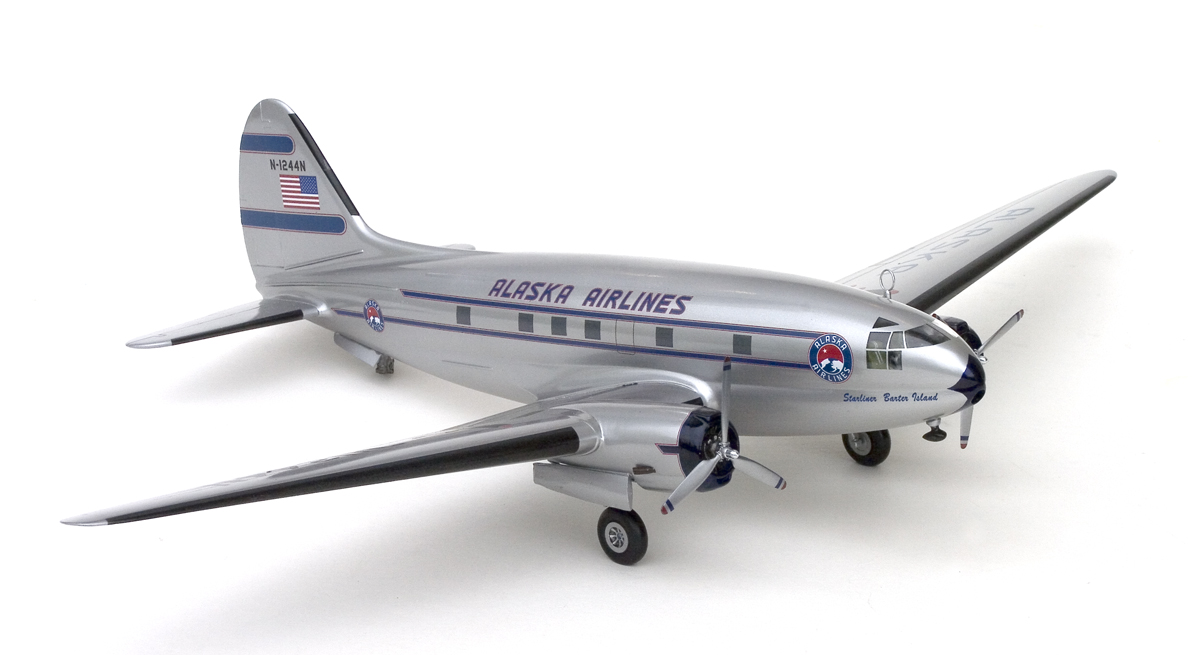
The Sow’s Ear: William Bros 1/72 Curtiss
C-46
|
 |
Recently, I was asked by a past client of mine if I would like to build
him another model. “Sure!” I exclaimed, thinking about a future
loan payment on my Z06 Corvette. I was counting the money in my head,
when I came out of my little day dream and asked “What will it be
this time?” “I want a 1/72 Curtiss C-46 in Alaska colors.”
he asked. So, I’m standing there with the “deer in the headlights”
look, when he adds “and it’s the polished scheme and oh…
there are no decals of it made.” Oh Lordy…..what have I gotten
my sorry little broke self into. “Well….OK….sure, I
can do it” sounding slightly deflated.
Why is it when you need to build a kit, it’s never in the stores?
After trying all the local and mail order shops, I was lucky enough to
find the kit at our local model show for ten dollars. So, have you figured
out that the 1/72 C-46 had to be the ancient William Brothers kit? You
know the kit is old when the instruction sheet has been drawn by hand.
CONSTRUCTION (major)
After opening the box and looking over the parts, the first thing to
do was the art work for the decals that did not exist. My client also
helped out by supplying me with the reference photos. From them, I worked
up a set of decals. It helps that I’m a contributing artist at DRAW
Decals, so this was a pleasant task. With that done, on to the kit. Remember
this is the one that everybody says doesn’t fit worth a darn. Well,
they’re right.
 First,
let me point out that the model was built out of the box. This was not
your add glue, shake, and its done model. Every, I mean every, part had
to be sanded, checked and sanded again to make sure the parts fit correctly.
The molds are slightly off center making round parts almost figure eight
shaped. Friends would call me up from time to time and ask, how is the
build going? “Good!” I said. “I have used all the Black
&Decker power tools that I own on it.” First,
let me point out that the model was built out of the box. This was not
your add glue, shake, and its done model. Every, I mean every, part had
to be sanded, checked and sanded again to make sure the parts fit correctly.
The molds are slightly off center making round parts almost figure eight
shaped. Friends would call me up from time to time and ask, how is the
build going? “Good!” I said. “I have used all the Black
&Decker power tools that I own on it.”
I think eighty percent of the building time was in the fit and puttying.
I did do some slight detailing in the cockpit by adding some decal seatbelts
and placards to the back wall. The canopy glass was sanded flush and polished
back with fine sanding pads. A quick coat of future made it better than
new. I also used Eduard’s mask, CX 062 when I was ready to paint.
The kit props were replaced with two F4U-1D Corsair propellers from the
1/72 Minicraft kits.
Because the model was going to be in natural metal, I had to make sure
it was baby butt smooth. The model was double primed with my favorite,
Tamiya surface primer L, light gray. After a good buffing with 4000 grit
pads, the entire model was shot with Alclad 2 Duraluminum. After a day
or two, I sprayed two wet coats of Future, thinned 50% with 99% Isopropyl.
The nose and the fronts of the engine nacelles were painted blue.
 The
engine decal stripes were designed with a trim piece of blue to overlap
the blue paint to give a seamless look. The Digital Silk Decals are a
little heavy on the ink, so to help them conform around the scoops on
the engine I dipped them into almost boiling water to soften them. Don’t
worry, these are real tough decals! After the model was completely decaled,
I again added another two coats of Future for protection from handling.
With some minor painting the model was finished. My client wanted a very
clean and simple display model, so no antennas, pitot tubes or weathering
was added. The Alaska decals I made for this kit will be on the DRAW Decal
site soon. The
engine decal stripes were designed with a trim piece of blue to overlap
the blue paint to give a seamless look. The Digital Silk Decals are a
little heavy on the ink, so to help them conform around the scoops on
the engine I dipped them into almost boiling water to soften them. Don’t
worry, these are real tough decals! After the model was completely decaled,
I again added another two coats of Future for protection from handling.
With some minor painting the model was finished. My client wanted a very
clean and simple display model, so no antennas, pitot tubes or weathering
was added. The Alaska decals I made for this kit will be on the DRAW Decal
site soon.
In the early stages of construction, I never thought I would get it
finished. But after the paint and decals went on, it was all worth the
effort, a silk purse was made from a sow’s ear…and the car
payment was made!
|
|