Ward’s Magic Seam Powder”
Part 1 of 2 parts – Filling seams, gaps and holes
|
|
INTRO
This is an article about possibilities - new ways to make certain unpopular
tasks faster, easier, and more pleasant.
Part one is meant for everyone. The emphasis is on folks who are happy
just assembling kits; more or less as the instructions tell them to.
Part two ventures beyond assembling kits. The ideas are meant to allow
you to modify, convert, kit-bash or just plain Frankenstein everyday kits
into whatever you wish.
Bear with me, please, for the way I wrote part one. I’ve had only
limited success in the past when I tried to share even the simplest of
these very liberating ideas. Too many of us have too many preconceptions,
which get in the way. I believe we’re both better off if I discuss
these fairly new, unusual processes as if I were doing a series of magic
tricks. In other words, I won’t reveal the secrets behind my magic
tricks, until you’ve actually seen the tricks. Seems only fair?
What we’ll discuss in part one amounts to great ways to fill seams,
gaps or holes. The process I’m about to describe allows that to
be done; but doesn’t end there.
OVERVIEW / SALES PITCH
The two halves of this simple but magical process are a homemade powder
and a water-thin liquid. When the liquid saturates the powder, the mixture
hardens within seconds.
Part of the powder’s magic involves its color. The powder comes
in a rainbow of colors. Each color becomes darker when saturated. What
this means is that there’s a very user-friendly indication of when
you have applied enough of the two-part mix for the task at hand; and
when you are about to sand too much of it off, after it has hardened.
I won’t discuss one-part, no-mixing, air-dry fillers or putties;
other than to say I’m not the least bit impressed with the vast
majority of them. I quit using all but one of those products, years ago.
(That one being Nitro-Stan
9001 automotive putty. I use it for after-primer touch-ups. You can
order it from Coast Airbrush
in Anaheim, California.)
Most two-part fillers or putties are something you mix up, away from
the model, first -- and then apply the combined mixture to the model.
Mix first; apply later. Then wait hours or days for each layer to harden
... all the while hoping it won’t shrink, flake, chip, or just plain
fall off. If it does, then repeat all of those steps ... endlessly.
Lame!! Infuriatingly inefficient!!
(My apologies here for aggressive “attitude,” but I’ve
always hated that! I assume many of you do, too? And welcome alternatives?)
This process is not like that. You apply one half of this two-part magic
mix to the model, in its raw state. You have the ability to pre-shape
it, if you wish: saving yourself oodles of time later, when sanding it
down. When you’re ready, add the other half of the process onto
the model. They will chemically combine, on the model. Boom! Done!
In minutes instead of hours, you’re ready to sand and prime. No
more screwing around with slow, fragile hobby putties! This magical stuff
has even replaced Evercoat’s fine auto body finishing putties for
a number of specific tasks, on my recent models ... and that’s saying
a lot, since I’ve made whole
models out of Evercoat’s stuff.
MAGIC LIQUID ACTIVATOR
I’ll explain the details of what an I’net hobby buddy calls
Ward’s Magic Seam Powder (or “MSP” for short), as we
go.
I’ll discuss the water-thin Magic Liquid Activator (or “MLA”)
product, once, now: because it’s a necessary part of every trick
I’ll demonstrate -- a subroutine, as it were.
Pour a few drops of the Magic Liquid Activator into a flat, disposable
reservoir of some kind. I use food container lids; specifically, cheap
yogurt cup lids made out of HDPE plastic. (High Density Polyethylene,
if it matters.) I use two of the lids for MLA liquid; and one for each
color of the powder I plan to use that session.
The reason for using two lids for the MLA liquid is simple: one acts
as a wedge, to tilt the other up, slightly: so the liquid runs to one
edge - where it’s easily picked up.
I use an old, worn-out X-acto #10 blade as an applicator “brush”
for the liquid. (Not a #11: the round, scalpel-like carving blade X-acto
calls General Purpose.)
Why a blade? Why rounded? Because a scientific principle called Capillary
Action will make that rounded metal blade act like a brush or a sponge.
(Not literally, of course: just sorta-kinda.) The idea here is that you
can pick up the liquid easily, just by touching the blade to the liquid.
You apply it to the Magic Seam Powder by touching a part of the model
that is near the MSP – and then letting gravity be your friend.
There are variations possible: my favorites are turning a blade at an
angle across the line of a straight seam; or pushing reluctant drops along
like hockey pucks.
You can easily gain better control of how much liquid will be applied.
Pick up however much wants to be picked up, from the little puddle of
MLA you’ve made; then lightly touch part of the wet blade to a dry
portion of your palette. What this does is “take back” some
of the liquid. Capillary action attracts some of the liquid to the palette’s
surface: where it remains.
For fine control of the amount of MLA on your blade-brush, don’t
dip it into the big main puddle: dip it into one of the smaller “take
back” puddles you’ve made.
When applying the liquid, don’t touch the powder directly, if
you can help it.
Learn to let gravity and capillary action work for you.
In some cases, you’ve carefully sculpted the MSP powder into the
exact shape you want your final hardened “part” to be. Touching
the shaped powder with a wet blade may take a chunk out of your sculpted
powder. And clog your blade.
Your blade’s edges will need to be scraped cleaned, rather often.
Blobs of the MSP / MLA mixture will be attracted to and harden on the
blade, as you work. It’s inevitable. But if you leave them there,
capillary action will stop working.
I have a cheap ($1 USD) retractable utility knife that I dedicated to
routine cleaning chores. A few quick scrapes with the utility knife’s
blade, along the sharp edges and tip of the rounded brush-blade, will
get it working again.
Your brush-blade does not have to be super sharp: just thin, round,
and clean.
I doubt I replace my brush-blade every other month: I just hone oldies
as needed. When I wear out a #10 for normal model work, it gets a new
job. (Aside: a former Navy Seal told me he was trained to lick a honing
stone; not use honing oil. It works great! I won’t vouch for the
taste, however.)
While the #10 X-acto blade style is the most common type usable as a
brush, it’s not your only choice. I also like X-acto’s #16
blades. I modified one by grinding off all sharp corners; rounding it
(as seen from the side); then used a honing stone to vaguely sharpen it.
(No sense risking cuts.) As you’d expect, smaller blades work better
than a big #10 blade, for chores requiring more precision.
LESSON ONE: FILLING EASY SEAMS
Every kit assembler has to fill gaps and seams, eventually ... and most
methods we’ve all been taught, basically stink. In my humble opinion,
this method beats any others I’m aware of. It’s very fast.
It’s very easy. (Once you’re used to it: like anything else!)
It works well on styrene, cast resins and other materials. And the end
result is both physically strong; and takes paints very well. I have even
stripped old paint completely off of models, with no new damage evident.
All of which will hopefully make it worth your while to read what’s
next. Since we’re laying a firm foundation with this lesson, this
one will be the longest.
I’ll bounce from one kit to another, with these examples. For
the first one, I’m going to use a version of a 1960’s Hawk
Model Company figure kit: specifically, the “Woodie on a Surfari”
kit, as re-released by Testors.
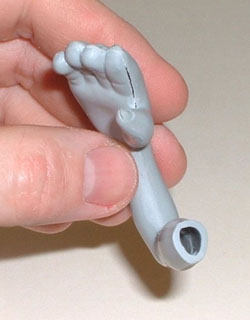
First picture: most of this figure went together with a minimum of fuss;
as did the kit’s other sub-assemblies. I was quite pleased. However,
one arm had a couple of small gaps to fill. (Small to me - your mileage
may vary.)
Note that while you could stick your kit parts together with this fancy
magical stuff, it’s my practice to use a plastic welding liquid
such as Tenax-7R for initial bonding of styrene plastic parts ... (qualifier
alert!) ... as often as possible.
I follow that up later, as needed, with this magical stuff.
It just makes sense to use a high quality plastic welding product like
Tenax, to reduce the number of problems you’ll have to solve later.
After a bit of practice with a liquid welder like Tenax, (applied with
a paint brush of some sort; mine are embarrassingly abused!), you’ll
be able to squeeze a small ribbon of melted plastic out, along the joint
line of most reasonably-matching mating surfaces, as you assemble your
kit parts. That little ribbon sands down quite easily; and will reduce
any evidence of seams. Even on an injected plastic figure kit originally
molded in the 1960’s, that tricks works well -- for proof, just
study the pics.
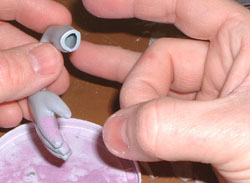
Next picture: it’s very hard to photograph any clear liquid, so
you’ll have to take my word for this -- but MLA liquid has just
been applied, along that open seam.
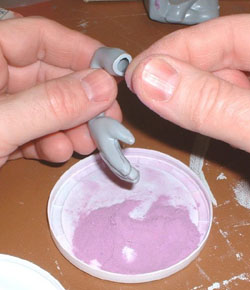
I have a fat pinch of the Magic Seam Powder between my fingers. I’m
ready to lightly sprinkle the powder onto the MLA liquid; which sits atop
that gap.
I’m exaggerating for silly effect, in the next shot. After the
powder has sat on the liquid for a few seconds, the next step is to tap
the kit parts: to shake loose any excess, unhardened powder. A light tap
or two usually does the job.
Note that I try to tap any excess off, over a wide container of dry
powder. That way I don’t needlessly waste any powder; or make a
big mess.
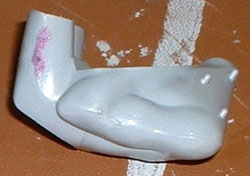
The next pic didn’t turn out, so I’ll be switching kit parts
for a second. I want you to get an idea of what MSP looks like, after
you’ve sprinkled it on MLA.
We’ll spend time explaining the implications of this photo, since
it’s another subroutine of sorts, which applies widely to any future
tricks we’ll do.
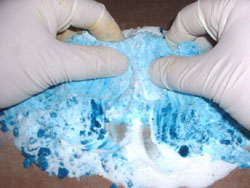
Note that the hardened clump has many dark and light spots; with the
light ones being what looks like dry MSP powder. That “dry MSP powder”
look is only true on the upper layers: the ones we can see. Beneath that
may be another story.
What’s going on? The liquid (applied first) absorbed all of the
falling powder that it could -- but in so doing, the two substances began
to combine, chemically; and the mixture of the two magic substances almost
instantly began to harden.
Some of the falling powder will stick to the outer layers of the now-mostly-saturated
mix ... even though there’s no fluid left, which will be ready to
saturate the powder, which still falls even after the chemical reaction
and hardening.
So, what you’re seeing are little islands of dark (saturated and
hardened) mix. Those areas sometimes stick up like little hills. Those
may be surrounded by dry powder; which sticks to “valley floors”
along the upper layers of that hard mix.
I don’t have the scientific background to explain the “why”
behind that. Probably what’s going on there is some form of crystallization;
or some similar effect. But if you want to think of it as little puddles
of liquid splashing upwards when dry powder falls on it, and then freezing
in mid-splash; that’s fine too.
The main thing is, these tiny little hills and valleys are common to
this particular technique. So it’s unlikely that you’ll be
able to fill something in one step, and have it glass-smooth. Which does
not mean you cannot have “glass smooth” – it just means
you can’t have it, in a single step.
If the shape of the parts I’m working on allow it, I use a sanding
stick to knock down the high points of the hardened mixture; and level
things out a bit. If I’m working in a confined space (like between
a figure’s thumb and finger), then I’ll break out some small
hobby files and knock the high points down, that way.
After that it’s just “repeat”. When you think it’s
done, hit it with some primer. In most cases you’ll have caught
most of the bugs; but a few may remain. That’s quite normal, no
matter what techniques or materials you use to fill and/or re-contour
an object. What’s different, here – and very good! –
is how quickly you can do all three of those steps; and be ready to repeat
them, if necessary. (I’ll use a stopwatch with one of the later
examples, to show you how fast it is.)
Back to the pictures.
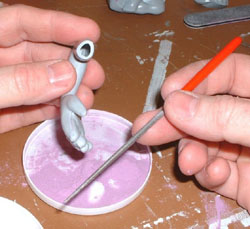
Off-camera, I filed down the quick-hardened clump, using a small rat-tail
file.
Keep in mind that 1960s figure kits, in injection molded form, have
problems to address that won’t be the case with a lot of other kits.
What I mean is, adding enough powder and liquid to fill a gap is one thing.
Not much is needed.
I’m doing that; but I also wish to re-contour the surrounding
area, if needed – and it often will be, when complex compound curves
bend and twist around; but are there to represent something that should
have a gentle radius, in real life.
So, I’m not showing you the easiest possible fix -- and thereby
“cheating”. If anything, I’m showing one of the worst
possible seam / re-contouring jobs, up front: to show off how well these
techniques can handle that problem.
When the shape is the way you want it, look for low spots and areas
that look like they might not have gotten all the saturation they need:
dry-looking areas.
When things are pretty much the way I want them, I apply what I call
a “Top Coat” of the MLA liquid; just to be sure I’ve
filled all pinholes properly, etc.
Better paranoid than sorry, I always say!
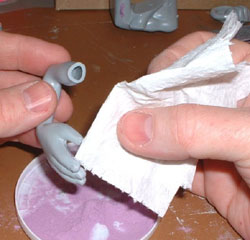
Next pic: this is a mix of good and bad things. I try to keep some absorbent
paper handy, whenever I’m working with these substances. I use it
for a lot of things. It’s good for pre-cleaning half-wet stuff on
a brush-blade, before I give it a good scrape-cleaning. It keeps the MLA
bottle’s cap area nice and squeaky clean, and free of any debris
that might prevent an air-tight seal.
And sadly enough, in this particular shot, I got carried away with my
top coat of MLA, and it nearly ran down the finger; and into the fingernail
details: causing me a bunch of unnecessary re-contouring work, later.
I wicked up the excess before it got out of hand: but had I not had some
bathroom tissue handy, I’d have been cussing myself out for trying
to do things in one overly-thick layer.
Keep the one big painting rule of thumb in mind, as you use these products.
As good as they are, it’s still an excellent idea to use multiple
thin coats as you work, instead of trying to get in too big of a hurry,
and use one really thick coat.
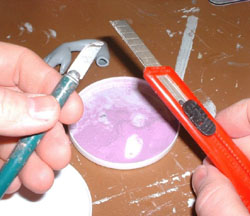
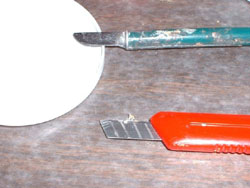
Seen next: cleaning your brush-blade. A few scrapes with a retractable
utility knife will clean your blade well enough for re-use. You’ll
be doing this rather often, I’m afraid. But after a while it’s
just routine; and it isn’t very difficult.
... and that’s it for filling the one relatively small, open gap
along that hand!
Once you practice enough to really get the hang of this you’ll
get a rhythm going, and it will only take you one or two minutes to fill
a gap like that one.
One last thing to consider, before we move on. Tiny amounts of the hardened
mix are unavoidably going to stick to the blade’s surface. You will
be dipping your blade back into fresh liquid. Even a barely visible amount
of the powder will start a very slow cure, in the MLA liquid. So ... accidentally
transfer as little half-wet powder as possible, back into your little
puddle of magic liquid! I only pour a few drops at a time; in part due
to this idea. A clean blade is a happy blade!
INTERMISSION
The main thing I want you to take from that first lesson is that you
can choose to add the MLA liquid to the model first; and then add the
MSP powder.
That’s one way to do things -- but it’s not the only way.
You can also do just the opposite: add the powder to the kit parts, first;
and then add the liquid, later.
It really doesn’t matter which one goes first; so long as you
make sure to fully saturate the powder with the liquid.
Personally, I find the latter method to be preferable ... but the other
one can sort of be seen as a prerequisite to learn, before using the more
advanced method.
Please really read these next ideas: don’t skim. Take some time
to ponder them.
Even though adding the MLA liquid, first, might be the least efficient
way to use these two magical materials, for the simple fix we just performed
it made the most sense. Why? The width of that gap was tight. Half a drop
of virtually any liquid could span that gap with no problem; and that
would be enough to “grab” both sides of the gap, at once.
In situations like that hand’s gap, surface tension (or some other
scientific effect) is enough to hold the thin MLA liquid where we put
it, long enough for us to drop some MSP powder on it; causing it to harden.
However, a fine dry powder would have fallen right through that gap.
Trying to put the dry powder on that gap, first, would have been like
putting it into a bucket, which has no bottom.
However, it’s still very desirable to do. (For reasons I’ll
explain later.)
So the trick then becomes figuring out creative ways to see kit parts
as if they were the side walls of a bucket; and to figure out how to add
a bottom.
We’ll be using that one powerful idea, over and over -- even for
the most advanced tricks we’ll discuss, in part two of this article
(book; whatever).
Where things really get wild is when you begin to realize that if the
“bottom” we are adding to our “bucket” has some
sort of a useful contour or texture built into it, then the hardened powder
can be said to have been “cast” inside a “mold”.
I know that’s probably a lot to wrap your head around. Don’t
worry: we’ll sneak up on it, little by little. We’ll learn
to crawl first, and then walk, before we run.
LESSON TWO: FILLING DIFFICULT SEAMS
This next lesson is sort of a reinforcement of what we’ve just
learned -- but with a few twists and turns that should be good food for
thought.
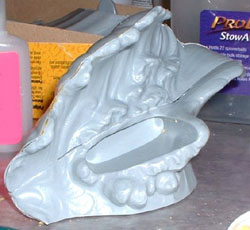
Kit-wise, I’ll pick on a portion of the Hotdogger
kit I reviewed in Oct.’s issue.
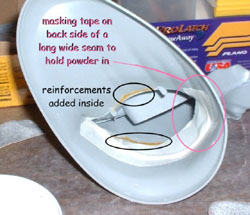
The next few pics show a quick and easy way to solve the “bottomless
bucket” problem. Masking tape has some unusual and useful properties.
We can use it as both a relatively stout “mold wall”; while
also using it as a “mold release agent”.
It doesn’t even seem to matter, very much, which side of the tape
you use. The sticky side will serve us quite well: it attaches itself
to our kit part (of course), and also helps hold the powder in (both by
being a wall; and in certain instances, the stickiness itself is also
helpful.) I used masking tape in other creative ways, on this build --
but I’ll save that for when I write a feature on this specific kit.
Quick reminder, to avoid confusion: the MSP powder comes in many colors.
In this example, I used a yellow powder. Why? It was within easy reach.
Earlier I said I used Tenax-7R for initial assembly, as often as possible.
That’s true. But Tenax and the other plastic welders depend on one
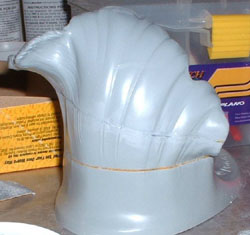
thing: two parts being in firm contact with one another. As you can see,
that’s not necessarily true in all places, on this kit’s wave
parts. The widths of the gaps change as the curvatures change: which means
I had to sort of stitch the base together.
In fairness: I expected those problems. Any radically compound curves,
molded in multiple parts in injected plastic form, are bound to have such
problems. For the record, the rest of the kit went together fine and dandy
-- “shake the box”.
The pics will give you an idea of my plan of attack, on the wave base.
Glue what I could, using Tenax. Next, use the gap-spanning trick we discussed
above -- on any part of a gap that would hold MLA liquid. That still left
many wider gaps, here or there. However, once those initial mixture “islands”
had hardened, I then had many three-sided gaps: that is, two kit-part
mating edges; plus one end of the little islands of hardened mix. Liquids
often stick to three sides easier than to only two, so little by little
I closed up the remaining gaps along the wave crests.
To do that, I used the steps of “liquid; powder; (sand or file);
then repeat” to do something I call “walking across a bridge,
as you make it”.
On long seams (or big holes) try touching your wet brush-blade to the
kit’s surface: very near a small border area where kit plastic butts
up against dry powder. (Avoid touching the powder, itself, as much as
you can.) Let gravity and capillary action be your friends. The dry powder
nearby will absorb the liquid you just added. Once it is saturated, it
will quickly harden. Since that area is now no longer dry powder, it won’t
hurt anything if you “step” on it with your blade-brush. So
do that, next: aiming to harden the nearest area of still-dry powder.
Those tricks fixed nearly all of the remaining gaps – except for
that really nasty looking (both wide and long) one visible along the lower
base piece. That’s the only area where I needed to use the masking
tape “bottom of a bucket” trick.
With these materials, and some practice using them, some of the nastiest
gaps can sometimes be the easiest and quickest to fix. When I got to that
biggie, things sped up. Other than cleaning the blade frequently, and
using bigger drops than I normal would, it was a “boom; boom; boom”
thing, along that big seam.
Summary:
Years ago I might have dreaded assembling that wave base; thanks to
the many gaps all over it. Now it was only half an evening’s work,
and it didn’t seem all that bad. It was slow work; yes. And often
boring. But not traumatic. It’s all a matter of having tools and
techniques that work well, with a minimum of hassle and needless (frustrating)
repetition. I happen to know a few useful tricks; so those gaps –
while I’d rather they not have been there – “weren’t
that bad”.
IN DEFENSE OF “BAD KITS”
I used to think certain genres just got no respect. I used to think
average kits made for military aircraft and armor modelers were consistently
made to a higher standard: that manufacturers patterned and tooled (molded)
all of them with more care than other kit types, from various less-populous
demographics.
I have since decided it’s not really genre that matters: it’s
how many times kit manufacturers have made a kit of a given subject. Think
about it. If you’ve made patterns and molds of some specific historical
vehicle a bunch of times, over the decades – and by “you”
I’m including all manufacturers: since they can each study the strengths
and weaknesses of competing products – then, presumably, the results
are bound to improve, each time. It’s like being allowed to correct
wrong answers on old school tests: the more times you repeat that cycle,
the better your answers. (And the more other papers you can cheat off
of.)
If I called up a hobby store and said I’d like to order a Bf-109
aircraft kit, they’d say “Which one? There’s forty to
choose from.” (Give or take -- and no offense meant!) “I don’t
know; you pick” as an answer may result in getting some hoary old
kit from the dawn of the age of plastics -- which some of you perhaps-overly-spoiled
types would treat as if it were covered in a deadly, flesh-eating fungus.
In the case of goofy little 1960s figure kits like the ones I’ve
been playing with in these first two examples, fans of the genre are lucky
if those kits got patterned and molded, even once. (Many cool drawings
never get beyond that stage, darn it!) So, while I may realize that some
random gift horse or other could use a bit of dental work, and maybe a
breath mint, I’m still grateful it’s a horse; and a gift.
LESSON THREE: FILLING SMALL HOLES
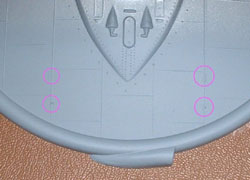
The next kit I’ill volunteer for a live picture demo is a 1996
Glencoe “UFO” re-issue of a Lindberg “Flying Saucer”
kit. (Talk about hoary old kits: the original was the first plastic sci-fi
kit ever made; way back in 1952!)
Why this kit? I had two of them, sitting around; there were two jet
engines I didn’t want to use, for one of the build-ups; and that
would leave four obvious holes to fill. In other words, if you can ignore
the subject matter and look at it strictly as a technical problem, it’s
one that could easily affect any kit genre.
Part of me is tempted to just say, “look at the pictures”
for this example. But some of you may want the extra hand-holding that
any process as new and perhaps weird as this one, may require? (Which
is fine.)
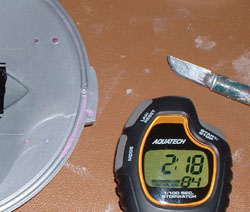
As you can see in the first picture, I filled the first two holes (off-camera).
Start to finish, that task took under a minute and a half. That’s
not “and wait two hours for it to dry” -- that’s stick
a fork in it, if you can; because it’s done!
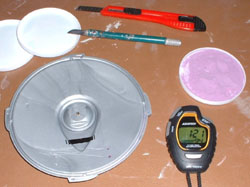
With two exceptions, all work done towards filling all four holes was
timed. I only “hit pause” on the stopwatch to play with my
camera’s set-up or composition; and towards the end, I forgot to
restart it before I shook up a can of primer.
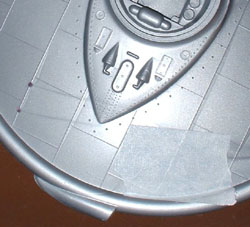
First picture: I used masking tape to cover all four holes; then I filled
the first two holes with powder, all the way to the top of each hole.
Next I did something non-intuitive: I made sort of a “V-shaped”
dent or empty space in the powder. (The intent being to apply MSP in thin
layers; and enable saturation.) I brushed away excess powder; then added
the liquid with a clean blade. Boom! Instantly, it set. Out of paranoia
I added a tiny bit of extra powder; then a liquid top-coat; then stopped
the watch. (Note: I intentionally let the hard mix stick up, above the
inner surface of the kit part, to show how smoothly it can be sanded down.)
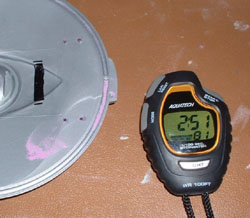
Second pic: same thing as above, except with the kit part flipped over,
and the tape removed from the filled holes. If you look closely you may
notice a light purple crescent near the top of the lower hole. That means
part of the powder did not get a drink. Shame on me: I didn’t follow
my own advice well enough!
Always work in layers you are sure you can saturate. The first layer
of powder you put into most holes, using these techniques (or variants
thereof) will likely be on the side that matters, when you’re done:
so you definitely want that layer to be as hard and smooth and pinhole-free
as you can reasonably hope for.
These four kit holes were deeper than they were wide. That implies even
more care than normal should have been taken by your impatient writer,
since these holes stood a better-than-average chance of having certain
problems related to increased difficulty in being able to see how thin
the initial powder layer was. The close, surrounding walls may have also
prevented an easy flow of the liquid.
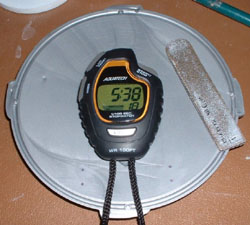
Third saucer pic: dry powder added to the next two holes; “V-shaped”
space made in the center of the powder, to assist saturation; excess powder
brushed away from the work area. (The “V” itself isn’t
an important shape: it’s all I could manage well, with a hole that
skinny ... and too much over-eager impatience. I guess that’s the
former Drag Racer in me: looking for another few hundredths!)
With wider holes, it would be easier to get shaping tools in there,
and work. If I had it to do over again, I might have first beveled those
holes, from one or both sides: figuring it would then be easier to control
that important first dry layer. (I remembered that idea too late, here;
but I did apply it to the next lesson.)
Fourth pic: Liquid added to both holes, instantly hardening the mixtures.
More powder added; excess pushed away; a thick liquid top-coat was then
added to both holes. Total time elapsed since the last photo: 33 seconds.
(See why I’m so spoiled about all this!? The no-wasted-time speed
can be heady and addictive!)
Fifth pic: just under three minutes later, the hardened mix that was
sticking above the kit’s (inner) surface has been sanded down. It’s
not “Contest Perfect” but it’s not bad: more than good
enough for many of Hollywood’s film models. (It’s easier to
see flaws in person, than in nearly any single-angle photograph.)
I don’t give up easily on my collection of poor, abused sanding
sticks! When both of the two factory ends become too worn for reasonable
use, I cut the sticks in half, using a razor saw. Sometimes squared-off;
sometimes at an angle: both types have many uses. Since I tend to wear
the ends of my sanding sticks out long before the middle, cutting it in
the middle gives me two new, fresh ends.
Sixth pic: I love Plasti-Kote’s primer! Even in a very tiny town
in a very remote area of New Mexico, my favorite local hardware stores
stocks it. Six bucks a can, but worth much more. It dries so fast it’s
not funny. (It also stinks up half the known universe, when it’s
used -- so no fair trying to spray it indoors, if other living beings
will be breathing the rather strong fumes. Safety first ... always!)
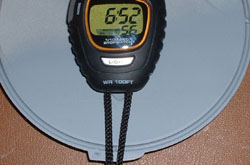
Seventh and eighth saucer pics: both sides of the primed piece. Close
inspection of the pics shows it isn’t perfect. I see two pinholes
on the right side; plus that crescent of unsaturated powder (that later
fell out, since it was just loose powder) ... but considering I was able
to fill four holes, sand one kit side flush, and shoot a coat of primer
over it; all in under seven minutes ... wowsers!!
Summary:
Now do you know why guys like David Merriman use words like “crap”
when they give their opinions on the one-part, no-mixing, air-dry hobby
putties?! (I’m sure others may love that stuff: and more power to
them. But I ain’t goin’ back!)
We’ll talk more about powder color choices, and the opacity of
the hardened mix, in part two. Short story: using a medium-dark powder
color and adding it to the kit parts before you add the magic liquid,
is often ideal. The added opacity of the hardened mix is a definite plus,
when it comes time for sanding. You will know exactly when it’s
time to quit sanding, so you won’t cause yourself “re-work”.
LESSON FOUR: OTHER POSSIBLE “BUCKET BOTTOMS”
There are situations where using masking tape as a “bucket bottom”
is not ideal; or even possible. (The insides of a small, pre-assembled
finger on a figure kit, for example.) However, by no means is masking
tape the last trick a clever mind can come up with! Keep thinking, until
you come up with some plan that might work, for your current situation.
And then try it. Observe the results. Learn what you can from the experience.
Then adjust as necessary; and try again.
Here are a few “lateral”
ideas I tried and liked, in addition to masking tape.
TISSUE PAPER BACKSTOPS
Sometimes, a restricted area is cooperative enough that it will allow
you to shove bathroom or facial tissue into or near it. I’ve tried
that a few times; with success each time. What happened for me is that
a small portion of the tissue crammed into some small nook or cranny of
a model gets wet, when you saturate the powder it is holding up. So, the
wetted portion sticks to the hardened powder; becoming part of that blob
of hardened material. That part (that got wet) won’t come back out;
but the rest of it is still dried tissue, which tears off/out easily.
Not tried yet, but logical enough: if you’re in the habit of washing
your models prior to paint, any dry tissue left inside a model’s
innards might just dissolve.
MOIST POWDER
Earlier I said, “A fine dry powder would have fallen right through
that gap.” The most important word in that sentence was “dry”.
I have experimented with pre-wetting MSP powder, ever so lightly, with
a liquid similar to water. Why? To get it to stick to itself; and to a
lesser extent to stay where I put it, in a particular gap situation. (An
open “cone” seam, with a bottom skinnier than the top.)
The trick is in realizing that when pre-saturating the MSP powder with
any water-like substance, there’s far less of a chance for the MLA
liquid to saturate the now-no-longer-dry powder. (Hence my caution in
telling you not to go nuts with the first liquid: or the more important
one won’t work!) What worked in the end was a variation on “take
back piles”: I poured a few drops of liquid on some dry powder on
my palette/lid; threw out the big wet clump itself; took some of the very
lightly moist powder nearby; mixed that with some dry powder; and used
it.
It actually worked reasonably well, for what I needed to do at the time.
The hole was deep enough and angled enough (wall-wise) that the slightly
moist MSP did cling to itself, and stay where I put it, more than long
enough to apply a thin layer of dry MSP above that; with a medium-light
application of MLA, over that.
It was a bit of a pain to saturate half-moist powder, properly: but
with each layer I added, the hardening of the one below it acted like
a barrier. So as I went up, it acted more and more like you’d expect
dry MSP powder to act. The stuff that was at the bottom, when it dried
out enough, came loose and fell or crumbled out on its own. (If one were
washing their kits prior to paint, it’d wash away.)
HOMEMADE C-CLAMPS
You’re probably chomping at the bit now, for me to tell you what
this stuff is?! On the assumption that you’ve probably peeked ahead
by now, I’ll add one more example; and then finally come clean on
all of the secrets I’ve withheld so far.
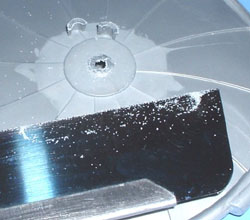
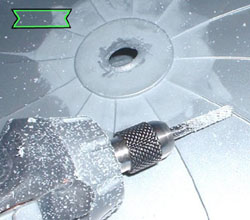
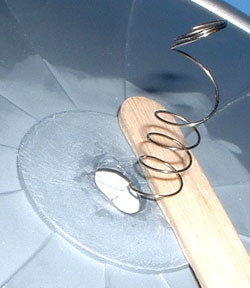
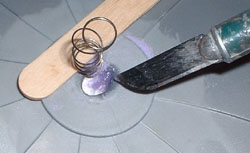
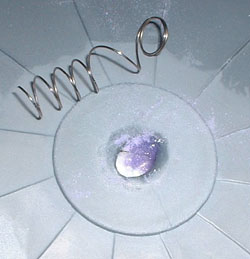
The photos show more work done to that Glencoe UFO kit. What happened
was that I got a wild hair somewhere to cut the old display stand’s
attachment points off of the bottom of the kit ... days after firmly welding
the hull halves together.
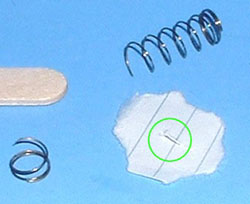
I was going to try to do something similar to what I did; except by
feeding a string or thread through a “bucket bottom” made
out of a torn index card. And then I saw a small spring near my workbench;
and a mental light went on. I’ve seen springs used in some pretty
wild, lateral ways (like spacers on bead looms), from time to time. So
I cut one end off of this one -- with a moto-tool’s cutting wheel;
while wearing good eye protection! -- so I could feed it through a slit
I had cut in the card: as if the spring were some sort of needle with
a screw-like twist in it. I made sure to thread in at least a couple of
turns of the spring, so it had a firm grasp on the bottom of the index
card. I then wrapped the card, as best I could (had to tear more of it
off, after a failure or two), in a circle around the outer part of the
spring. This let me shove it down through the hole in the kit; a bit further
than that; and then snugly back up, against the hole. A craft or Popsicle
stick slid under the spring; stretching it, and tightening it. The end
result was a small “C-clamp” device which held the index card
in place. Then I had the bucket bottom I needed; and could add my layers
of powder and liquid.
Note: if you’re viewing this article online, roll your computer’s
cursor over the thumbnail images you see. Hover there. The file names
I used should appear. That will give you “photo captions,”
which will in turn add a few more details.
MAGICIAN’S SECRETS -- REVEALED!
A confession: right from the start, I distracted you with one hand,
while my other hand did the actual trick. What I mean is, the real magic
behind all of this is done by the liquid, not by the powder. The powder
is important to all of this -- don’t get me wrong; but the liquid
matters a great deal more.
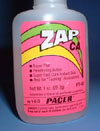
The magic liquid is – (drum roll, please!) -- “Zap CA”
brand water-thin super glue. You can buy it in most hobby shops and/or
craft stores. It comes in a small squeeze bottle, with a pink-colored
label. (I airbrushed the distinctive label out, way back in the wave base
pictures; sneaky little cuss, aren’t I?! Heehee!)
That company also sells other, thicker styles: but for the tricks above,
saturation is absolutely necessary, so I can’t recommend anything
but the water-thin type. (If you want to independently experiment with
more than one type; go for it!)
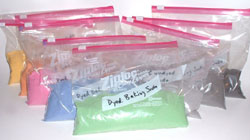
Magic Seam Powder comes in three basic varieties. The first one I tried
to dye or tint or color, way back in May 2007, was simply baking soda.
When I was excitedly telling others about all this, online some months
later, I was told I should try talc; so I did. I’ve since tried
mixtures of both powders. All three types have great features, when used
with the water-thin super glue I recommended.
As far as differences between using baking soda and talc -- I am much
more familiar with baking soda, at present. I’ve used it a lot longer.
I’ve only used talc for about two months now. I can tell you that
baking soda sets up super-hard, super-fast: which, once you are used to
the idea that you’d better sand or file or grind it down quickly,
is a boon instead of a bad thing. Talc takes longer to set, and files
down a lot easier (during the first few minutes to half an hour or so).
I’ve found that a 50/50 (1:1) mix of the two has enough of the
best of both powder’s features, that I’m using that mix, more
and more. I keep a 35mm film container full of it; and tend to use either
that or straight baking soda, more often than any of the other ratios
of combined powders, or straight talc.
But even that isn’t the full truth. (Are you ready for this?)
The real magic behind all of these tricks is ... water molecules.
It isn’t so much the baking soda or the talc that does the magic
in these tricks or lessons, so much as the fact that super (also called
CA or cyanoacrylate) glues are designed to cure in a much faster way,
in the presence of water molecules.
Don’t take my word for it; take Wikipedia’s.
Baking soda simply has a lot of water molecules hanging around, just
waiting to “supercharge your super glue”.
So do a lot of other things: including bathroom and facial tissues;
other papers; your skin; and ordinary air. (Hence my wanting airtight
seals, on my CA bottles!)
One thing I didn’t mention before, for fear of spoiling the surprise,
was that an eye-blink-quick wipe with a dry piece of tissue adds just
enough water molecules to start the curing or hardening process. The way
I use it, I not only wick up excess with tissue, but I sometimes cure
one thin, final top-coat with either a quick wipe of a tissue, or a brief
touch with a fingertip. Using fingers is less of a hassle with pure talc:
the slippery nature of talc helps fingertips stick less.
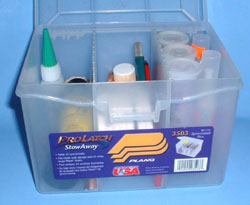
Check out, in one of the last photos, my little portable toolkit with
all of the stuff I take with me when I build stuff away from my usual
workbench. It’s hard to make out the label, but the bottle on the
upper left is not glue: it’s “debonder” or “un-cure”.
(In a pinch, ordinary acetone may un-stick some super glue bonds.)
My recommendation of one specific brand of water-thin super glue has
more to do with the bottle style, than with the glue itself. Other brands
always tick me off by hardening in the bottle, long before I’ve
used a third or half of what I paid for; let alone all of it. I’m
far too poor and/or cheap to buy inefficient products you have to be in
a race to use up! Fact is, I just polished off the bottle seen here, after
over a year’s regular use. Good to the last drop: literally! Right
now I am using a bottle that I opened about a year and a half ago; and
then put in a place where I’d remember it (ahem!); and forgot all
about it, until the other one ran out. It also has not given me any early
gelling or “hardening in the bottle” problems. (I’m
open to suggestions on how to prevent “bottle curing” on those
other, screw-on top products. Until then, I’m a very happy “Zap
CA” Man!)
Down sides? Some people are allergic to super glues. Some are just afraid
to try anything new. (Hence me showing the tricks; then mentioning the
materials. I’ve had far too many “that won’t work”
reactions in the past -- while knowing it not only works, but works great!)
Safety concerns? Not many. See part two for more of that sort of thing;
including debunking some odd but persistent rumors.
The one thing that seems like a big negative -- at least to newbies
-- is how hard this stuff hardens. If you read the Wikipedia article I
linked to, earlier, you’ll see that they talk about the chemistry
of CA glues. They mention a two-hour span of time, before super glue sets
up as hard as it ever will. It’s about as hard as kit plastic or
resin generally gets, much sooner than that. If you go out and see a movie,
and come back, get ready for some quality time with good files!? But if
you discipline yourself to think in three steps – powder; liquid;
sand it down – and remember that last one as you work, it’s
a problem of very little concern, compared to all of the positives the
process can add to your modeling life.
LESSON ZERO: MAKING YOUR OWN MAGIC POWDERS
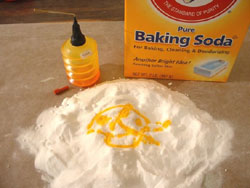
Step one: acquire the raw materials.
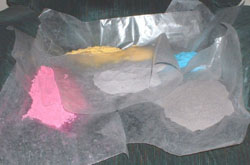
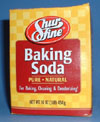
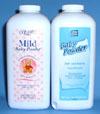
Powder-wise, you’ll need baking soda and/or talc.
When shopping for baking soda, make sure it’s just that: not baking
powder or cornstarch. When shopping for talc, look for “talc, fragrance”
as the only ingredients. It may only say “sodium bicarbonate”
on a box of baking soda.
I have consistently had excellent luck with cheap, off-brand powders.
I’m even half convinced the Shur-Fine brand baking soda has a slightly
finer grain to it.
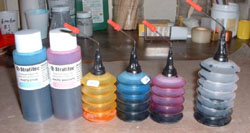
Dye-wise, almost any random generic inkjet refill kit will do …
but make sure it’s capable of doing colors! (Some kits only contain
black ink.)
Shop well, when you look for inkjet refill kits. I say that because
I picked up a generic kit at Sam’s Club two or more years ago. It
included all sorts of extra stuff I figured I would never user; yet was
cheaper than other kits which didn’t have all the extras. The best
bonus: two tall bottles of “photo” inks, which my printer
can’t use. I have long since used all the other inks up for printing:
but those red and blue photo inks may last me years, for dying these powders.
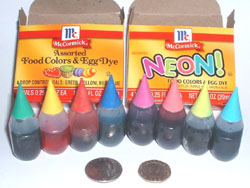
Alternate dyes: food coloring works well. I have used it enough to recommend
it nearly as high as the inkjet refill inks. It’s four or five times
cheaper per box: but won’t last remotely as long, due to its much
smaller capacity per bottle. It even comes in some very bright colors:
quite useful at times, if the colors of other inks aren’t cooperating,
when you try to custom-mix cool new colors. (This is what I used to pre-moistened
dyed MSP powder; to pre-pack that “cone-shaped” gap.)
Not recommended: I tried a bunch of things that didn’t work well
enough to tell you about. Artist’s waterproof inks were the closest
“no”. The fancy ones for use in technical pens and the like
may cause the powders to clump up, rather badly, after they have dried
back out. They’re usable: just not highly recommended.
Thank John Lester for this tip: always use a fresh box of baking soda.
Don’t risk using one that’s been sitting in the fridge forever,
sucking up who-knows-what into it. (I have yet to figure out where rumors
of baking soda doing all sorts of weird mutations, long after the fact,
may come from -- but that’s way up on my list of suspects! I figure
my top-coating practice eliminates those possibilities.)
Mixing tips: use gloves! Inkjet inks do not fool around: without gloves,
you may stain your fingers for days! (And be careful with the sink; carpets;
and ...)
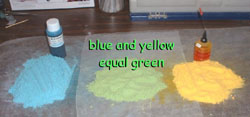
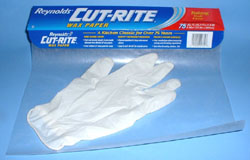
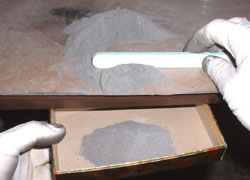
Let newly-dyed baking soda dry out, before you try to use it. I just
lift up the over-sized wax paper I use to protect my workbench, when I
dye the powders; carry that batch to some place I can set it down; and
leave it there overnight.
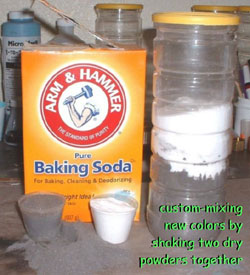
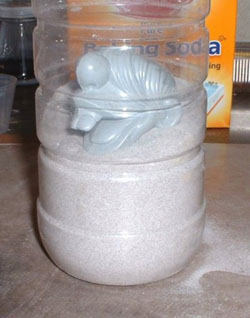
That tall mixing container is from a “Snausages” dog treat
product. Handy for a bunch of uses: including storage of tall thin things
like brushes, if you’ve nothing better. Here I’m just using
it as a shaker, to mix dried powders. It’s quite handy: a zillion
times faster and easier than blending custom colors using your fingers.
Early on, I got bad results on custom color mixes, when I tried to mix
two wet inkjet ink colors at once. Red and blue came out as a charcoal
gray, instead of the purple I expected. I’ve played more with it:
food coloring doesn’t do that.
Talc alone might fight you somewhat, when you try to dye it. The 50/50
mix I talked about can be mixed as un-dyed powders, first; then dyed later.
With the addition of some baking soda, the talc’s resistance to
being dyed isn’t bad.
Darkness is a color-mixing concern. (See part two for more info.) When
I first started dyed baking soda, I went way too dark with it. I mixed
it how I wanted the final colors to be -- not yet realizing they would
darken several times over, when they became saturated with water-thin
super glue. I started mixing up lighter and lighter batches. The last
few have almost been too light. Shoot for maybe two thirds of the final
powder darkness you want, as a starting point.
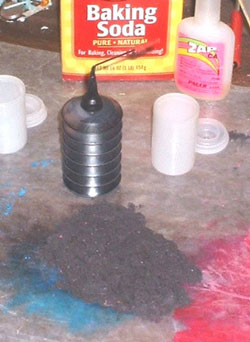
Don’t do what I show in the first dry-mixing picture. Much more
dark powder than light in that container, means it won’t really
lighten up very noticeably. Better to start with white, and add other
colors to it, a little at a time, than to try to lighten up something
that’s way too dark. I also put too much powder in the container,
in that shot. I shoot for two-thirds empty space: it’s easier and
faster.
Don’t despair, if you’re down to your last few drops of
inkjet refill ink. Add water to the ink. You’ll be surprised how
far the last drops will last. (But at a possible cost of having a more
course final powder: didn’t do it enough to say for sure.)
That’s it for part one! Check out part two next month for other
cool tricks.
|
|
