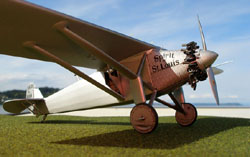
Revell 1/48 Ryan NYP
Spirit of St. Louis
|
 |
Introduction
I reviewed Revell’s new kit of the Ryan NYP in the February
2006 issue of this magazine.... That review was too kind and generous.
Building the kit revealed many discrepancies, inadequacies and errors
in Revell’s presentation of this iconic subject. In their defense,
though, I must say they did a pretty good job presenting a pretty good
kit at a very, very reasonable price. A reader, I’ve lost his name,
of that initial review sent me a recommendation for what turned out to
be the best reference on the airplane. I used all of the references listed
in my initial review in building this model and have listed the “new“
book, and four others, here below.
A bit of trivia for all you good readers of Internet Modeler. My research
on the SoSL turned up no evidence of a relief tube for Charlie. A couple
of the books referenced below, and in my initial review, explain this.
He took an aluminum container with him with a cork in the top. When he
arrived over France he threw the full container over the side to avoid
embarrassment at Le Bourget.
I’m trying a new aproach to writing a “build-article“.
Instead of the usual, “...and then I glued the...“ narrative,
I’m using a listing of the things done with amplification as required
for clarity. I’m also using more photos now that I have acquired
a cheap digital camera. Let me know what you think of this approach.
The Build
-
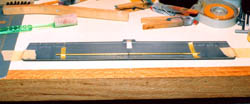
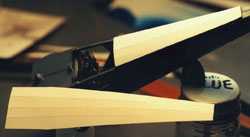
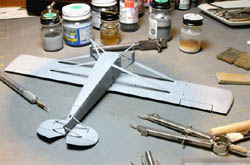
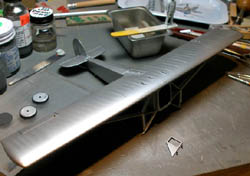
Added about a quarter to a half degree of dihedral with a brass
tube spar.
-
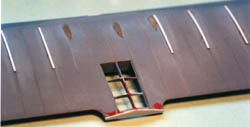
Replaced/relocated fuel filler fairings/vents with parts cast in
epoxy.
-
Deleted all underside ribs, which were different in number from,
and did not align with, the upperside ribs.
-
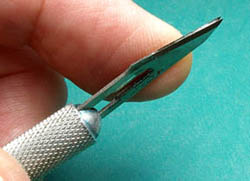
Re represented underside ribs with rib tapes lightly scribed with
two #11 scalpel blades AC’d together.
-
Added top side rib tapes the same way.
-
Scribed reinforcing patches around the holes drilled for aileron
control cables and around the wing tank drains and cabin air intake.
-
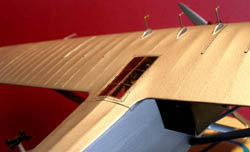
Added cabin air intake.
-
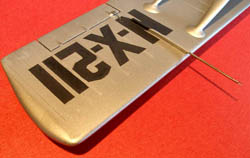
Made a replacement pitot tube of Monel tubing and brass wire.
-
Fabricated a proper skylight window to replace Revell’s flat
lump of plastic.
-
Enlarged wing strut tip fairings on wing by building up with filler.
Nose
-
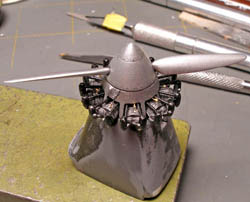
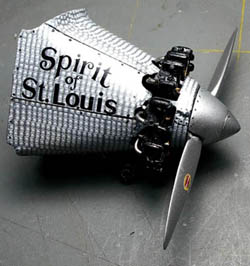
Enlarged magneto fairing bumps on fore cowl.
-
Detailed spinner with root cut outs for blades, scribed end cap
and impressed screw pattern.
-
Replaced plastic push rod tubes with metal rods.
-
Replaced plastic exhaust pipes with thinned wall brass tubing.
-
Replaced plastic exhaust pipes to carburetor heat exchanger with
wrapped guitar strings to represent the asbestos lagging.
-
Added spark plugs and high tension leads front and back for the
dual-ignition.
-
Added the three small vent pipes at the leading edge of the wing.
Fuselage
-
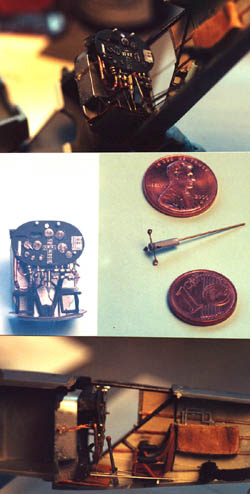
Detailed interior: corrected seat structure, removed leather seat
cushion, made inflatable rubber seat cushion, made Earth Inductor
Compass control head outboard of seat on the right, made magnetic
compass mounted on skylight stringer, detailed, wired, plumbed instrument
panel, detailed and rigged controls and so on.
-
Made a windmill for the Earth Inductor Compass that is more to
scale than the plastic original provided by Revell.
-
Made new fuselage top and belly skins of .010“ styrene sheet
internally embossed with stringers Harry Woodman style.
-
Removed raised stringers from fuselage sides.
-
Made a new door of sheet brass lined with styrene because I lost
the original plastic door. Ich bien ein dummkopf!
-
Made an inside door handle.
-
Replaced grab handles with brass wire.
-
Drilled holes for rudder and elevator cables.
Scribed reinforcing patches around said holes.
Tail
-
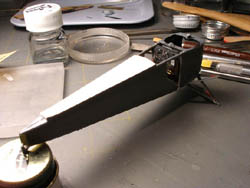
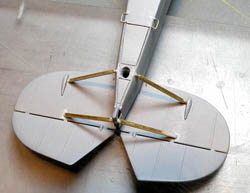
Separated fin/rudder from right fuselage half.
-
Separated and discarded plastic struts from rear fuselage belly
piece and replaced them with brass Strutz.
-
Sanded off all raised ribs.
-
Scribed rib tapes as for wing.
-
Replaced oversized plastic fin anchor with a vee of brass wire.
-
Detailed elevator trim mechanism.
-
Made fin root gap closers of sheet brass to replicate sheet aluminum
oringinals.
-
Added quarter-teardrop fairings for elevator trim joints.
-
Drooped elevator and displaced rudder.
Landing Gear & Wing Struts
-
Replaced all four wing struts with new struts of the proper chord
made from Contrail Strut Stock as the originals were all too narrow.
-
Filled, and generally refined, the complex struttery involved with
the landing gear.
-
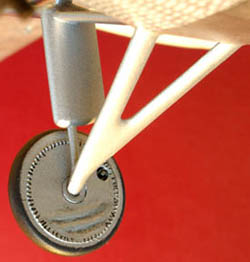
Replaced the tubular lower members of the LG with brass rods for
strength.
-
Replaced wheel hub nut fairings with parts cast in epoxy.
-
Carved wrinkles in the fabric wheel coverings.
-
Made replacement venturi for finer scale effect.
-
Refined tail skid.
Finishing
-
The plane was sprayed overall with Mr. Color No.8 Silver as I could
not get the new formula Floquil Old Silver to work for me; the pigment
appears to be too coarsly gound in this new formula to be satisfactory.
That’s a pity as Floquil Old Silver has been my first choice
for silver for decades.
-
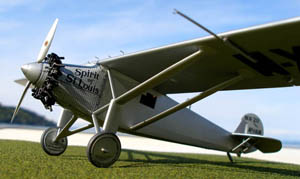
Revell’s use of decals for the damascening on the cowling
was a brilliant solution to a difficult problem. But I wish they had
provided for some overlap of the six individual pieces as they didn’t
fit worth a damn. The top piece has to fit a double reverse compound
curve and a plane surface won’t do that without a lot of softening
and/or stretching. The Revell decals do neither as they are nearly
impervious to setting solutions. I ended up cutting several slits
into the top decal and flooding it with 50 year old Walthers Solvaset
straight from the bottle. Solvaset is really strong stuff! A lot of
pushing and prodding with a water-wetted finger finally got it to
lay down. I wound up with gaps here and there between the six decal
pieces and in the slits I had cut. Hand retouching with a very fine
brush finally put everything right and it looks pretty darned good
if I do say so myself. I emphasized the cowl panel lines and fasteners
with a fine pen and ink.
-
When the nose unit was finished the damascened area was oversprayed
with clear gloss auto lacquer.
-
I used the kit decals on the rudder.
-
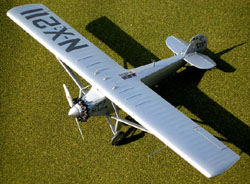
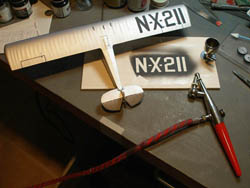
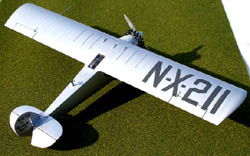
Revell got everything about the wing registrations wrong; even
the proportions of the dashes are wrong! I made Friskit stencils from
copies of the Dale Caldwell drawings in Ev Cassagneres’ book,
refrenced below, and sprayed the registrations with Floquil Grimy
Black.
-
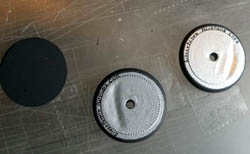
Before assembling the inner wheel centers to the outer wheels/tires,
I thinned the plastic around the holes for access to the valve stems
and glued a couple of wire “spokes“ and the valve stems
on the inside. So now when a very critical examiner looks inside one
of those holes he can see the spokes on the far side of the wheel
and the valve stem on the near side. AMS anyone?
-
I sprayed the wheels silver and then made a styrene disk with which
to mask the silver for spraying the tires Floquil Grimy Black. I hand
lettered “Silvertown Airplane Cord“ onto the silver-painted
side walls of the tires with a Micron brand No.005 black pen. I also
shaded the wrinkles, previously carved in the wheel covers, with gray
pastel chalk powder.
-
A little touch-up here and there, rigging the controls and the
plane was finished.
-
The silver painted areas of the model were lightly oversprayed
with Testors Dullcoat.
Conclusion
This was a tough build. I started it on January 30, 2006 and finished
it on April 20, 2007, the night before our IPMS-Seattle Spring Show, after
investing 286 hours in the process, exclusive of research time. There
were several time-outs for vacations, surgery and such but all-in-all
it was a satisfying experience. I learned a great deal about the SoSL
and the people involved with it from my research. An open question continues,
however, to bother me; when is someone going to issue a good kit of the
Ryan NYP in 1/72? The Frog and Hawk/Testors kits are worthless.
Added References
-
The Untold Story of the Spirit of St. Louis: Ev Cassagneres, Flying
Books International, USA, 2002, ISBN 0-911139-32-X.
-
Conquest of the Atlantic – Pioneer Flights, 1919-1939: Phil
Munson, Stenlake Publishing, UK, 2002, ISBN 1-84033-180-1.
-
Lindbergh – A Biography: Leonard Mosly, Doubleday, USA, 1976,
No ISBN or Library of Congress numbers.
-
Atlantic Wings 1919-1939, The Conquest of the North Atlantic by
Aeroplane: Kenneth McDonough, Model Aeronautical Press, UK, 1966,
No ISBN or Library of Congress numbers.
-
Die Grossen Atlantik Fluge – 1919 bis heute: Carlo Demand,
Motorbuch Verlag Stuttgart, Germany, 1983, ISBN 3-87943-909-5.
|
|

