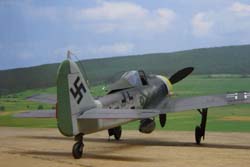
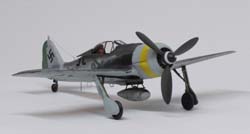
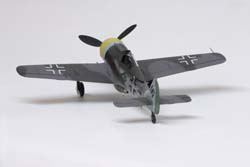
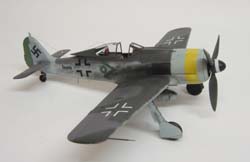
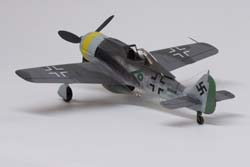
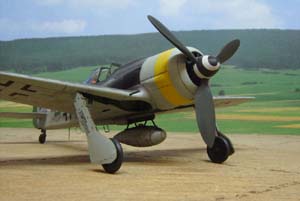
Eduard 1/48 Fw 190A-8
|
 |
To start off I must say this is one of the finest models of the Fw 190
out there. For those familiar with recent Eduard kits, this is no different,
with recessed lines and lots of detail. You have a good choice of four
different markings for the Fw 190A–8/9 on the decal sheet, too.
To see what comes in the box, read my review in the November ’06
issue.
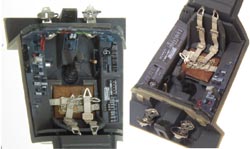
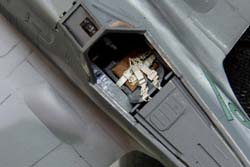
The first step is the cockpit, and this is the best part of the kit;
you get some nice prepainted photo etched parts. Just take your time in
cutting them off the tree. I put down some tape and then put the part
on the tape and made the cut. This way it will not go flying off to the
other side of the room. I painted the tub with RLM 66 and started to put
in the photo etch parts. The only thing that I did differently was to
put in some clear plastic (.005) between parts PE6 and PE7. This will
give the glass look on the instruments. I then added the seat belts. I
made some attachment points where the seat belts attach to the tub and
that was it.
I then put the fuselage together. At this point you must decide if you
want an open or closed kit (gun bays and engine compartment). I wanted
to have it closed up so there were some things that I did not do in the
next steps.
The wing is next. This is where you must follow the instructions. If
not, you will have trouble getting the landing gear and the engine cowling
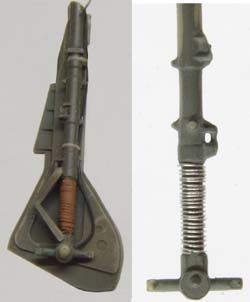
to line up. First the spar must fit just right or you will have issues
with the landing gear. I think the Hasegawa kit has a better attachment
point here, with its square peg. I made a jig with the correct inward
angle of the strut to the wing and to the fuselage, to make sure I had
everything right.
The new HT Model Special on the Focke-Wulf FW 190A/F/G/ is about the
best book for reference that you can get. They have factory drawings of
the Fw 190 and some T.O. drawings of the landing gear that help out a
lot. It has some very nice color pictures of Fw 190s that are still around,
and some very good pictures of the engine and cockpit.
I made some gun barrels for the wing cannons out of hypodermic tubing
and that finished the wing. On the top wing you will have to cut out a
notch where the back of the gun door will fit to the wing if you have
it closed. The next step is gluing the wing to the fuselage. I did a lot
of dry fitting to get it just right (then you will not have to use any
putty.)
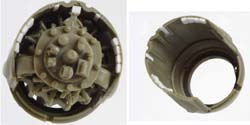
Following that is the engine. They have a nicely detailed BMW 801 engine
in the kit, with two cooling fans (one with 12 blades and one with 14
for the late BMW 801). They also have two propellers: a VDM metal propeller
and a wooden propeller. I did not use the kit exhaust as they look too
small and out of scale. I made some new ones and glued them to the engine
cowling. Whether you have the kit open or closed the next step is very
critical to how the engine will fit on the fuselage. The engine mounts
must be in the right place for the engine and cowling to fit the fuselage.
I did a lot of dry fitting here to get a good fit.
The aircraft that I wanted to do was an Fw 190A-9, and you have all
the parts to do A-9 in the kit. There are some good pictures in the Luftwaffe
Warbirds Photo Album Vol. 1 and Vol. 6 and Aeromaster has a decal for
that aircraft. I painted the model RLM 75 and RLM 74 with RLM 76 undersides.
Eduard has four different markings in the kit so you will have a good
selection to chose from. I then put a coat of Future Floor Wax on and
decaled the model. The Aeromaster decals for the green chevron and the
Gruppel bar was a very bright green so I had to re paint them with some
RLM 25 green. I also painted the rudder RLM 25, and added the yellow band
on the cowling. Next I did a wash of black and burnt umber. I put on a
coat of flat and let it dry for a day. Next was adding the canopy. Eduard
has done something here that no other manufacturers have done. They have
two canopies: one common flat and one blown. Eduard has included a canopy
for the open position and one for the closed position of both canopy styles.
The open canopy is narrower than the closed one.
I then added the land gear and use the jig to get the right angle, and
added the cannon to the wing and the pitot tube. With the blown canopy
open, the antenna will hang down alongside the fuselage. I had to use
some very fine wire to get it to work, but it sure looks good.
Is the kit worth it? YES. Out of the box you will end up with the best
FW 190 out there. Yes, there are some issues with the kit but not enough
to matter. If you take your time and follow the directions, you should
have no trouble. It is 1000% better than the all-black Aurora 190 kit
of the 50s.
References:
-
Squadron Number 22 Walkaround Focke-Wulf Fw 190A/F
|
|

