Ward’s Magic Seam Powder”
Part 2 of 2 parts – Filling seams, gaps and holes
|
|
INTRO
Part one of this two-part article covered some relatively simple tips
and tricks regarding assembly of scale model kits; and showed you how
to dye baking soda and/or talc, for use with water-thin Zap CA super glue.
Part two assumes you’ve already read part one; that you tried
the tricks there; that you’re either comfortable with those tricks
now or feel you may be, later; and that you’re eager now, to find
out how much farther this can all go.
The first part was pretty linear and structured: what comes first, what’s
after that, etc. It had to be. Because we’ve already covered the
basics, part two can be more free-form. It’s intended as a tasty
smorgasbord of food for thought.
Because I want readers to try these materials and techniques for themselves,
I’ve also included a number of “the author isn’t so
smart, after all” morsels. I’m not trying to promote myself,
here: I’m trying to promote tools, materials and techniques that
you can use, to make your scale modeling time more pleasing.
HOW FAR CAN ALL OF THIS GO?
The truth is, this is all just how far one person has gone down this
path, so far. I’m sure I’m barely scratching the surface.
The idea of using baking soda along with super glues (of various types)
is probably several decades old. Gotta be more majorly cool tricks out
there than this one writer knows about, at present!?
Even so, I think I managed to do some pretty cool and wild things with
these under-appreciated hobby materials, in the six months since I got
the bright idea to give up on trying to dye super glue, itself; and to
dye baking soda, instead.
If you readers have cool ideas to share: submit them! I have found Internet
Modeler’s publishers to be very willing to enable scale modelers
to hear about anything new or of possible interest. Submit it to them
or to me: your choice.
Update – just hours before I was going to hit “send”
on this part of the article, I noticed this cool new mini-article
about this subject, over at Starship
Modeler. (It’s alive! And there’s video!)
LESSON FIVE: PAGING DOCTOR FRANKENSTEIN!
Let’s start off with something relatively “Lite” –
the idea that super glues were made to stick things together. (I had to
avoid that topic in part one: to hide the big secret.) Earlier I showed
you some pretty big gaps and seams in kits -- which I had the gall to
sum up as not being all that bad. Can you see why, now? (Ha!)
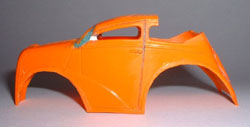
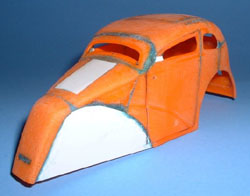
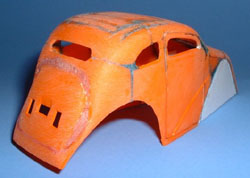
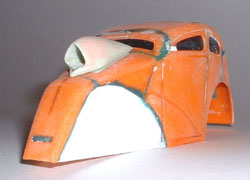
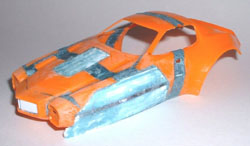
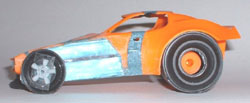
You’re looking at three automotive cartoon (‘toon) kits.
Two underwent more than their fair share of unlicensed, student Med Tech
surgery. They started as ‘toons ... and when I’m done with
them, who knows what they’ll be: cooler, I hope? If not, than at
least different than other builds of the kits I started with.
The one that started out square-looking was a “Manglia”
kit, by Polar Lights. That donor kit was part of their Snap Draggins caricature
line. Any resemblance to a stock Anglia, at this point, is purely a mistake.
It will only get worse as I keep altering it -- I haven’t really
decided if it’ll go Drag or Salt Flats racing.
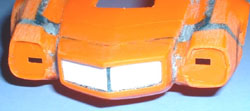
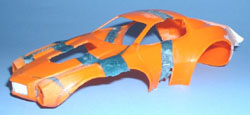
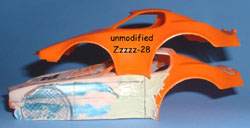
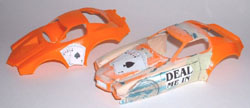
The other two cars both started out as Deal’s Wheels Zzzzz-28
Camaro kits. (See my First
Look review, in the August 2007 issue.)
One kit stayed pretty normal. That one’s going to be the tow car
for the other one. The one that’s one-fourth hardened super glue
now, is morphing itself into a ‘toon version of a 1970’s funny
car. (More on those two builds, after I recover from all the “Heavy
Tech” writing I’ve been doing these last few months!)
Of interest to readers will be the “pie cuts” altering the
angle of the headlights, the long stretches of material I added near the
front fenders, and so forth. And yes, all of that dark blue stuff is dyed
baking soda, hardened with super glue.
I used some sheet plastic, here or there: but not much. Most of the
white you’re seeing on the Funny Car is strip plastic: those bend
a lot easier, so they were more useful to me when I was trying to make
“plank on frame” fenders, which needed to have compound curves.
Evercoat’s fine “Metal Glaze” and/or “Glaze Coat”
auto body finishing putties were used to (start to) smooth things out.
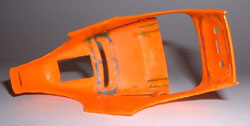
On the Manglia kit, really study the roof. Chopping a top and having
it come out halfway smooth and symmetrical, isn’t as easy as it
might seem. A lot of stuff had to be ground down, inside: sort of a “fold,
spindle or mutilate here” line. There are also a number of slit-cuts,
to convince portions of compound curves to all do the same basic coordinated
thing. Notice the lack of reinforcements. I found super glue and baking
soda to be plenty strong, without any backing.
In part that’s due to the way I sort of staggered certain cuts.
One major flaw super glue has is that if you apply it to a straight, flat
butt joint and then try hard to flex or bend the bonded parts, at that
joint: you’ll break it loose. But it didn’t much matter, here:
butt joints on curved parts are considerably stronger.
I hope you get that the thinking behind each individual step of doing
a radical conversion isn’t all that different from what we’ve
seen so far? It’s having the courage to give it a try, if you’ve
never done a thing like this -- that’s the big deal! Within a couple
or three months of (a) discovering the dye trick, and (b) starting to
hang out at the very inspirational Coffin
Corners message boards, where all sorts of nifty automotive projects
by participants are on display, I had hit the internet and looked up some
top-chopping articles; read enough different ones to get a fair background
for some of the challenges involved; picked up my trusty Black & Decker
RTX moto-tool, and loaded a metal cutting wheel.
The result? A mangled Manglia. I was so “whoo-hoo!” over
that working out, that I went even more ballistic with the Zzzzz-28 Funny
Car. (That time breaking out or looking up 1970s race car pictures as
references on how period race cars had been cut-and-pasted, in real life:
from passenger cars to fiberglass Funny Cars.)
Summary:
Yesterday’s limits are no longer binding, after you gain techniques
this powerful. You’ll never know what you can do, today, until you
give it a try ... or two!
LESSON SIX: SIMPLE KIT MODIFICATIONS
What I’m about to show you next are variations on the two main
lessons we covered, back in part one. (Filling seams and filling holes.)
What’s new is the thought we’re putting behind what’s
possible -- not the techniques themselves.
First picture: one of the windshield pillars on a ’37 Ford car
kit was molded wider than the other side. I had three choices. I could
just ignore it; or sand one side down, to make both sides equal; or try
to make the skinny post fatter.
Six months ago, I would have considered widening that post to be a major
project -- one I would have worried about on several levels. Not least
of which would be the material I had added in, to widen the post, falling
out precisely two seconds after I sprayed a killer paint job on the model.
(Forcing me to go find a big sledgehammer; then go cry, and take up needlepoint
and horseshoes.)
No one was born with this knowledge. We all acquire our knowledge over
time. So, the models I’m using to demonstrate things in part two,
are sometimes older “stalled projects” of mine, which have
been languishing in the basement ... waiting for me to find better, more
efficient ways of accomplishing certain tasks.
Before I discovered and refined these tricks, I might have tried sanding
one edge of the post perfectly flat; and then welding in a chunk of sheet
plastic, using one of the excellent liquid plastic welders on the market.
(As I did out of habit, on the Manglia’s front door posts; if you
noticed?)
I’m sure I’m not the only hobbyist that worries about such
things. Any such sanding would have to be perfect, for the addition to
fit well. Knowing how much Tenax-7R I use, and the smallness of the part
I would be adding, I might have had a gooey mess; not a repair. I would
almost certainly have a seam to fill. On a bad day, I might have broken
the windshield pillars I’d hoped to improve.
I wouldn’t have even tried air-dry hobby putties for that chore!
(See the Sith Infiltrator kit for one of the last times I tried stuff
like that.) No way would I have trusted them to stick and stay stuck:
too much new surface area being added, compared to the tiny bonding area
available. Frankly, I would not have trusted even the Evercoat auto body
products I love so much: for the same reasons.
But that’s all “before” -- here’s now. (And
again: this could be you!)
I just sat there for a moment, when I first noticed the difference in
pillar width. (One of those “fix one thing; then notice another
one” deals.) I decided I liked the wide pillar best. I also suspected
it was more Period Correct. I thought about thinking more about it ...
at which point I lost patience: “Oh, go get your tape! It’ll
be fixed before you finish debating whether or not you should fix it!”
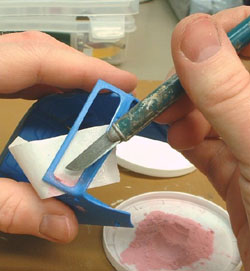
And off I went. I got out the masking tape; poured some of my special
50:50 mix (sets slower, but sands easier) onto both the kit and the tape
“mold”; pre-shaped the dry powder (with a toothpick, as I
recall); and then added one drop of Zap CA water-thin super glue. (As
pictured.) Boom! That section of powder instantly became solid ... and
was attached forever.
A few more drops; remove the tape; file it a bit – done!
Next!
The odd torso and head are parts of a Battle Droid -- a figure kit from
the Star Wars series of sci-fi movies.
That was one of the first times I tried making a kit-thickness “wall”
from super glue and dyed baking soda. There are a few mistakes: note the
missing chunk. It broke off when I accidentally bonded the two kit halves
firmly together (by using way too much super glue, right out of the bottle);
and had to pry them apart, non-gently. But I learned; one mistake versus
a bunch of new, useful info. (For instance: you’ll gas yourself
silly, if you drip big drops right out of the bottle!)
The biggest deviation from previous lessons is that my masking tape
“mold wall” needed something flat and firm behind it. Previously,
the small size of things kept the tape itself well within its comfort
zone, stretch-wise. This time it took a slab of sheet plastic behind the
tape, to act as a stiffener or “mother mold”.
I’m trying to keep the word count reasonable, so for those of
you who are into sci-fi kits, I’ll offer an older review I wrote,
for the Starship
Modeler web site.
That one’s no longer mine: a bigger fan than I owns it. (Hey,
I just build kits: she has tattoos!) I figured I wanted to see how much
better I could make one of those Droids, with the addition of recent skills
-- hence starting another one.
Next models, please!
The next example kits are a more refined attempt to build those “walls”;
plus a comparison of older, more common techniques to new ones. I’m
a fan of the Deal’s Wheels series of caricature models. I built
all I could afford, as a kid back in the 1970s. But planes are cool, too;
and as a kid I used to build WWI biplanes all the time. So when I saw
a cheap “glue bomb” of the Lucky Pierre caricature biplane
on eBay, I snatched it up with ideas of doing a restoration on it. (I’ve
since heard unconfirmed word that Pierre may be re-released. And the Spitsfire
kit is looking more and more like it’ll actually get re-released,
too. Whoo-hoo!) [Editor's Note: the Spitsfire has been re-released and
Ward will be giving us a look at it - RNP]
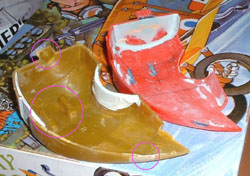
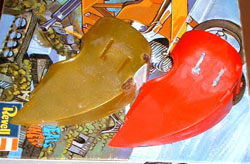
The gold plastic is an original Deal’s Wheels release; the red
one is a 2007 re-release. Same fuselage parts, from the same molds …
but representing two different airplanes? I guarantee that cruel indignity
wasn’t Dave Deal’s idea!
After disassembling the gold kit’s glued parts, and trying half-successfully
to strip decades-old paint (I’ve since learned of better chemicals
and methods), I moved on to repairing cracks and the like -- as best I
could at the time: this being long before recent discoveries. Note the
sheet plastic, behind holes I intended to fill; and the light blue Evercoat
auto body finishing putty, doing that filling.
Note the much more neat and sophisticated modifications to the red kit.
I not only could do better, with these techniques: I could do more!
Both of these kits came with the cockpits sealed shut. On the red kit,
I was able to cut the pilot’s position open; shave off all of the
parts on the interior that would look silly later (a kiddie kit’s
wing mounting slots); and work on getting rid of anything that would have
spoiled the opportunity for me to do up the cockpit in ‘toon style.
(I may seek out decent references, and start over on the innards. Hey,
just ‘cause it’s a cartoon model doesn’t mean I can’t
take it seriously!)
Note the sort of “L-shaped” holes that resulted in the sides
of the red kit, after removal of the wing slots. No problem for super
glue and dyed baking soda: not only are the holes filled, but it required
very little additional auto body finishing putty to get both sides of
the kit’s fuselage parts smooth / up to snuff, and ready for the
various scratchbuilt details I’ll add into that cockpit ... eventually.
It’ll probably be a while, so I’m throwing in some unrelated,
work-so-far pics.
On this kit I used masking tape and sheet plastic as a “glove
mold” and “mother mold” combination, in a few areas
(firewall and tail skid’s mounting point) -- but I also went with
the old reliable un-aided masking tape on the wing slots things I removed.
As I recall it now, I used the tape on the inside: figuring any hardened
clumps sticking up above the fuselage’s convex exterior would be
easier to sand.
NOTES ON CONTRAST AND OPACITY
Let’s take a free-form break; then go back to discussing the pictures.
Part of the reason I mixed up so many colors was to see which ones worked
best. What I discovered isn’t as easy as saying “use this
one color, exclusively”. It’s more of a loose series of guidelines
I use for different projects. One of the biggest guidelines is “what’s
nearby?” ... by which I mean, I’m sometimes either too engrossed
in what I’m doing to get up and go get something pre-proven; or
I’m just too lazy to do it. So, I grab whatever’s handy. (Which
is how I came up with using a spring as a C-clamp: so don’t knock
it till you’ve tried it, methinks!)
I stock my portable-modeling tool kits well. In the one for glues and
fillers, there are six or more powder colors, ready to go, in 35mm film
containers. Two of those are usually proven favorites. The rest may be
ones I am experimenting with; plus one that’s an ugly combination
of many leftover, random colors.
I’ve probably dyed 12 to 15 pounds of baking soda, so far -- with
much of that being mailed out to various modeling buddies, for them to
try. I haven’t had much feedback from any of them on what colors
they prefer, at this point -- and part of the reason for that is my fault:
they’re all waiting for this article!
Some of it also seems to be that the guys who have tried it are so impressed
with the results, that they don’t really care what powder colors
they’re using!
So, I can’t claim to know all there is to know about what colors
will work the best. What I do know is that yellow is becoming my least-favorite
powder color. I’m finding myself pretty consistently using medium-dark
greens, blues and reds. The purple or reddish-purple colors I’ve
mixed have been pretty good, too; in terms of how they’ll look on
a model’s surface, after they’ve been saturated.
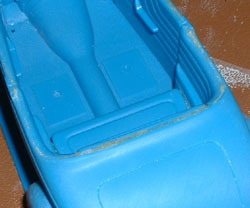
The interior side walls of the blue ’37 Ford kit fit onto the
outer body shell pretty well, but the rear seat’s fit wasn’t
so great. I used what I had on hand (yellow) as my filler material. Even
when I added the powder first, and saturated it later, the opacity of
what was left, after I sanded excess off, wasn’t overwhelming.
One thing you should try is to overlay one color with another. This
will help identify pinholes and low spots. (A trick shamelessly stolen
from the auto body industry: they supply different colors of fillers,
putties and cream hardeners for that reason.) A further tweak to that
idea is to do all of your initial layers with baking soda (or the 50:50
mix); and then switch over to pure talc, for the last layers. Think of
one as being course or medium; with the other being fine. If they are
dyed two different colors, you then have the best of both worlds.
It may be that I’m just too spoiled with all of this stuff, but
I hope to know with good certainty that the greater majority of any filling
or re-contouring problems have been properly dealt with, before I spray
any primer. I like to keep my paint coats (including primer) as thin as
possible, so as not to obscure any of the nit-picky detailing work that
either the kit manufacturer or I have added.
I guess the primer stages of scale modeling work feel like closure to
me, on the early chores. So if I have to go back a bunch of steps, after
I apply primer, the inefficiency of it ticks me off. Makes me want to
build fewer models, at times. Hence my stubbornly sticking with my search
for faster, better, cooler fillers.
So, any color of powder that can’t easily be seen (after it has
been hardened, then filed or sanded down), isn’t very high on my
list of favorite colors. Hence my not loving yellow -- it comes close
to being baking soda without any dye.
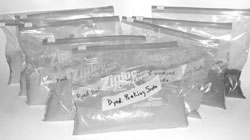
Here’s a visual aide, since not everyone’s familiar with
“artistic value”. I took the same exact photo of the baggies
full of powder, from part one; then turned the color “saturation”
all the way down, with my old-but-trusty “Paint Shop Pro 5”
computer program. What you see are all the colors showing up as almost
being the same, in terms of darkness; and very close to the lightest gray
color. Only the medium gray and the darker gray show much of an obvious
difference.
One thing that just occurred to me, weeks ago, is trying to mix up batches
that will harden so that they match what I’m applying them to. Hence
playing with gray powders, which I hadn’t done before this last
batch of dyed powders. (Not on purpose, anyway!) I have some gray-colored
kits I’m working on, now. It makes sense for me to practice on them,
first: I could practice trying to match artistic value with gray kits,
instead of trying to match both value and color at the same time. Why
make experimentation harder than it needs to be, right?
Anyway, I think I’d been heading in that vague direction for a
while – being able to repair and match household items, etc., had
occurred to me -- but what made the idea bubble up into my conscious mind
was a pre-painted sci-fi kit by Alfred Wong, over on Starship
Modeler’s “Reader’s Gallery”.
If the very talented Mr. Wong doesn’t mind putting together a
pre-painted snap kit, then my assumption that it’s a constant that
kits always come unpainted, is just plain wrong. In hindsight, yes: that’s
a variable. One I’d better get used to; judging by the kits on the
market, and articles in FSM about detailing them.
As I said in the first part of this article, baking soda by itself,
when saturated with water-thin super glue, hardens in a transparent state.
It looks almost like crude glass. To demonstrate that, I’m going
to show you the ear pieces on my eyeglasses, as a sort of “before
and after” visual aide. (What I should do is buy new glasses ...
but I’m too busy buying more important things, like model kits and
supplies ... so I repaired them, as any good nerd-on-a-budget might do.)
All that happened to them was the ends of the parts that go over one’s
ears, had the outer plastic sheath chip off. On one earpiece, the fix
is almost transparent: clear enough that you can see the thick, structural
wire thing that’s inside.
On the other, you probably would not know the same amount of material
had been replaced, on that side, if I hadn’t pointed it out? (I
apologize for the poor contrast of that second photo, but it was still
instructive enough to use.)
With any transparent bonding or filling substance, you’ll always
have the worry that you either used too little of the material –
with structural problems down the line – or there is more there
than you think there is (which will show up later, when you start applying
primer or paint).
The other end of the spectrum is powder that was dyed too dark. At some
point you’ve gone too far in that direction, too. The problem there
is that if the dry powder is already very dark, you risk not being able
to see areas that still need a drink, later; after you apply liquid to
the powder, and it hardens. The medium-dark colors will show a very helpful
contrast between their dry states and their saturated states. The dark-dyed
stuff is too close to that final state, at the start.
As I said, maybe six months of exposure to all of this is spoiling me?
Compared to the hobby putties I have tried, even the un-dyed baking soda
(which dries clear) has its uses. Compared to that, even the lightest-dyed
powders are very nice to have around. Compared to that, medium-to-dark
powders flat rock!
LESSON SEVEN: “MOLDING IN PLACE”
I realize that something like 86% of Internet Modeler’s readers
are primarily “airplane
guys” (and gals!), so I saved up some “serious”
airplane shots, to show a few more advanced possibilities, in a more relevant
and attractive way, to that core audience. (By serious I mean a non-cartoon
subject; not a “wow” build.) For the record, I respect the
many top-notch historical modelers I’ve known -- lots and bunches
and oodles! -- so forgive a “cool shapes and colors” modeler,
please, if he dares to venture into the foyer of Sacred Model Ground.
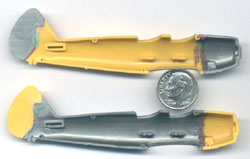 |
First picture: when I first discovered the one big secret behind all
of these tricks, I was all excited about it. Wanted to tell all of my
modeling buddies about it. To do that, I needed a visual aide. I hit the
basement, looking for something cheap to cut up. I had two old biplanes
I’d probably never build. (And several others I do plan to build
one of these days.) Those two were from the same mold tooling: just molded
in two different colors. Perfect! As you can see, I cut the noses and
tails off, and swapped them around. A quick, easy cut-and-paste demo.
Okay. A few things to note here – one, I can’t cut straight.
Or rather: I didn’t pay enough attention when I was cutting the
yellow nose off. I had already cut the nose off of the silver one. I too-quickly
counted panel lines on the yellow one, didn’t double-check; and
started cutting. When it didn’t fit, I quickly saw why.
I was so upset with myself over having pulled that particularly bone-headed
move, that I immediately compounded that error by cutting the second line
crooked, to boot – but sighed (after cussing awhile), and figured,
“Big fat so what?” - since I had no big intention of finishing
either kit, and it wasn’t intended as a test of cutting skill –
my original intent was a bonding demonstration.
So forgive me, if you please, for the slightly or badly upturned silver
nose! Of (hopefully) more importance here is that you can clearly make
out the two colors of powder I used to Frankenstein these poor, innocent
little biplane parts together after surgery: sort of a dark red color,
and a light-to-medium green.
Some joined areas you can see right through – indicating that
I put the liquid on first; and then added powder.
Some areas are almost completely opaque - indicating that the powder
went down first; and was very well saturated.
(Lessons well-learned, I hope, from back in part one?! Yes?)
Note that the slanting cut on the forward fuselage of the yellow kit
went through an alignment hole. Even so, after rejoining the yellow parts,
that hole is still mostly open. Had I paid more attention and thought
ahead, I’d have used temporary spacers between the unglued parts
(made to be the width of the razor saw that had made the cuts); and then
that hole could have remained completely open.
In hindsight it would have been easy enough to do – since there
was enough space to isolate two such spacers from the main gap to be filled.
I could have tack-glued the center of the cut, after spacing out both
ends appropriately - with the flat parts of the kit’s mating edges
laying flat on a flat surface; so as not to introduce more eyeball-induced
wonkiness. A bit of tape stuck to the interior, towards the center of
that crooked cut, could have held powder in the middle third of the gap,
long enough to get the two parts firmly tacked together.
After that, the two ends of the gaps would still be gaps. Remove your
temporary spacers, and the tape; put some new tape all the way around
the exterior; add powder to the insides – doing one little section
at a time, so you can let gravity and the sticky tape hold that section
of powder in. Add water-thin super glue with a brush-blade, etc.
While not exactly “Boom!” on speed, that would have all
worked.
However -- better to make mistakes on something that’s not a Holy
Grail kit you are dying to build, than one that is. And a bit of practice
(including failing and fixing things) is a good thing to be doing, before
major conversions, etc.
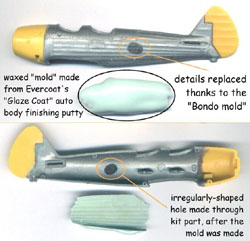
Second pic: this is a scan, not a photo, and it’s not as easy
to make out certain things as I’d like it to be. (Again; apologies!)
The main idea I hope to get across with this image is that once you’ve
mastered all of the preceding lessons, the next big thing is to mold your
own kit parts or additions right onto the surface of a kit part: including
matching a kit’s texture or minor detailing.
Having had experience with the idea of looking at the empty air around
an object - artists call it “negative space” - and being able
to visualize what it would look like, if it were instead a solid object,
will definitely be useful in such situations.
Some of you may have figured out that masking tape would have been approaching
its limits, in the hypothetical fix-it example, above. It would be asking
a lot of masking tape to conform to all of the surface detailing on the
exterior of that kit. Electrical tape might not do badly – and it’s
a thing you may want to try, at some point – but I’m going
to skip that, and jump right into what pros call “Bondo molds”.
That is: hard solid molds that (at least as I do it) are made by rubbing
a thin layer of auto body finishing putties onto a well-waxed surface
(so it won’t permanently stick.) It may warp on you if you don’t
control excess heat; and keep it evenly thick. If that layer turns out
okay, carefully add a few more. (If it doesn’t, pop the mold off
and adjust it in hot water, or over the heat of a candle’s flame:
did the latter, a time or two, with good success.) About an eighth of
an inch (4mm) is as thick a mold as we need.
Once I had a good Bondo mold or “texture stamp,” I then
intentionally damaged the kit part, by grinding an irregular hole right
through the fuselage. (This being a demo, after all.)
To put all of that detail back, I waxed my hard mold up again; pressed
it onto the outside of the kit part, and held it there, carefully / firmly.
I added a thin layer of the dry powder, into the hold; saturated that
first layer carefully; added another layer on top of that – and
so on, until the powder was flush with the surface of the interior of
the kit; which gave me both sides in good repair.
Next!
Reminder: if you’re reading this online, and you roll your cursor
over the thumbnails of the images and hover there, the file names I used
for the photos should show appear. That will give you succinct, separate
photo captions.
Quickie notes, on each model you’ll see:
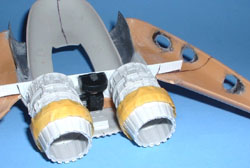
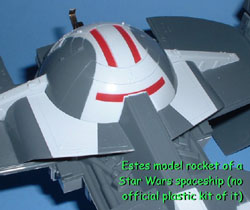
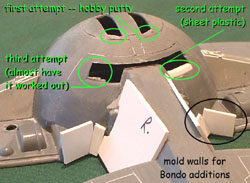
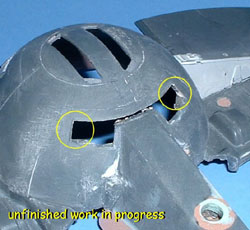
The Sith Infiltrator is a stalled project from years ago, that I go
back to once in a while. Looking at it now, I’m almost shocked at
how crude the attempted fixes to the window areas appear. Hard for me
to look back at that sort of stuff, after knowing tricks this cool --
while thinking kindly about any of those old ways?!
The most advanced super glue tricks I knew, when work on that “kit”
began, were based on what Paul Boyer wrote in Fine Scale Modeler; and
a cool seminar by Roy Sutherland at a Tamiya/Con event. (Full credits
where due, at the end.)
Roy said you could use Bare-Metal Foil as a mold barrier of sorts: his
example being obtaining a glove fit between ill-fitting aircraft canopy
and fuselage parts. (If it sticks, it’s not that big of a deal to
rip or tear or sand the stuck BMF off. He had claimed it wouldn’t
stick. It did for me. Maybe he used gel super glues?)
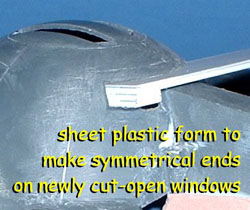
I modified and misused Roy’s idea, to try to find a better way
than “file and hope; repair the boo-boos, and start filing again,”
on those window areas.
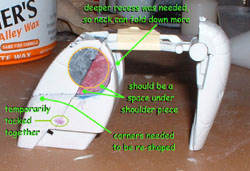
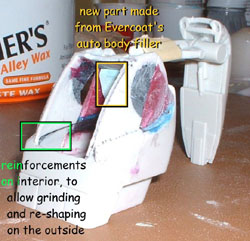
I laminated some sheet plastic together; then shaped it -- as seen from
one very limited viewing angle. It was made to be shoved into one side
at a time; filling in the edges of an intentionally over-filed border
area, that I wanted perfect. The idea being that I could get one half
correct; then remove the “mold” and flip it over or around;
and do the same thing on the other side. That almost worked, as well as
I had hoped. Almost, but not quite. Had I known these tricks, then, I’d
have just waxed up that sheet plastic mold form, so nothing would stick
to it (at least not permanently; it’s going to stick a little bit:
it’s super glue!); shoved a bit of powder into the gap; backing
it as necessary, from behind; and saturated it.
By the way: on tricks like these you’re essentially focusing on
one plane or viewing angle at a time. Front view, first, in this example:
then sand the outside flush (there’s always going to be some “flash”
with this method); then inside. The repaired sections probably look worse
than they are; due to not sanding.
Next!
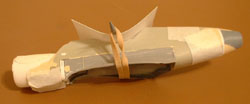
Here’s another spin on Roy’s trick. Though I’m not
showing BMF (Bare Metal Foil) here, I used it as a mold barrier / release
agent, on the bottom side of sheet plastic; which I curled first, then
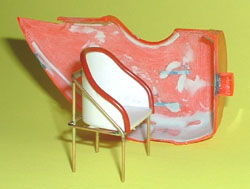
held in place with a toothpick and a rubber band. I then did the pre-dyed-soda,
two-knife trick (see credits) to make hard-but-clear additions to the
fuselage walls: using super glue and liquid accelerator.
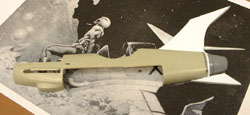
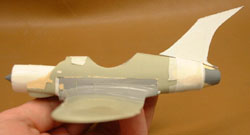
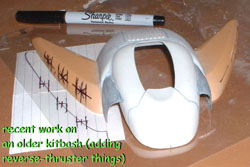
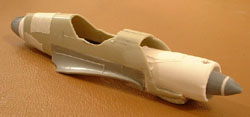
The model is an unfinished kit-bashed entry in SSM’s “Sf-109
Challenge”. Mostly bits and pieces of a Bf-109 kit; with other German
WWII bits thrown in, as well. The first image includes a re-sized B&W
scan of a Frank Frazetta oil painting. I was surprised how well the fuselage’s
center, at least, “fit” that painting.
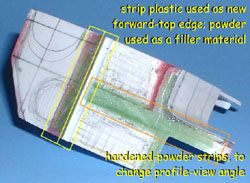
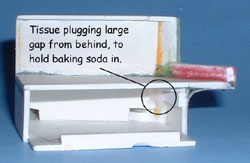
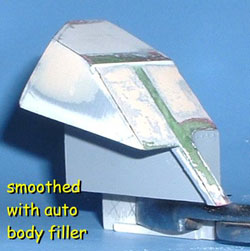
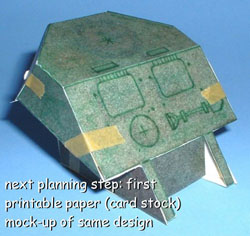
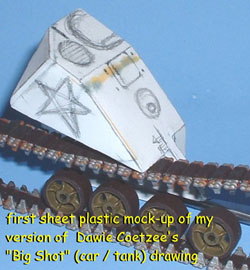
The next six shots are of a recent model. The design is half car; half
tank; and all cool, in my opinion! You can see the original
inspiration artwork here.
I’ve developed the habit (after having worked on some projects
that involved lots of photo research and blueprint-drawing) of making
a physical half-model of any symmetrical vehicle: a crude study model.
The main idea being to see in full 3D what I’ve drawn in 2D; and
to therefore see where I’m full of poop on my guess-timates. I learn
a lot, from bouncing back and forth from my 2D and 3D “tests”.
The reason I’m including these shots is to show that when I left
my beloved Evercoat auto body products at home, one portable modeling
day, I didn’t let that stop me. I kept right on going, using super
glue tricks. When I later got back home, I went back to auto body materials;
until I had things sufficiently re-worked to go back to 2D. But in this
case I wanted to test the fit of the flat “as drawn” 2D panels
... so I made myself a little printable card model.
I’m thrilled that Dawie Coetzee, the artist who inspired me so
much with this design, is chatting with me about getting all the details
right, on that model.
Speeding up:
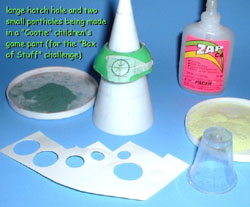
Next: the raw beginnings of an undersea vehicle I am making up, as I
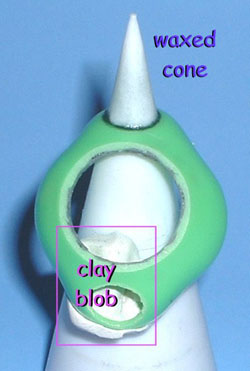
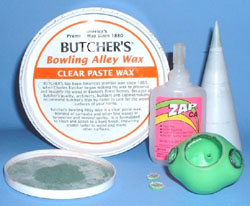
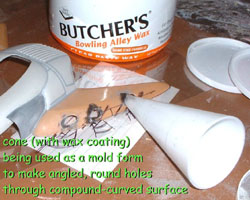
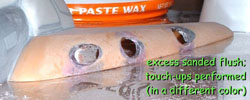
go along, for Starship Modeler’s “Box of Stuff” challenge.
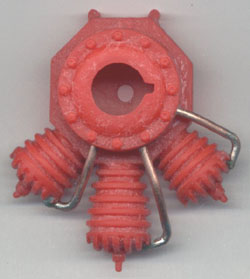
The important idea is using a cone (it came in the box of stuff I got)
as a round mold form. The fact that it’s a cone lets me mold holes
of many sizes. (Wouldn’t a thunk of it, before the BoS Challenge!)
I end up with hole edges that are tapered; but I can live with that. It
might even help to hold in the later “molded in place” porthole
windows; if I use the form from both sides – think back to the spring
trick with the flying saucer.
Next: a goofy little kit-bash I started in 2004 or so, that I drag out
and do stuff to, from time to time. Note the use of Tamiya’s putty,
to fill various things; and transparent super glue. It’s made out
of a stand from an unpopular sci-fi kit, and other sci-fi bits and pieces;
with a few aircraft details thrown in. I’m including it here as
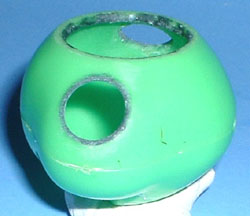
the best photographic example I have, showing what a round hole looks
like, when it penetrates a compound curve. (Not at all like a round hole,
usually!)
TINTING SUPER GLUE ITSELF - INSTEAD OF POWDER
One “bonus item” you may wish to experiment with is using
a very specific product I’ve identified as having properties of
a very helpful nature, related to Zap CA water-thin super glue: the “amber”
transparent dye by Castin’
Craft, which comes in a liquid form. (I buy mine from Creative
Wholesale on the internet; great service and prices.)
What happens is this: after you add a small amount to the Zap CA, it
dyes the super glue itself. (Aggressively!) That’s cool enough --
but within minutes, it starts to first “gel” noticeably; and
after that, it hardens fully, pretty quickly.
I can imagine uses for lightly-tinted transparent parts, made out of
super glue: I’ve already made amber-colored (paint-able) transparent
taillights for a model car. I can also see this being used for space ship
windows, and other things. After I get an interior built for my BoS Challenge
underwater vehicle’s cockpit area, and more portholes made, I intend
to use this trick to make “glass”.
As far as tinting Zap CA water-thin super glue goes, I have not had
any real luck with any of their other transparent dye colors -- so note
that I only recommend their “amber” color for dying Zap CA
super glue, and making it gel and harden.
However, I have had good overall success with tinting Micro-Mark’s
CR-600 casting resins, using the other transparent dye colors by Castin’
Craft. I particularly like their green, in that context. A few small drops
of that, added as you mix up that resin, for pouring small parts, results
in a sort of sissy-looking final part; but with minimal unwanted surface
glare, etc. I find it much easier to work on the cast parts; as compared
to the un-dyed white. It’s sort of like a light neutral gray color
in functionality: except that it’s really a light (pastel?) green.
I’ve been told that one early brand of CA (Hot Stuff?) once had
a brochure of some sort available, that told how to dye that particular
formulation. I know at least one modern company makes a “black CA”
– but other than the amber dye mentioned above, I had next to no
luck trying to add color to Zap super glue.
SAFETY CONCERNS
While trying to tell others about how great all this stuff is, I kept
running across persistent rumors, that were enough to scare some folks
off. I never saw or head of any solid proof; just a lot of vague talk,
without any tangible, verifiable details. The relatively harmless nature
of store-bought ingredients is one big reason why I can’t accept
the rumors or Old Wives Tales I’ve heard. Other’s success
with super glue and baking soda, going back years or decades, is another
biggie. (Hard to buy the idea that moisture affects this stuff, when R/C
subs use it!)
I’ve heard, more than once, that cyanoacrylate glues have cyanide
in them. I’ve even seen it printed as a warning in a popular scale
modeling magazine -- and then a later retraction of that warning, when
the magazine did basic research.
However, I am no chemist! I’ll refer you to an article by Ross
Martinek (who is a geochemist) in the May 1990 issue of Fine Scale Modeler
magazine. It’s called “Safety with glues, paints, and thinners”.
Ross makes the point that scale modeling is one of the safest of all hobbies
-- but to read warning labels; use all appropriate safety devices, etc.
I found it to be a very good read.
One thing I hadn’t considered, before I tried to talk some of
my buddies into trying all this: some folks may have a legitimate allergy
to super glues. This makes sense: lots of folks have allergies to one
thing or another -- peanuts, strawberries, pollens, pet hair, etc. So
please go easy with this stuff until you’re sure you are not allergic
to it. And even then, take all appropriate precautions.
I don’t believe I’m allergic to any of this stuff, but I
still refuse (after having tried it) to bottle-drip thin CA glues directly
onto anything that will set them quickly.
I quit doing that about the time of my Battle Droid experiments. When
super glues set quickly – even with store bought, liquid accelerators
– they give off a small cloud of some sort of a nasty-smelling gas.
How nasty? I was exposed to tear gas, briefly, in the military. I’ve
had idiots spray me with mace (when it was new, and every idiot had to
have it). I’ve had the joy of cleaning two freshly skunk-sprayed
dogs. Drag racing fuel fumes; etc. To all that, I’ve now added the
non-fun of headaches and/or watering eyes, thanks to this stuff. But only
when I do the one thing that’s always sure to cause troubles: get
in too big a hurry. I no longer use more than a drop of this stuff at
a time; applied with a brush-blade.
When used sensibly and in moderation, I’ve had no problems. So
that’s what I do, now. Be patient1 Work with small “brush-blade”
knife-drops and thin powder layers. This stuff is still greased lightning,
compared to virtually everything else! About the only faster way to make
or change parts is to injection mold them.
CREDIT WHERE DUE:
The main baking soda trick is as old as the hills: as I’ve implied.
All I added was the idea of dye. (As far as I know, I was the first: but
I’m open to suggestions to the contrary; particularly if you can
point me to specific old mag back-issues.)
The idea of using a rounded blade as a brush wasn’t mine, either.
It came from the back of a 1989 Verlinden Productions catalog. Very handy
idea! Before I had the idea to dye baking soda, I was using two such blades:
one to apply super glue to a model; and the other to apply store-bought
liquid accelerator.
“Molding in place” (as I call it) is definitely cool beans;
whoever first invented it. I don’t claim to be the first –
but I don’t recall ever reading any articles about it. Lot of potential
there; so I hope that (and all of these tricks) really catch on!
The “masking tape as a mold barrier” idea comes from Super
Rod magazine’s Oct 2004 Fiberglass Special issue. Jerry Weesner
gets the nod.
David Merriman’s ultra-informative “Cabal
Report” how-to’s are where I learned about Butcher’s
Bowling Alley Wax; Evercoat’s products; and much more – half
or more of which I’m still “chicken of” but working
towards, in baby steps.
Roy Sutherland did a wonderful hour-long seminar at Tamiya/Con 2002,
on super glue tricks. (I wished they taped all seminars, and put them
on DVD; but many are lost forever, now: darn it!) My handwritten notes
from this seminar gave me a bunch of ideas. Steps towards where I am on
this path, today.
Paul Boyer was an even-earlier influence on me, as far as seeing some
of the possibilities of using super glues. I got a lot out of his “FSM’s
Guide to Super Glues” article, in the Jan 1995 issue of Fine Scale
Modeler magazine. He also wrote up another article I recently dug up,
re-read, and liked: “The Search for FSM’s Favorite Filler
Putty”. (FSM Jan 1998). In that one Paul gave all of the usual hobby
putty suspects a fair trail, then shot nearly all but Milliput; 3M’s
Acryl-Blue auto body putty; and gap-filling super glues with liquid accelerators.
Considering his first “search” article was in Summer 1983,
that’s saying a lot.
The folks frequenting the message boards over at Starship
Modeler have been good to me. Their encouragement helped motivated
me to write this monster.
Frank “macfrank” Henriquez gets a big thanks, for telling
me about using talc. (Instead of baking soda.) I once had no idea the
substitution was possible. I admit I was pretty skeptical, at first –
but our online talks over on the Starship Modeler message boards quickly
convinced me that Frank knows his stuff.
I wish to thank Clyde “en’til Zog” Jones for inspiring
the magical theme of part one. His joking “Ward’s Magic Seam
Powder” name for dyed baking soda inspired me to use that name (with
permission!); and to hold the withhold the “reveal”.
RECOMMENDED READING
Besides the resources already mentioned throughout parts one and two,
I hope you’ll consider the following.
I offer my “Cartoon
Caddy” article, from IM’s Oct 2007 issue, as a way to
get used to the idea of using auto body finishing putties as molds; castings;
etc.
You may find the “Prop Builder’s Molding and Casting Handbook”
book by Thurston James to be extremely helpful with the mindset of molding.
I found it to be a wealth of ideas and practical how-to’s; as well
as an eye-opener in terms of unusual materials and possibilities. (RTV
rubber and casting resins are by no means the limits of the possible:
just what we’re most familiar with.)
“Drawing on the Right Side of the Brain” is a wonderful
book. I believe it came out in 1989; updated and revised versions have
since become available. Betty Edwards essentially combined her experiences
as an art teacher, with science that offered explanations of how the human
mind actually works. The result is a must-have, must-read book, on a number
of levels.
Amazon dot com can supply any of
those books; used or new.
Last but not least: check out “Lateral
thinking,” over at Wikipedia.
Have fun; play safe; and good luck with all of your hobby projects!
|
|
