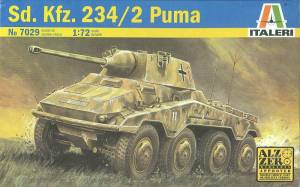
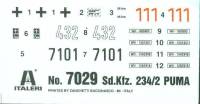
Italeri 1/72nd SdKfz 234/2 "Puma"
|
 |
The Kit
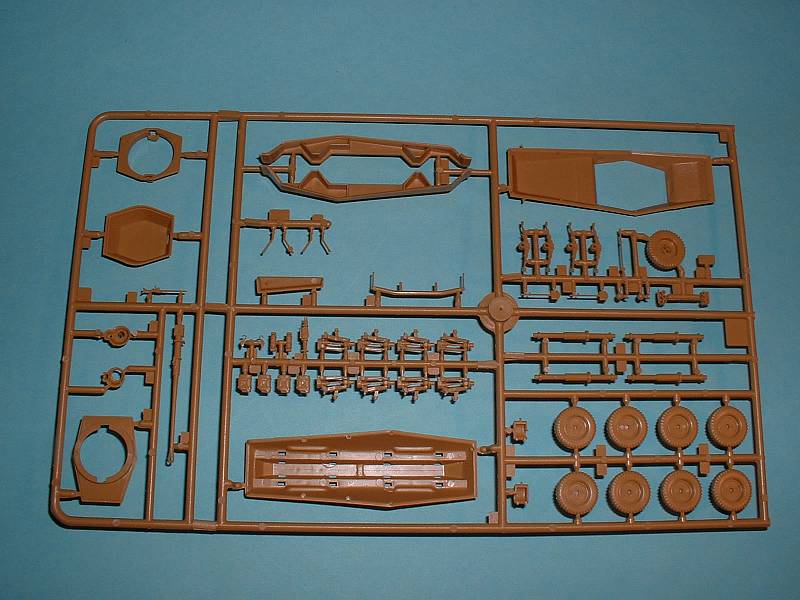
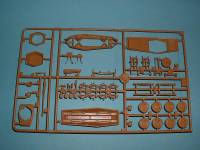
The Italeri Puma consists of a total of 61 parts on the sprue. This
doesn't mean, though, that all 61 parts are used. Italeri's latest kits
can be built either "regular" or "simplified". What
this means is that you can build the kit as if you were a "modeler"
or a "wargamer". The "simplified" build uses 34 less
parts meaning there are only 27 parts used in total. When building the
kit "regular" only 4 parts aren't used giving a total of 57
parts. It really depends on what level of detail you want to go to as
to which version you build. Most modelers that I know of do not wargame,
so would build this "regular". When you build the simplified
version you leave off the highly detailed suspension, instead opting for
the four, single piece axles. In addition, the instructions have you leave
off all pioneer tools and extra "baggage" added to the fenders.
 As
I'm assuming most of the modelers that read this site don't wargame, I'm
going to step through the instructions for the "regular" build.
(I had hoped to have this built for the June issue, but "life issues"
got in the way (as they always do) resulting in the model almost finished.
If only I had a few more days... As
I'm assuming most of the modelers that read this site don't wargame, I'm
going to step through the instructions for the "regular" build.
(I had hoped to have this built for the June issue, but "life issues"
got in the way (as they always do) resulting in the model almost finished.
If only I had a few more days...
In any event, construction starts with adding the suspension to the
lower hull. Overall Italeri's molding is very nice with the detail coming
out extremely "crisp". This is definitely evident in all the
pieces for the suspension. Unlike the Roden kit, you don't build each
piece of suspension for each wheel with multiple pieces of plastic. Instead,
there is one piece per axle, along with four separate leaf springs. After
all suspension pieces are added then the hull pieces are assembled.
Now you add the fenders to the hull, followed by all the pieces that
go onto the fenders. Again, Italeri's molding is top notch and the detail
on all pieces is fantastic. In fact, all items, be they pioneer tools
or "jerry cans" are separate pieces so the detail really stands
out.
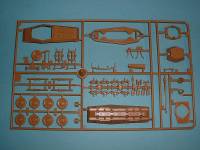
Following the fenders and such the turret is assembled. Unfortunately
nothing on this kit is drilled out, so not only will you have to drill
out the barrel for the main gun and the machine gun, you'll also have
to drill out the grenade launchers as well. This is one area where Roden
really shines, as their grenade launchers are all molded hollow.
 Once
the turret is finished then you finish up with the last of the pieces.
Earlier in the instructions Italeri has you glue the wheels to the hull,
but I would personally wait until everything is painted and most weathering
already accomplished. Once
the turret is finished then you finish up with the last of the pieces.
Earlier in the instructions Italeri has you glue the wheels to the hull,
but I would personally wait until everything is painted and most weathering
already accomplished.
Conclusion
Unfortunately there are a couple of areas that Italeri could improve
upon. First, most parts had a mold-line running around the entire part
needing careful cleaning to remove. The second area that needs definitely
improving upon are the wheels. They are hollow on the back side, and unlike
at least their DUKW release, don't come with other wheels to cobble together,
nor does it appear there are aftermarket items yet released to replace
them. I feel it's a shame Italeri didn't mold these wheels complete. (Unfortunately
the Roden wheels will not work with the Italeri kit, at least not without
some major surgery.)
On the up side, the Italeri Puma is definitely the easiest of the four
releases to assemble. The first released was the MaRS resin kit, and while
the detail on it is phenominal, I understand it's a difficult build. The
second to be released was the Roden injected plastic kit and two areas
needing care in building are the wheels (four pieces for each wheel) and
the suspension (four parts for each two axles). The third to be released
was the Hasegawa kit, and while it appears "crisper" than the
Roden kit, also has a few parts. Finally the Italeri kit. With only one
piece wheels and one suspension piece per axle it is definitely the easiest
to build of the four.
 However,
the Italeri kit - unlike the Roden kit - does not come with any interior,
nor are any of the hatches separate. So, depending on what you want to
accomplish with your Puma - a quick build just to have one, or a show-stopping
contest-winning model - there are plenty of Puma kits to choose from.
For those wanting a Puma quick then the Italeri kit is the best option.
For a better comparison of the available Puma kits, be sure to check out
Doug Chaltry's article at the On
The Way! site. However,
the Italeri kit - unlike the Roden kit - does not come with any interior,
nor are any of the hatches separate. So, depending on what you want to
accomplish with your Puma - a quick build just to have one, or a show-stopping
contest-winning model - there are plenty of Puma kits to choose from.
For those wanting a Puma quick then the Italeri kit is the best option.
For a better comparison of the available Puma kits, be sure to check out
Doug Chaltry's article at the On
The Way! site.
My thanks to Testors for the review
kit.
|
|