Eduard
1/144 Ju.87G Stuka
|
 |
History
Stuka! Few aircraft are as recognizable, and none wrought as much terror
as the Ju.87 Stuka. Germanys premier dive bomber, it was developed in
1933 under the direction of Hermann Pohlmann of the Junkers Flugzeugwerke
for consideration in the RLM Second Phase modern dive bomber design
competition to be held in January of 1935. A bomber pilot during the First
World War, Pohlmann drew from his experience in the development of the
Junkers K-47(A-48), the first dive bomber design produced and evaluated
by the Swedish works of the Junkers Co. in 1928 while Hugo Junkers was
still in charge of the company. Like the K-47, the new proto-type (Ju
87V-1) followed the no frills design principals of the day, resulting
in an angular, and singularly ugly aircraft that would become feared
by Allied ground troops and civilians throughout Europe and the Mediterranean
in WWII. It was easily recognizable both visually by its tapered, inverted-gull
wings, squared empennage, and fixed landing gear fitted with wheel pants,
and audibly by the whistling, screaming sound it made in a dive, which
was due to the floating aileron/flap design and slotted dive brakes, and
enhanced by propeller driven sirens mounted on the landing gear struts
and whistles attached to the bombs it dropped. It was an instrument of
terror.
 Stuka,
the word itself being a contraction of the German term Sturkampfflugzeug
(diving battle aircraft; the generic term for all dive bombers), became
a household word on both sides of the war, though by 1939, the term specifically
implied the type Ju 87. Stuka,
the word itself being a contraction of the German term Sturkampfflugzeug
(diving battle aircraft; the generic term for all dive bombers), became
a household word on both sides of the war, though by 1939, the term specifically
implied the type Ju 87.
The first production aircraft, the Ju 87 A-1, (Anton) were powered by
the 640hp Junkers Jumo 210Ca engine and 3 of the type were shipped to
the Kampfgruppe K.88 Legion Condor to be combat tested in the Spanish
Civil War, being flown exclusively by a rotation of German pilots to provide
Germany with a maximum number of trained combat pilots. These aircraft
were underpowered and could carry their maximum bomb load only without
the rear gunner. When the new 1100hp Jumo 211A engines became available,
Pohlmanns design team overhauled the Antons to produce the Ju 87B, (Berta)
the first truly battle worthy Stuka. The Bertas were tested in Spain with
great success. When Germany invaded Poland in on Sept 1, 1939, Ju 87Bs
were the spearhead of Germanys Blitzkrieg, being used for both precision
bombing of strategic targets and as flying artillery, in the tactical
support role. In Poland the type proved its worth to both the flight
and maintenance crews and the high command, as an effective weapon and
as a sturdy workhorse that could sustain damage and still get the flight
crews back home. Field maintenance crews also found the design easy to
repair and maintain, which helped its popularity.
In the Spring of 1940, the 87Bs once again led the invasion as the
Blitzkrieg rolled through Denmark, Norway, Holland, Belgium and France,
and were also used against marine vessels during the evacuation of Dunkirk
in late May. It was here that the first signs of trouble occurred. The
Stuka was no match for the smaller faster fighters used by France and
England. During the Battle of Britain, RAF pilots in Hurricanes and Spitfires
discovered that a diving Stuka was easy prey and Stuka Groups suffered
heavy losses which contributed to Hitler postponing Operation Sea Lion,
his planned invasion of England. Even though the Stukas weakness had
been found, it was still an effective weapon when the Luftwaffe could
put superior numbers of aircraft up and it wreaked havoc in the Mediterranean,
inflicting heavy damage to the HMS Illustrious during the bombing of Malta
and playing a crucial role in the invasions of Yugoslavia, Greece and
North Africa where it was used against English shipping. In June of 1941,
Stukas again led an invasion force, this time deep into Russia. But the
tide of war turned for Germany and as the allies won victories and put
Germany on a defensive posture, the Stukas role as dive bomber was less
important than its role as a close tactical support aircraft.
 From
its inception till the end of the war, the Ju 87 underwent numerous design
changes, some subtle, some not so. From the A and various B models, the
carrier based Ju 87C, with folding wings, Ju 87D(1 through 8), Ju 87 B/R
with long range fuel tanks, an experimental torpedo bomber version listed
as the Ju 87E, and finally the Ju 87G(1, 2) Tank Buster, armed with
two 3.7cm cannon pods mounted under the wings. In 1944, many Ju 87Ds
were stripped of armament and used in a training role, listed as the Ju
87 H-1 through H-8. From
its inception till the end of the war, the Ju 87 underwent numerous design
changes, some subtle, some not so. From the A and various B models, the
carrier based Ju 87C, with folding wings, Ju 87D(1 through 8), Ju 87 B/R
with long range fuel tanks, an experimental torpedo bomber version listed
as the Ju 87E, and finally the Ju 87G(1, 2) Tank Buster, armed with
two 3.7cm cannon pods mounted under the wings. In 1944, many Ju 87Ds
were stripped of armament and used in a training role, listed as the Ju
87 H-1 through H-8.
The Kit
 Eduard
has produced three different 1/144 Stuka kits, representing the 87 D,
R and G models. Courtesy of the editors of Internet Modeler (fine human
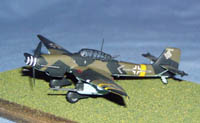
beings, all of them) I was able to build one of my favorites, the Ju 87G.
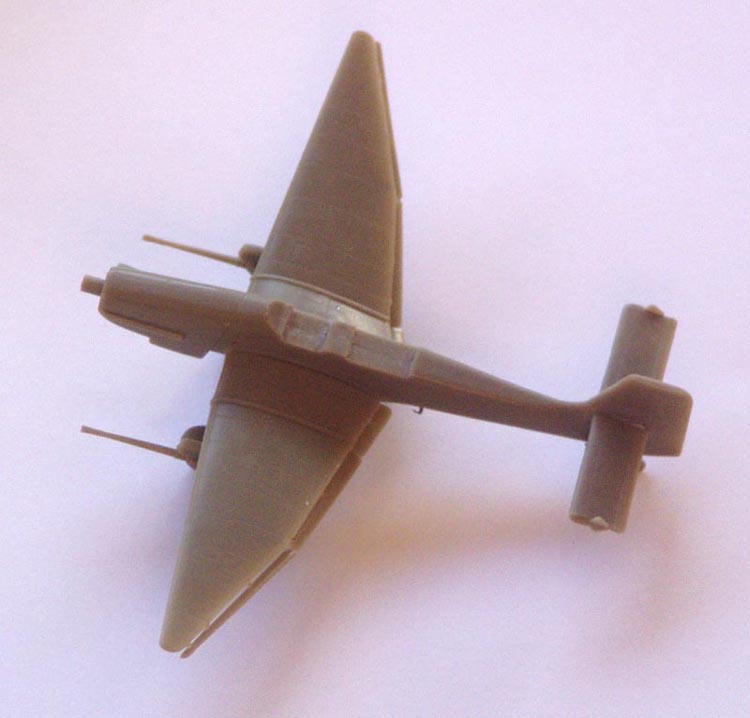
The kit consists of 27 light green/gray plastic parts on a single sprue,
clear canopy, 17 photo-etched parts (some are extras), vinyl painting
masks, building instructions, decals and full color painting guide for
three different aircraft. The parts are very fine with recessed panel
lines, only slight flash where the mold separated, no sink holes or ejector
pin marks. The construction sequence is very straight forward, being laid
out in only three steps: main assembly first, everything under the wings
(LG, gun pods, bomb racks, flaps/ailerons, fuselage steps) second, and
canopy, prop, rear guns and radio mast added in the final step. Eduard
has produced three different 1/144 Stuka kits, representing the 87 D,
R and G models. Courtesy of the editors of Internet Modeler (fine human
beings, all of them) I was able to build one of my favorites, the Ju 87G.
The kit consists of 27 light green/gray plastic parts on a single sprue,
clear canopy, 17 photo-etched parts (some are extras), vinyl painting
masks, building instructions, decals and full color painting guide for
three different aircraft. The parts are very fine with recessed panel
lines, only slight flash where the mold separated, no sink holes or ejector
pin marks. The construction sequence is very straight forward, being laid
out in only three steps: main assembly first, everything under the wings
(LG, gun pods, bomb racks, flaps/ailerons, fuselage steps) second, and
canopy, prop, rear guns and radio mast added in the final step.
The Build
Disclaimer:
Any whining or complaining that may appear in the following narrative
is purely a reflection of the authors low expectations of the kit, combined
with his frustration over his own impatience and inability and should
not be construed as criticism of the kit or Eduard Models.
 Ok,
Im really a 1/48 builder, but I do have a small collection of 1/144 scale
models and kits on the shelves. This collection started when I saw a pile
of the old 1/144 Revells in a going out of business sale at a price I
couldnt refuse. I started building them when I was required by a former
employer to be alone at the office to answer the occasional phone call
on Saturdays. These little kits could be completely assembled and painted
in the course of these Saturdays and it was nice way to pass the time,
while making overtime pay. After that job was no more, I would occasionally
build one of these little kits as a way of taking a break from the usual
glacial pace that those of us who suffer from AMS build at. In other words,
these were toys to be enjoyed, slammers to build in one sitting. Ok,
Im really a 1/48 builder, but I do have a small collection of 1/144 scale
models and kits on the shelves. This collection started when I saw a pile
of the old 1/144 Revells in a going out of business sale at a price I
couldnt refuse. I started building them when I was required by a former
employer to be alone at the office to answer the occasional phone call
on Saturdays. These little kits could be completely assembled and painted
in the course of these Saturdays and it was nice way to pass the time,
while making overtime pay. After that job was no more, I would occasionally
build one of these little kits as a way of taking a break from the usual
glacial pace that those of us who suffer from AMS build at. In other words,
these were toys to be enjoyed, slammers to build in one sitting.
The Eduard Stuka
is NOT one of those kits.
The day the kit
arrived in the mail, I immediately gathered up the glue, sprue cutter,
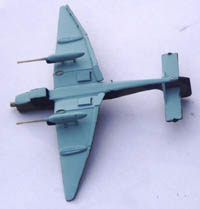
X-acto knife, and went to work. I promptly assembled the fuselage halves,
attached the wings, horizontal stabs and Damn! the fuselage halves dont
line up perfectly and I was left with a stepped seam down the center line.
If I hadnt been chomping at the bit to slam this little model together,
I would have done a dry fit and discovered the problem, which has the
simple fix of removing the locator pins and gluing the fuselage halves
together properly aligned. In my rush, I also didnt do the best job of
putting the stabs on straight. I should also mention the tips of the stabs.
Theyre separate parts. And theyre tiny. I wondered why Eduard would
do such a thing but while doing the research for the history portion of
this article, I saw that earlier Stukas had flat stab tips and later models
had rounded tips. So I guess that explains it. It wasnt really difficult
to get the tips on but Id be willing to pay an extra dollar for two different
stabs with the tips attached.
At this point, the
model sat on the shelf for a couple of weeks while I contemplated the
pros and cons of puttying or scrapping the botched fuselage seam. After
I decided to scrape the fuselage seam smooth with a curved scalpel blade,
and breaking off and repositioning the stabs, I was able to proceed with
step 2.
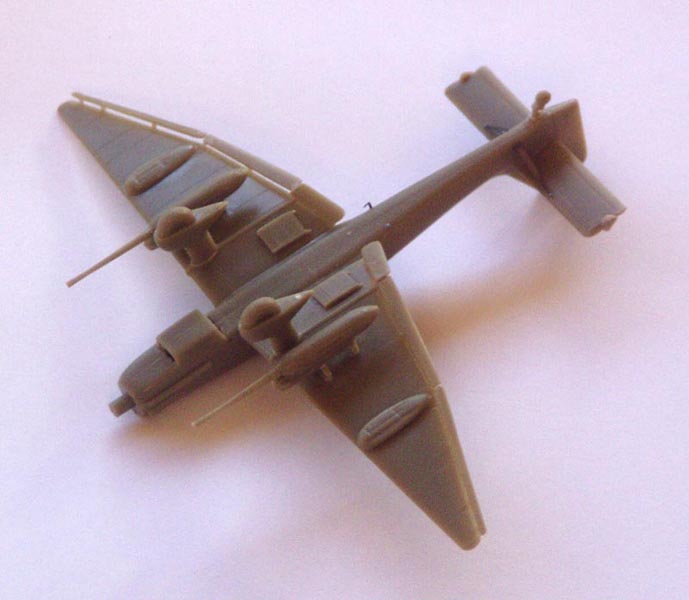
 I
applied the under-wing bits (radiators, gun pods, bomb racks, and LG)
which left the ailerons and flaps. This was the 2nd bump in the road,
which involved letting the model sit while I contemplated some more. Eduard
supplies these as 6 separate parts, 3 per wing panel. I cant even remember
any 1/48 Stuka kits that have this feature. And in this tiny scale, its
a fiddly job. To make matters worse, there are no locator holes on the
parts to help those of us with fingers too big and eyes too dim get them
properly aligned. And for all that, I still made sure to let the separate
parts make contact with each other so I could apply a bit of glue for
added strength. In the end, I did the best I could and only the most expert
scrutiny would reveal my imperfect work. I did also clear out the openings,
fore and aft, on the chin radiator. Considering all the other fine detail
on this model, Im surprised Eduard didnt do a better job here, or at
least provide a PE front grill for it. But the few minutes it took with
a new X-acto blade was worth the effort as it was a vast improvement over
what was there before. I
applied the under-wing bits (radiators, gun pods, bomb racks, and LG)
which left the ailerons and flaps. This was the 2nd bump in the road,
which involved letting the model sit while I contemplated some more. Eduard
supplies these as 6 separate parts, 3 per wing panel. I cant even remember
any 1/48 Stuka kits that have this feature. And in this tiny scale, its
a fiddly job. To make matters worse, there are no locator holes on the
parts to help those of us with fingers too big and eyes too dim get them
properly aligned. And for all that, I still made sure to let the separate
parts make contact with each other so I could apply a bit of glue for
added strength. In the end, I did the best I could and only the most expert
scrutiny would reveal my imperfect work. I did also clear out the openings,
fore and aft, on the chin radiator. Considering all the other fine detail
on this model, Im surprised Eduard didnt do a better job here, or at
least provide a PE front grill for it. But the few minutes it took with
a new X-acto blade was worth the effort as it was a vast improvement over
what was there before.
Then it was time
to add the PE. Yes, PE bits on a 1/144 Stuka. These Eduard people must
be out of their minds. But to their credit, they did supply extras for
all the PE. Two sets of fuselage steps, which are hardly visible to the
naked eye, and an extra stab brace, as well as extra radio mast, MG and
pitot. I was lucky enough not to need the extras but thats only because
I found the parts that I dropped once or twice. I should also mention
that the landing gear was knocked off when a family member put something
on top of the model when I left it on the kitchen table. But there was
no actual damage and I figured it would be easier to paint that way.
Painting
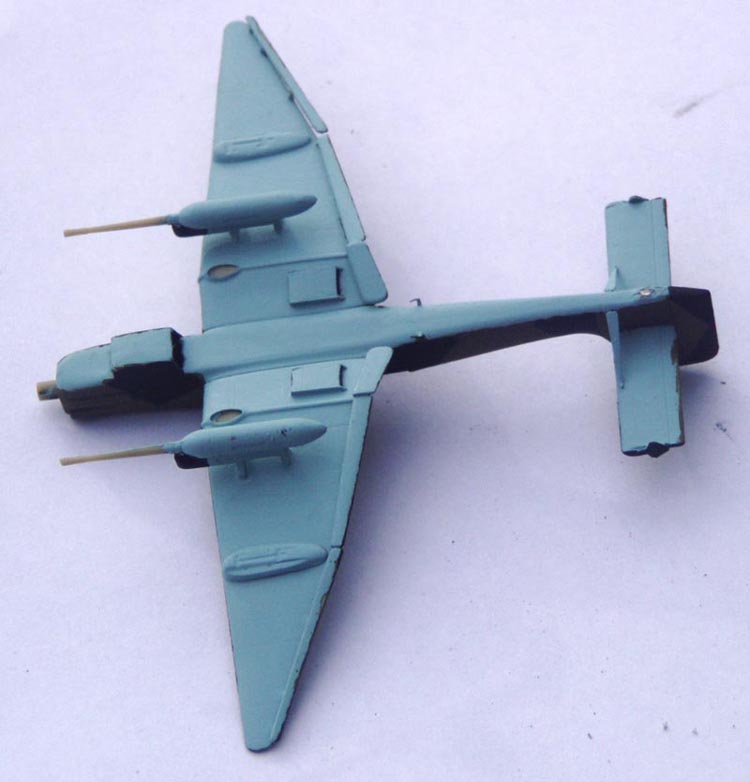
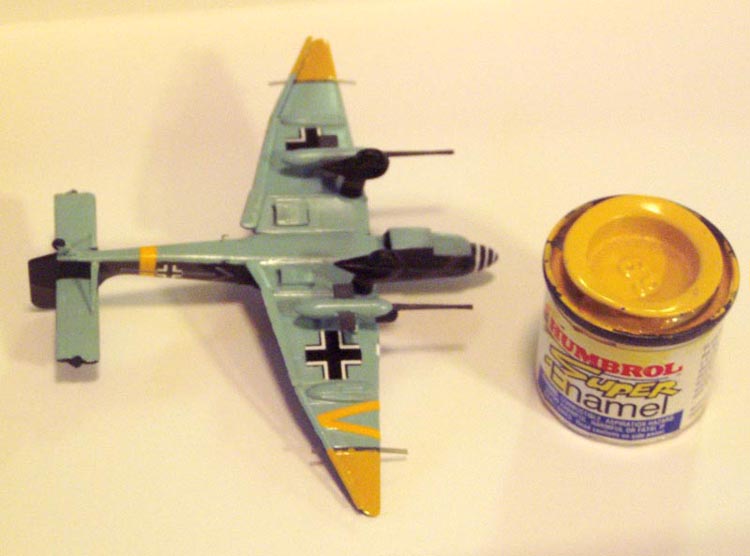
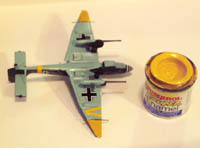
 With
all the tiny parts hanging precariously from the underside of the model,
I didnt want to risk breaking them all off when I tried to remove the
masking tape. So I painted the entire model free-hand with a couple of
different size brushes, starting with the underside blue. I used Humbrol
65, which may not be 100% accurate but looked good to me. After 2 coats
of the blue had dried for 24hrs, I applied 2 coats of the lighter shade
of green, in this case Humbrol 155. I suspect this color may be several
shades lighter than the official RLM dark green used on these aircraft,
but on several Stuka models in my past, I felt the contrast between the
two shades of green I used was hardly noticeable. And in this scale it
would only be worse. So I went with a lighter shade. The dark green is
Floquil German Black Green, which I believe is an accurate color for a
Stuka. And even though a good friend called me a liar, I really did do
this splinter cammo job free-hand with a brush. Yes, there was some touch-up
involved before I got all the lines straight and the points pointy. While
I had the Black Green open, I also painted the canopy frames with a 10
0(ten 0) brush. This was probably the most challenging part of the model.
The canopy frames are just so small and hardly visible even under an Optivisor.
And even then, it took a few different sessions, scraping the sploodges
off the glass panels with a wooden tooth pick cut to a chisel edge, which
is harder than the paint but softer than the plastic so it doesnt leave
scratches. With
all the tiny parts hanging precariously from the underside of the model,
I didnt want to risk breaking them all off when I tried to remove the
masking tape. So I painted the entire model free-hand with a couple of
different size brushes, starting with the underside blue. I used Humbrol
65, which may not be 100% accurate but looked good to me. After 2 coats
of the blue had dried for 24hrs, I applied 2 coats of the lighter shade
of green, in this case Humbrol 155. I suspect this color may be several
shades lighter than the official RLM dark green used on these aircraft,
but on several Stuka models in my past, I felt the contrast between the
two shades of green I used was hardly noticeable. And in this scale it
would only be worse. So I went with a lighter shade. The dark green is
Floquil German Black Green, which I believe is an accurate color for a
Stuka. And even though a good friend called me a liar, I really did do
this splinter cammo job free-hand with a brush. Yes, there was some touch-up
involved before I got all the lines straight and the points pointy. While
I had the Black Green open, I also painted the canopy frames with a 10
0(ten 0) brush. This was probably the most challenging part of the model.
The canopy frames are just so small and hardly visible even under an Optivisor.
And even then, it took a few different sessions, scraping the sploodges
off the glass panels with a wooden tooth pick cut to a chisel edge, which
is harder than the paint but softer than the plastic so it doesnt leave
scratches.
 I
did hold off painting the yellow on the wing tip undersides until after
the decals were applied so Id have a better idea of what shade of yellow
would be the best match. The wheels have very clearly defined hub/tire
demarcation lines which made painting those bits very easy. I later discovered
the vinyl masks made just for this but the wheels and tires were so well
defined, I really didnt need them. Finally, I painted the PE ammo clips
and barrels on the cannons and the black inside the muzzles, which I bored
out with the X-acto back in step one. The model then got two coats of
Future in preparation for the decals. I
did hold off painting the yellow on the wing tip undersides until after
the decals were applied so Id have a better idea of what shade of yellow
would be the best match. The wheels have very clearly defined hub/tire
demarcation lines which made painting those bits very easy. I later discovered
the vinyl masks made just for this but the wheels and tires were so well
defined, I really didnt need them. Finally, I painted the PE ammo clips
and barrels on the cannons and the black inside the muzzles, which I bored
out with the X-acto back in step one. The model then got two coats of
Future in preparation for the decals.
Decals
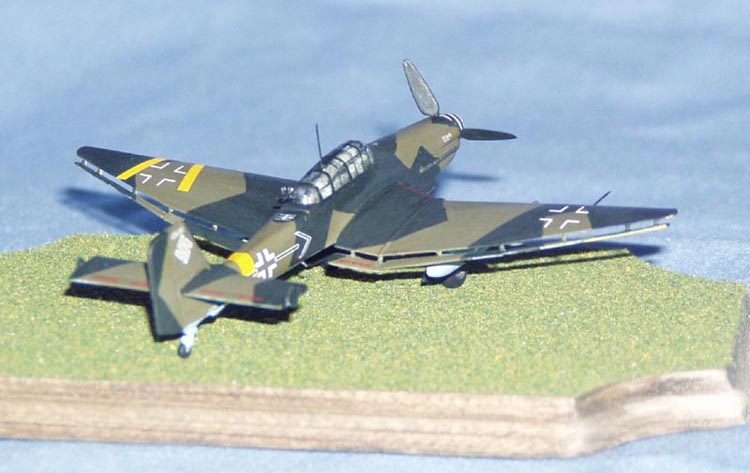
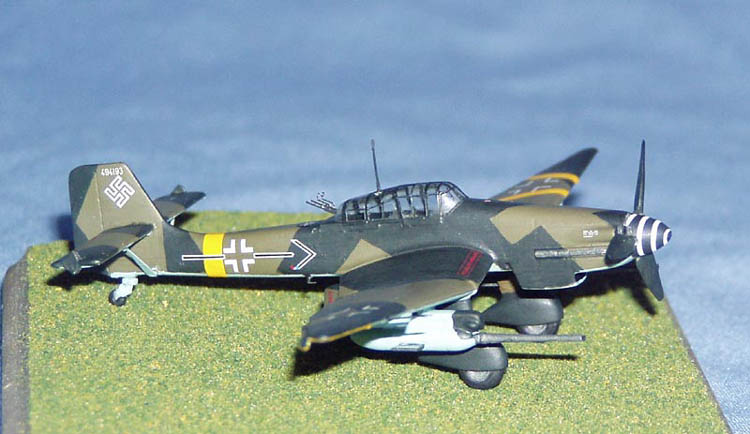
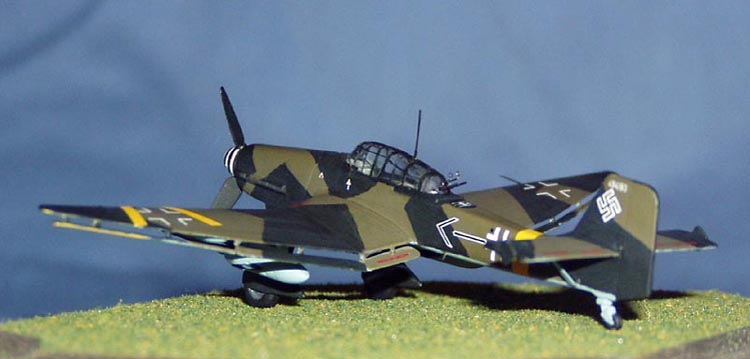
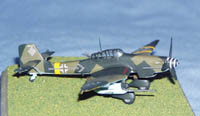 This
was the best part of the model. I decided on the markings for Hans Ulrich
Rudels aircraft (Dont we all do that?) and was anticipating translucent
yellow decals for the fuselage band and wing chevron. Even though these
yellow decals are laid down over two very different shades of green and
underside blue, theres not the slightest hint of change in the color
of the yellow decals. Theyre perfectly opaque. Same with the white decals.
I was so happy to be wrong, since translucent decals are a major issue
for me. But even having these opaque decals, applying said decals isnt
so easy. Eduard includes some stenciling and other decals that are just
too small for your typical mortal to be able to apply. And the decal for
the white spiral on the spinner took more than half an hour with a wet
brush before I finally got something that looked right. This was the first
time Id ever tried a spiraled spinner decal and I think Ill go back
to painting that detail on future models (which isnt intended as a slight
at Eduard). Once I got it in place, it looked great. I just think I could
paint it easier. To Eduards credit, they did mold the spinner and prop
blades as separate parts which Im sure made the decal operation that
much easier. I should also add that the decals went down great without
any setting solution. This
was the best part of the model. I decided on the markings for Hans Ulrich
Rudels aircraft (Dont we all do that?) and was anticipating translucent
yellow decals for the fuselage band and wing chevron. Even though these
yellow decals are laid down over two very different shades of green and
underside blue, theres not the slightest hint of change in the color
of the yellow decals. Theyre perfectly opaque. Same with the white decals.
I was so happy to be wrong, since translucent decals are a major issue
for me. But even having these opaque decals, applying said decals isnt
so easy. Eduard includes some stenciling and other decals that are just
too small for your typical mortal to be able to apply. And the decal for
the white spiral on the spinner took more than half an hour with a wet
brush before I finally got something that looked right. This was the first
time Id ever tried a spiraled spinner decal and I think Ill go back
to painting that detail on future models (which isnt intended as a slight
at Eduard). Once I got it in place, it looked great. I just think I could
paint it easier. To Eduards credit, they did mold the spinner and prop
blades as separate parts which Im sure made the decal operation that
much easier. I should also add that the decals went down great without
any setting solution.
After the decals had dried overnight, I used the vinyl mask strips for
the yellow wing tips, which were painted with Humbrol 69. As bright as
it the yellow paint was, it was still a few shades paler than the Eduard
decals. I warmed the yellow up with the tiniest smidge of red, which matched
close enough for government work. When the yellow dried overnight, I applied
two coats of clear flat to seal the decals and dull the Future.
Final Assembly
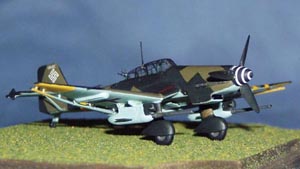
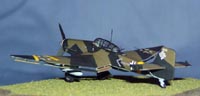 All
that was left were the finishing touches. The canopy didnt fit as well
as I would have liked. This could be due to the misaligned fuselage halves,
the three coats of RLM 02 I had to apply over the black I originally applied
to the cockpit area, or just an imperfection with the kit. Either way,
it took some sanding, filing and test fitting before I got a fit that
I could live with and attached the canopy with white glue. I then attached
prop blades, PE radio mast, MG and pitot tube and the model was finished.
I did make an attempt to install the antenna wire using a strand of my
wifes hair, but I could neither get it stretched tight nor get a realistic
sag. I could lie to the reader and say I might try again with some other
material but Im pretty happy with the model the way it is and know from
experience that that last detail will probably be the one that ruins the
model, whether I spill a blob of CA on it or just drop it. Ive reached
the point where I know its best to quit while Im ahead. All
that was left were the finishing touches. The canopy didnt fit as well
as I would have liked. This could be due to the misaligned fuselage halves,
the three coats of RLM 02 I had to apply over the black I originally applied
to the cockpit area, or just an imperfection with the kit. Either way,
it took some sanding, filing and test fitting before I got a fit that
I could live with and attached the canopy with white glue. I then attached
prop blades, PE radio mast, MG and pitot tube and the model was finished.
I did make an attempt to install the antenna wire using a strand of my
wifes hair, but I could neither get it stretched tight nor get a realistic
sag. I could lie to the reader and say I might try again with some other
material but Im pretty happy with the model the way it is and know from
experience that that last detail will probably be the one that ruins the
model, whether I spill a blob of CA on it or just drop it. Ive reached
the point where I know its best to quit while Im ahead.
Conclusion
 Like
all of the Eduard kits Ive seen produced in the past 6 or 7 years, this
one is really first rate with respect to quality of detail and molding.
The decals are the best yet. While I sometimes found this kit to be needlessly
complicated, I really cant argue with the end result. Its far superior
to the old Revell and Academy kits in this scale. My only real complaint
is the lack of locator holes on the flaps and ailerons and thats pretty
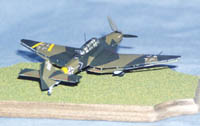
minor. After building this little bitty Stuka, Im looking forward to
picking up Eduards 1/144 FW 190 next time Im at the local hobby shop.
Im sure it will look great parked next to the Stuka. Like
all of the Eduard kits Ive seen produced in the past 6 or 7 years, this
one is really first rate with respect to quality of detail and molding.
The decals are the best yet. While I sometimes found this kit to be needlessly
complicated, I really cant argue with the end result. Its far superior
to the old Revell and Academy kits in this scale. My only real complaint
is the lack of locator holes on the flaps and ailerons and thats pretty
minor. After building this little bitty Stuka, Im looking forward to
picking up Eduards 1/144 FW 190 next time Im at the local hobby shop.
Im sure it will look great parked next to the Stuka.
And who knows, after Ive blocked out the trauma suffered on this kit,
I may just suffer a fit of madness and get the Ju87 R and D versions too.
And last but not least, I must thank Chris at IM for the review copy.
Historical Reference: Squadron Ju 87 Stuka In Action
|
|