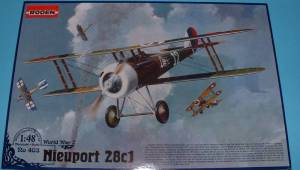
Roden 1/48th Nieuport 28C.1
|
 |
History
Look to the Windsock Datafile of a good reference on the Nieuport 28.
The Kit
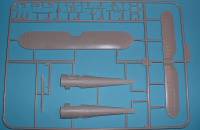
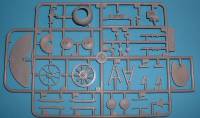
The Roden Nie.28 consists of 51 injected pieces and a piece of clear
acetate that is used for the windscreen. Parts are extremely crisp and
very well done - out of the box this is no doubt Roden's best to date.
Decals consist of markings for the following people: Lt. James A. Meissner,
N 6144, of the 94th Aero in two different liveries; Major John Huffer,
N6169 of the 94th; Lt. Douglas Campbell, N6164 of the 94th; and - of course
- Lt. Edward Rickenbacker, N6159 of the 94th.  What's
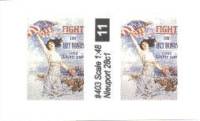
really interested is that Roden includes the Liberty Loan posters that
Rickenbacker attached to the tops of his lower wings, and thin "stickers"
and not decals. They did this primarily because it was the only way to
get the all of the colors to come through and look like it did in real
life. It was also done because Rickenbacker actually had posters "glued"
to his wings, so these would be thicker than what a decal could create.
In all, an excellent idea and hats off to Roden for thinking of it. What's
really interested is that Roden includes the Liberty Loan posters that
Rickenbacker attached to the tops of his lower wings, and thin "stickers"
and not decals. They did this primarily because it was the only way to
get the all of the colors to come through and look like it did in real
life. It was also done because Rickenbacker actually had posters "glued"
to his wings, so these would be thicker than what a decal could create.
In all, an excellent idea and hats off to Roden for thinking of it.
Instead of starting with the cockpit, the instructions have you start
with the engine, firewall and cowl. This whole assembly should remain
off the model until last, and the cowl should be painted prior to adding
it to the rest of the assembly.
The rest of construction is also as orthodox. Instead of assembling
the cockpit in situ with the fuselage halves, then joining the halves
together after all the cockpit is assembled, Roden has you  glue
the fuselage halves together as the completed cockpit - assembled in the
next sequence - is slid into the already glued fuselage halves from the
front. An excellent idea. The cockpit is pretty complete out of the box
but there remains enough room for people to add their personal touches,
such as seatbelts. If you look at the NASM restore the seat they add to
theirs is a lot different than the kit supplied one. Personally I consider
NASM's to be representative of the real thing, and think in this instance
Roden is in error. But then again, to get the seat assembly looking like
the real thing requires the use of photoetch. It's quite a complex affair. glue
the fuselage halves together as the completed cockpit - assembled in the
next sequence - is slid into the already glued fuselage halves from the
front. An excellent idea. The cockpit is pretty complete out of the box
but there remains enough room for people to add their personal touches,
such as seatbelts. If you look at the NASM restore the seat they add to
theirs is a lot different than the kit supplied one. Personally I consider
NASM's to be representative of the real thing, and think in this instance
Roden is in error. But then again, to get the seat assembly looking like
the real thing requires the use of photoetch. It's quite a complex affair.
Once the cockpit is slid into the fuselage and glued, then the lower
wing can be glued on. Leave the lower wing off until you're sure the cockpit
is in the correct location, as the hole in the underside of the fuselage
gives you plenty of room to maneuver the cockpit into place.
 Roden
engineered the kit in such a way so as not only will the engine/prop spin
together, but the wheels will also turn if so inclined. Roden
engineered the kit in such a way so as not only will the engine/prop spin
together, but the wheels will also turn if so inclined.
From here, construction moves into painting, adding the top wing and
landing gear struts and final finishing. Included on the instructions
is a rigging diagram - shame on any manufacturer who doesn't include this
in their instructions. Keep in mind that all war-time Nie.28s were finished
in French five-color finish, so you have your work cut out for you.
Conclusion
 This
is a great kit, and one can see the strides Roden has taken through the
years to better their product. Right now their Nieuport 28 is the best
they have released to date, and hopefully this sets a standard for their
kits to come. If you want to build aircraft flown by the United States
of America, this is a must as it was the first fighter to be employed
by the US, ever. This
is a great kit, and one can see the strides Roden has taken through the
years to better their product. Right now their Nieuport 28 is the best
they have released to date, and hopefully this sets a standard for their
kits to come. If you want to build aircraft flown by the United States
of America, this is a must as it was the first fighter to be employed
by the US, ever.
Thanks to Roden for the review
sample.
|
|
