Czech Master Resin 1/72 Martinsyde F.4 Buzzard
|
 |
History
Showing a clear lineage from the Martinsyde G.100 and G.102 'Elephant',
the F.4 was destined to be relegated to the 'what if' pages of history.
Despite being superior to the Sopwith Snipe, it never saw widespread useage
due to the Armistice, however, if the war had continued it was scheduled
to equip many RAF squadrons. As it was it saw limited service postwar
with the Irish Republic, Latvia, Portugal, Rssia, Spain and Finland.
The Kit
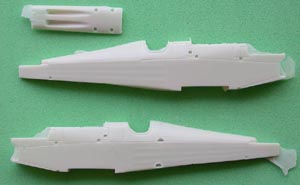 This
is a re-release of Czech Master Resin's earlier Martinsyde Buzzard, this
time done in the more common tan resin and including decals. The parts
are cleanly cast, with the smaller parts set in a wafer that will need
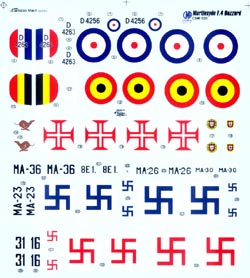
some careful trimming to free them. The decal sheet has a total of five
countries represented, with different serials offering a plethora of options. This
is a re-release of Czech Master Resin's earlier Martinsyde Buzzard, this
time done in the more common tan resin and including decals. The parts
are cleanly cast, with the smaller parts set in a wafer that will need
some careful trimming to free them. The decal sheet has a total of five
countries represented, with different serials offering a plethora of options.
Starting with the interior, this is basic, like the original. A decent
seat, separate cockpit floor, and control stick make up the majority of
the cockpit. A separate instrument panel, with cutouts for the guns, finishes
things here, and although one might be tempted to add more detail, both
a lack of information and a lack of visibility makes the kit parts more
than enough.
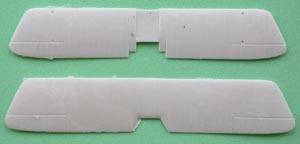 Stepping
forward from the cockpit, the engine is nicely done, with separate exhaust
stacks and intake collector pipes. This engine fits into the separate
radiator front, with a separate fuselage top trapping it inside. With
the engine secured to the front radiator, there are no worries about placement
in the fuselage. With the engine assembly done, and the cockpit finished,
the fuselage can be closed up and the rest of the construction can commence. Stepping
forward from the cockpit, the engine is nicely done, with separate exhaust
stacks and intake collector pipes. This engine fits into the separate
radiator front, with a separate fuselage top trapping it inside. With
the engine secured to the front radiator, there are no worries about placement
in the fuselage. With the engine assembly done, and the cockpit finished,
the fuselage can be closed up and the rest of the construction can commence.
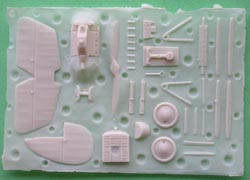 From
this point, the rest of the assembly is like any other biplane model.
The wings and tailplanes are all molded as solid pieces, with the lower
wing including a piece of the lower fuselage to aid in placement. The
horizontal stabilizer fits onto a shelf atop the fuselage, with the rudder
fitting on top of that. The upper wing is mounted onto individual wing
and cabane struts, which would benefit from the use of a jig for alignment.
The landing gear has the traditional V struts, with a one-piece spreader
bar including the axle. Slap on the two wheels and this little plane is
ready for paint. From
this point, the rest of the assembly is like any other biplane model.
The wings and tailplanes are all molded as solid pieces, with the lower
wing including a piece of the lower fuselage to aid in placement. The
horizontal stabilizer fits onto a shelf atop the fuselage, with the rudder
fitting on top of that. The upper wing is mounted onto individual wing
and cabane struts, which would benefit from the use of a jig for alignment.
The landing gear has the traditional V struts, with a one-piece spreader
bar including the axle. Slap on the two wheels and this little plane is
ready for paint.
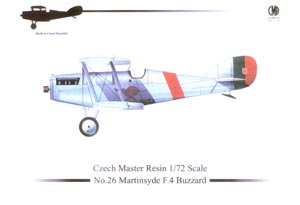
There are six pages in the instructions devoted to color schemes for
this plane. One of which requires no decals, so we'll start with that
one. This is an F.4 Buzzard of the Polish Air Service and was the personal
aircraft of the commanding officer of the Polish Air Force, General Wlodzimierz
Zagorski. This plane is finished in red and white stripes running horizontally
along the fuselage, wings, and tailplanes. There is no chance that this
plane would be missed!
 Next
up, still in the Baltic region, are a couple Latvian examples. These are
the same except for a change in tail numbers (either 16 or 31), and both
are finished in dark green over light gray, with Latvian roundels in six
positions. Moving north and to the west, we come to Finland, where the
Martinsyde F.4 Buzzards were finished in overall silver. Here there several
different serial number options, with different styles and different roundel
placements on the fuselage. Next
up, still in the Baltic region, are a couple Latvian examples. These are
the same except for a change in tail numbers (either 16 or 31), and both
are finished in dark green over light gray, with Latvian roundels in six
positions. Moving north and to the west, we come to Finland, where the
Martinsyde F.4 Buzzards were finished in overall silver. Here there several
different serial number options, with different styles and different roundel
placements on the fuselage.
Swinging down into the Low Countries, next up is Belgium. Here is a
single option, this one being PC10 over CDL. A white numeral 1 is on the
fuselage sides, with Belgian roundels on the wings and the tricolor on
the rudder. Crossing the Channel, we come to the RAF option, this being
D4256. It too is finished in PC10 over CDL, with standard British roundels
in the usual places. Finally, we head south to the Iberian Peninsula,
with a Portuguese example. This plane is silver overall (although the
instructions suggest that it might have been CDL as well). A running dog
is on the fuselage, along with a red stripe, and the Portuguese national
markings are in the usual places.
The decals are nicely printed with wonderful register (the white outline
to the British roundels and serial numbers are perfect!) and should have
no problems in application.
Conclusion
This is a welcome re-release of an earlier CMR kit and I hope they continue
the trend of releasing kits from their product line with new decals.
|
|
