Academy 1/72 F-8 Crusader
|
 |
Introduction
This kit was the subject of an in-the-box review last
month, so to see the components go to last months issue..
Construction
It has been a very long time coming, but we finally have a really good
1/72nd F-8 kit. I played with the Heller kit, tried the Hasegawa kit,
and bought a couple of the Ace and Revell kits and even a couple of the
RVHP resin RF-8 resin fuselages. But none of them seemed to really capture
the lines of the real airplane quite right. Finally, after about three
years of promises and teasing the new Academy kit arrived.
 So,
what is the kit really like? Well, I would expect a bunch of older kits
to start showing up on e-bay when this one hits the local hobby shops.
It is (finally) the Crusader kit we have been waiting for. Sure there
are a few minor glitches here and there, but I will cover them as I go
through my build. There is really nothing that fits poorly or detracts
from the build at all. So,
what is the kit really like? Well, I would expect a bunch of older kits
to start showing up on e-bay when this one hits the local hobby shops.
It is (finally) the Crusader kit we have been waiting for. Sure there
are a few minor glitches here and there, but I will cover them as I go
through my build. There is really nothing that fits poorly or detracts
from the build at all.
My first impressions as I started the build were "Wow! This thing
is complex". And to some degree it is. Before you assemble the left
and right fuselage halves, you have to build and install six separate
parts to trap between the halves. The cockpit tub, the intake trunk, the
dive brake area, the under wing area, the main gear well, and the tail
hook well. Most of them have at least one or two parts to assemble. All
this stuff to fit inside the fuselage left me wondering how it was all
going to actually fit. Well, the first attempt went near perfect. All
that stuff just slips into its proper location and the two halves fit
almost flawlessly.
Some tips on the fuselage assembly now that I have done my first one
may help you with yours:
-
Be sure to drill out all the various holes in the two fuselage halves
prior to gluing them together. There are several. I forgot to do this
and ended up with a flashlight behind the fuselage, and plotting from
the inside of another kit to find the darn holes later so I could
glue on the sidewinder rails, ventral fins, afterburner cooling scoops
and maybe some other stuff I have forgotten about.
-
First the seat is probably the weakest item in the kit. A bit of
sanding to round off the corners of the parachute pack 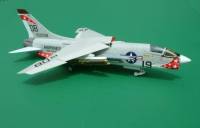 help
some, as does thinning down of the pull rings on the top of the headrest.
No seatbelt detail is provided so that needs to be added as well.
I chose to replace the seat with an aftermarket resin seat, but ran
into some minor fit problems there. The thickness of the cockpit tub
floor, plus the top of the intake duct leave the cockpit tub a bit
too shallow. Thus an accurate aftermarket seat sets too high in the
tub and you would be unable to close the canopy over it. I removed
about half the bottom of the seat pan on the resin seat and it works
just fine. help
some, as does thinning down of the pull rings on the top of the headrest.
No seatbelt detail is provided so that needs to be added as well.
I chose to replace the seat with an aftermarket resin seat, but ran
into some minor fit problems there. The thickness of the cockpit tub
floor, plus the top of the intake duct leave the cockpit tub a bit
too shallow. Thus an accurate aftermarket seat sets too high in the
tub and you would be unable to close the canopy over it. I removed
about half the bottom of the seat pan on the resin seat and it works
just fine.
-
There are two "locking arms" devices (parts C10 and C11)
that the directions tell you to install when you assemble the main
gear wells. I would recommend you leave them off until much later
in the building process, maybe just before main gear installation?
If you put them in now, they are sure to get broken or lost. Neither
of mine survived the whole build intact.
The wings are really about as simple as it gets, just top and bottom
and the four leading edge flaps. One significant item concerning the real
Crusader's wing seems relevant here. First, the provision is there to
make the kit with the unique Crusader wing jacked up in the front. The
temptation is mighty, but you should know that when the wing is in the
up position on the real airplane, the leading and trailing edge flaps
are down. It all happens automatically. Since the kit does allow you to
put the wing up, it is really too bad they didn't give you the ability
to do it right and drop the flaps as well. I used an aftermarket wing
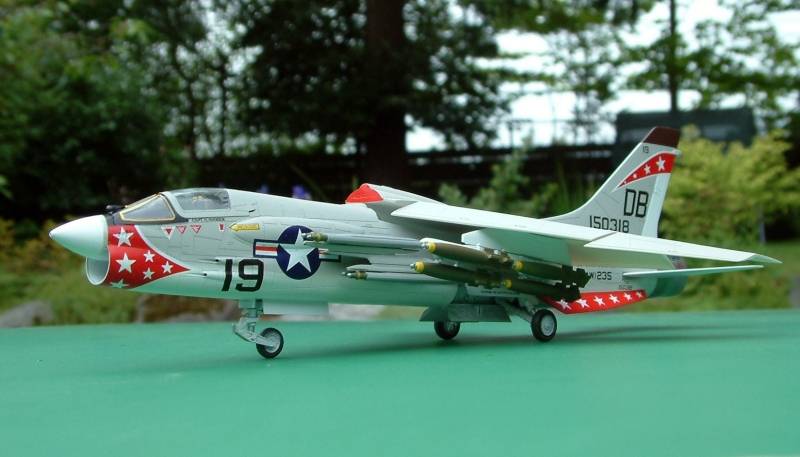
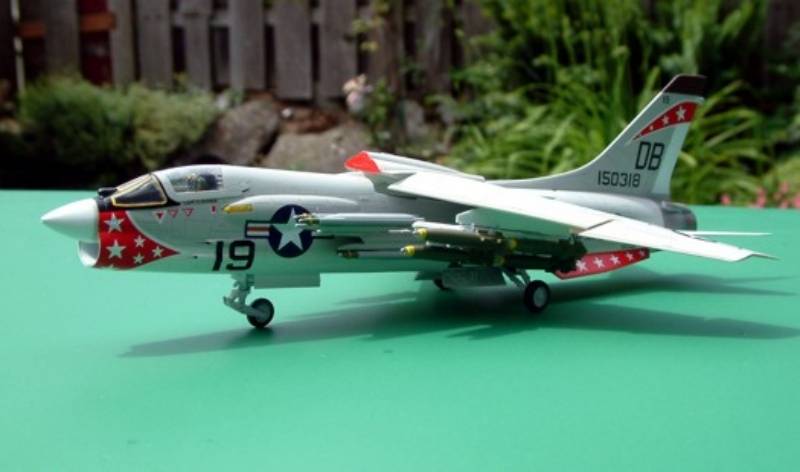
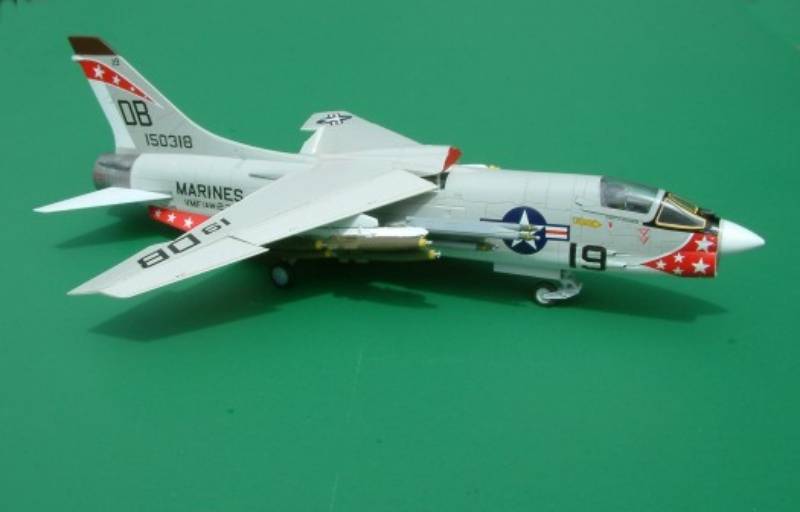
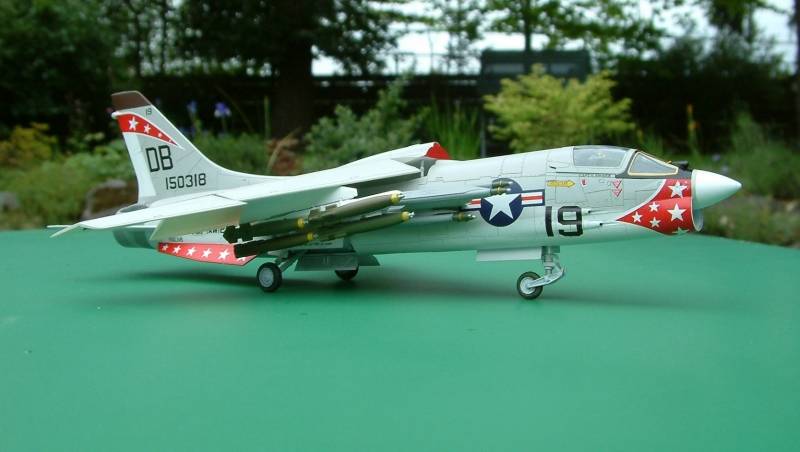
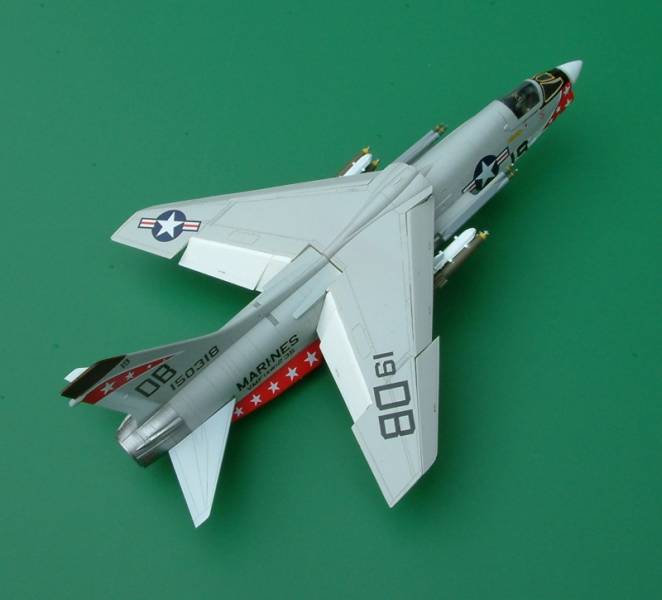
with the flaps down for my build.
 The
other wing item is the small "H" shaped post (C39) they give
you for the aft end of the wing if you choose to install it in the up
position. If you use that part it jacks the rear of the wing way up above
the aft fuselage. The actual airplane just hinges at that point, it does
not stick up beyond the fuselage. The way to fix that is just to not use
part C39 and glue the wing to the aft fuselage. The
other wing item is the small "H" shaped post (C39) they give
you for the aft end of the wing if you choose to install it in the up
position. If you use that part it jacks the rear of the wing way up above
the aft fuselage. The actual airplane just hinges at that point, it does
not stick up beyond the fuselage. The way to fix that is just to not use
part C39 and glue the wing to the aft fuselage.
All in all, the kit is a pleasure to build. I used no filler anywhere
and only light sanding on the various joints.
One really innovative thing Academy did was to give you a decal for
the whole windscreen frame and black anti-glare shield area. This includes
the very thin yellow sealing area around the edge of the three glass parts.
And, if the bird you choose to do does not have a black anti-glare shield,
not to worry. They give you the yellow parts as another option.
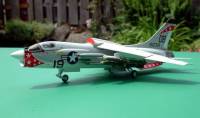
 As
mentioned above, I did use a wing with the flaps down, an aftermarket
seat and ended up with what I thought was a bit more colorful set of markings
from an old (very) Micro Scale decal sheet. As
mentioned above, I did use a wing with the flaps down, an aftermarket
seat and ended up with what I thought was a bit more colorful set of markings
from an old (very) Micro Scale decal sheet.
At last! A very well done Crusader! And it looks like more versions
still to come.
If you like post war Navy/Marine Jets, this one is a home run.
|
|