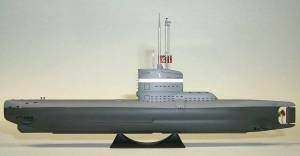
ICM 1/144 Scale Type XXIII WW2 German U-Boat
|
 |
History
The first Type XXIII U-boat (U-2321) was laid down on 10th March 1944.
It was launched and commissioned on June 12, 1944. She went out on operational
patrol around the British Isles in early 1945. The Type XXIII U-boat was
designed for operations in shallow waters. Of the 61 Type XXIII's that
were commissioned, only six boats attained operational status. These six
boats sank or damaged a combined total of five allied ships for 14,601
tons.
 Armament
for the Type XXIII consisted only of two torpedoes. This was due to the
crowded conditions of it's interior design. The torpedoes had to be reloaded
externally while the ship was in port. The Type XXIII had a normal range
of 2600 nautical miles at 8 knots (surfaced), and speeds of 9.7 knots
surfaced and 12.5 knots submerged. The normal crew complement was 14-18
men. Armament
for the Type XXIII consisted only of two torpedoes. This was due to the
crowded conditions of it's interior design. The torpedoes had to be reloaded
externally while the ship was in port. The Type XXIII had a normal range
of 2600 nautical miles at 8 knots (surfaced), and speeds of 9.7 knots
surfaced and 12.5 knots submerged. The normal crew complement was 14-18
men.
The Kit
 Using
a simple ruler, I measured the dimensions of the hull, converted it to
1/144 feet and then converted the readings to the metric system. I measured
the length at 34.5m (actual was 34.7m), the beam at 2.97m (actual was
3m) and the height at 7.55m (actual was 7.7m). As far as I'm concerned,
the dimensions of the kit are very reasonable. Using
a simple ruler, I measured the dimensions of the hull, converted it to
1/144 feet and then converted the readings to the metric system. I measured
the length at 34.5m (actual was 34.7m), the beam at 2.97m (actual was
3m) and the height at 7.55m (actual was 7.7m). As far as I'm concerned,
the dimensions of the kit are very reasonable.
I started assembly by gluing the conning tower bridge deck into the
right hull half. Before you glue it in, make sure the holes for inserting
the schnorkel and loop antenna are opened up to accept the parts. Once
the hull is glued up, you will not be able to make any adjustments for
fit.
 Next
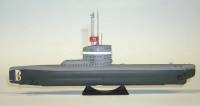
I glued the hull together. There are no locating pins on the hull, but
if done carefully, you won't need them. I started by gluing the conning
tower using liquid cement. I gradually worked my way around the hull,
bow first, then the stern. The bow "chin" under the hull didn't
line up exactly, but this was the only place I noticed any "match-up"
problem worth mentioning. Next
I glued the hull together. There are no locating pins on the hull, but
if done carefully, you won't need them. I started by gluing the conning
tower using liquid cement. I gradually worked my way around the hull,
bow first, then the stern. The bow "chin" under the hull didn't
line up exactly, but this was the only place I noticed any "match-up"
problem worth mentioning.
The only places that required any filling were the two "dimples"
on the keel where the hull halves were attached to the sprue. The rest
of the seams sanded smooth. I did have to sand off the molded in steps
on the front side of the conning tower in order to get that seam flush.
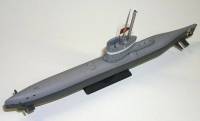 Using
a #78 drill bit, I drilled several small holes in the conning tower to
hold replacement steps for the ones I sanded off. I made a template for
forming the steps using an old Popsicle stick, and used it to bend some
30 gauge enameled armature wire for the new steps. These were glued in
place using small amounts of Krazy Glue. Because the conning tower would
receive a horizontal white decal stripe, I left the one step that it would
interfere with off until after decaling was finished. Using
a #78 drill bit, I drilled several small holes in the conning tower to
hold replacement steps for the ones I sanded off. I made a template for
forming the steps using an old Popsicle stick, and used it to bend some
30 gauge enameled armature wire for the new steps. These were glued in
place using small amounts of Krazy Glue. Because the conning tower would
receive a horizontal white decal stripe, I left the one step that it would
interfere with off until after decaling was finished.
I next glued on the diving planes and fins. I cut the whip antennas
off of their bases, and attached the bases to the inside of the conning
tower. This completed the assembly for painting. I decided to follow the
instruction sheet color scheme for the U-2322. Not having any color references,
I decided to use what looked good to me. I used Model Master Euro I Gray
for the lower surfaces. Once this was dry, I masked the hull with plastic
electrical tape and sprayed the upper surfaces using Model Master Neutral
Gray. After drying for a couple of days, I sprayed the model with Model
Master Clear Acrylic Gloss for a solid decal base.
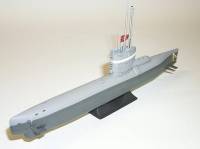 Rather
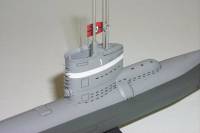
than masking and painting, I used a Super Scale white decal stripe for
the stripe on the conning tower. The U-2322 "emblem" was taken
from the kit decal sheet, as were the bow depth markings. The kit decals
have a flat sheen. I did get a little silvering on the starboard side
bow markings. I added the remaining wire step, painted it, and turned
my attention to the detailing. Rather
than masking and painting, I used a Super Scale white decal stripe for
the stripe on the conning tower. The U-2322 "emblem" was taken
from the kit decal sheet, as were the bow depth markings. The kit decals
have a flat sheen. I did get a little silvering on the starboard side
bow markings. I added the remaining wire step, painted it, and turned
my attention to the detailing.
Using a black disposable drafting pen, I colored in all the holes, baffles,
and panel lines on the model. I outlined some of the lines on the deck
and hull, then washed most of the color off, in order to present a more
subdued appearance. I decided that in this small scale it, overkill on
the detailing would be very easy to do. I liked the overall effect I ended
up with.
I painted and glued on the loop antenna, schnorkel, and periscope. Note
that there is no stop on the periscope to control how high it sticks up.
I just lined it up to where it looked good. I also thought keeping the
schnorkel in the extended position would give the model a more menacing
appearance.
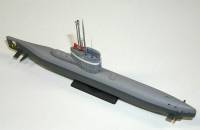 I
drilled a small hole and used a wire lead from an 1/8 watt resistor to
replace the kit's flagpole. I then added the whip antennas using fine
stainless steel wire to the bases. After all the "fiddly bits"
were glued on and dry, I sprayed the model with Model Master Clear Acrylic
Flat. When dry, I added the propeller, which was painted with Model Master
Brass. The display stand was painted flat black and attached to the sub.
The Reich flag on the decal sheet lacks a swastika. I found a reasonable
replacement in my decal scrap box, and attached it to complete the model. I
drilled a small hole and used a wire lead from an 1/8 watt resistor to
replace the kit's flagpole. I then added the whip antennas using fine
stainless steel wire to the bases. After all the "fiddly bits"
were glued on and dry, I sprayed the model with Model Master Clear Acrylic
Flat. When dry, I added the propeller, which was painted with Model Master
Brass. The display stand was painted flat black and attached to the sub.
The Reich flag on the decal sheet lacks a swastika. I found a reasonable
replacement in my decal scrap box, and attached it to complete the model.
Conclusion
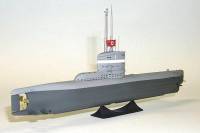 This
was a simple, yet fun, kit to build. From the references I was able to
find, it accurately captures the shape of the Type XXIII, and is dimensionally
to scale. It would be nice if there were some crewman to place in the
completed conning tower, but that is the only criticism I have concerning
this kit. I think it will be a popular kit, and can recommend it to anyone
interested in WW2 U-boats. For their part, I hope ICM turns out more submarine
kits in the future. This
was a simple, yet fun, kit to build. From the references I was able to
find, it accurately captures the shape of the Type XXIII, and is dimensionally
to scale. It would be nice if there were some crewman to place in the
completed conning tower, but that is the only criticism I have concerning
this kit. I think it will be a popular kit, and can recommend it to anyone
interested in WW2 U-boats. For their part, I hope ICM turns out more submarine
kits in the future.
As a foot note, since starting this kit, I have found several other
submarine kits available in 1/144 scale from various manufacturers. One
of these is the U-2322's big sister, the Type XXI.
Thanks to ICM Holding for the review
sample.
References
uboat.net - The U-boat War 1939-1945
|
|
