Pro Resin 1/72nd Curtiss P-1A, F6C-2 and F6C-3 Hawks
|
 |
History
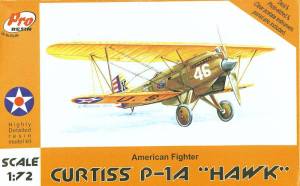
The history of the Curtiss Hawks is vast and spans multiple years. The
P-1 was a United States 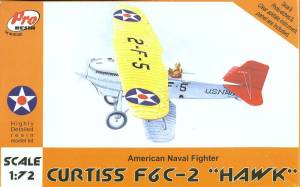 Army
Air Corp (USAAC) match for the requirement of a single-seat pursuit (the
'P' in P-1) aircraft. The P-1A was an improvement on the P-1 by lengthening
the fuselage by three inches as well as adding the improved D-12C engine
(the P-1 used the "standard" D-12). The aircraft was so well
liked that the US Navy ordered the P-1 as the F6C-1. Army
Air Corp (USAAC) match for the requirement of a single-seat pursuit (the
'P' in P-1) aircraft. The P-1A was an improvement on the P-1 by lengthening
the fuselage by three inches as well as adding the improved D-12C engine
(the P-1 used the "standard" D-12). The aircraft was so well
liked that the US Navy ordered the P-1 as the F6C-1.
The F6C-2 was an enhancement on the F6C-1 by replacing the "land-based"
landing gear with gear that was better suited to landing on aircraft carriers.
The F6C-3 improvements were actually done before the P-1A was put into
production, therefore the P-1A was the direct result of the F6C-3 enhancements.
These enhancements included 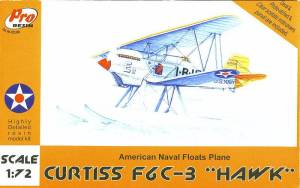 the
addition of the D-12C engine as well as the longer - and stronger - fuselage.
In addition, the initial shipboard F6C-3s had the same landing gear and
tail skid as the F6C-2, but later on those items were replaced by what
was used on the production F6C-4s. However, the Marine Corp F6C-3s used
the same land-based landing gear that was used on the F6C-1, or P-1A. the
addition of the D-12C engine as well as the longer - and stronger - fuselage.
In addition, the initial shipboard F6C-3s had the same landing gear and
tail skid as the F6C-2, but later on those items were replaced by what
was used on the production F6C-4s. However, the Marine Corp F6C-3s used
the same land-based landing gear that was used on the F6C-1, or P-1A.
The Kit
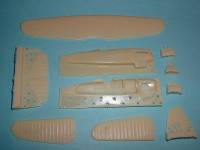
All three kits have a number of common components. These are the wings,
tail surfaces and cockpit pieces. The rest is different from kit to kit.
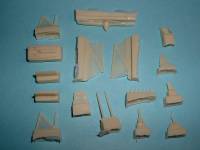 There
are 37 resin pieces to the P-1A, along with 10 photoetch and a piece of
clear acetate (used for such things as the instruments and the windscreen).
There is only one set of markings for a machine of the 43rd School Squadron
based at Kelly Field, Texas, in 1930. There
are 37 resin pieces to the P-1A, along with 10 photoetch and a piece of
clear acetate (used for such things as the instruments and the windscreen).
There is only one set of markings for a machine of the 43rd School Squadron
based at Kelly Field, Texas, in 1930.
There are also 37 resin pieces for the F6C-2 (difference being the fuselage
halves as well as the undercarriage), but with 19 photoetch pieces (the
additional being the spoked wheels as well as the landing cable "catchers"
found on the underside of the axle) and also the clear acetate. Markings
are again for only one machine, this one being from VF-2, NAS North Island,
San Diego, California, 1926.
 The
F6C-3 naturally has more resin, since it represents the float version
of the Hawk. It comes with 43 resin pieces but the same photoetch and
clear acetate as found in the P-1A (10 and 5 pieces, respectively). Again
only one machine is covered in the decal sheet, that being a machine from
VF-5, Norfolk, Virginia, 1928. The
F6C-3 naturally has more resin, since it represents the float version
of the Hawk. It comes with 43 resin pieces but the same photoetch and
clear acetate as found in the P-1A (10 and 5 pieces, respectively). Again
only one machine is covered in the decal sheet, that being a machine from
VF-5, Norfolk, Virginia, 1928.
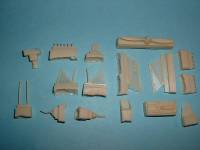
All three kits are extremely well done and I haven't found any surface
flaws with the resin pieces yet. The only possible problem lies with the
first few kits of the P-1A - its fuselage halves are slightly warped,
needing hot water to straighten out. Everything else in all three kits
is extremely well done.
 Construction
of all three naturally starts with the cockpit, and the detail in all
three is outstanding. The molded in detail is quite exceptional and to
that you add a really well done floor with photoetch rudder pedals, a
control stick and a resin seat with photoetch belts. Couple that with
the photoetch and clear "film" instrument panel the cockpit
is very complete - although the super detailer has plenty of room to add
items to their heart's desire. Construction
of all three naturally starts with the cockpit, and the detail in all
three is outstanding. The molded in detail is quite exceptional and to
that you add a really well done floor with photoetch rudder pedals, a
control stick and a resin seat with photoetch belts. Couple that with
the photoetch and clear "film" instrument panel the cockpit
is very complete - although the super detailer has plenty of room to add
items to their heart's desire.
The instructions then have you assemble all the major pieces together.
Install the cockpit pieces to a fuselage half, close the fuselage halves
then add some of the flying surfaces. While the instructions have you
add the upper wing in the same step, I would hold off until initial painting
is complete.
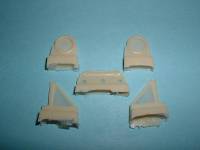 The
rest of the pieces are added once initial painting is complete. I like
the way Pro Resin provides the exhaust stacks as complete items instead
of gluing on separate exhaust pipes. The
rest of the pieces are added once initial painting is complete. I like
the way Pro Resin provides the exhaust stacks as complete items instead
of gluing on separate exhaust pipes.
The final construction step is where each kit differentiates, since
the P-1A has different undercarriage from the F6C-2, and the F6C-3 is
completely different from the other two since that kit is float-based.
Kit Accuracy
The only place any of these kits fall from accuracy is the F6C-3. According
to the Squadron Signal 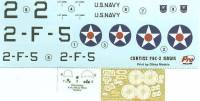 In
Action book, the area under the tail around the tailskid should be shaped
differently. The example catered for on the decal sheet appears to have
the F6C-4-type tail skid installed, instead of the F6C-2. There is a picture
of the exact aircraft that Pro Resin models on page 13 of Curtiss Navy
Hawks In Action. Adding this feature appears to be as easy as doing
some filing/sanding and adding a piece in front of the tail skid to "beef
up" the area. In
Action book, the area under the tail around the tailskid should be shaped
differently. The example catered for on the decal sheet appears to have
the F6C-4-type tail skid installed, instead of the F6C-2. There is a picture
of the exact aircraft that Pro Resin models on page 13 of Curtiss Navy
Hawks In Action. Adding this feature appears to be as easy as doing
some filing/sanding and adding a piece in front of the tail skid to "beef
up" the area.
Possible Additions
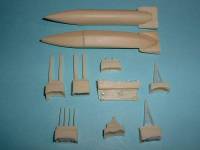 At
first I was hoping that the P-1A could be converted into later-series
Hawks (P-1B and forward). However, the P-1B changed the shape of the under-nose
radiator so that would be a major undertaking to convert. At
first I was hoping that the P-1A could be converted into later-series
Hawks (P-1B and forward). However, the P-1B changed the shape of the under-nose
radiator so that would be a major undertaking to convert.
In addition, the P-1 could be made from the P-1A easily, as there appears
to be only a "real" three-inch difference in fuselage length
between the P-1 and the P-1A. In 1/72nd this is practically immeasurable
so all you need are decals to make one of the P-1s.
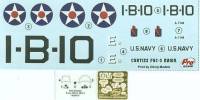 There
is one other possibility for the purists out there who would like an example
of every aircraft. Pro Resin could release the P-1A as the F6C-1, but
as I mentioned it would be for the purists, as only five existed. Pro
Resin could add a new decal sheet with the inclusion of the F6C-2 photoetch
(as every photo I have seen of the F6C-1s show them with uncovered, spoked
wheels). However, I'm not sure about the economics of such a release,
so those wanting such an aircraft could purchase one of each and do their
own combining - the only difficulty would be coming up with decals for
the F6C-1. There
is one other possibility for the purists out there who would like an example
of every aircraft. Pro Resin could release the P-1A as the F6C-1, but
as I mentioned it would be for the purists, as only five existed. Pro
Resin could add a new decal sheet with the inclusion of the F6C-2 photoetch
(as every photo I have seen of the F6C-1s show them with uncovered, spoked
wheels). However, I'm not sure about the economics of such a release,
so those wanting such an aircraft could purchase one of each and do their
own combining - the only difficulty would be coming up with decals for
the F6C-1.
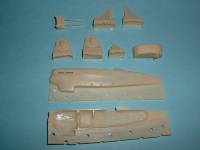 Two
other possibiliteis are: to make a land-version, initial-delivery F6C-3
by combining the landing gear from the F6C-2 and wheels from the P-1A
(the images of these F6C-3s show a covered wheel, showing no spokes);
or you could build a Marine Corp F6C-3 by combining the landing gear from
the P-1A with the F6C-3 kit. Making the later-delivered F6C-3 (with the
F6C-4 landing gear) will require scratchbuilding new landing gear struts. Two
other possibiliteis are: to make a land-version, initial-delivery F6C-3
by combining the landing gear from the F6C-2 and wheels from the P-1A
(the images of these F6C-3s show a covered wheel, showing no spokes);
or you could build a Marine Corp F6C-3 by combining the landing gear from
the P-1A with the F6C-3 kit. Making the later-delivered F6C-3 (with the
F6C-4 landing gear) will require scratchbuilding new landing gear struts.
(In above paragraphs I mentioned the F6C-4. Making an F6C-4 from the
F6C-3 will require major surgery as it was radial powered instead of being
powered by an in-line engine.)
Conclusion
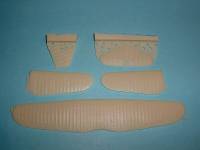 One
huge plus in Pro Resin's favor with their kits is the inclusion of a set
of references. More model manufacturers need to follow Pro Resin's lead
and provide this to their customers. That way we can see exactly what
the company was looking at when they manufactured their kits. Being that
as it may, the only thing I can come up with in regards to the shape problem
mentioned above on the F6C-3 as that Pro Resin wanted to provide as many
options as possible, with little expenditure in funds. One
huge plus in Pro Resin's favor with their kits is the inclusion of a set
of references. More model manufacturers need to follow Pro Resin's lead
and provide this to their customers. That way we can see exactly what
the company was looking at when they manufactured their kits. Being that
as it may, the only thing I can come up with in regards to the shape problem
mentioned above on the F6C-3 as that Pro Resin wanted to provide as many
options as possible, with little expenditure in funds.
All in all, the three Hawk kits are extremely well done and are definitely
needed. Years and years ago there was a vacuform-replacement fuselage
from Rareplane's Rarebits line to convert  the
antiquated Monogram P-6 kit into the P-1A, and that was your only choice
for making this early Hawk. This is no longer needed and can be considered
outdated and best left ignored. These kits are very welcome and highly
recommended. Now if only we could get some support decals so we could
model different Hawks. the
antiquated Monogram P-6 kit into the P-1A, and that was your only choice
for making this early Hawk. This is no longer needed and can be considered
outdated and best left ignored. These kits are very welcome and highly
recommended. Now if only we could get some support decals so we could
model different Hawks.
My thanks to Pro Resin for the
review samples. |
|
