Academy 1/72 F-8 Crusader (Part 3)
|
 |
Introduction
We reviewed this kit 'in the box' in the May issue of Internet Modeler,
then, I did a build review in the June issue. This time I will show you
how to rework this excellent kit to get an earlier version.
Construction
 As
I reviewed my references on the Crusader, it quickly became apparent that
many of the more colorful markings were applied to early versions of the
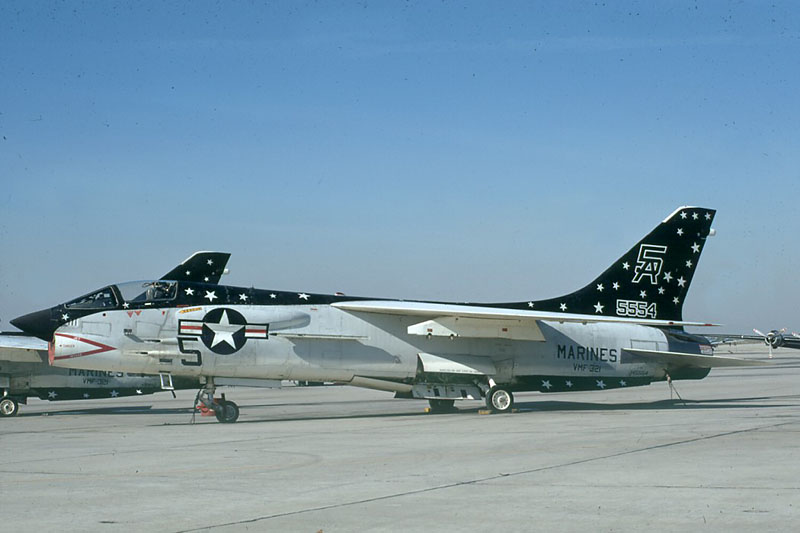
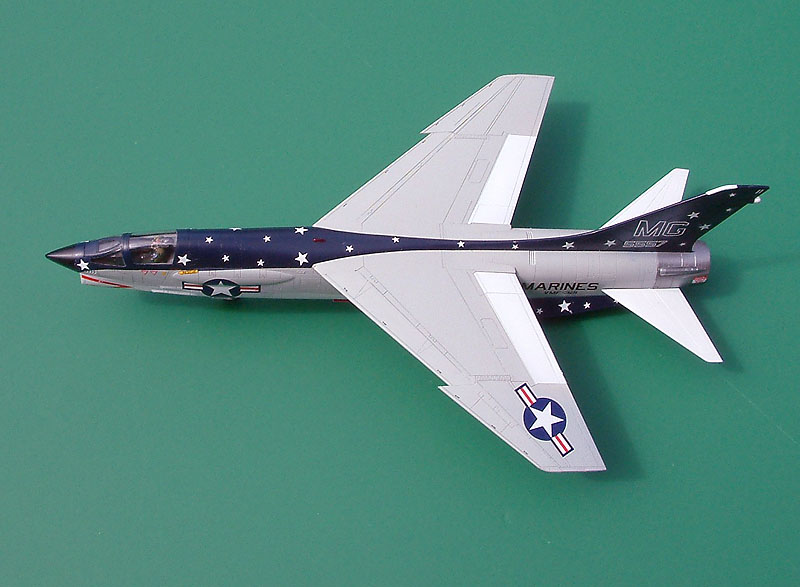
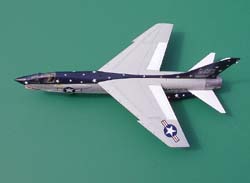
airplane, often in Reserve Squadrons. The attached F-8K is an excellent
example of this. The principal visual differences between the F-8K I wanted
to model and the kit is the smaller, more pointed radome and the lack
of a bulge on the top of the wing center section. Since neither of these
seemed to be major obstacles, I decided to attempt the rework. As
I reviewed my references on the Crusader, it quickly became apparent that
many of the more colorful markings were applied to early versions of the
airplane, often in Reserve Squadrons. The attached F-8K is an excellent
example of this. The principal visual differences between the F-8K I wanted
to model and the kit is the smaller, more pointed radome and the lack
of a bulge on the top of the wing center section. Since neither of these
seemed to be major obstacles, I decided to attempt the rework.
As I dug around in the catacombs I call my reference library, I discovered
an old Microscale decal sheet with just the markings I wanted, and a picture
that graphically showed the difference between the early radome and the
later one that the kit represents. That was the final incentive; it was
off to the shop with my second Academy Crusader firmly in hand.
Nose Radome rework
 When
I compared the kit to the photos and drawings of the early bird, I suspected
that I would have to remove enough material on the radome that there was
a real danger of either sanding completely through the sidewalls or they
would be so thin as to have no strength. The last thing I wanted was to
be almost done and have the radome collapse. The way I eliminated this
potential problem was to stuff the inside of each half of the radome with
Apoxie Sculpt. This is great stuff
to work with. You may remember Tim Bradley used it to fill the cabin windows
on his Airliner review a few issue ago. They are also one of our sponsors
and I would urge you to give it a try. The real advantage is it cures
in about three hours and when dry has a surface hardness and smoothness
almost identical to the styrene. Also can be smoothed with just a wet
finger during application to the point where finishing is rather simple.
Final big plus for me is that it scribes beautifully and has no apparent
shrinkage when cured. When
I compared the kit to the photos and drawings of the early bird, I suspected
that I would have to remove enough material on the radome that there was
a real danger of either sanding completely through the sidewalls or they
would be so thin as to have no strength. The last thing I wanted was to
be almost done and have the radome collapse. The way I eliminated this
potential problem was to stuff the inside of each half of the radome with
Apoxie Sculpt. This is great stuff
to work with. You may remember Tim Bradley used it to fill the cabin windows
on his Airliner review a few issue ago. They are also one of our sponsors
and I would urge you to give it a try. The real advantage is it cures
in about three hours and when dry has a surface hardness and smoothness
almost identical to the styrene. Also can be smoothed with just a wet
finger during application to the point where finishing is rather simple.
Final big plus for me is that it scribes beautifully and has no apparent
shrinkage when cured.
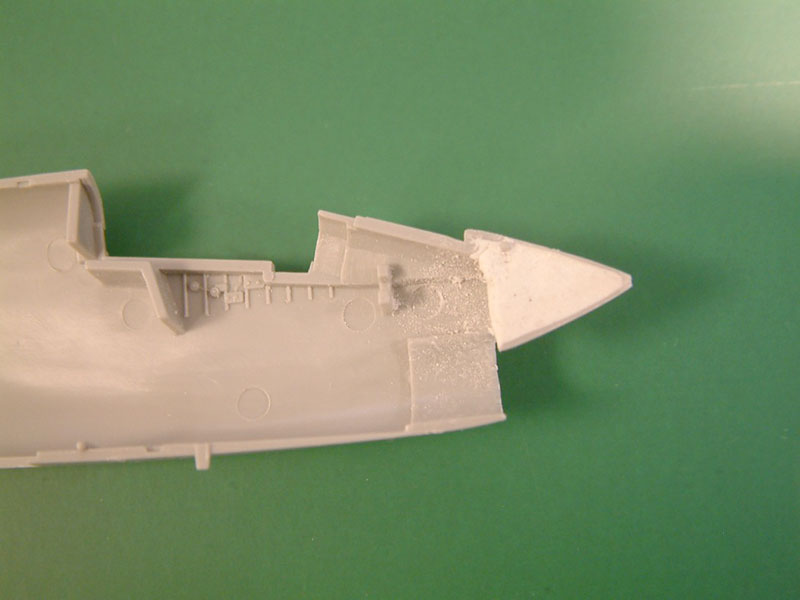
After I stuffed the radome halves, I assembled the fuselage in normal
sequence, but left off the clear parts and none of the gear, gear doors
and wing. After everything was dry, I proceeded to clean up all the normal
fuselage join seams and then started on the radome reduction.
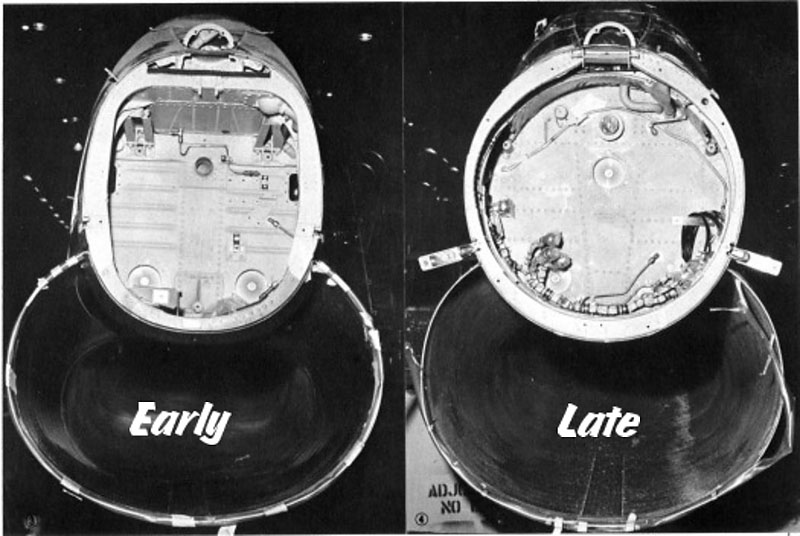
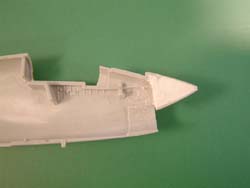
 What
needs to happen here is the kit radome has a rather bulbous shape when
viewed from the side. The early airplane has a more pointed side view.
Also as the reference picture shows, the later airplane has a round cross
section and the early one a rather more rectangular cross section. I wanted
to remove enough material to get the correct shape without having to reshape
the area under the windscreen too much. My hope was to preserve the vents
there. This part went quickly and while I did not break through the radome
walls, it did get very thin and the Apoxie Sculpt was a good plan. What
needs to happen here is the kit radome has a rather bulbous shape when
viewed from the side. The early airplane has a more pointed side view.
Also as the reference picture shows, the later airplane has a round cross
section and the early one a rather more rectangular cross section. I wanted
to remove enough material to get the correct shape without having to reshape
the area under the windscreen too much. My hope was to preserve the vents
there. This part went quickly and while I did not break through the radome
walls, it did get very thin and the Apoxie Sculpt was a good plan.
Overwing Bulge removal
 The
extra bulge over the wing center section was added to later Crusaders
to house the avionics for the Bullpup missiles that these later birds
were capable of carrying. I have never actually seen a picture of an operational
airplane carrying these missiles, but the bulge was on all later models.
It needed to come off of the model I was building. I made a mistake and
tried to fill the underside prior to assembly, then grind and sand it
off, clean it up and then attach it to the top of the wing. Bad plan!
Even with the filling, the part tended to distort enough to make it a
very poor fit. A better plan would have been to just attach it to the
model, remove the bulge and fill the void with Apoxie Sculpt and finish
it on the model. Lessen learned for the next one. The
extra bulge over the wing center section was added to later Crusaders
to house the avionics for the Bullpup missiles that these later birds
were capable of carrying. I have never actually seen a picture of an operational
airplane carrying these missiles, but the bulge was on all later models.
It needed to come off of the model I was building. I made a mistake and
tried to fill the underside prior to assembly, then grind and sand it
off, clean it up and then attach it to the top of the wing. Bad plan!
Even with the filling, the part tended to distort enough to make it a
very poor fit. A better plan would have been to just attach it to the
model, remove the bulge and fill the void with Apoxie Sculpt and finish
it on the model. Lessen learned for the next one.
Final assembly and finishing
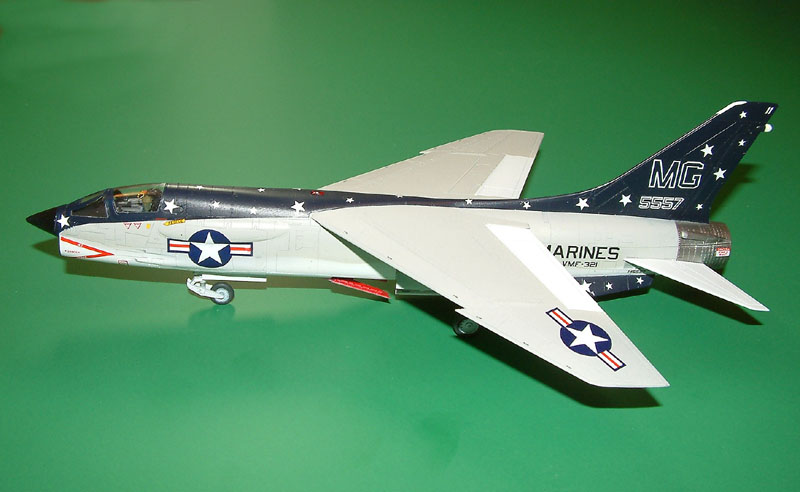
 The
rest of the build is identical to the June build so not much reason to
cover it again. On to the final laps of this project-applying decals.
Oh oh! The old Microscale stickers tail markings are too big. Well a couple
hours of work with the ALPs printer and computer and that was fixed. Ain't
modern technology wonderful? The
rest of the build is identical to the June build so not much reason to
cover it again. On to the final laps of this project-applying decals.
Oh oh! The old Microscale stickers tail markings are too big. Well a couple
hours of work with the ALPs printer and computer and that was fixed. Ain't
modern technology wonderful?
Conclusion
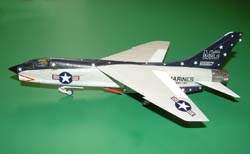
This is really a very simple rework. It has taken me about as long
to write about it as it took to actually do the rework. But the benefit
is now the range of markings for this fine new kit is much expanded. I
intend to do at least a couple more of these and when the next version
arrives from Academy I will be able to do almost the entire line of what
might have been one of the Navy's finest fighters.
In the next month or two, I will move on to the next exciting episode
of the great Crusader project. How about an RF-8?
|
|