Custom Dioramics
1/35 Small Turret Bunker | 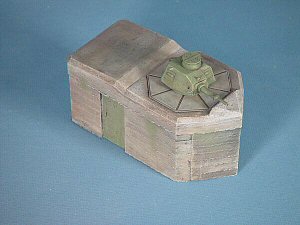 | Background During WW2, the Germans never let any captured materials go to waste. After the fall of France, the Germans recycled much of the usable materials left over from the French military including their WW1-era FT-17 light tank that was still in service. As the FT-17 was no match for contemporary German armor, the tank was relegated to the defense of outlying lower-threat regions like Norway. Even when the tank was no longer serviceable, the Germans made use of the turrets and main guns for defensive bunkers. At least one such bunker still exists today in Norway. The Kit  When this new kit from Custom Dioramics arrived, I decided to try my hand at this different form of multimedia kit. Produced from plaster of Paris and resin, this kit represents a gun emplacement typical of the German defensive bunkers around occupied Europe. While I have acquired a few kits/diorama accessories made from plaster of Paris, I had never gotten around to trying one. When this new kit from Custom Dioramics arrived, I decided to try my hand at this different form of multimedia kit. Produced from plaster of Paris and resin, this kit represents a gun emplacement typical of the German defensive bunkers around occupied Europe. While I have acquired a few kits/diorama accessories made from plaster of Paris, I had never gotten around to trying one.
So what is different about plaster of Paris? It is a type of ceramic material that, if you drop it, will shatter into tiny rubble. It doesn’t assemble with cement nor cyano. It also requires a bit of preparation before painting as well. Is it difficult? I gave it a try. 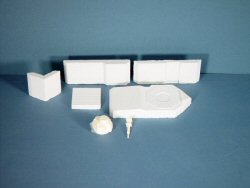 The first step was to sand off the molding excess on the plaster parts as well as cut away the casting blocks from the resin parts. The plaster is far easier to prepare as a few swipes with a sanding stick took care of any excess. The first step was to sand off the molding excess on the plaster parts as well as cut away the casting blocks from the resin parts. The plaster is far easier to prepare as a few swipes with a sanding stick took care of any excess.
After dry-fitting the walls and bunker top together, the next step was to mix up a batch of 10-minute epoxy (or whatever curing speed preference you choose). I applied the epoxy to the wall joints like peanut butter and fit the pieces together. Once the walls were together, I applied a layer along the tops of the walls and put the top of the bunker in place. I set the whole assembly aside and turned my attention to the turret. The resin turret represents a French FT-17 that was one of the turrets available in surplus for bunker duty. The gun barrel on my example was not completely cast, so I replaced it with a section of brass tube of the same diameter and length. Assembly was easy and quick. The plaster of Paris requires a base coat of some sort to fill the porous surface and prepare the surface for normal modeling paints. I decided to try an airbrushed coat of Mr. Surfacer 1000. This went on smoothly (as well it should) and worked magnificently as a base coat. The remainder of the paints used were acrylics for color and oils for weathering. 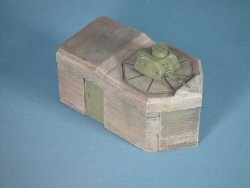 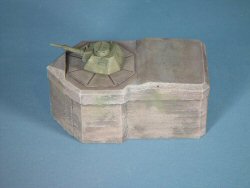 After painting and weathering the concrete surfaces of the bunker, I painted the door and turret dark green. There were two small holes on the door where a handle would be, so I fashioned a door handle from brass wire and cyanoed the handle into place. 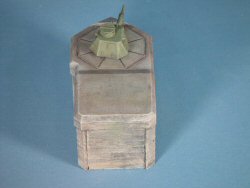 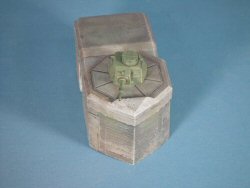 After weathering the turret with dry-brushing and Rust-All, I applied a liberal coat of Rust-All number 2 (Black) to the whole model to add depth to the surface of the concrete. The final step was a dry brushing of light gray on the concrete seams and turret edges to highlight details. Conclusion This was a very quick build (a few hours) and I now have a bunker that will set nicely into a vignette. What’s more, I now have the confidence to work with other plaster of Paris materials and I have found one way (Mr. Surfacer 1000) to prepare the surface in order to make the model compatible with normal modeling paints and techniques. My sincere thanks to VLS for this review sample!
| 


|

 When this new kit from Custom Dioramics arrived, I decided to try my hand at this different form of multimedia kit. Produced from plaster of Paris and resin, this kit represents a gun emplacement typical of the German defensive bunkers around occupied Europe. While I have acquired a few kits/diorama accessories made from plaster of Paris, I had never gotten around to trying one.
 The first step was to sand off the molding excess on the plaster parts as well as cut away the casting blocks from the resin parts. The plaster is far easier to prepare as a few swipes with a sanding stick took care of any excess.


