Italeri 1/35 LVT(A)4 Kit No. 6396
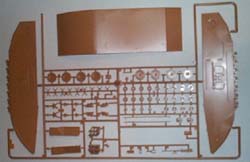
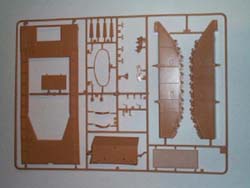
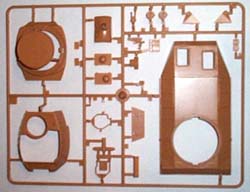
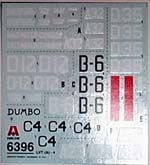
MSRP: $30.00 | 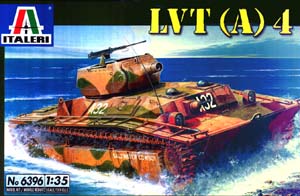 | History (from the kit's instruction sheet) The redesigned version of the amphibian support vehicle LVT(A)1 was developed for the American Marines. In the course of numerous actions during the Pacific Campaign, the Marines became aware of the need for a vehicle more heavily armed than its predecessor which had a 37mm cannon. This improvement was necessary to better counteract the Japanese fortifications and tanks which grew in number as the war progressed. Equipped with a new tower housing, and a 75mm howitzer, this vehicle was widely used in the battles for the conquest of Iwo Jima and Okinawa. What's in the box? The kit comes in a tray and lid type box. Inside are three tan trees of plastic parts, four lengths of black vinyl rubber-band type tracks, the decal sheet and the instructions. The parts trees are all loose, with no cello bags. Italeri released an LVT(A)1 "Alligator" version of this amphibious tank in 2000. It was kit no. 6384. This new kit shares a lot of common parts with that earlier kit. The (A)1 was molded in olive drab plastic. This new kit is molded in light sand colored plastic. Tree letter "A" is 90% identical to the same tree in the earlier (A)1 kit. The difference is that the earlier kit had two .30 caliber machine-guns molded on the tree. The new (A)4 omits these parts on the tree and adds a .50 caliber machine gun and two grill panels that are new to this tree. The tree holds: the vehicle's inner side panels, bottom panel, grill panels, boat hook poles, road wheels, return rollers, drive sprockets, suspension parts, grab handles etc. Two parts are shaded out, on the parts drawings on the instructions, as being excess and not to use. (82 parts here). Tree letter "B" is totally the same as the earlier (A)1 kit, but you do not use one part (part no. 23) which is a diamond patterned floor panel. This tree holds: the vehicle's outer side panels, a top panel, rear panel and other small parts. (29 parts) Tree letter "C" is totally new and unique to this kit. It holds: a second top panel, gun breech, turret parts, mantle etc. (24 parts). Letter "D" is the four lengths of black vinyl rubber-band type treads. (also the same as the first kit). This means that we will be faced with two hot-screwdriver riveting jobs, per side, to join each run into a continuous loop. Not something I look forward to. One length, per side, would have been nicer. The decal sheet gives markings for six different schemes. This is a real step upward from the older (A)1 kit. It only had two schemes and was very lacking about telling us much about those markings. Only that one was South Pacific Theatre and the other one pretty generic. What six schemes do we get?: 1. U.S. Marines, Iwo Jima 1945. 2. U.S. Marines 3rd Armoured Amphibian Battalion, Peleliu 1942. 3. A second scheme for the 3rd Armoured Amphibian Battalion, Peleliu 1942. 4. A second scheme for the U.S. Marines, Iwo Jima 1945. 5. U.S. Army 7th Infantry Division, Okinawa 1945. 6. U.S. Marines 2nd Armoured Amphibian Battalion, Iwo Jima 1945. The instructions are a large single sheet that accordian folds out into 10 pages. Page one gives the vehicle's history, in six languages including English. The bottom of the page gives useful advice, about assembly of the kit, in 11 languages. Page two has the parts tree drawings, followed by Model Master paint color listings to use. Page three through the top of page seven gives us nine total assembly steps. The bottom of page seven through page 9 gives us the six painting and marking drawings, as four views. It also gives us the decal application instructions. Page ten gives us possible hazard warnings in 20 different languages, followed by a mail-in coupon to use to request any parts that may be missing in the kit. Conclusion The parts are very well molded and flash free. I would have prefered them to have been in some cello bags, to prevent them rubbing together and parts breaking off the trees. I also noticed that the box art painting shows two clear domes, on top of the forward hatches of the vehicle. These are molded as SOLID in the kit. If they are really clear domes, on the actual vehicle, we will be hard pressed to find clear domes to replace the solid ones in the kit. Except for the domes, I highly recommend this kit to WWII armor modelers. It will find a welcome spot on a lot of modeling shelves. I purchased my kit at the local shop.
| 


|
