Octopus 1/72 Fairey Firefly By Tom Gloeckle |  | It started out innocently, a model that looked pretty good. Nice resin and petit scribing on cleanly molded plastic. Ah but it was deceptive, because lurking in that innocent plastic was (lightning and thunder) THE MODEL FROM HELL!
I read a review in a popular modeling magazine that promised a nice model with no vices. What kit was this guy building? Surely not the same evil beast that crossed my doorstep, and it started right away.
I guess what started the evil ball rolling was the choice of doing the two seat trainer instead of the standard fighter variant. This is where I probably made my biggest and first mistake. I thought this would be more interesting, little did I realize how interesting it would be. Cockpit The parts were all washed and dried before construction to ensure paint and glue would adhere to the parts. The cockpit parts are all very nice with lots of detail, but the sidewalls are almost paper thin. Not necessarily a bad thing, but it was difficult to glue to the cockpit floor. It was a bit of a tricky proposition to get in the fuselage. The forward cockpit was inserted from below through the wing cavity starting with the instrument panel, which has no real positive locating point, with plenty of superglue. The rest of the cockpit with even more superglue followed this, and I mean A LOT of superglue. Once that was in place, the hump with the second cockpit was put in place.
Fuselage 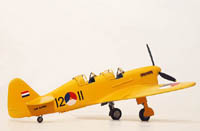 Which now leads to the assembly of the fuselage. The hump was a fair fit at best, requiring a great deal gap filling superglue, putty and lots and lots of swearing. There are no positive joining devices, which didn't pose too much of a problem in other limited run kits, but this thing needed them. There's a resin piece for the nose that includes the prop location and the radiator front. Once again, fit was quite poor, and required superglue and Miliput. When one must build as poor a kit as this, Miliput is indispensable. All that fine detail, well when all the puttying, sanding and swearing at this phase was done it was all gone. The plastic was not terribly conducive to rescribing. Besides, by this time the fed up factor was beginning to build. Little did I know it would get worse, much worse. Which now leads to the assembly of the fuselage. The hump was a fair fit at best, requiring a great deal gap filling superglue, putty and lots and lots of swearing. There are no positive joining devices, which didn't pose too much of a problem in other limited run kits, but this thing needed them. There's a resin piece for the nose that includes the prop location and the radiator front. Once again, fit was quite poor, and required superglue and Miliput. When one must build as poor a kit as this, Miliput is indispensable. All that fine detail, well when all the puttying, sanding and swearing at this phase was done it was all gone. The plastic was not terribly conducive to rescribing. Besides, by this time the fed up factor was beginning to build. Little did I know it would get worse, much worse.
Wings The wings required a moto tool grinding to thin the trailing edges and make them look better. I'm convinced nothing can now make this thing look better. Anyway, the fit of the wing halves was marginal again at best.
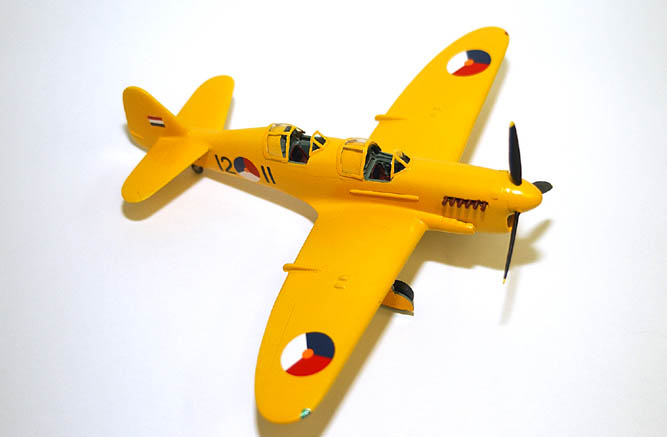
At this time I also removed the canon mounts on the wings as this is a trainer and it isn't armed. I also thinned the face of the wheel well insert that met the lower wing to ensure it didn't interfere with the fuselage. This would be the least of my worries, and had me little prepared for the further misery about to come when introducing the wings to the fuselage.
I felt it was most important to get the forward joint under the wing to match the complicated contours under the forward fuselage. This still wasn't the greatest, but not near as bad as the joint under the wing fillets. It was almost like the wing was torqued, meaning one fillet joined with a bit of an overlap, but there was a 1/8th inch of a gap on the other. A fair amount of Miliput, red putty, and even more swearing later, the underwing looked presentable.
 At this point I was beginning to doubt whether I was either a good modeler, or that I could finish this monstrosity of a kit. But I persevered. The upper wing joint was still just fair requiring more putty. The horizontal stabilizers are one piece, which, surprise, didn't fit all that great. By now my blood pressure has increased considerably. I talked to a friend of mine about this model. I made him laugh, and I can assure you, that I didn't use the same language with him that I'm using here. At this point I was beginning to doubt whether I was either a good modeler, or that I could finish this monstrosity of a kit. But I persevered. The upper wing joint was still just fair requiring more putty. The horizontal stabilizers are one piece, which, surprise, didn't fit all that great. By now my blood pressure has increased considerably. I talked to a friend of mine about this model. I made him laugh, and I can assure you, that I didn't use the same language with him that I'm using here. Details After getting the basic airframe in somewhat workable condition, it was time to work on the canopies, but before that happened, I had to clean up the cockpit edges. These were crudely shaped, sloppy and just plain unacceptable. I used small strips of plastic to clean them up. Helped a little, but not much, by now I had reached my threshold of tolerance and honestly did worry about it anymore. I just wanted to finish the Firefly and get on with my life.
The kit comes with two sets of forward canopies, and a canopy for the radioman for the fighter version, which thankfully come with spares. I must say that the forward canopies come as an early and later bulged version. The trainer requires the later canopies.
However, the vacuformed canopies are TOO thin, tough to cut out, and when I tried to add them to the fuselage they were too narrow in width and too short in length. This caused the windscreen to actually split up the middle! 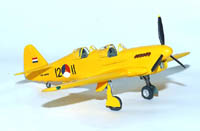 Don't even try placing them on in the closed position, the only usable option is open. Since I destroyed one each of the two versions the canopy, I now have one early and one late one. Don't even try placing them on in the closed position, the only usable option is open. Since I destroyed one each of the two versions the canopy, I now have one early and one late one.
In the process of this pure nightmare, the rear windscreen decided it wanted to explore the mysteries of the fuselage, and fell into the cockpit never to be seen again. I promptly screamed and nearly threw the thing into the wall. Instead, I peeled backed the rear cockpit like a banana, and retrieved the errant windscreen.
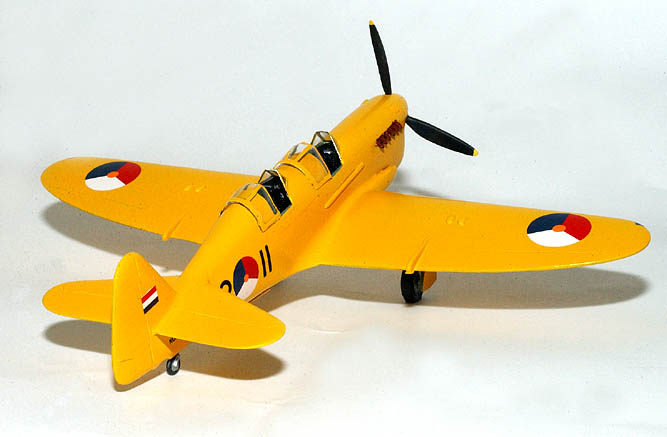
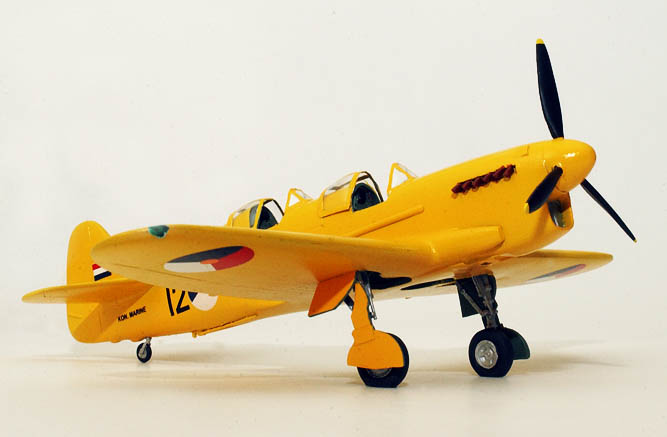
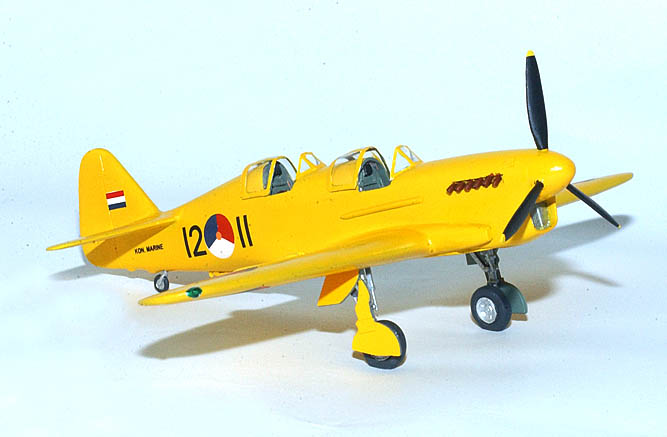
After regaining what little composure I had, I decided to tackle the propeller. This consisted of the spinner, backing plate, and three individually molded blades. The spinner has little dimples molded in to show you where to drill for the blades, but as usual, the folks at Octopus/Pavla gave absolutely no suggestion what the spin direction nor pitch should be. I looked at a Grand Phoenix Firefly I had finished to figure that out. I didn't bother with a hub and just butt-joined it in place. I did knock off a blade at least three times in this step. This thing is cursed! I also added the tail wheel at this point for some reason. I don't know why, a setup for failure. Anyway, I had to drill a larger hole in the fuselage to mount the tail wheel, bad mistake. Should have waited until it was finished, but I plinked it off three times, the last never to be seen again. I think by now I was crying. After I had composed myself, I replaced the wayward tail wheel with one from an Airfix Firefly. It's smaller, but it brought me one step closer to completion. Finish The end was near, so I started by priming the model in Tamiya white finishing primer. I thought this would provide a good solid base with which to paint the model yellow. So I made up a mix of Tamiya flat yellow with a little Tamiya flat red. After it dried, I covered the model Future, my preferred clear coat. After this dried it was on to the decals.
The decals are thin and quite workable, but I knew that the white on the Dutch markings was a bit translucent, so I added  roughly cut out circles of white decal placed where the markings would go. This worked like a charm, except when I got to one of fuselage roundels. When I put the roundel in place, the white decal moved with it and the decal was destroyed. So back to the Airfix Firefly and robbed it of two Dutch roundels since the remaining roundel from the kit was bigger. When decals were dry I added another coat of future to seal them. I really didn't add any weathering as this was a trainer and I by now didn't really care anymore. roughly cut out circles of white decal placed where the markings would go. This worked like a charm, except when I got to one of fuselage roundels. When I put the roundel in place, the white decal moved with it and the decal was destroyed. So back to the Airfix Firefly and robbed it of two Dutch roundels since the remaining roundel from the kit was bigger. When decals were dry I added another coat of future to seal them. I really didn't add any weathering as this was a trainer and I by now didn't really care anymore. THE HOME STRETCH! The final step was to add the main landing gear. By now I was anticipating a painful experience, but this kit had a final evil twist left in it. The landing gear was relatively pain free and posed no problems at all. You will have to find the center of the wheel hub so that a mounting hole can be drilled. Why Octopus didn't mold it the hole in place is truly beyond me. Though the gear doors are way too thick, but by now I was truly thankful it was over, and didn't bother to thin them. If you do get to this point, and still care deeply about this thing, I would recommend using sheet plastic for the doors. Conclusion This was without question the worst model I have ever built. I don't get this as the Octopus Skua, though not from Tamiya, was a much better kit.
The only conclusion I can come up with is that being a multi version kit, there had to be some compromises. This Firefly makes a forty-year-old Airfix kit look real good. I was given this kit to review, but if I had spent the twenty plus dollar asking price, I'd be seriously mad.
So if you like a real challenge, then buy two of these models. I won't be responsible for the straightjacket time after your done. Otherwise, if you see the Octopus Firefly on the model shelf, turn around and walk away. Now, if you'll excuse me, I have to go to therapy, that eye twitch won't be going away by itself. | 


|