Eduard 1/72nd DH2 Profipack | 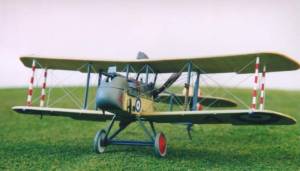 | Background According to the Datafile, in March 1915, Geoffrey de Havilland produced a first draught of a design for a single seater pusher fighter. The aircraft was in use by August of the same year and was in series production by November. The introduction of the DH2 countered the Fokker Eindeckers and by the middle of 1916, the DH-2 was a dominant aeroplane. Naturally, technology did not stand still and by July, the Germans' Albatros D.I, Fokker biplanes and Halberstadt aircraft were proving more than a match for the DH2, so that by the end of 1916, the DH2 was obsolete. The DH2 continued to see service in the secondary sectors of the war, for example: the Middle East but its days in the war's main sector - the Western Front - were over. Box Contents 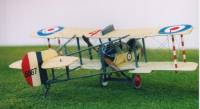 The Profipack version of the kit contains two sprues of light beige, finely moulded and flash-free plastic parts; an Express Mask; a fret of photoetched parts; a detailed instruction booklet; and decals for four DH-2 schemes. The schemes are (i) "A" Flight of No. 24 Squadron, RFC, (ii) 6011, No.24 Squadron, 1916, (iii) 7850, No.24 Squadron, pilot Lt. D.H. Geary, 1916, and (iv) 4th Army Air Park, Beauval, France, 1916. The decals also include red rectangles for the interplane struts and instrument decals. The Profipack version of the kit contains two sprues of light beige, finely moulded and flash-free plastic parts; an Express Mask; a fret of photoetched parts; a detailed instruction booklet; and decals for four DH-2 schemes. The schemes are (i) "A" Flight of No. 24 Squadron, RFC, (ii) 6011, No.24 Squadron, 1916, (iii) 7850, No.24 Squadron, pilot Lt. D.H. Geary, 1916, and (iv) 4th Army Air Park, Beauval, France, 1916. The decals also include red rectangles for the interplane struts and instrument decals.
Building the Kit First stop was the interior, as per the instructions. The nacelle components are arranged so that 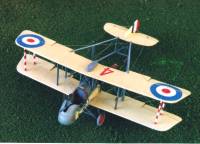 filling seams is minimized. The interior contains a lot of detail that is enhanced by the Profipack's photo-etched pieces. For example, I used the photo-etch seatbelts and seat - a nice addendum to the kit. Usually I am somewhat leery about photoetch seats but this one folded well and there were no gaps at the join of the seatback and seat. I painted the sidewall clear-doped-linen (CDL) and the rear bulkhead and other interior parts in grey. I painted up some of the interior details, including the instruments, and I coloured the cross-bracing using watercolour pencils. The cabane struts come attached to the cockpit nacelle sidewalls but I was nervous that leaving them like that would lead to alignment problems down the line so I opted to cut them off and re-adhere them later. The nacelle parts went together easily enough. I chose to make A Flight No.24 Squadron (same as the box art) so there was no compass fairing on the underside. I was a little dubious about the absence of the compass fairing: a profile of this aeroplane is in the Squadron In Action book, but I could not find a picture of this aeroplane. filling seams is minimized. The interior contains a lot of detail that is enhanced by the Profipack's photo-etched pieces. For example, I used the photo-etch seatbelts and seat - a nice addendum to the kit. Usually I am somewhat leery about photoetch seats but this one folded well and there were no gaps at the join of the seatback and seat. I painted the sidewall clear-doped-linen (CDL) and the rear bulkhead and other interior parts in grey. I painted up some of the interior details, including the instruments, and I coloured the cross-bracing using watercolour pencils. The cabane struts come attached to the cockpit nacelle sidewalls but I was nervous that leaving them like that would lead to alignment problems down the line so I opted to cut them off and re-adhere them later. The nacelle parts went together easily enough. I chose to make A Flight No.24 Squadron (same as the box art) so there was no compass fairing on the underside. I was a little dubious about the absence of the compass fairing: a profile of this aeroplane is in the Squadron In Action book, but I could not find a picture of this aeroplane. 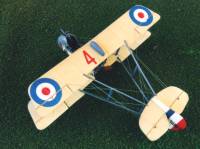 The other parts of the interior were also straightforward. Eduard's photoetch instrument panel combined with the clear part for the dials gives a good effect. The other parts of the interior were also straightforward. Eduard's photoetch instrument panel combined with the clear part for the dials gives a good effect.
The engine detail in the Profipack is excellent. Aside from the basic plastic part for the casing and cylinders, there are photoetch parts for the push rods. This construction makes painting easy and everything went together without any problem. I did not use the photoetch parts for the straps that go on the top of the cockpit nacelle because this would have required sanding off the plastic ones on the kit part - too difficult for me since I was certain to make a mess of things if I tried that. Nor did I use the photoetch ammunition drums and ammunition: folding these proved beyond my capability and the basic plastic parts in the kit looked just fine. The Lewis gun parts are excellent and went together without difficulty, though I did not glue that in place until the rest of the model had been completed. 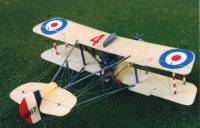 The lower wing part comes attached to the floor of the cockpit nacelle, so there are no attachment and alignment problems. Once I had completed this subassembly, I sprayed the nacelle in grey, then masked off and sprayed the wings and the sides of the nacelle with Aged White, my representation of CDL. The lower wing part comes attached to the floor of the cockpit nacelle, so there are no attachment and alignment problems. Once I had completed this subassembly, I sprayed the nacelle in grey, then masked off and sprayed the wings and the sides of the nacelle with Aged White, my representation of CDL.
I was somewhat dubious about using the red decals for the interplane strut markings but to my surprise they worked well. I sprayed the outer interplane struts white, coated them with Future and added the red decals. They wrapped nicely around the struts and I found it straightforward to remove the excess red decal with sandpaper and a sharp Exacto knife. Once that had dried I attached the top wing using the interplane struts first. When that was in place, I attached the cabane struts that I had cut off previously. 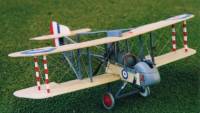 Adding the landing gear was straightforward. I painted the wheels by spraying them red, applied the wheel disk masks, and then sprayed the tyres grey. The booms and tail parts also went on without any difficulty. Adding the landing gear was straightforward. I painted the wheels by spraying them red, applied the wheel disk masks, and then sprayed the tyres grey. The booms and tail parts also went on without any difficulty.
The decals were excellent but I made the mistake of attempting to put the stitching decals on in a single piece. The best way I found was to cut this decal in three pieces (at the corners) and add them separately. The kit instructions contain a decent rigging diagram and between that, the Datafile and other modellers' work on the web, I was able to fathom the rigging. This was a fairly difficult model to rig, primarily because so many wires are required to go into such a small space. Once completed, however, the effect is most pleasing. Conclusion 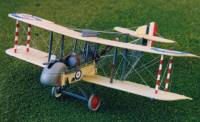 This is an excellent model: I cannot imagine anything additional that Eduard could have done to make this a much better model. However, the subject is a fairly tricky one with its tail booms and extensive rigging, so I would recommend this kit to anyone who has done a little bit of rigging before. Eduard is to be congratulated for bringing such an excellent product to the market. This is an excellent model: I cannot imagine anything additional that Eduard could have done to make this a much better model. However, the subject is a fairly tricky one with its tail booms and extensive rigging, so I would recommend this kit to anyone who has done a little bit of rigging before. Eduard is to be congratulated for bringing such an excellent product to the market.
References Peter Cooksley and Don Greer. "De Havilland DH2 in Action." Squadron/Signal Publications, Inc., Carrollton, Texas, U.S.A. 1999. B.J. Gray. "Airco DH2: Windsock Datafile 48." Albatros Productions, Ltd., Berkhamsted, Hertfordshire, United Kingdom. 1994.
| 


|
