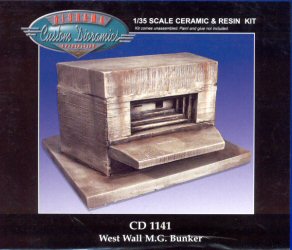
Custom Dioramics 1/35 West Wall MG Bunker |  | Last September, I did a quick-build of the Custom Dioramics (VLS) Turret Bunker to look at how one assembles and finishes kits made from Plaster of Paris. In that build, I used two-part epoxy for assembly and Gunze’s Mr. Surfacer 1000 as the sealing coat over the raw plaster before painting and weathering was done.  This month, VLS has released the Custom Dioramics West Wall Machine Gun Bunker in 1/35th scale, and as with the turret bunker, this kit is comprised of Plaster of Paris parts with a few resin details. In this case, the resin represents the block of wall with the MG and vision ports on the face as well as three sections of wooden retaining wall. Unlike the previous build where the bunker more-or-less resides on the surface, this MG bunker is intended to be sunk into the ground about three scale feet. This month, VLS has released the Custom Dioramics West Wall Machine Gun Bunker in 1/35th scale, and as with the turret bunker, this kit is comprised of Plaster of Paris parts with a few resin details. In this case, the resin represents the block of wall with the MG and vision ports on the face as well as three sections of wooden retaining wall. Unlike the previous build where the bunker more-or-less resides on the surface, this MG bunker is intended to be sunk into the ground about three scale feet.
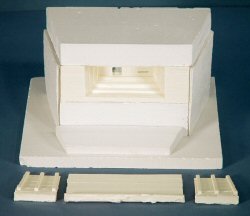
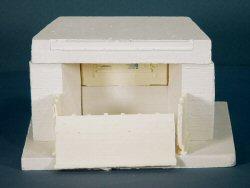
The kit comes with a plaster base, two plaster bunker side walls, one plaster lower front wall, one plaster field-of-fire apron, one resin upper front wall with the MG/viewing ports, one plaster roof, and three retaining walls in resin. Dry-fitting the parts showed no problems here.  I decided to keep the base separate until I figured out how I wanted to display this bunker. For that same reason, I set the three retaining wall sections aside. I used my sanding stick and cutting disk to clean up any mold remnants on the parts, and then mixed up a batch of two-part epoxy. The parts all went together without problems though some of the bunker corners ended up with minor gaps. Aves to the rescue – I mixed up a small batch of their two-part Epoxy Paste and sealed up the gaps like a snap. I decided to keep the base separate until I figured out how I wanted to display this bunker. For that same reason, I set the three retaining wall sections aside. I used my sanding stick and cutting disk to clean up any mold remnants on the parts, and then mixed up a batch of two-part epoxy. The parts all went together without problems though some of the bunker corners ended up with minor gaps. Aves to the rescue – I mixed up a small batch of their two-part Epoxy Paste and sealed up the gaps like a snap.
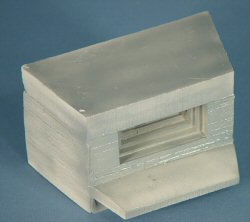
 Unlike the previous build-up, I wanted to try something different as a basecoat sealer on the Plaster of Paris parts. In this case, Future Floor Wax. I applied several coats of Future on the plaster parts without diluting the Future (I normally thin Future with about 50-50 Isopropyl alcohol to apply a base coat over flat finishes). I applied two coats of Future, and after it was dry I applied a coat of Tamiya acrylic gray as a primer coat. While the Future did seal up most of the surface, I can see that I will use a few more coats of Future prior to using any colors. Why Future over Mr. Surfacer? Well actually Mr. Surfacer worked flawlessly after one coat, but for those who don’t have Mr. Surfacer available, Future will work as well, it will just take a few coats until you see a uniform sheen on the surface of the model. Unlike the previous build-up, I wanted to try something different as a basecoat sealer on the Plaster of Paris parts. In this case, Future Floor Wax. I applied several coats of Future on the plaster parts without diluting the Future (I normally thin Future with about 50-50 Isopropyl alcohol to apply a base coat over flat finishes). I applied two coats of Future, and after it was dry I applied a coat of Tamiya acrylic gray as a primer coat. While the Future did seal up most of the surface, I can see that I will use a few more coats of Future prior to using any colors. Why Future over Mr. Surfacer? Well actually Mr. Surfacer worked flawlessly after one coat, but for those who don’t have Mr. Surfacer available, Future will work as well, it will just take a few coats until you see a uniform sheen on the surface of the model.
Conclusions These Custom Dioramics structures from VLS provide an interesting backdrop for those nice Tamiya and Academy armor subjects that are rolling off the production line. You can see that assembling and finishing these structures are simplicity and fun as well. This bunker set is definitely recommended! My sincere thanks to VLS for this review sample!
| 


|
