Mirage 1/72 T-26TB Ammunition Transport By Bill Kreuger | 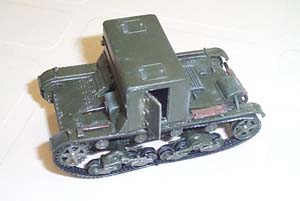 | History: 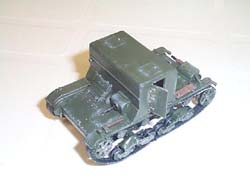 Russian self-propelled armored carriers based on the chassis of the T-26 tank were first developed and demonstrated in 1933 at the OKMO design bureau test range. At that time, the TR-4-1 ammunition carrier was tested. Other carriers were tested over the course of a two-year period as a means of support for both armored and artillery units of the Russian Army. These tests resulted in a new lighter type of transport that differed from the earlier designs in only minor details. The T-26T artillery tractor was selected as the basis for the infantry and ammunition carrier. Storage area was obtained by raising and widening the body of the tank. It could carry up to a 1 ton load of ammunition and the infantry transport could carry a squad of 7 troops. Both were similar in design, the only difference being in ladders. Those on the infantry transport were located on the sides to allow a quick exit through the side doors. The ammunition carrier had no side ladders, but at the front of the vehicle there was a ladder for climbing onto the tank. The carriers were armed only with a single 7.62mm machine gun, as they were intended to operate with escorted convoys. Russian self-propelled armored carriers based on the chassis of the T-26 tank were first developed and demonstrated in 1933 at the OKMO design bureau test range. At that time, the TR-4-1 ammunition carrier was tested. Other carriers were tested over the course of a two-year period as a means of support for both armored and artillery units of the Russian Army. These tests resulted in a new lighter type of transport that differed from the earlier designs in only minor details. The T-26T artillery tractor was selected as the basis for the infantry and ammunition carrier. Storage area was obtained by raising and widening the body of the tank. It could carry up to a 1 ton load of ammunition and the infantry transport could carry a squad of 7 troops. Both were similar in design, the only difference being in ladders. Those on the infantry transport were located on the sides to allow a quick exit through the side doors. The ammunition carrier had no side ladders, but at the front of the vehicle there was a ladder for climbing onto the tank. The carriers were armed only with a single 7.62mm machine gun, as they were intended to operate with escorted convoys. The Kit 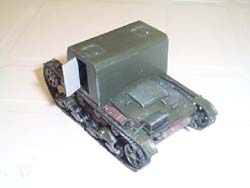 This kit is produced in 1/72 scale and consists of approximately 140 pieces cast in dark gray and a light gray plastic, as well as a set of rubber band like tracks. I was impressed with the detail of the many pieces, even down to the very smallest item of running gear. The molding seems to be very crisp and clear without any flash at all. I had very little clean up in preparing the parts for construction. I am familiar with the Mirage Company, having built one of their 1/72 scale models previously. I believe it was one of their early Vickers tanks that I had built about 6 to 8 months ago. I had a very pleasant experience with that kit and I was looking forward to building this one. This kit is produced in 1/72 scale and consists of approximately 140 pieces cast in dark gray and a light gray plastic, as well as a set of rubber band like tracks. I was impressed with the detail of the many pieces, even down to the very smallest item of running gear. The molding seems to be very crisp and clear without any flash at all. I had very little clean up in preparing the parts for construction. I am familiar with the Mirage Company, having built one of their 1/72 scale models previously. I believe it was one of their early Vickers tanks that I had built about 6 to 8 months ago. I had a very pleasant experience with that kit and I was looking forward to building this one. 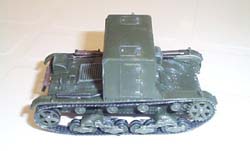 The instruction sheet consists of six pages of exploded drawings, which indicate clearly how the various pieces are to be assembled. There are 18 steps in the instructions. The instructions also include a history of the vehicle, as well as specifications of the original. There are painting instructions with each step, but the colors are coded to the Humbrol range of colors, with no indication of what they are other than a code number. The parts are packed in a plastic bag, instructions separate (outside of the bag) and all placed in an end-opening box. No decals were included. The boxtop has an artist rendering of the actual tank, showing it in action on the battlefield. The instruction sheet consists of six pages of exploded drawings, which indicate clearly how the various pieces are to be assembled. There are 18 steps in the instructions. The instructions also include a history of the vehicle, as well as specifications of the original. There are painting instructions with each step, but the colors are coded to the Humbrol range of colors, with no indication of what they are other than a code number. The parts are packed in a plastic bag, instructions separate (outside of the bag) and all placed in an end-opening box. No decals were included. The boxtop has an artist rendering of the actual tank, showing it in action on the battlefield. Construction I began the assembly of the kit by washing all the parts in soapy water to get rid of any mold release agents. When the parts were dry, I painted the road wheels, and bogie wheels. I painted these on the sprue using a fine brush since these pieces are so very small. I used flat black and olive green from Model Masters Acryl. A note on the back page of the instructions indicated painting "the entire tank olive green as used on Soviet armor during WW2." When this was completed, I next painted the drive wheels and idler wheels of the kit. I used the same olive green as described above. 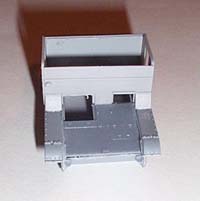 The first step in assembling the model consists of gluing the tank fenders to the chassis sidewalls (A1 to D2). This is done for each side. You need to pay attention to the correct positioning of the fenders, to make sure you get the front of the fenders attached to the front of the sidewall. The drawing for step 1 shows this pretty clearly. When this is finished and completely dry, you glue the sidewalls to the bottom chassis of the tank. The fit of both the sidewalls to the chassis bottom is very good. There are notches provided on each of the side’s interior where the edge of the front and rear bottom chassis fit. The first step in assembling the model consists of gluing the tank fenders to the chassis sidewalls (A1 to D2). This is done for each side. You need to pay attention to the correct positioning of the fenders, to make sure you get the front of the fenders attached to the front of the sidewall. The drawing for step 1 shows this pretty clearly. When this is finished and completely dry, you glue the sidewalls to the bottom chassis of the tank. The fit of both the sidewalls to the chassis bottom is very good. There are notches provided on each of the side’s interior where the edge of the front and rear bottom chassis fit. The next few steps, 2 through 5, are the assembly of the idler wheels, the bogie wheels, road wheels and drive wheels. These steps were very straightforward. The only thing that you need to be aware of is that the parts you are working with are extremely small. All wheels consist of a two-piece construction. I assembled the very small bogie wheels and the slightly larger road wheels with one side still attached to the sprue. I could then cut the assembled wheel off the sprue when needed during the assembly. Steps 6 and 7 entailed the assembly of the 7.62mm machine gun into its cupola and the assembly of the storage racks for machine gun ammunition drums. These parts are quite small, especially the round ammunition drums. The only difficulty here is dealing with the size of the parts. 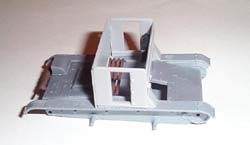 The next step is the assembly of a portion of the tank's interior. This has you gluing a slatted bench to the inside, rear wall of the tank storage area. The interior detail is pretty sparse, however very little of the interior is seen. The next step is the assembly of a portion of the tank's interior. This has you gluing a slatted bench to the inside, rear wall of the tank storage area. The interior detail is pretty sparse, however very little of the interior is seen. Step 9 begins the construction of the exterior body of the tank. This is pretty straightforward, with the assembly of the rear panel and muffler, rear deck, air intake and exhaust ports, as well as the rear of the storage compartment from step 8. The instructions point out where each of these sections are to be placed, but it is smart to dry fit everything to know exactly. The only real difficulty for me was the fit of the rear storage compartment wall. The lower outside edges of this piece is slotted to fit down onto the fenders. I had to file the slots a little wider to get them to fit over the section of the tank's chassis. Again, it points out the need to dry fit everything. 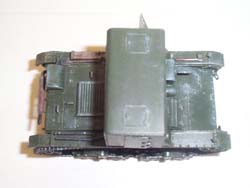 The next few steps continue with the construction of the exterior of the tank. As you move on through steps 10 through 14 you complete the tank exterior. Step 10 is a little tricky, which is simply the removal of a triangular piece of plastic in order to fit the front view port of the tank. The entire piece makes up a sidewall of the Vickers tank, but you just need this small triangle. There is a panel line, which marks the appropriate place to make your cut. During this series of steps, you also complete the assembly of the storage compartment. Again, there is very little in the way of interior detail, but you do add the machine gun ammunition racks, tank floor, and the machine gun in this series. The next few steps continue with the construction of the exterior of the tank. As you move on through steps 10 through 14 you complete the tank exterior. Step 10 is a little tricky, which is simply the removal of a triangular piece of plastic in order to fit the front view port of the tank. The entire piece makes up a sidewall of the Vickers tank, but you just need this small triangle. There is a panel line, which marks the appropriate place to make your cut. During this series of steps, you also complete the assembly of the storage compartment. Again, there is very little in the way of interior detail, but you do add the machine gun ammunition racks, tank floor, and the machine gun in this series. I found that with dryfitting, everything went together very well. There are indented slots on most pieces, which help in the assembly of the storage compartment and exterior doors. The next couple of steps, 15 and 16, take you through the assembly of the running gear. In step 15 you attach the bogie wheels and drive wheels to both sides. This step is fairly painless as there are locating holes and spindles in the places where the parts are to be assembled. Step 16 entails the assembly of the road wheels. This step is time consuming and can lead to some frustration if you are not careful. The road wheels are assembled in groups of four and are placed between four sets of springs. You need to go slow and make sure the springs are oriented in the correct direction for the front and rear of each side. The instructions point this out clearly. I glued a set of four road wheels to one of the spring halves and let these all dry solidly before adding the opposite side of the spring. This procedure worked well for me. When all the sets are assembled, you glue the road wheels to the chassis. Again, there are spindles on the lower chassis where the road wheel sets are to be placed. 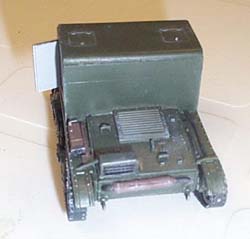 Step 17 is the completion of the exterior of the tank, including the placement of various tools, the idler wheel and the tracks. The most difficult part of this step is the placement of the track. It is of the rubber-band type, but it is made longer than necessary. You need to carefully fit it around the wheels and adjust it to the proper length. After doing this, you remove it and glue it together with superglue. After drying, it is easy to fit it carefully around the wheels. Everything else is straightforward. Step 17 is the completion of the exterior of the tank, including the placement of various tools, the idler wheel and the tracks. The most difficult part of this step is the placement of the track. It is of the rubber-band type, but it is made longer than necessary. You need to carefully fit it around the wheels and adjust it to the proper length. After doing this, you remove it and glue it together with superglue. After drying, it is easy to fit it carefully around the wheels. Everything else is straightforward. The final step is deciding which version of the transport you wish to complete. The kit allows you add door ladders and handles for the infantry transport, or the front ladder and handle for the ammunition carrier. I built my kit as the ammunition transport. Again, this was very easy to complete. I painted my model with an overall olive green color, using Model Master Acryl. I weathered it by dry brushing with both aluminum and by lightening up the base color. As described above, I was able to paint many of the smaller pieces on the sprue before attaching them to the model. Conclusion 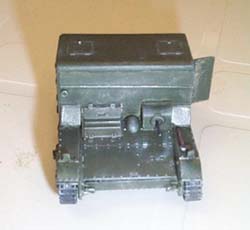 I enjoyed working on this kit, as it was both fun and challenging. I am impressed with the amount of detail that Mirage provides on their 1/72 scale tanks. It is almost as if they took a 1/35th scale model and shrunk it down to this scale. I would recommend this model to anyone with some modeling experience behind him or her. The only reason why I say that is due to the smallness of many of the parts; some experience will help to cut down the frustration level. However, for those newer modelers out there, I think it could be a good kit to cut your teeth on. The only shortcomings I see in this kit are a lack of a good color chart and/or more specific painting instructions. When color codes are provided, there should be some sort of listing as to what these code numbers mean. I enjoyed working on this kit, as it was both fun and challenging. I am impressed with the amount of detail that Mirage provides on their 1/72 scale tanks. It is almost as if they took a 1/35th scale model and shrunk it down to this scale. I would recommend this model to anyone with some modeling experience behind him or her. The only reason why I say that is due to the smallness of many of the parts; some experience will help to cut down the frustration level. However, for those newer modelers out there, I think it could be a good kit to cut your teeth on. The only shortcomings I see in this kit are a lack of a good color chart and/or more specific painting instructions. When color codes are provided, there should be some sort of listing as to what these code numbers mean. Thanks to Squadron for the review sample, and Ray Mehlberger for giving me the opportunity to build it.
| 


|
