Flashback 1/48 Etrich Taube | 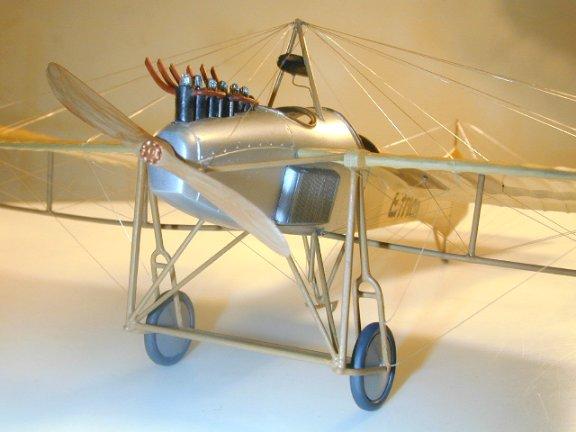 | While going through the collection of a friend looking for my usual 1/72nd scale kits, my hand kept being drawn to the Flashback Taube. But it's in 1/48th I reminded myself. Yes, but you do have the PYRO 1/48th collection that you say you are going to build. This would be a nice addition, says self. So I slide it off the shelf, make a deal and take it home. And it is a lovely kit. I snipped and cut and sanded and then got the idea that maybe I should share this build. So out came the camera but after parts had been removed from the sprue so there will be some things not shown, ie, the parts on the sprue. But, first, a little history. This is directly from the kit instruction sheet. HISTORY 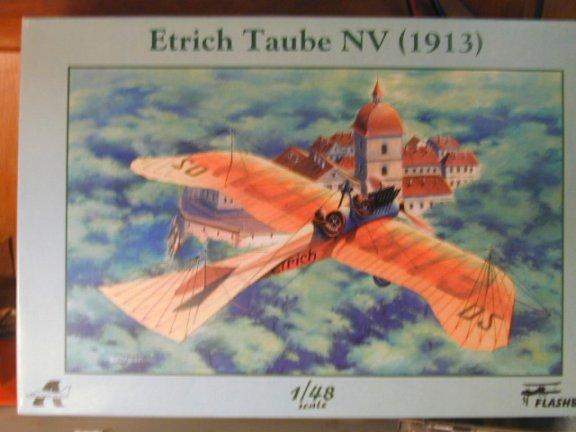 Etrich Taube type NV, with the factory designation NV-3, was the first aircraft with the official German designation D2. Th NV-3 was the first German aeroplane, flown by a German crew, to fly over Paris. Piloted by A. Friedrich, with Dr. H. Elias navigating, they flew from Berlin to Paris, taking off from Johannisthal of September 5, 1913 at 05:26, landing in Paris-Villacoublay on September 7, 1913 at 17:20. On September 13, with Igo Etrich in the front cockpit, replacing Dr. Elias, Friedrich flew from Paris to London, crossing ehe English Channel duplicating the route of the Louis Bleriot in 1909. They landed in Hendon the same evening. They left London on September 17, and, with some intermediate landings in Calais, Antwerpen, and Hannover, they successfully reached Johannisthal on September 20 at 16:15. In 1913, this flight was the most successful achiever by a German aircraft with a German crew, and received a lot of publicity. This flight is known as the "Five countries flight". Etrich Taube type NV, with the factory designation NV-3, was the first aircraft with the official German designation D2. Th NV-3 was the first German aeroplane, flown by a German crew, to fly over Paris. Piloted by A. Friedrich, with Dr. H. Elias navigating, they flew from Berlin to Paris, taking off from Johannisthal of September 5, 1913 at 05:26, landing in Paris-Villacoublay on September 7, 1913 at 17:20. On September 13, with Igo Etrich in the front cockpit, replacing Dr. Elias, Friedrich flew from Paris to London, crossing ehe English Channel duplicating the route of the Louis Bleriot in 1909. They landed in Hendon the same evening. They left London on September 17, and, with some intermediate landings in Calais, Antwerpen, and Hannover, they successfully reached Johannisthal on September 20 at 16:15. In 1913, this flight was the most successful achiever by a German aircraft with a German crew, and received a lot of publicity. This flight is known as the "Five countries flight". THE KIT The kit consists of two separate trees, a resin engine and fuel tank, a small pe set, a sheet of decals and and an excellent one page exploded drawing instruction sheet. There is also a very detailed rigging diagram that must be studied very carefully. This is a difficult kit to rig. The attachment points for the parts are strong but not large. The was no flash on the kit I had. The parts are crisp and well molded. Now let's get on with the build. THE FUSELAGE 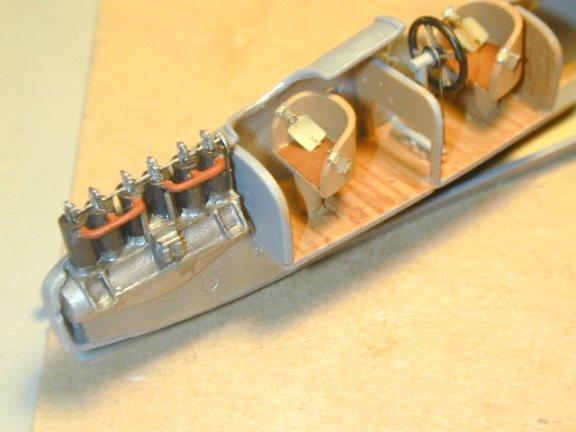 The fuselage halves require only minimal sanding for a nice flat fit. The interior surfaces were sprayed with CDL. The interior is very easy to build. I used Testor's Wood for my basic interior wood color with some dry brushing to bring out some details. The box art shows two steering wheels but the kit provides only one, for the rear seat. The engine was built, painted and again some dry brushing to bring out details. Do not attach the exhausts to the engine at this time. They are delicate and protrude well into the work area of the model. I think they will be knocked off several times if attached first. After the engine and interior are glued in, the fuselage halves are glued together. There is a little fit problem near the engine that needed a little trimming. The fit is not perfect so I aligned the top surfaces and left my putty work for the bottom. This completes the construction of the fuselage. I used Model Master British Gulf Armor Light Stone straight out of the bottle for the CDL and S n J Aluminum, unpolished, for the metal surfaces. The fuselage halves require only minimal sanding for a nice flat fit. The interior surfaces were sprayed with CDL. The interior is very easy to build. I used Testor's Wood for my basic interior wood color with some dry brushing to bring out some details. The box art shows two steering wheels but the kit provides only one, for the rear seat. The engine was built, painted and again some dry brushing to bring out details. Do not attach the exhausts to the engine at this time. They are delicate and protrude well into the work area of the model. I think they will be knocked off several times if attached first. After the engine and interior are glued in, the fuselage halves are glued together. There is a little fit problem near the engine that needed a little trimming. The fit is not perfect so I aligned the top surfaces and left my putty work for the bottom. This completes the construction of the fuselage. I used Model Master British Gulf Armor Light Stone straight out of the bottle for the CDL and S n J Aluminum, unpolished, for the metal surfaces. WINGS AND TAIL SURFACES 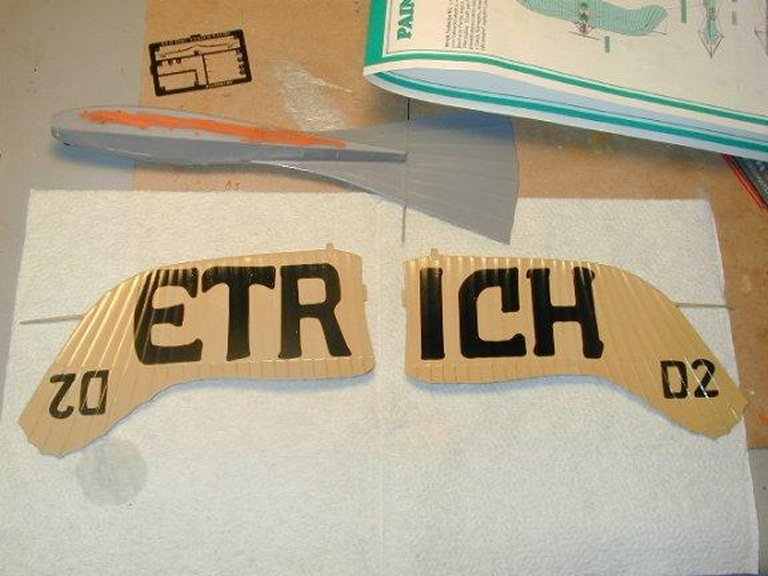 After removing the wings and tail surfaces and cleaning them, determine where you are going to drill your rigging holes. This is especially important if you use the invisible thread as I do. If you use the thread method, there are a lot of holes. Check the box art and the instruction sheet and drill as many of the holes as you can find. It is much easier to drill them now than when the kit is glued together. This is a hard model to handle and trying to drill a hole after assembly will, in my opinion, lead to disaster. After all of holes are drilled, I added the tail surfaces to the fuselage. The fit was near perfect and no putty was necessary. After removing the wings and tail surfaces and cleaning them, determine where you are going to drill your rigging holes. This is especially important if you use the invisible thread as I do. If you use the thread method, there are a lot of holes. Check the box art and the instruction sheet and drill as many of the holes as you can find. It is much easier to drill them now than when the kit is glued together. This is a hard model to handle and trying to drill a hole after assembly will, in my opinion, lead to disaster. After all of holes are drilled, I added the tail surfaces to the fuselage. The fit was near perfect and no putty was necessary.  Before attaching the wings to the fuselage, I applied the decals. Since I wanted the look of the decal showing through the top of the wing, I made a paper mask of the decals and then applied the decals to the bottom of the wings. I then wet the paper mask and applied it on the top wing directly over the lower decal. Before the paper dries, spray the mask with black paint. It doesn't have to be dark as you are going to overspray it. After the mask is removed, spray the CDL over the black until you get the look you want. You could also at this time mask the lower section of the wing and spray it a lighter CDL to represent the thinner trailing edges of the wing. One point with the mask; since I held mine on with water, be careful not to blow it off with too much air brush pressure and spray with the mask as wet as you can get away with. Frisket paper will probably work better but I didn't have any. Since the look will be fuzzy anyway, a crisp sharp line is not necessary. After it dried, I applied a gloss coat. Before attaching the wings to the fuselage, I applied the decals. Since I wanted the look of the decal showing through the top of the wing, I made a paper mask of the decals and then applied the decals to the bottom of the wings. I then wet the paper mask and applied it on the top wing directly over the lower decal. Before the paper dries, spray the mask with black paint. It doesn't have to be dark as you are going to overspray it. After the mask is removed, spray the CDL over the black until you get the look you want. You could also at this time mask the lower section of the wing and spray it a lighter CDL to represent the thinner trailing edges of the wing. One point with the mask; since I held mine on with water, be careful not to blow it off with too much air brush pressure and spray with the mask as wet as you can get away with. Frisket paper will probably work better but I didn't have any. Since the look will be fuzzy anyway, a crisp sharp line is not necessary. After it dried, I applied a gloss coat. 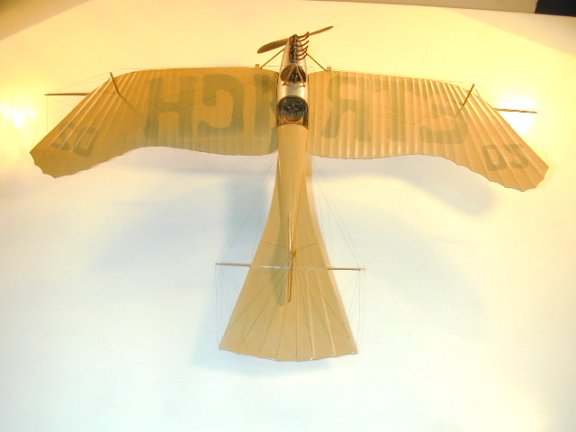 At this point I attached the wing. The fit is a little off so some sanding is required to get it straight. Since the fuselage is completely painted at this point, a small amount of paint must be scraped off in the arc that the wing touches. I turned the model upside down to support the wing. Be careful to get the proper dihedral. While still upside down, attach the underwing support and allow this to dry completely. Make sure the rigging holes are drilled if you are going to use invisible thread. This is a very delicate assembly at this point. It will not be at full strength until after the rigging. At this point I attached the wing. The fit is a little off so some sanding is required to get it straight. Since the fuselage is completely painted at this point, a small amount of paint must be scraped off in the arc that the wing touches. I turned the model upside down to support the wing. Be careful to get the proper dihedral. While still upside down, attach the underwing support and allow this to dry completely. Make sure the rigging holes are drilled if you are going to use invisible thread. This is a very delicate assembly at this point. It will not be at full strength until after the rigging. UNDERCARRIAGE  The undercarriage is not difficult but it is tricky. Study the drawings carefully, especially in regard to alignment. I drilled a second hole in the leading edge support as the plans indicate one should be there but there is none on the kit. After mounting and aligning the undercarriage assembly, add the supports from the undercarriage to wings and fuselage. Here is a major flaw in the kit. None of the supports were the proper length. So I replaced them with round stock of the appropriate diameter. At this point the assembly of the model is almost complete. The undercarriage is not difficult but it is tricky. Study the drawings carefully, especially in regard to alignment. I drilled a second hole in the leading edge support as the plans indicate one should be there but there is none on the kit. After mounting and aligning the undercarriage assembly, add the supports from the undercarriage to wings and fuselage. Here is a major flaw in the kit. None of the supports were the proper length. So I replaced them with round stock of the appropriate diameter. At this point the assembly of the model is almost complete. RIGGING 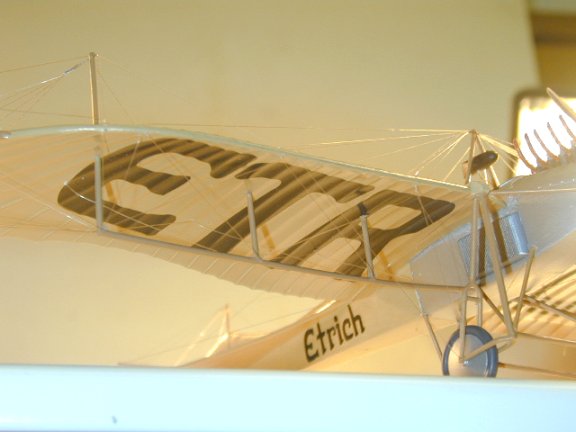 Let the fun begin. The model was rigged using DURAS so the following will be for that method. If you cut each wire individually, most of what I say from this point on will not apply. Before attaching the upper and lower V supports, make sure you drill as large a hole as you can because as many as ten wires will pass through these holes. I started with the tail surfaces. Eight wires go from the upper support to the tail to the tail skid. I glued seven wires on the the 8th to make it appear to be a block. This same method will be used for the wings. I made sure all of the wires going through the upper support hole were in place and then glued it. This was also done on the bottom at the tail skid. Then with clothespins, each wire is pulled tight. Make sure they do not overlap another wire or the look of the rigging will be lost. This is repeated from the bottom to the top and pulled tight. When all of the alignment is done and all wires are taunt, a drop of super glue applied with a piece of stretched sprue is touched to each hole. After a hint of kicker at each hole, the loose end is cut top and bottom and the tail is complete. Let the fun begin. The model was rigged using DURAS so the following will be for that method. If you cut each wire individually, most of what I say from this point on will not apply. Before attaching the upper and lower V supports, make sure you drill as large a hole as you can because as many as ten wires will pass through these holes. I started with the tail surfaces. Eight wires go from the upper support to the tail to the tail skid. I glued seven wires on the the 8th to make it appear to be a block. This same method will be used for the wings. I made sure all of the wires going through the upper support hole were in place and then glued it. This was also done on the bottom at the tail skid. Then with clothespins, each wire is pulled tight. Make sure they do not overlap another wire or the look of the rigging will be lost. This is repeated from the bottom to the top and pulled tight. When all of the alignment is done and all wires are taunt, a drop of super glue applied with a piece of stretched sprue is touched to each hole. After a hint of kicker at each hole, the loose end is cut top and bottom and the tail is complete.  Repeat the tail procedure for the wing tips. The upper wing support will need ten wires running through it so the drill size should be at least a #76. Six wires will be for the wings, two will go to the nose and two will go to the tail. Do the wires to the tail last as they will get in your way if not. Thread the twelve wings wires through the wing to their under wing location and before gluing at the wing, make sure that any hole that get more than one wire has that wire in place. From this point on it very slow work because the plane cannot be placed on its back due to the upper supports and wires. It was a painfully slow procedure, one wire at a time, constantly checking for tightness and location. The rigging alone had to take four hours. After the rigging is complete the wing is now a very strong unit. This model is living proof that the rigging supported the wing while this delicate thing flew around in the sky. Repeat the tail procedure for the wing tips. The upper wing support will need ten wires running through it so the drill size should be at least a #76. Six wires will be for the wings, two will go to the nose and two will go to the tail. Do the wires to the tail last as they will get in your way if not. Thread the twelve wings wires through the wing to their under wing location and before gluing at the wing, make sure that any hole that get more than one wire has that wire in place. From this point on it very slow work because the plane cannot be placed on its back due to the upper supports and wires. It was a painfully slow procedure, one wire at a time, constantly checking for tightness and location. The rigging alone had to take four hours. After the rigging is complete the wing is now a very strong unit. This model is living proof that the rigging supported the wing while this delicate thing flew around in the sky. FINAL ASSEMBLY AND COMMENTS 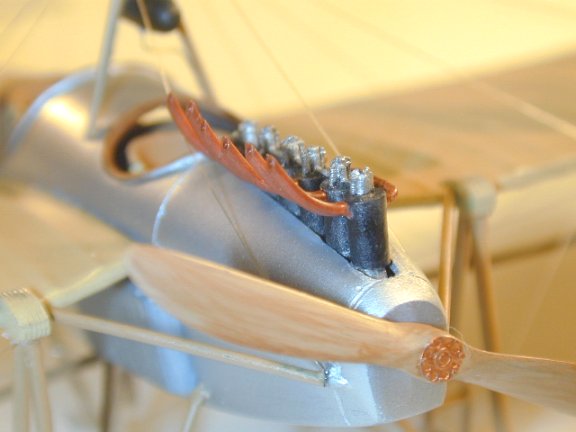 Only after the rigging is complete do I attach the prop and the exhaust pipes. Any touch up is done as far as painting and the model is complete. Building time had to be between 25 to 30 hours, probably double my normal building time. I will eventually have a collection of 1/48th early planes with the Taube being the second. The kit was built 100% out of the box. If you want to see this kit modified and with a paint job that will knock your socks off, go look at the one Peter Plattner built, it is one beautiful kit. Only after the rigging is complete do I attach the prop and the exhaust pipes. Any touch up is done as far as painting and the model is complete. Building time had to be between 25 to 30 hours, probably double my normal building time. I will eventually have a collection of 1/48th early planes with the Taube being the second. The kit was built 100% out of the box. If you want to see this kit modified and with a paint job that will knock your socks off, go look at the one Peter Plattner built, it is one beautiful kit. All in all this was an enjoyable build even though it took far longer that I thought it would. When you go outside your normal scale, it throws off your groove. (Sorry, couldn't resist) I'm glad I built it so that the 48th scale collection can eventually be seven kits. And who knows; maybe another 48th early plane will come along and I can add that one. | 


|