Tamiya 1/72 Vought F4U-1D Corsair | 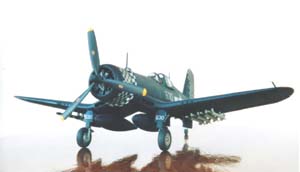 | Background I can add little to the large literature on the Corsair. Kits of this aeroplane abound in the modelling hobby in different scales and for numerous versions. As a reference, I purchased Bert Kinzey's "F4U Corsair in Detail & Scale - Part 1 XF4U Through F2G", an inexpensive and clear publication: not that one need purchase a reference because the web contains numerous resources for this carrier based aeroplane. The F4U-1D, deployed in the latter part of World War II was enhanced by its being able to carry two large extra fuel tanks or bombs, plus eight rockets under the outer wing. The F4U-1D continued to be used after the war, including some as late as the 1960s in El Salvador. The Kit 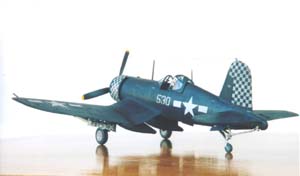 I purchased this kit so I could make it as a Christmas gift for my next door neighbour, who was a United States Navy pilot in World War II: he flew PBY's but he has a model of one of those. The kit is more expensive than most kits in 1/72nd scale but the quality is high and after-market purchases unnecessary. So although the initial outlay is greater, the total expense is reasonable. The quality of the kit in terms of molding and fit is first rate. I waited until after the first week of December to build it and it was ready a few days before Christmas. The kit has an immaculately molded sprue containing the regular plastic parts and a clear sprue in a little separate plastic bag. The decal sheet has markings for three versions: 1) VF-84 167, carrier Bunker Hill, February, 1945; 2) VMF-112, No. 1 carrier Bennington, January, 1945, and; 3) VMF-312, No. 530, Okinawa, April 1945 - I decided upon the latter because I liked the chequered nose markings. I purchased this kit so I could make it as a Christmas gift for my next door neighbour, who was a United States Navy pilot in World War II: he flew PBY's but he has a model of one of those. The kit is more expensive than most kits in 1/72nd scale but the quality is high and after-market purchases unnecessary. So although the initial outlay is greater, the total expense is reasonable. The quality of the kit in terms of molding and fit is first rate. I waited until after the first week of December to build it and it was ready a few days before Christmas. The kit has an immaculately molded sprue containing the regular plastic parts and a clear sprue in a little separate plastic bag. The decal sheet has markings for three versions: 1) VF-84 167, carrier Bunker Hill, February, 1945; 2) VMF-112, No. 1 carrier Bennington, January, 1945, and; 3) VMF-312, No. 530, Okinawa, April 1945 - I decided upon the latter because I liked the chequered nose markings. Interior 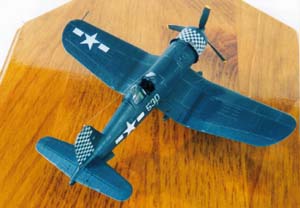 As usual, I began in the cockpit and fuselage interior. I simply followed the instructions, which are clear and simple. The kit is so well engineered that the little bumps and fitting parts show you exactly where a piece should be positioned - no guess work required or thumbing through references to make sure you glued something in the right place. I attached the seat to a rear bulkhead piece, which I initially kept separate from the other interior pieces so I could paint some of the detail more easily. The only piece I left off was the clear piece gun sight, which I added at the end. As usual, I began in the cockpit and fuselage interior. I simply followed the instructions, which are clear and simple. The kit is so well engineered that the little bumps and fitting parts show you exactly where a piece should be positioned - no guess work required or thumbing through references to make sure you glued something in the right place. I attached the seat to a rear bulkhead piece, which I initially kept separate from the other interior pieces so I could paint some of the detail more easily. The only piece I left off was the clear piece gun sight, which I added at the end. After I had sprayed the fuselage interior and the cockpit components with Medium Green, I painted in some detail on the console and the instrument panel, after which, I gave the whole interior a burnt umber oil wash and some dry-brushing with a lightened green. I tried to paint the interior as well as I could because I was going to leave the two-part canopy in the 'open' position. I also used the seatbelt decal: perhaps that's not the most realistic representation but it is better than anything I could reproduce. Fuselage and wing parts 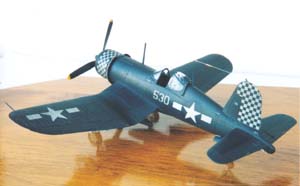 The landing gear wheel well is nicely blocked in and the fit of the parts is excellent. If you want to use the rockets or drop tanks, you should open the holes in the underside wing part at this stage of construction. I glued the two upper wing pieces to the single underside piece without any problems. Next I closed the fuselage, which was where I found my only fit problem. It is entirely possible that I had not glued the cockpit sub-assembly in the correct position but there were some minor seams. After I added the headrest sub-assembly, several rounds of filling and sanding eliminated the seams and I had to do a little re-scribing of "lost" panel lines. I glued on the tailpieces: they are idiot-proofed by making the tabs different sizes for each side. The landing gear wheel well is nicely blocked in and the fit of the parts is excellent. If you want to use the rockets or drop tanks, you should open the holes in the underside wing part at this stage of construction. I glued the two upper wing pieces to the single underside piece without any problems. Next I closed the fuselage, which was where I found my only fit problem. It is entirely possible that I had not glued the cockpit sub-assembly in the correct position but there were some minor seams. After I added the headrest sub-assembly, several rounds of filling and sanding eliminated the seams and I had to do a little re-scribing of "lost" panel lines. I glued on the tailpieces: they are idiot-proofed by making the tabs different sizes for each side. Once I had glued the wing and fuselage pieces together, I started on the front fuselage/engine sub-assembly. Once again, the fit was excellent and I encountered no difficulties. There is no seam filling for this area because the cowl comes as a single piece. Further, you have the option of open or closed cooling flaps: I chose open. I painted the engine 'Engine grey' and dry-brushed it with silver and burnt aluminium. I did not glue the engine into the cowl at this point because I wanted to spray paint the cowl without having to mask off the engine. 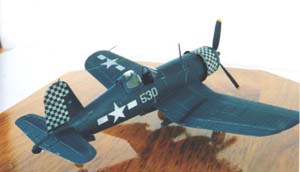 I sprayed the interior of the cowl and the landing gear wheel wells in Medium Green. I used Insignia Blue and U.S. Sea Blue for the exterior. I thought the U.S. Sea Blue looked a little dark so I lightened it up a little with Insignia Blue. I sprayed the interior of the cowl and the landing gear wheel wells in Medium Green. I used Insignia Blue and U.S. Sea Blue for the exterior. I thought the U.S. Sea Blue looked a little dark so I lightened it up a little with Insignia Blue. Landing gear and final pieces The landing gear went on easily enough. The inside of the doors had little molding disks that I had to sand off but otherwise the parts are so well engineered that I had no difficulty. I masked off the canopy pieces using Tamiya masking tape for each separate windows section and sprayed that Insignia Blue: VM-312 has the Bird-cage canopy with the extra framing pieces. I used the large drop tanks and all the rockets: whether this is accurate, I do not know but this is hardly a complex kit so I wanted to add as much detail as I could. Once I had attached the antenna masts, it was time for the decals and some light weathering. Weathering and decals The Tamiya decals adhered well but are a little thick so I used a Super Scale 'Avenger' sheet for the stars. I also replaced the black walkway stripes on the wing with decal paper sprayed black. For the other decals I followed the instruction sheet and had no difficulties. 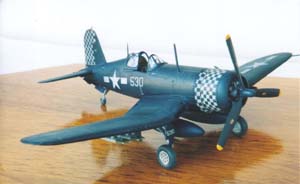 I used a burnt umber wash on the wheel wells, which showed up nicely. The blue paint was quite dark but the oil wash over the white component of the decal gave them a slightly dirty and worn appearance rather than the brilliant white associated with toothpaste adverts. The wash also helped to blend in the decals with the surface. I used a silver Prismacolor pencil along a few of the panel lines to bring out some detail. A final coat of Testors Clear (not so) Flat sealed everything. I glued on the canopy pieces with Elmer's white glue, attached some .005-inch straight wire to the antenna mast also using white glue, and I was finished. I used a burnt umber wash on the wheel wells, which showed up nicely. The blue paint was quite dark but the oil wash over the white component of the decal gave them a slightly dirty and worn appearance rather than the brilliant white associated with toothpaste adverts. The wash also helped to blend in the decals with the surface. I used a silver Prismacolor pencil along a few of the panel lines to bring out some detail. A final coat of Testors Clear (not so) Flat sealed everything. I glued on the canopy pieces with Elmer's white glue, attached some .005-inch straight wire to the antenna mast also using white glue, and I was finished. Conclusion and Recommendation This is a first rate kit: probably one of the most straightforward you can purchase and it builds into a first rate model. Although the price is a little on the high side, as I mentioned above, nothing else is needed, so it turns out to be an inexpensive purchase. It can be assembled easily, quickly and the result can be a competition winner. Its simplicity also makes it an excellent choice for a novice modeller. Highly recommended. Reference Bert Kinzey. "F4U Corsair in Detail & Scale - Part 1 XF4U Through F2G." Squadron/Signal Publications, Carrolton, Texas. 1998. | 


|
