Roden 1/72nd IS-3 |  | History My apologies for this, but my references on the type are all in Russian. Therefore the following history is taken from the Roden instructions. "IS-3, a heavy tank, devised at an experimental plant No. 100 under leadership of M.F. Balzha in 1944-45, was the latest Soviet tank devised in the course of the Great Patriotic War. "To analyze reasons of bad losses suffered by Soviet tank military units in the course of Kursk Battle (6063 machines during 38 days of battle), a special commission was formed in 1943. Based on its proceedings and on IS-2, a new heavy IS-3 breakthrough tank was designed, its body, welded from some rolled steel armour plates with maximally possible slope on the front side, and provided with moulded gun turret, having the shape of flattened hemisphere, became more streamlined. Thickness of the front armour was increased considerably owing to reduction of the armour thickness in any other less vulnerable places. Thus, front armour plates of the body were 120 mm thick, while from the part of gun turret was 230 mm thick. Having the same full weight, the tank had area of frontal projection 1.5 times less. For the first time this tank was equipped with a commander's system for automatic control over the gun turret rotation.  "Its series production was started in May 1945 and continued up to mid-1946. The end of the War produced 29 tanks, with their total number amounting to 2311. "Its series production was started in May 1945 and continued up to mid-1946. The end of the War produced 29 tanks, with their total number amounting to 2311.
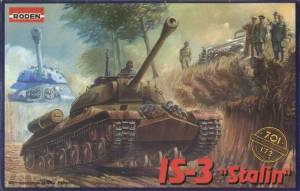
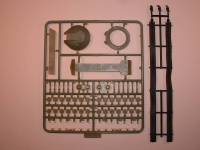
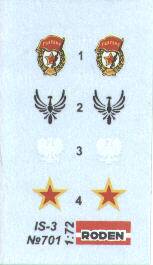
:"IS-3 was not used in any military actions during the World War II, but on 7 September 1945 a tank regiment had taken part in the parade of Red Army Units in Berlin, dedicated to the victory over Japan. "IS-3 was modernized by the end of 1950s and it was named IS-3M. "The tank was not exported almost. Two machines arrived in Poland in 1946, while another machine arrived to Czechoslovakia with the purpose of familiarizing and training instructors. A considerably larger number of tanks were sent to Northern Korea, which had two IS-3 operational regiments in 1960s. 100 heavy tanks of IS-3 and IS-3M makes were delivered to Egypt from 1956 to 1967." The Kit The Roden IS-3 consists of 124 light green injected plastic pieces and five pieces of "rubber" to make up the full trackage as well as a few track spares. There are markings for four machines, all but the Egyptian IS-3 Soviet armor green, the Egyptian machine being finished in "Sand". The first machine is an IS-3 of the Army Forces of Egypt, Cairo, July 1956. The second machine is from the Kantemirov Guardian division, 1946. The second machine is from N.703.604A81, Army Forces of People's Republic of Poland; armoured officer's school in Poznan; late 1940s. The last machine is from the Army Forces of People's Republic of China during total troop excercises in 1950s.  The level of detail on this model is outstanding. Roden definitely gets their armor kits "right" (not that any of their other kits are shabby, mind you). The highlight of this kit, outside of the exceptional molded in detail, is the maching gun on the top of the turret. This is itself a piece of art and worthy of complete modeling - washes, drybrushes, etc. - to bring out the exceptional detail. The level of detail on this model is outstanding. Roden definitely gets their armor kits "right" (not that any of their other kits are shabby, mind you). The highlight of this kit, outside of the exceptional molded in detail, is the maching gun on the top of the turret. This is itself a piece of art and worthy of complete modeling - washes, drybrushes, etc. - to bring out the exceptional detail.
Construction starts with the lower hull sides. First is added what appears to be torsion bars (although I'm not entirely sure what they are). From there the wheels are glued together and added to each axle. Once that is accomplished the sides are mated with the lower hull. Now the wheel/axle combinations are glued on. I suspect I will deviate from this course of construction and glue the axles to the lower hull and save all of the wheels until close to the end of construction. That way you can paint the larger parts without worrying about ruining the black "rubber" painted on each main wheel prior to adding the wheels and axles together. Now construction moves to the upper hull. After adding fender "blanks" to the underside you add some details to the upper side followed by gluing the hull halves together. There are then more details to add to the upper hull proceeded by moving to the gun mantlet and turret.  Once the gun mantlet and barrel are glued together the gun that sits on top of the turret is now put together. Then details are added to the turret followed by inserting the mantlet/barrel in between the two turret halves and glueing those halves together (carefully, allowing the barrel to move up and down). Construction is finished by adding the tracks and sticking the turret on the hull so it remains free and moveable. Now begins the painting, decaling and weathering stages. Once the gun mantlet and barrel are glued together the gun that sits on top of the turret is now put together. Then details are added to the turret followed by inserting the mantlet/barrel in between the two turret halves and glueing those halves together (carefully, allowing the barrel to move up and down). Construction is finished by adding the tracks and sticking the turret on the hull so it remains free and moveable. Now begins the painting, decaling and weathering stages.
Conclusion Overall this is an extremely nice kit and will look wonderful when built. Roden has truly excelled at the production of this kit and it is highly recommended. Our thanks to Roden for the review kit. | 


|
