Revell #85-2995 1/24
BMW Mini Cooper R53 | 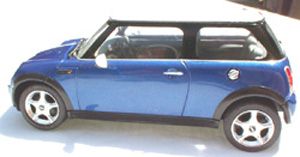 | 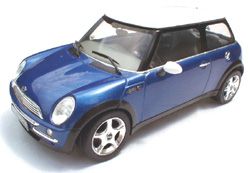 The original Mini Cooper gained cult status as a car that was more fun to drive than should have been legal, especially considering its origins as budget transportation. In recent years BMW has acquired rights to the marque, and has been marketing a new and updated version. The new Mini Cooper, like the new VW Beetle, is a good example of the retro-look. It retains a strong visual resemblance to the original Mini, but alloy wheels, trim, and a deco interior give a modern look that reflects a couple of generations of improved automotive technology. Best of all it's still fun to drive and relatively affordable. The original Mini Cooper gained cult status as a car that was more fun to drive than should have been legal, especially considering its origins as budget transportation. In recent years BMW has acquired rights to the marque, and has been marketing a new and updated version. The new Mini Cooper, like the new VW Beetle, is a good example of the retro-look. It retains a strong visual resemblance to the original Mini, but alloy wheels, trim, and a deco interior give a modern look that reflects a couple of generations of improved automotive technology. Best of all it's still fun to drive and relatively affordable.
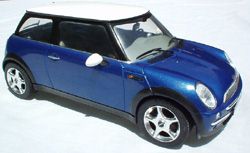 I found the Revell model of the Mini Cooper marked down for clearance at a local store. For $4.75 who could resist? Like a puppy it stared at me; don't even ask how it followed me home! OK, I said, it's an out of the box build for you, and then to the shelves with ya! I found the Revell model of the Mini Cooper marked down for clearance at a local store. For $4.75 who could resist? Like a puppy it stared at me; don't even ask how it followed me home! OK, I said, it's an out of the box build for you, and then to the shelves with ya!
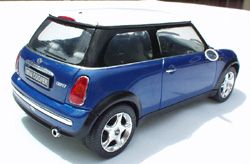 I've seen several Minis on the streets, and I wanted to look at one up close to get a feel for painting it. But I couldn't manage to catch one in my pickup, and the nearest dealer is in the next state. However a quick search on the net yielded great photos. These photos along with the directions showed that a good part of the interior should be painted a convincing metallic color like aluminum. I've seen several Minis on the streets, and I wanted to look at one up close to get a feel for painting it. But I couldn't manage to catch one in my pickup, and the nearest dealer is in the next state. However a quick search on the net yielded great photos. These photos along with the directions showed that a good part of the interior should be painted a convincing metallic color like aluminum.
I first painted the interior and the bottom of the chassis gloss black with Tamiya spray can acrylic lacquer. This Tamiya paint works very well as a primer for the next color, Alclad II aluminum. The areas to remain aluminum were masked off, and the other colors painted. -tn.jpg) The directions call for the interior to be painted in light and dark grays, but no specific shades are given. I selected grays from Model Master military paints to match photos. Revell would have you paint the recessed areas of the seats dark gray, but I felt that I would be difficult to do this neatly by hand. Instead I airbrushed a coat of future on the seats, washed them with Paynes gray oil paint thinned with turpenoid, and then dull coated. The directions call for the interior to be painted in light and dark grays, but no specific shades are given. I selected grays from Model Master military paints to match photos. Revell would have you paint the recessed areas of the seats dark gray, but I felt that I would be difficult to do this neatly by hand. Instead I airbrushed a coat of future on the seats, washed them with Paynes gray oil paint thinned with turpenoid, and then dull coated.
The model has aluminum mag wheels, but there are no brake parts to see behind the mags. Brakes should have been included because they should be visible on the finished model. I painted the insides of the wheels black to make this omission less obvious. A nice touch is that the front wheels can be turned left or right. -tn.jpg) Like many car models the directions tell you to place the assembled chassis into the body and then glue on the front panel. I never like to do it this way, because you either mess up the painted body parts with glue, or you just don't get a good fit. Some test fitting showed that I could glue the front panel on, paint the body, and just be able to rotate the chassis in place. This method does require trimming a ledge behind the front grill so it can be put in place later. Like many car models the directions tell you to place the assembled chassis into the body and then glue on the front panel. I never like to do it this way, because you either mess up the painted body parts with glue, or you just don't get a good fit. Some test fitting showed that I could glue the front panel on, paint the body, and just be able to rotate the chassis in place. This method does require trimming a ledge behind the front grill so it can be put in place later.
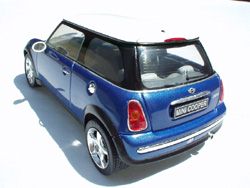 The body was painted with Tamiya blue acrylic lacquer from the spray can. The aluminum trim was done with bare metal foil, which was also used to touch up sprue attachment points on the bumpers. The "chrome" plating on the front grill was defective and this was fixed with bare metal foil. The lower panels of the body should be painted semi-gloss black. I cut circles from masking tape with an Olfa circle cutter to mask the round areas around the tires. The body was painted with Tamiya blue acrylic lacquer from the spray can. The aluminum trim was done with bare metal foil, which was also used to touch up sprue attachment points on the bumpers. The "chrome" plating on the front grill was defective and this was fixed with bare metal foil. The lower panels of the body should be painted semi-gloss black. I cut circles from masking tape with an Olfa circle cutter to mask the round areas around the tires.
-tn.jpg) The windows on this kit are molded all in one piece. The pillars and areas around the windows should be painted black. The area to be painted is frosted on the inside of the clear part but the frosted area is very lightly done, and there is no obvious ridge to help you as a painting guide. I tried painting it by had on the inside, but with no obvious edge I was not able to achieve consistent neat lines. I put masking tape over the areas and rubbed it with a pencil to try to make an outline show as a guide. I tried to see the frosted area through magic tape, but in all cases the frosted area was too faint to be of any help. Finally I put tape over the inside of one side and drew an outline by looking at the other side and cutting it out. This required several cut and tries for each of the windows and took more time than I care to admit, but it worked in the end. The windows on this kit are molded all in one piece. The pillars and areas around the windows should be painted black. The area to be painted is frosted on the inside of the clear part but the frosted area is very lightly done, and there is no obvious ridge to help you as a painting guide. I tried painting it by had on the inside, but with no obvious edge I was not able to achieve consistent neat lines. I put masking tape over the areas and rubbed it with a pencil to try to make an outline show as a guide. I tried to see the frosted area through magic tape, but in all cases the frosted area was too faint to be of any help. Finally I put tape over the inside of one side and drew an outline by looking at the other side and cutting it out. This required several cut and tries for each of the windows and took more time than I care to admit, but it worked in the end.
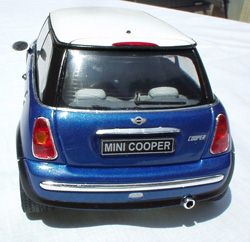 The openings in the body were a little too large for the head and tail light assemblies, such that the lights would fall through into the inside of the body. Instead of adding the lights after the body was put on the chassis I attached them first. I used white glue to hold them in place and then used gap filling super glue to secure them from the inside. The openings in the body were a little too large for the head and tail light assemblies, such that the lights would fall through into the inside of the body. Instead of adding the lights after the body was put on the chassis I attached them first. I used white glue to hold them in place and then used gap filling super glue to secure them from the inside.
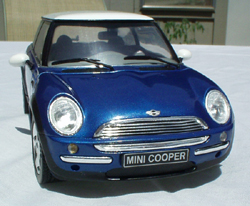 After I carefully inserted windows and then the chassis into the body the rest was easy. Like the real Mini Cooper the Revell's model is fun, quick, and just a little too cute! After I carefully inserted windows and then the chassis into the body the rest was easy. Like the real Mini Cooper the Revell's model is fun, quick, and just a little too cute!
| 


|
