| The Wright Stuff
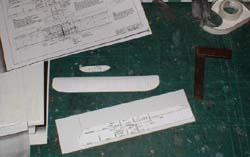
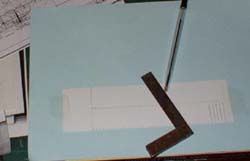
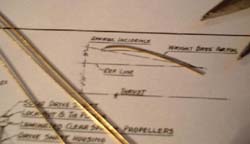
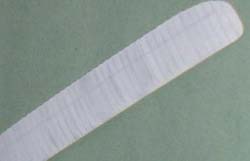
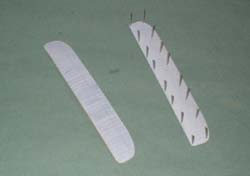
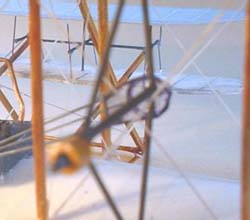
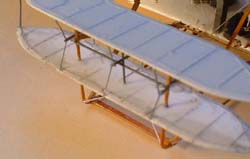
Scratchbuilt 1/72 Wright Flyer | 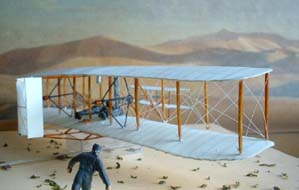 | Introduction At 10.35 AM, December 17,1903 the first manned powered flight took place. Two brothers from Dayton, Ohio had achieved one of mankind's greatest ambitions; to fly! For millennia human beings had envied the birds of the air. To fly anywhere in the air, away from the constraints of land and sea and soar above it all. The Wright Brothers, Wilbur and Orville had done what others had only dreamt of doing. Their aeroplane was the culmination of years of research done mainly in isolation in the last years of the Nineteenth century. Certainly they were influenced by the many other experimenters who for the most part had failed but their invention was in the main a product of the two brothers unique combination of intellects. They had an intuitive mechanical genius, which combined with the technology of the time made it possible for the first time to FLY! The Model Modelling the Wright Flyer is not the easiest thing in the world to do as it has only been kitted by one major plastic model manufacturer, namely the Monogram Kitty Hawk model. However it is a very old product coming out as it did in the late 1950s and in a rather odd scale of 1:39. Those were the days they made them to fit in the box! So apart from that kit there is no alternative but to scratch build. For plans I used the William Wylam drawings found in Volume one of Scale Aircraft Drawings. These were brought to the correct scale using a photocopier. I chose 1:72 scale as it is the scale I usually build in and also because I wanted the model to be part of a small diorama. I commenced by doing the wings first. I decided to build these up from .05 thou. plastic sheet reinforced with brass wire to form the camber. Two blanks of styrene sheet were cut over size to make the top and bottom of each wing. Then using a black ballpoint pen I embossed the rib positions with the aid of a small set square whilst positioned over a soft magazine or catalogue. When all the ribs were marked I set the leading edge fold. The scribing of the wings made the plastic curl like crazy, so to enable me to get the camber in the undersides I made curved ribs from pliable brass wire using the wing section from the plans and a rolling pin to get the correct curve. I made six for each wing and glued them in place with super glue. When they were all in place I folded over the wing halves and sandwiched the trailing edges with double sided tape ala Harry Woodman's method. The wings fortunately when finished have a pronounced anhedril which was built into the original Flyer by the Wright Brothers. Lastly on the wings I created the scalloped trailing edge using a bit of 600 wet'n'dry attached to a pencil. Next I cut out and shaped the rudder and elevator pieces and scribed them according to the plan. I then painted all the flying surfaces before starting any construction. I had an odd Revell paint pot of an off white colour that seemed to be just right for the Wright Flyer! It was number 5 but Humbrol ivory would do as well. In any case, a light coat allowed the black ink from the Biro to show through and gave the surfaces a nice translucent effect. Since there is no real fuselage on the first aeroplane the main structure of the Flyer is the wing cellule and everything hangs off of it. Therefore I constructed the wing cell using the thinnest Contrail strut material available. Once that was done I started attaching the various bits and pieces to it. Firstly the front skids were formed out of the same brass wire I had used on the ribs. I set four little struts to the under side of the bottom wing and glued the skids to them. The elevators simply slipped over the front of the skid and were set in place with super glue. When all was dry I added the connecting struts across the bottom of the skids and the ones going from the top wing to the front of the skids. A V- shaped piece of wire formed the top rudder support , the bottom support being formed by the skid assembly. The rudder was then glued to the struts. Next I turned to the motor and propeller supports. The former was made up of 90 thou plastic sheet, some bits of brass wire and a punching from 40 thou plastic. The propeller shafts were glued to a kite shaped bit of brass wire according to the plans With that done I started to paint the struts, frames and add the details to the airframe. All the wing struts were given a coat of Humbrol number 92 yellow brown and then a coat of Tamiya clear orange for a nice wood effect. To get the sprockets to appear as they do I made the bits that attach to the shafts out of clear plastic sheet and drew the sprocket shape on with an indelible ink pen. Once these were glued onto the shaft assembly with super glue they were connected to the motor with dark grey hot stretched sprue. The motor itself was painted tank grey, Humbrol number 67 and highlighted with a dry brushing of silver. Other details included the radiator, fuel tank, body cradle and elevator control rod. When all the detailing was finished the entire model was rigged with hot stretched sprue. I used a dark colour for all the struts on the biplane elevators. With that I had a model replica of the World's first flying machine.; the Wright Flyer I. Others over the years have claimed to be the first to fly or claim that others COULD have flown before the Wright brothers but I think the argument ends with Orville Wright's own words; " . . . .a machine carrying a man had raised itself by its own power into the air in full flight, had sailed forward without reduction of speed and had finally landed at a point as high as that from which it had started." | 


|
