Tamiya Mitsubishi Lancer WRC Evo VIIBy Keith Walker | 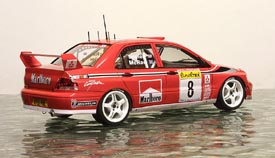 |
Background
If you follow racing at all and rally racing in particular, then the name of Tommi Mäkinen should conjure up images of a blazing fast red car on gravel or snow covered roads, streaking by at speeds that seem to defy the laws of physics, totally dominating the rally scene for year after year.
This kit is not of that incredible car.
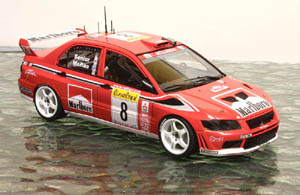 In the mid 1990’s, Mitsubishi completely dominated rally racing, during the “Group A” days, when the racing machines couldn’t deviate as much from their passenger car prototypes. The Mitsubishi Lancer in the hands of Tommi was so strong an entry in rallying that they held the championship for four years straight, from 1996 to 1999.
When the FIA changed world rally racing from the “Group A” formula over to the WRC formula in an attempt to achieve parity between the Euro teams and Mitsubishi (ignoring the fact that the Japanese teams are managed by European concerns), Tommi’s dominance began to wane. Mitsubishi/Ralliart decided that since their Lancer was so crushing in its dominance that they could continue to compete with their old car at the level of the new formula. And for a while they did. But while the other teams began to field entirely new designs with no basis in the older “Group A” formula, Mitsu/Ralliart soldiered on with the same car, albeit with improvements.
The Lancer, larger and slower than its more nimble WRC counterparts, did well at the hands of Makinen, actually winning the championship for two more years (1998 and 1999). However, with Tommi leaving the Mitsubishi/Ralliart team for Subaru and other teams continuing to make strides with their WRC specific cars, Mitsubishi’s fortunes changed fast, fading by 2001 to an 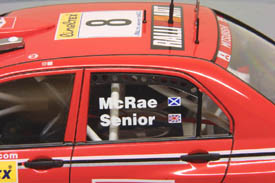 also-ran team competing for the 4th place position against Hyundai, Škoda and the independents. This continued slide finally ended in Mitsubishi/Ralliart losing their Marlboro Racing sponsorship and pulling out of WRC racing for the 2003 rally season.
This Tamiya kit represents Mitsubishi’s penultimate effort at WRC rally racing – there was a “WRC2” car fielded in mid-season in 2002, but as they say, it was too little, too late.
Construction
Building this latest WRC entry from Tamiya begins like the others in the series, with the chassis. The Mitsubishi Lancer departs slightly from the norm by having a floor pan of a different color than the body, and a separately molded engine, but otherwise the construction follows the standard sequence of front and rear suspension and then the interior. The area underneath the exhaust pipe (actually above, but nobody thinks that way) is painted silver, which makes for some tricky masking. Watch out for the color callouts on the rear suspension: the parts are really red and blue on the real car. This makes for easy identification of the parts by the service teams.
 While working on the chassis, I prepped the body so that it would be ready when the rest of the car is complete. Recently, I’ve begun to sand and carve off external details of the body, replacing them later with either some photoetch or the original part. Doing this makes the sanding and buffing out the finish easier since you’re not working around the details and it also makes these details sharper as then don’t get buried under layers of paint. All of the body fasteners that run along the rocker panels and bumpers, as well as the trunk (boot) lid hold downs were replaced with photoetch. The squirter nozzles on the engine hood (bonnet) were carefully carved off then later put back on, but you can just as well use a small drop of epoxy painted black to create the same effect.
After sanding the little pips and seam lines off, the body was washed up thoroughly, and primed with Tamiya primer. Why do I use the more expensive and hard-to-get Tamiya primer? Other primers may work ok, but you know that the Tamiya primer will be compatible with the plastic as well as Tamiya spray colors, so I heavily recommend it. I also use Tamiya colors because they match the decals exactly. Anyway, if you find yourself yelling at me right now, telling me how crazy I 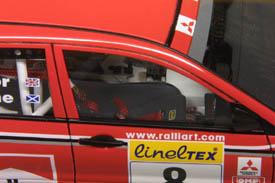 am to use this expensive stuff, then you already have your own system and you can skip ahead. The Tamiya system works for me – as good as their models are, their tools and paints are of equal or better quality.
The primer was sanded smooth with 2400 grit (yes, twenty-four hundred grit) making sure to not sand through. If that happens, bite the bullet and recoat the primer and try again.
Next I put on the color coats, again using Tamiya sprays, in this case TS-49, Bright Red. I followed the time-honored method of spraying on a light mist coat of paint followed by a heavy coat a few moments later after giving the initial coat time to flash off. I repeated the whole thing a few hours later. The mist coat is important for proper adhesion of the heavy coat and to compensate for Tamiya lacquer’s (and other lacquers, for that matter) tendency to “pull back” from sharp edges such as body and door seams.
After the color coats had dried for a week or so, the task of “rubbing out” the lacquer. I started with 3200 grit and worked my way up through 4000, 6000, 8000 and then 12000 grits. When this is completed the finish of the model is very smooth if slightly matte, with no trace of orange peel.
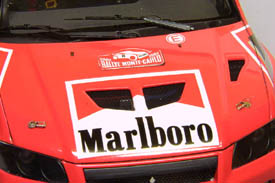 This was followed by my secret weapon (and only non-Tamiya step), the polish. I used Griot’s Fine Hand Polish, a car-care product for 1:1 models. The Tamiya polish is probably great too, but I don’t have any and I do have the Griot’s. It’s important to remember that the polishing step will not get rid of any orange peel. If after you polish a section there is still some texture, use the abrasives again, starting with a finer grit this time.
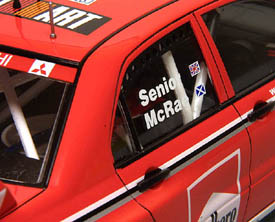
Final assembly consisted of adding the photoetch and other details taken off earlier, and attaching the chassis to the body (a snap fit). Decals are the standard Tamiya fare, a little too thick, brittle and resistant to setting solutions, but judicious use of a hair dryer to soften them up helps.
Details that I added to the kit included most of the parts from the associated photoetch fret from Studio 27, as well as some body fasteners from another Studio 27 fret and seatbelts. If you use the Studio 27 photoetch, remember that they’re made 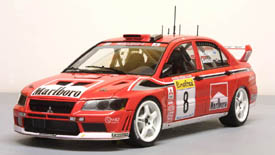 of stainless steel, and don’t bend easily without annealing them first with a candle flame.
Additionally, I added some sponsor decals from Studio 27. I gotta tell you, the difference between Tamiya and Studio 27 decals is night and day, the Tamiya ones definitely being the worse of the two. S-27’s decals go on smoother, have minimal edges, suck up into crevices more easily and just work easier. The High-Tech decals that I used for the driver’s names on the rear quarter windows are incredible since you get to remove the decal film, making for a more in-scale look.
Pros and Cons
Pros | Cons |
| Standard Tamiya quality | Body fastener details are not to scale |
| Separately molded engine | Still no seatbelts, just decals. |
| No driver figures | No driver figures :-) |
| Taillights are molded in transparent colored plastic | Tamiya car decals are still too thick and brittle |
| No cigarette sponsor decals |
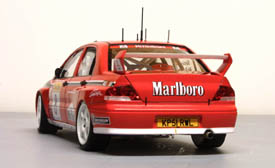 Conclusion
Building these Tamiya WRC kits is very enjoyable; their quality is beyond reproach, with nary a single piece needing “help” to get in place. The level of detail improves with each new release, although the lack of seatbelts continues to frustrate. Another great job, Tamiya!


