Roden 1/48th Fokker D.VII Fokker-built, early
|
 |
History
 The
history of the Fokker D.VII is vast. In fact, it was the only aircraft
specifically named in the Versailles Treaty in 1918 as it was considered
formidable. The
history of the Fokker D.VII is vast. In fact, it was the only aircraft
specifically named in the Versailles Treaty in 1918 as it was considered
formidable.
There were approximately only 200 of the "Early" type D.VIIs
built. This type was differentiated externally by a different exhaust,
consisting of two short pipes jutting out of a hole on the starboard fuselage
side. Another distinguishing feature was that the majority of the aircraft
were delivered with the usual Fokker-streaked finish on the fuselage surfaces
- the flying surfaces were covered with four-color lozenge.
The Kit
 The
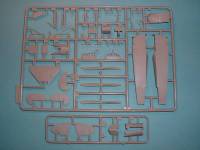
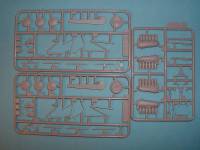
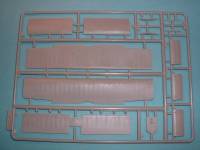
1/48th Roden Fokker D.VII "Early" is the first in what appears
to be a vast line of D.VIIs. It consists of 93 injected molded parts,
although there are spares since Roden created sprues common to all of
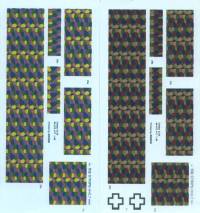
the D.VIIs. Decals not only consist of full lozenge for all flying surfaces
(although some may question the colors) but also markings for four aircraft.
First is 278/18 which was flown by Hermann Goering of Jasta 27.
Next is Bruno Loerzer's black and white striped fuselage-machine of Jasta
26. The third scheme is for Hugo Schaefer's machine (with the white serpent
on fuselage sides and turledeck) of Jasta 15. Finally, the fourth and
last scheme is for Rudolf Berthold's "white flying sword" of
Jasta 15. Decals appear in register and very well done. Some reviews already
written give caution about what type of water to use with the decals.
It has been suggested that the best water to use is not common
tap water. Instead, use something a little more "pure". The
1/48th Roden Fokker D.VII "Early" is the first in what appears
to be a vast line of D.VIIs. It consists of 93 injected molded parts,
although there are spares since Roden created sprues common to all of
the D.VIIs. Decals not only consist of full lozenge for all flying surfaces
(although some may question the colors) but also markings for four aircraft.
First is 278/18 which was flown by Hermann Goering of Jasta 27.
Next is Bruno Loerzer's black and white striped fuselage-machine of Jasta
26. The third scheme is for Hugo Schaefer's machine (with the white serpent
on fuselage sides and turledeck) of Jasta 15. Finally, the fourth and
last scheme is for Rudolf Berthold's "white flying sword" of
Jasta 15. Decals appear in register and very well done. Some reviews already
written give caution about what type of water to use with the decals.
It has been suggested that the best water to use is not common
tap water. Instead, use something a little more "pure".
 Construction
starts with the engine this time. It appears to be very well done and
should be treated like a model itself. One of the options with this model
is to show off the engine with the front, forward side panels off and
all the support "tubing" present. If that option is taken, then
you definitely want to spend extra time with the engine. Construction
starts with the engine this time. It appears to be very well done and
should be treated like a model itself. One of the options with this model
is to show off the engine with the front, forward side panels off and
all the support "tubing" present. If that option is taken, then
you definitely want to spend extra time with the engine.
Construction then moves to the separate fuel tank, assembling the fuselage
floor and then construction of the horizontal tail surfaces, assembling
the wing halves and then building up the wing axle fairing and the radiator.
An extra plus is that Roden provides all control surfaces as separate
- a very nice touch that all models (especially WW1) should follow.
 Now
construction moves to building the front, forward framework if you decide
to build the kit with the front, forward nose panels off. Take your time
here and make sure everything is square and lines up. This will no doubt
help in the long run. If you decide not to leave the forward panels off,
then you may want to leave all the framework out of the nose and just
add the engine without the framework. There may be fit problems later
on. Or maybe even assemble this area after you finish the rest of the
fuselage. Now
construction moves to building the front, forward framework if you decide
to build the kit with the front, forward nose panels off. Take your time
here and make sure everything is square and lines up. This will no doubt
help in the long run. If you decide not to leave the forward panels off,
then you may want to leave all the framework out of the nose and just
add the engine without the framework. There may be fit problems later
on. Or maybe even assemble this area after you finish the rest of the
fuselage.
The rest of the cockpit is now constructed and the fuselage glued together.
Once this is finished then the lower wing and horizontal tail can be added.
At this point I would recommend painting and finishing before adding the
rest of the struts and the upper wing. As naturally comes with most WW1
aircraft, final finishing consist of rigging the model, unfortunately
no rigging diagram is included.
Conclusion
 While
1/48th is not my scale, this is a very well done kit, and those that dabble
in this scale should purchase this kit right away. In the very near future
watch for a full-build review - but not by me!! While
1/48th is not my scale, this is a very well done kit, and those that dabble
in this scale should purchase this kit right away. In the very near future
watch for a full-build review - but not by me!!
My thanks to Roden and Squadron
Shop for the reivew samples.
|


|
