Trumpeter 1/144 Kawanishi Type 97 H6K5 Mavis | 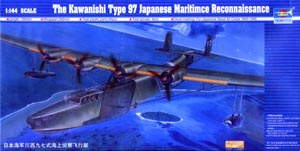 | Overview 1/144th is not a scale I build in often, and Japanese WWII flying boats never elicited more than a passing interest from me, but when I saw the new Trumpeter 1/144 H6K5/23 Mavis my interest was piqued enough to open the box and take a look. The initial impression was good, and I left the shop later with a model that looks good and is priced well, or at least a lot more affordable than some of the recent large-scale aircraft kits. The Kit 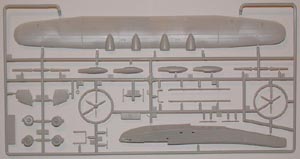 The box contains four sprues; two clear and two in light grey as well as decals for several aircraft. Initial impressions were, as mentioned before, good; detail was crisp with no obvious flash, mold mismatches, or surface flaws. Panel lines are crisply engraved and match up with each other when the fuselage halves go together. It's obvious from the inner fuselage that another release will be done at some point as there are thinned out areas for windows that don't exist in the H6K5. The box contains four sprues; two clear and two in light grey as well as decals for several aircraft. Initial impressions were, as mentioned before, good; detail was crisp with no obvious flash, mold mismatches, or surface flaws. Panel lines are crisply engraved and match up with each other when the fuselage halves go together. It's obvious from the inner fuselage that another release will be done at some point as there are thinned out areas for windows that don't exist in the H6K5.
Fit has been excellent; the only areas that needed putty were the fuselage-to-wing struts (more on that in a minute). Extra work is required to cut holes out for the waist blisters, but the interior of the fuselage was thinned out in the area this needs to be done and the plastic carved out easily without any accidental gouges. Flying surfaces were glued straight and perpendicular with no fuss or extra work required. 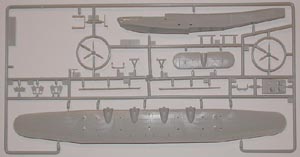 The part that has caused the most work is the "A" frames that connect the fuselage to the wings. There was a slight mold line on the outer edges that was easy enough to clean up, but a thicker one inside the A, which was harder to clean. In the end, it's not that visible once the wing's on so you may want to leave well enough alone. I had to do some extra filing on the base of the A-frame to make it fit flush with the rest of the fuselage, and even with that there were slight gaps here and there than needed filling and sanding. The part that has caused the most work is the "A" frames that connect the fuselage to the wings. There was a slight mold line on the outer edges that was easy enough to clean up, but a thicker one inside the A, which was harder to clean. In the end, it's not that visible once the wing's on so you may want to leave well enough alone. I had to do some extra filing on the base of the A-frame to make it fit flush with the rest of the fuselage, and even with that there were slight gaps here and there than needed filling and sanding.
Another problem that I ran into is the dihedral of the main wing. Another review I've read had their wing dihedral higher than it should have been and this raised the wing tips so that the support struts on the bottom didn't reach their slot in the bottom of the wings. This was found out after the wing had been glued together and was rectified by cutting a line in the bottom of the wing with a saw and bending the wing down until the gap was gone. In my case, it wasn't that bad; the tabs were halfway in their wing mounts. I elected to putty the gap with milliput and it worked well. 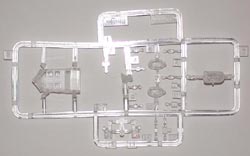 There were some minor problems that I had to deal with; there were slight mold lines on the joints for the wing top and bottom; when test fitting they caused a slight gap between the number 3 & 4 engines. Short work with a file fixed this. There were also slight bulges in the fuselage in some places where the plastic was thinned out for the windows of different variants. This was fixed fairly easily with some sandpaper and really wasn’t apparent until I carefully looked over the two pieces. There were some minor problems that I had to deal with; there were slight mold lines on the joints for the wing top and bottom; when test fitting they caused a slight gap between the number 3 & 4 engines. Short work with a file fixed this. There were also slight bulges in the fuselage in some places where the plastic was thinned out for the windows of different variants. This was fixed fairly easily with some sandpaper and really wasn’t apparent until I carefully looked over the two pieces.
My research material on the Mavis at this point is limited to web pages so I can't comment on the accuracy other than to say it certainly looks like a Mavis. One potential gotcha is that the propellers are all molded with spinners and not all of the aircraft flew with them. Some of the aircraft they provide markings for definitely did 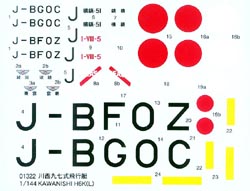 not at one point, at least. not at one point, at least. Conclusion The new Mavis is a good kit. It's not without faults, but those that exist are hardly difficult to overcome. I’ve had mine for about three weeks now and all that’s left is to finish the struts and perform a little backdating. This despite a busy schedule that doesn’t allow much time to model. It’s gone together well. | 


|
