Minicrafts 1/144 757 'TWA'By Chris Banyai-Riepl |
 |
History
The 757 is the smaller half of a two-plane concept developed by Boeing that incorporated near identical cockpits into both a narrow-body and a wide-body airliner. By doing this pilots could get a type rating for either the 757 or the 767 and be able to fly both planes, thus allowing airlines to lower training costs and expand markets effectively. The distinctive 757 nose is a result of this concept, with a lower cockpit window area and a flattened radome. Approval of the 757/767 concept came quickly and soon airlines were buying both the 757 and 767 to replace ageing aircraft in their fleet. The great fuel efficiency of the twin-engine design coupled with a good range placed the 757 in an ideal position for an inexpensive transcontinental airliner, with examples being flown on just about every continent in the world.
The Kit
 There
are few options for a 1/144 757 out there, and this is the only injection
molded kit of the type out there. This is a re-release with new decals
and is a typical example of a Minicraft kit. The three trees of parts
are molded in a white plastic, with the windscreen cap being molded in
clear. The panel lines are recessed and are decent for the most part,
although some of them just drift off into nothingness. Overall the molding
of this kit is a bit better than the original release, which is surprising.
Perhaps theyre using a better plastic this time around.
There
are few options for a 1/144 757 out there, and this is the only injection
molded kit of the type out there. This is a re-release with new decals
and is a typical example of a Minicraft kit. The three trees of parts
are molded in a white plastic, with the windscreen cap being molded in
clear. The panel lines are recessed and are decent for the most part,
although some of them just drift off into nothingness. Overall the molding
of this kit is a bit better than the original release, which is surprising.
Perhaps theyre using a better plastic this time around.

Like most airliner kits in this scale, there is no interior, not even a cockpit section. For the cabin thats not even an issue since Minicraft chooses to not have window openings along the fuselage. The cockpit, though, could use something in there, as the windows on the 757 are rather large and you can see quite a bit through them should you choose to leave them clear. For those that prefer decal windows, Minicraft does include a set of windscreen decals in the kit. While on the subject of the nose, there are some shape problems here, mainly in the way that the taper comes off the top of the fuselage, as well as the fit of the windscreen part. There are three options here: one, ignore it; two, break out the filler and sandpaper; or three, get the Braz replacement nose. If you opt for either choice one or two, dont forget to add some nose weights to keep this model on all three legs.
 As
long as were talking about the fuselage, there are a couple of other
areas that may or may not be of concern. First off, the fuselage aft
of the wing is about 5mm too long. To some thats noticeable, to others
its no big deal. The second problem could be of more concern and that
is with the vertical fin. Minicraft has this as being too broad in chord.
This is a concern as there are many liveries out there with complex tail
markings and having the tail too broad throws the proportions off. Luckily
there is a replacement tail available from Braz (see my review of this
and other 757 parts elsewhere in this issue).
As
long as were talking about the fuselage, there are a couple of other
areas that may or may not be of concern. First off, the fuselage aft
of the wing is about 5mm too long. To some thats noticeable, to others
its no big deal. The second problem could be of more concern and that
is with the vertical fin. Minicraft has this as being too broad in chord.
This is a concern as there are many liveries out there with complex tail
markings and having the tail too broad throws the proportions off. Luckily
there is a replacement tail available from Braz (see my review of this
and other 757 parts elsewhere in this issue).
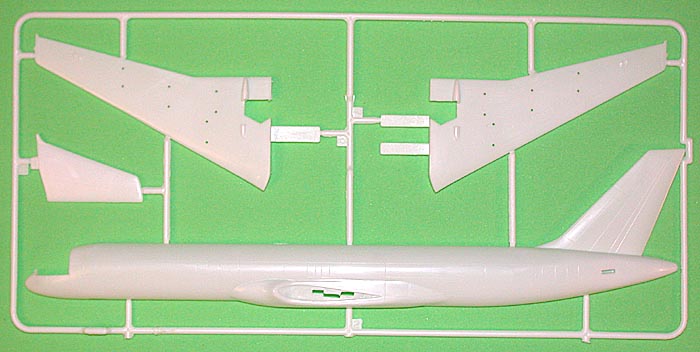
Moving to the wings, these are split into upper and lower halves, with locking tongues designed to mesh inside the fuselage, resulting in a very positive fit. Be ready for some cleanup here, though, as the edges on both the fuselage and the wings are soft and rounded and will likely require a bit of filler to smooth out. The flap tracks are molded as separate pieces except for the one that runs through the main gear section. Having the tracks molded separately is a nice feature, as it makes it much easier to fill the sink marks that are present. I wish that all airliner kits had these molded separately, as I have yet to find a single kit that doesnt have sink marks in this area.
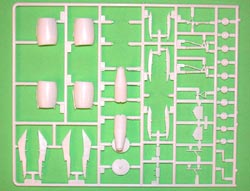 The
landing gear is decent and looks good enough out of the box. For those
who want to add a bit of extra detail, theres plenty of room for brake
lines and other plumbing. The gear doors are just flat pieces of plastic,
but being injection molded they are a bit thick. Since theyre devoid
of detail anyway Id probably just replace them with some thin card stock
or even brass. The stabilizers are molded solid in right and left sides
and have thick trailing edges and indistinct and unequal leading edge
fillets. This is one area that will require a fair bit of work to get
looking right, and unfortunately no one has a set of replacement stabilizers
yet.
The
landing gear is decent and looks good enough out of the box. For those
who want to add a bit of extra detail, theres plenty of room for brake
lines and other plumbing. The gear doors are just flat pieces of plastic,
but being injection molded they are a bit thick. Since theyre devoid
of detail anyway Id probably just replace them with some thin card stock
or even brass. The stabilizers are molded solid in right and left sides
and have thick trailing edges and indistinct and unequal leading edge
fillets. This is one area that will require a fair bit of work to get
looking right, and unfortunately no one has a set of replacement stabilizers
yet.

This brings us up to the engines. In the box, on the sprues these look to be well done. This kit comes with Pratt & Whitney engines and theyre broken down into separate pylons (split right and left halves), separate fan section (also split into right and left halves) and a separate hot section that attaches to the back of the fan blade disk. Once these are put together, though, two large problems show up. First is the intake section. There is a very large and very noticeable step inside the intake lip. If youre going to fix this Id suggest doing it before you assemble things, as youre going to be using a fair bit of filler and lots of grinding. The second problem is just as difficult to fix and even more apparent and that is the angle of the completed engine on the wing. Out of the box the engines end up angling upward. Fixing it will involve a fair amount of work. A much easier solution is to buy the Braz replacement engines, as they are far better than the kit ones are and are set at the proper angle.
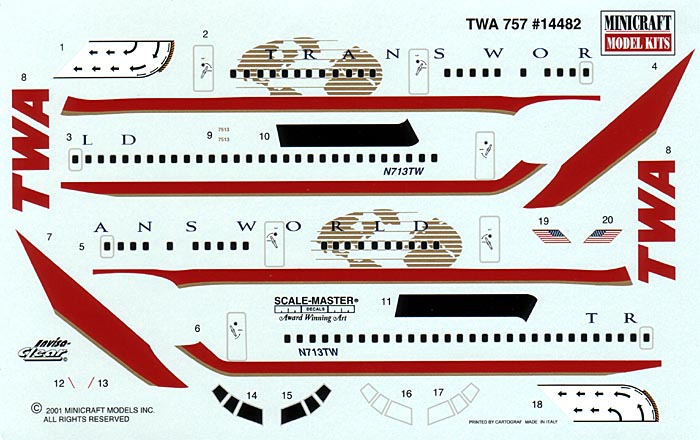
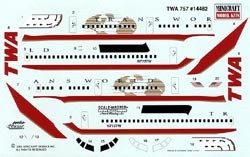 The
decals are printed by Cartograf out of
The
decals are printed by Cartograf out of Italy
Conclusion
If you want to build an injection-molded 757 youre going to have to get this kit. With the excellent Braz corrections for the nose, tail and engines you can end up with a very nice and accurate 757 model on your shelves. There's no shortage of interesting liveries for the 757 and Minicraft is planning on releasing this same kit with several new decal sheets, so keep an eye out for that favorite airline of yours.

![]()


