Building Eduard's 1/72 Albatros D.V
By Michael Kendix
 |
Background
According to the "Albatros In Action" book, the D.V was an attempt to improve upon the Albatros D.III, the D.IV being a non-sequential project, built to test a geared version of a Mercedes engine. The D.V and D.Va were powered by an 180hp Mercedes. The main difference between the D.III and the D.V/D.Va was the wing root attachment and more prominently, the aileron control mechanism. The primary difference between the D.V and D.Va was the area around the ailerons and the associated rigging on the outer areas of the wing bays. Although somewhat superior to its predecessor, the improvement was less than had been anticipated. Indeed, the D.V/D.Va was obsolete when it entered service, apparently. Nevertheless, the Albatros D.V and D.Va provided the mount for numerous celebrated German pilots, including Jacobs, Bäumer, Lothar and Manfred von Richthofen, and Udet.
 An in-depth review of the kit was given in an earlier edition of Internet Modeler so I will not provide a detailed description of the kits contents and accuracy. Upon opening the box of either the Profipak or non-Profipak version of this kit, the contents exude quality. The Profipak version contains more decal options and a fine fret of photoetch parts, much of which provides for interior detail, which has some minor inaccuracies but looks great regardless. When these kits were released I bought one Profipak and one non-Profipak, and I decided to build them simultaneously. My initial plan was to build one with a plain plywood fuselage and one with a painted fuselage: Jacobs’ all-black machine loomed as a possibility. I wanted to try a plywood fuselage using techniques I had seen used by David Solosy and Mark Shanks, however, I wanted to hedge my bets in case I blew it. Previously, I had used wood grain decals, which I felt were adequate but could be improved upon. Thus, I decided that I would attempt a plain wood fuselage on both kits and if they turned out to be mediocre, at least one of them would be an all-black model à la Jacobs.
Interior
 First I airbrushed the fuselage interior with Model Master’s acrylic 'Wood'' and brushed it with a mixture of different colour water-based gouache paints manufactured by Savoir Faire. I put a little yellow ochre, burnt umber and black on a palette (I use beer bottle tops for palettes) and using a fairly wet brush, a Q-tip and a small make-up sponge applicator, I applied the gouache paints. If you don't like the results, you can easily remove it since it is water based. I gently pushed this stuff around until I found the right sort of effect. Once it was dry, I brushed on a coat of Future to seal it in. This turned out to be good practice for the exterior fuselage.
 Construction began in the cockpit. In the Profipak version, a large piece of photoetch represents the floor and the rear bulkhead, on top of which is the seat mounting. Photoetch parts were also provided for the foot rudder, seat belt, instrument panel and various bells and whistles. The non-Profipak version has no photoetch but the interior is nevertheless acceptable in my view. You get a seat, a floor that contains a foot rudder, and a control stick. Details can be added depending upon your propensity for such things. I added seat belts using foil left over from a champagne bottle.
The Profipak has a wonderful pair of photoetch cooling jackets for the Spandau guns: simply cut off the solid plastic cooling jackets and replace them with the photoetch ones; then add the photoetch tips and a piece of .020" plastic rod for the ends. Other photoetch pieces are provided for the guns. For the non-Profipak, I used a couple of cooling jackets from the Tom's Modelworks’ Spandau sets. The kit's engine is excellent and is mounted on a base with a firewall at the rear. I painted the engine with a base of 'Engine Grey' and I dry-brushed it with aluminium to bring out the metallic effect. I painted the engine pipes with an enamel 'Rust'. I find it easier to do fine detail brushwork with enamels rather than acrylics since the latter dry too quickly. When I closed the fuselage, the entire interior fit without any problem: a remarkable feat on Eduard's part given the trouble I have had with many World War One kits that cram stuff into the cockpit interior. Care should be taken, however, to ensure all the components - engine and interior subassembly - are lined up correctly. Failure to pay attention to this will make it difficult to add the guns later and mount the top wing.
 Once the fuselage was closed I glued on the lower wing piece, which also contains the underside piece of the fuselage. I always find this arrangement somewhat taxing compared to where you simply have a port and starboard wing piece. You have to take great care making sure the lower wing piece is positioned correctly. Finally, I glued on the tail parts. Note that there is a natural seam between the horizontal tail parts and the fuselage that should remain. Once I completed this task, considerable puttying, and sanding for the fuselage seam and the lower wing-to-fuselage join was required. After I had finished that and then rescribed the panel lines, the fun really began - the wood fuselages.
The Plywood Fuselage
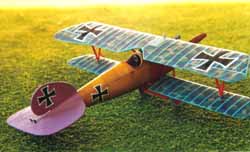 Up front, I have to acknowledge my debt to David Solosy and Mark Flake, whose methods I gratefully adopted, and then adapted slightly to suit my own limitations. Rather than attempt to draw on wood grain with watercolour pencils, an activity that exceeds my skill and patience endowment, I went for a more subtle effect. I sprayed on a base coat of acrylic 'Wood'. Once that was dry, I mixed a small amount of the same paint with a little white paint and lightened 3 or 4 of the fuselage panels. Again, allowing that to dry, I applied the gouache water-base paints as described above. I used a paintbrush, a Q-tip and those small make-up applicators with the sponge tip. I tried to swipe the gouache paints in different directions for each panel, although that was somewhat problematic for a small 1/72nd scale model. The key to this is not to worry too much and recognize that the whole thing can be washed off with water if you do not like it. Also, as with all weathering or 'effects' of this type, it is better to do too little: understatement is the key. Aside from providing a sort of 'grain' affect, the gouache paints also worked into the fuselage panel lines, acting like a wash, which enhanced their effect. Once I had applied the gouache paints to my satisfaction, I sprayed the surface with Tamiya Clear Yellow. Note that although this Tamiya paint is an acrylic, it smells different from the other acrylics I use, such as Mister Kit, Polly Scale, Aeromaster and Model Master, which I usually thin with isopropyl alcohol or Windex. I, therefore, used Tamiya thinner to thin the Clear Yellow to good effect. Finally, I brushed on a couple of coats of Future and that was it.
The Wings
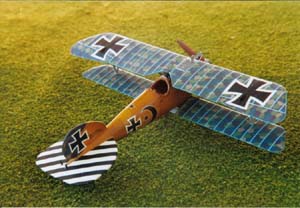
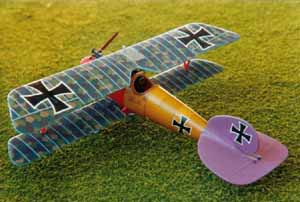
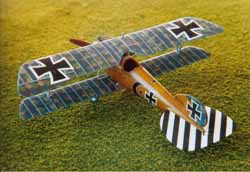 I was satisfied with the wood fuselage effect on both kits so I decided to build models flown by Waldhausen of Jasta 37 - the decals comes with the Profipak, and Schönebeck of Jasta 11: both are an Albatros D.V. The wings were next. Both schemes have five-colour lozenge for which I used Eagle Strike's decals. The lozenge was applied chord-wise, except for the aileron control surfaces, which were applied span-wise. The Waldhausen also had lozenge on the vertical tailpiece. The Eagle Strike decals went on easily enough, although I found them slightly fragile and they chipped a little too easily. Nevertheless, I was able to touch up the odd tear and chip with out too much trouble.
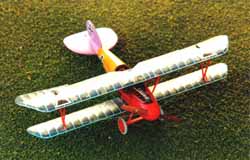
Once I had applied the lozenge decals, it was time for the rib tapes. I could not determine from my references whether the rib tapes were lozenge and since there is no definitive choice for rib tape colours, I selected light blue on the top and pink on the bottom. The total number of rib tapes for the two models combined was over two hundred so rather than slice each one from sprayed decal paper, as I have done previously, I went with Eagle Strike's rib tape decal sheets. Nevertheless, this was an arduous and lengthy task, and one reason not to build two of these kits at once, unless you select a non-lozenge scheme.
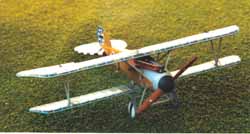 The decals go on well with water and a combination of Micro Set and Micro Sol. For the lozenge strips, I lined the leading edge up with the end of the lozenge strip so I had only to trim the trailing edge. Even the sharpest, brand new Exacto blade seemed to tear the decals when trimming, so I allowed the decals to dry then carefully sanded off the overhanging superfluous decal.
If you keep the sanding stick at the correct angle, you will be left with a nice clean edge, which will be painted in whatever colour you selected for the rib tapes. I found U.S.S.R. Underside Blue to be the closest match for the blue rib tapes. After about a fortnight of evenings working on this stuff, I finally completed the task. I noticed that I made an error with respect to the depiction of the lozenge: namely, I should not have extended the lozenge all the way to the fuselage. Pictures from the Smithsonian Institutes’ National Air and Space Museum show its Albatros D.Va with a strip of plain wood at the wing nearest the fuselage.
Painting
The Waldhausen model is shown in the instructions as having aluminium for the engine housing area, however, I believe this is incorrect. Having painted it aluminium, I was advised by those more knowledgeable than I on the World War One Modeling discussion list, that it was probably grey. Also, the Osprey 'Albatros Aces' depicts this as grey; I used the same medium grey for the struts and undercarriage. Then, I masked off all but the horizontal tail parts and sprayed them white in preparation for the black strip decals. At this point, I also glued on the Spandau guns and the ammunition chute.
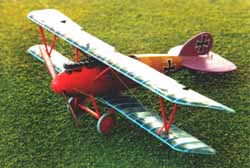
I masked of the Schönebeck model and sprayed the front fuselage, strut and undercarriage with 'Guards Red', and the rear fuselage and tail “German Mauve”. The Model Master acrylic 'Guards Red' is a deeper red and unlike some reds, it sprays well, is somewhat glossy and needed longer to dry than most acrylics. It is also a little over-bright in 1/72nd scale and even though I flattened it at the end with clear flat, I had my reservations.
Wings and undercarriage construction
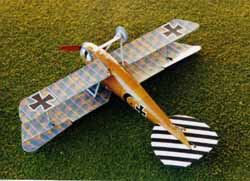 I encountered few difficulties when I glued on the top wing. I used Testors’ (orange) tube glue to adhere the struts into the top wing and when that had set up a bit, I glued that onto the lower wing and fuselage. To my astonishment, the cabane and interplane struts all fit! I used Mark Flake's method, described on the Roll Models' web site, to glue on the undercarriage. I drilled small holes through the fuselage and similar size holes through the tops of the undercarriage legs. Then, I inserted small pieces of .020-inch plastic rod through the leg holes and into the fuselage to adhere the undercarriage legs. It took a little playing around, but eventually I managed to get everything glued on. Once this was all dry and set, I brushed the entire model with a coat of Future.
Details
The Profipak's photoetch contains a number of nice little hatch hinges, brackets and the control arm shrouds for the ailerons. A member of the World War One Modeling discussion list was kind enough to send me another photoetch set and I used this for the hatches and shroud, as well as the wing footplate and other bits and pieces. Rather than use super glue and risk a glue mess, whenever possible, I glued the photoetch parts with Elmer's White Glue. Following this, I applied the decals for the markings. One of the top wing crosses shattered in water, so I used a set from an old Esci Albatros D.III kit. The crosses were not quite the same as those in the kit but close enough. Similarly, I used some crosses from the Pegasus Austro-Hungarian 'Crowns and Crosses' sheet for the Schönebeck model. All the decals went on without too much difficulty. The kit decals are from Propag and are extremely thin. Other manufacturers’ products tend to be a bit thicker. There was no silvering effect but in one or two places I can still see a thick decal edge; for example, on the 'weights and measures' decal for the Schönebeck model. I also found it difficult to make the black and white wheel hub decals on the Waldhausen model lay down flat. Once the decals were dry, they received another coat of Future.
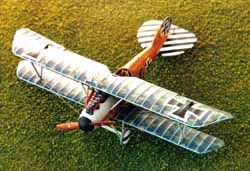 The propeller refused to fit under the spinner on both kits but I sanded it down and it looked fine. The propeller wood grain was accomplished using the same method as for the wood fuselage, though I used more burnt umber to provide a darker effect. I know many of the Albatros D.V propellers are made from light and dark layers of wood and perhaps I erred in not reproducing that effect for these models. I made the engine pipes from piano wire and 28 gauge copper wire. The engine exhaust horn has to be glued on carefully. It does fit through the cabane structure but you have to be patient.
I made the rigging using .005-inch wire from Small Parts Inc., glued on with Elmer's White Glue. Once all that was dry, I sprayed the models with acrylic Model Master 'Clear Flat' and then gave the wood components a layer of Future to shine them up again. When all the spraying and painting was complete I added a windscreen cut from clear plastic.
Conclusion
As other reviewers have found, this is an outstanding kit. I prefer the Profipak and its photoetch but you can make an excellent model without it. There are very few problems with this kit and even those are minor and more a function of the subject, such as the undercarriage. I did not use the kit's lozenge decals but I am particular and they really are quite acceptable.
Acknowledgements
I would like to thank Steve Perry for his valuable assistance, Bob Pearson and Matt Bittner for their helpful encouragement, and Shane Weier for his advice. I would also like to thank the members of the World War One Modeling discussion list run by Allan Wright, courtesy of the University of New Hampshire. I also relied heavily on the reviews by Mark Flake and David Solosy on the Roll Models’ and Perth Military Modelers web sites, respectively.
References
-
John F. Connors. 'Albatros Fighter In Action.' Squadron Signal Publications, Inc., Carrolton, Texas, U.S.A. 1981.
-
Norman Franks. 'Albatros Aces of World War 1.' Osprey Aircraft of the Aces 32. Osprey Publishing, Oxford, United Kingdom. 2000
