Revell 1/24 New MINI Cooper, kit #85-2995
By Chuck Herrmann
|
|
 |

|
|
 |
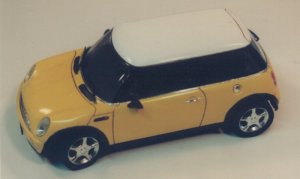
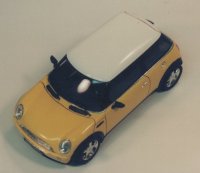 This model was molded in Poland; the Revell AG logo is stamped on the chassis. It is also available from Revell Germany in Europe, but that version is molded in dark (British Racing) green. This is a curbside kit so it lacks a full engine. There are not too many pieces in the box, about sixty. But the molding looks clean, not much flash or mold lines. The body was especially clean and not much sanding was needed at all. The front body panel will need to go on after the body is attached to the chassis, so don't glue it on beforehand. The fender flares are molded in, this will need careful masking when painting.
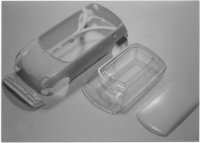 The US version of this kit is molded in white, so painting is easier. On my kit I painted the body Model Master Bright Yellow, the actual factory yellow is a lighter shade. The roof is a separate piece that sits on top of the one-piece window assembly. The window pillars are painted on the inside of the glass, there is molded in detail to make this easier.
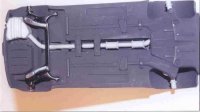 The wheels are satin-chromed plated five spoke pieces, but the lack of any brake detail is very noticeable. An aftermarket addition here would be very helpful. Paint the back of the wheel inserts black o the spokes stand out. The rubber Dunlop tires (17") are nice, but probably too wide. The wheels attach to the sprue close to the edge so be careful cutting them off.
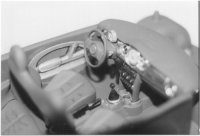 The interior builds up off a separate floor piece that fits onto the chassis. The rear seats are molded in. The entire dash is plated so I scraped off the lower section since only the top half is metal on the real thing. Everything fit well, I airbrushed it dark gray. The instrument panel, tach face and steering wheel logo are decals. The aluminum accents on the doors are molded in; I masked them off while painting the gray and brushed on some silver paint later.
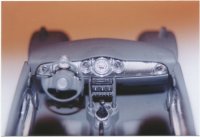 So far so good, however in the final assembly stages I found there are several shortcomings in the design of this kit. The instructions say to glue the chrome headlight and taillight buckets in before you attach the body. I now agree, because I didn't and then found out that both are too small to fill the openings in the body. Also, they are attached to the sprue close to the edge so I trimmed a bit off during clean up and that made the gap larger once it is attached. I suggest putting some filler in the openings then securing the buckets before attaching the chassis, while you can still handle the body from both sides.
 Next problem was the fit of the front body pan to the body. The window assembly sits on top of the interior, don't bother trying to glue it first as it holds in place nicely once the body shell is attached. However, the lower front body panel on mine did not fit. I cut quite a bit off the front of the chassis, and barely got it to work. The front grille needs to go behind the lower panel and in front of the main body and these parts need to be held in place while you glue them all together while holding the window in place. I needed two more hands! Also there is no definite mounting point for the body on the chassis, I ended up running some super glue along the edge of the chassis and held it all together long enough to set. I never did get a real good fit between the body panels.
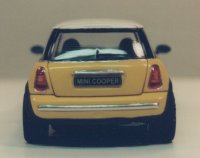 The light lenses are clear, you need to paint the taillights red with amber turn signals. The side markers are molded on - paint the vents here black then the lights amber. The molded in cowl vents are not well defined, this makes it hard to paint a crisp edge. The front wipers do not sit flush on the windshield in a down position, and break off easily if you try to bend them. I painted the mirrors black and the roof white. The only license plates on the decal sheets are two styles of the word "Mini Cooper". You have a choice of chrome plated or a body color fuel tank cap.
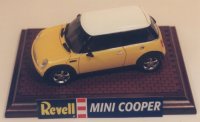 The final assembly problems stop me from giving this kit an enthusiastic recommendation. If I build another one most of this can be overcome, but the sloppy fit of the lights and the indefinite fit of body to chassis are not state of the art. Having said that, with some extra attention it could build into a nice looking shelf model.