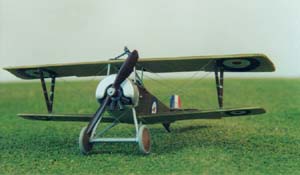
Building Toko's 1/72nd Scale Nieuport 16c
By Michael Kendix
Introduction
The Nieuport 16c (the 'c' denotes 'scout') followed the Nieuport 11c or Bébé, which it resembles closely. The differences between the two were slight; the Nieuport 16c was fitted with a more powerful 110 hp Le Rhone 9J rotary engine and sometimes had a headrest. The more powerful engine permitted easier use of the balloon busting Le Prieur rockets that could be mounted on the interplane struts, although some of these rockets were used on Nieuport 11s. Few pictures of the Nieuport 16 exist. I decided to build a scheme out of the box; namely, Albert Ball's Nieuport 16 Scout Serial A 134 in which he claimed two victories.
Born in 1896 in Nottingham, his father was Lord Mayor of the city. Albert Ball flew Nieuports with No 11 and 16 Squadrons during 1915 and 1916. Often flying alone he had 31 victories by the end of September 1916. On returning to France in 1917, as a flight commander with 56 Squadron, Ball flew SE5s but also had his own Nieuport Scout. With a score of 44 claims, he was killed on May 6, 1917 and was awarded the Victoria Cross posthumously. He was 20 years old.
The Kit
The kit comes on two sprues. The level of detail is good with restrained representation of the flying surface ribs though Toko's fabric weave effect is a little too prominent on this kit. There are some inaccuracies - the most noticeable being the front facing part of the cowl. The lower wing is a little short (4mm) and the landing gear and struts are somewhat at variance with the real thing. However, changing or replacing these items was beyond my patience or ability. Essentially, I built this kit without any significant modifications. The kit can be built with the Imperial Russian Air Service's skis and Hotchkiss gun (or it could be a Colt machine gun) or as a British or French model with wheels and a Lewis gun.
Cleanup, Fuselage and Wings
 The first task was cleaning off the flash from the kit's parts. There is not a great deal of flash but most of the parts have some along the molding lines. One should take special care with the struts, gun mounts and landing gear, which are nice and thin but quite fragile.
I sprayed the interior of the fuselage Aged White to represent the clear-doped-linen (CDL) and then painted the interior framework a dark brown. The lower wing is a single piece joined by a piece of the fuselage floor on which the seat, control stick and foot rudder are mounted. I painted the seat Leather brown and cut out a couple of strips of wine bottle foil to make seat belts. The control stick and foot rudder were painted dark grey. Once these pieces were glued and dry, I closed the fuselage.
The fuselage has a couple of molded in filler caps at the front, which I sanded off and replaced later with plastic rod. I added the headrest, which needed filler to mold it into the fuselage. This made the sanding and seam filling process easier.
I was in two minds regarding the windscreen and its frame, which comes as a solid piece of plastic. I could sand it off and scratch build a replacement or retain it and try to make something of it. I decided to try and salvage it. Once the fuselage seams had been filled and sanded, I cut out as much of the 'window' as possible using a file and Exacto knife. I used Model Master's Clear Parts & Window Maker to make a window.
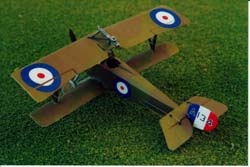
Once the fuselage and lower wing were ready, I sprayed their underside and that of the lower wing Aged White. When that dried, I masked of the lower surfaces and sprayed the upper surfaces of the fuselage and wings with Polyscale's PC-10. In my view, that PC-10 is far to the green end of the green-brown PC-10 spectrum and is a fair representation of the profile on Bob Pearson's CD. Once that was dry, I masked it off and sprayed Dark Earth to complete the upper surface's camouflage scheme. I learned later that the current wisdom is that the upper surfaces should be French olive drab, however, it was a little late to make an adjustment. I then left the entire assembly for a couple of days and coated it in Future in preparation for the decals.
Bits and Pieces
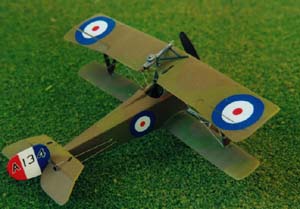 In between drying time for the fuselage and wings, I proceeded with the other components. I painted the engine, Engine Grey, after which I dry brushed it with aluminium. Finally, I painted the piston rods 'Brass'. Perhaps the engine is not the best it could be but in my opinion it is decent.
The interplane 'V' struts are made with oversized bumps representing the struts' taping. I sanded these off, painted the struts brown, dry brushed them with various shades of brown, and painted the tapes in aluminium. I painted the propeller a base medium brown and added dry brushing of various browns and dark grey to create a wood grain effect. I painted the gun and its mounting Engine Grey then dry brushed it with Aluminium and Burnt Aluminium. I picked out the gun handles with dark brown. I sprayed the wheels with Dark Earth while they were on the sprue, cut them off and painted the tyres Light Grey. I cleaned up the cabane struts and landing gear, and painted them Aluminium.
Decals
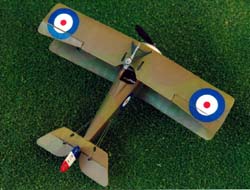 This kit has a fair number of decals, all of which I put on prior to adding the top wing. The tail decals are decent. Unfortunately, I picked up the Proweld instead of the Solvaset and as the decals disintegrated rapidly I though "Crumbs that stuff is even stronger than I thought." As the Proweld began to attack the plastic, I glanced up and saw the bottle. It was like the scene from 'Alien' where the creature's blood is spilled onto the floor and melts down through about six levels of the space ship's decks. At that point I threw the tail part into a bowl of water, which immediately stopped the process. Fortunately, I'd saved the decals from the Toko Nieuport 11 kit, so I used one of them as a replacement. The roundels went on without too much trouble. I used Microset to soften them and Microset to ensure they snuggled into position. I left these to dry for a day and then covered all the decals with Future to seal them.
Getting the Top Wing In Position
Once the decals and Future were thoroughly dry, I glued on the top wing. The V-struts make the process easier. I used Testors orange tube plastic cement, and jigged the assembly up using cassette tapes. When the glue had set a bit, I added the cabane struts. One of the interplane struts became unglued in this process but it was easy enough to glue it back. The upside down 'V' cabane strut was too long so I cut it in two separate pieces, trimmed the pieces down and glued them in. I added the two lines that run from in front of the cockpit to the aileron cranks in the centre of the wing. The fuselage has indentations for these lines so they are easy to put into place.
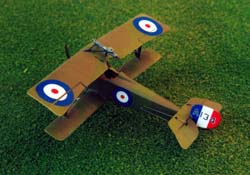 Once the wing parts were dry I added the engine, the cowl and the cowl cheeks. This time I put the cheeks on the right way up. I cannot be certain but the kit instructions may have switched the numbers of the two cheeks parts. I then added the landing gear, which was fairly straightforward. I added some bracing made from plastic strip at the base of the landing gear next to the wheels. The landing gear are not quite correct in shape but in my view are acceptable. After the wheels were glued on, I assembled the gun mounts and the Lewis gun.
The kit also comes with Le Prieur rockets, which according to 'Nieuport Aces of World War 1', were used by Albert Ball in A134. As far as I know, no pictures of that particular aeroplane with its rockets exist, so you can please yourself whether you include them. I chose to leave them off since I felt it detracted from the model's appearance and was a fair amount of trouble but that's just a personal choice.
Rigging
I used .005-inch wire from Small Parts for the rigging. The rigging is straightforward on this aeroplane, except for the tail parts. The rigging should run from the tail elevator aileron control horn through the horizontal tail, to the fuselage side. I had pre-drilled small holes in the horizontal tail prior to painting but when I went to fit the wires, they did not connect correctly. I was forced to enlarge the holes and as a result, the holes are a little too large. The remainder of the rigging was entirely straightforward.
Conclusion
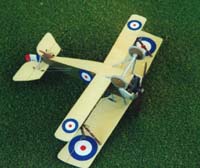 After a few touch ups, a bit of an oil wash in the aileron joins and a final coat of Polyscale Flat, the model was finished. I know the kit has several inaccuracies; the cowl, the landing gear and the interplane struts. Nevertheless, this kit looks like a Nieuport 16 when it is built. It is a fairly well made and inexpensive kit that is not too difficult to build.
Acknowledgement
Thanks to Matt Bittner, Alberto Casirati, Todd Hayes and Hans Trauner for advice and information on building this kit.
References
-
Peter Cooksley. 'Nieuport Fighters In Action.' Aircraft Number 167. Squadron Signal Publications Inc., 1115 Crowley Drive, Carrollton, Texas 75011-5010, U.S.A., 1997.
-
Norman Franks. 'Nieuport Aces of World War 1.' Osprey Aircraft of the Aces Series Number 33. Osprey Publishing, Elms Court, Chapel Way, Botley Oxford, OX2 9LP, United Kingdom, 2000.

