Introduction
This model was acquired and built as part of Seattle-based NorthWest Scale Modelers' Museum of Flight display, "50 Years of Human Spaceflight". Although only an unmanned, boilerplate version of the MOL ever flew in space, the project was quite serious during the period 1963-69. This model, along with a 1/48 Colllect-Aire Boeing X-20 Dyna-Soar by Ralph Braun, represented a military perspective in contrast to the mostly civil focus of human spaceflight.
History
A concise history of the stillborn MOL can be found in the reference.
Kit
New Ware is a small Czech enterprise devoted to resin kits and photo-etch detail sets of factual spaceflight subjects. All products are ordered directly from the New Ware site (see references), using PayPal for payment. The only difficulty, a small one at that, is that New Ware has to provide you with a quote in Czech Koruna before you submit payment. Your models will arrive a few weeks later.
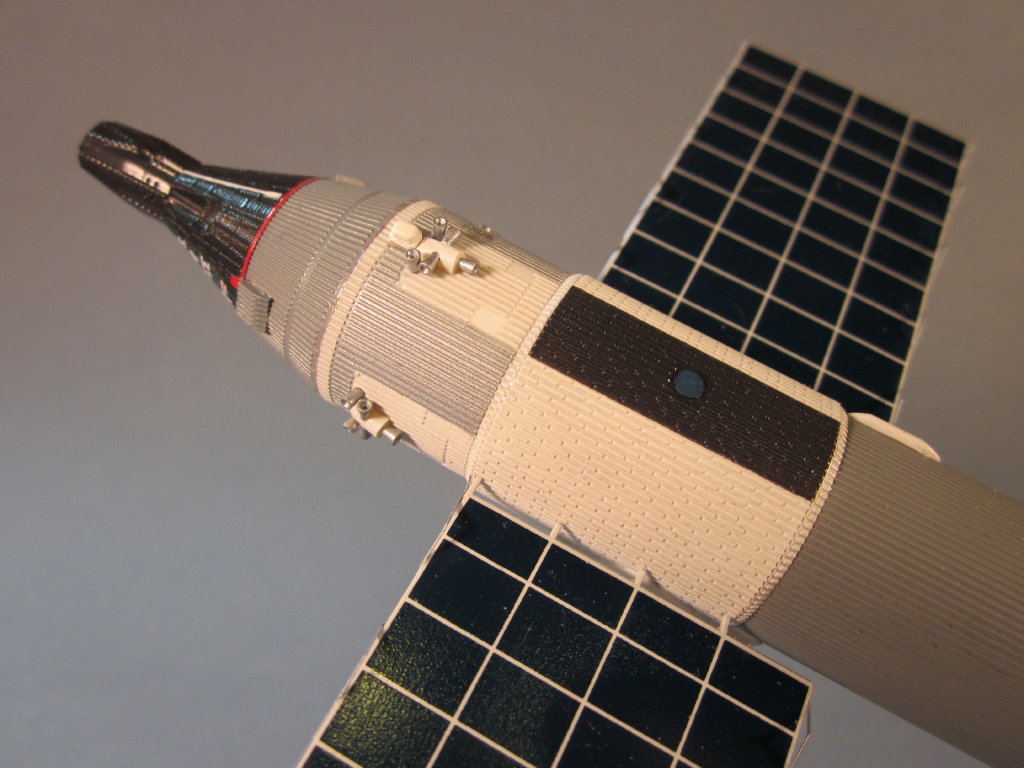
The primary cylinder representing the bulk of the MOL spacecraft (Gemini crew return capsule, and attached laboratory section) are molded in one resin piece. The delicate and crisp detail captured in this resin mold is among the most impressive I have ever seen in approximately 10 years of building various and sundry cottage industry resin kits. Other smaller items such as two blisters and the reaction control system (RCS) thruster assemblies are provided as separate resin parts. A particularly nice touch is that the RCS thruster bells are in fact molded as bells, with very little cleanup needed. All of the resin parts are completely bubble-free. From this and other New Ware castings I have seen, it is easy to say that superb resin casting is characteristic of this company's offerings.
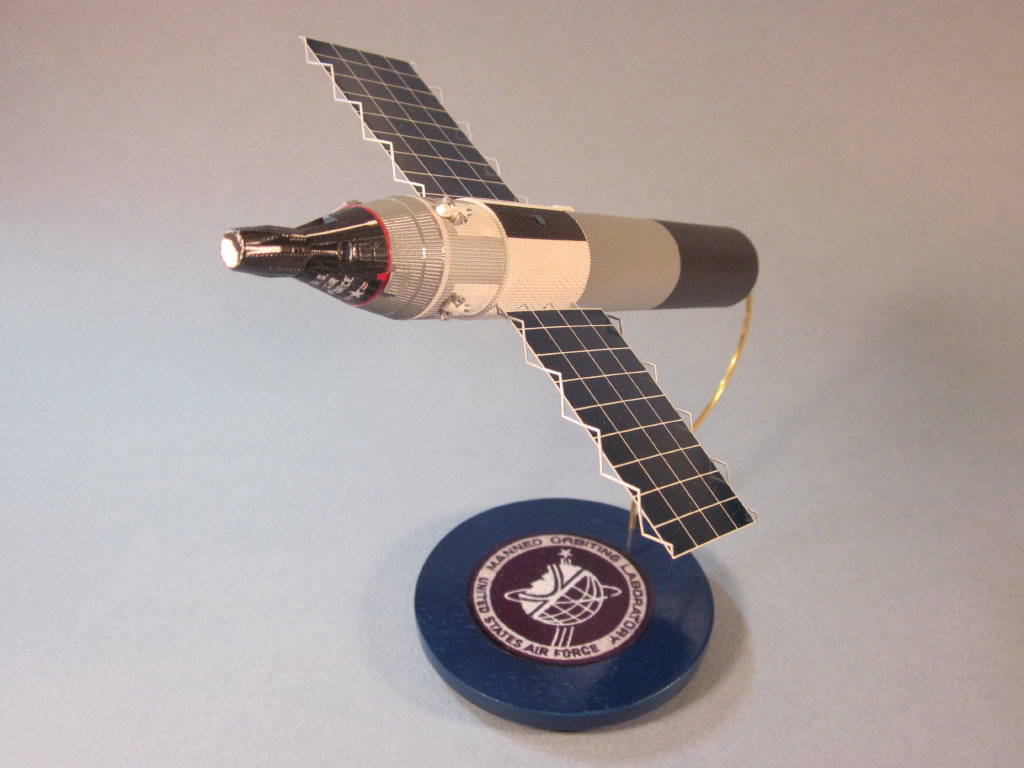
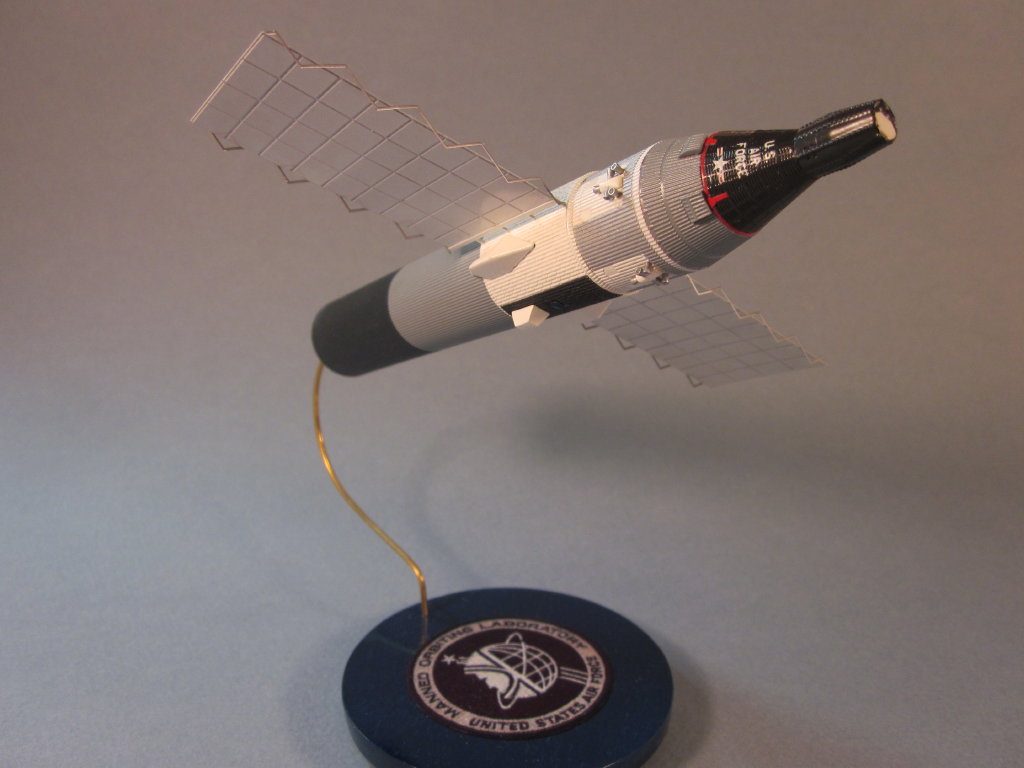
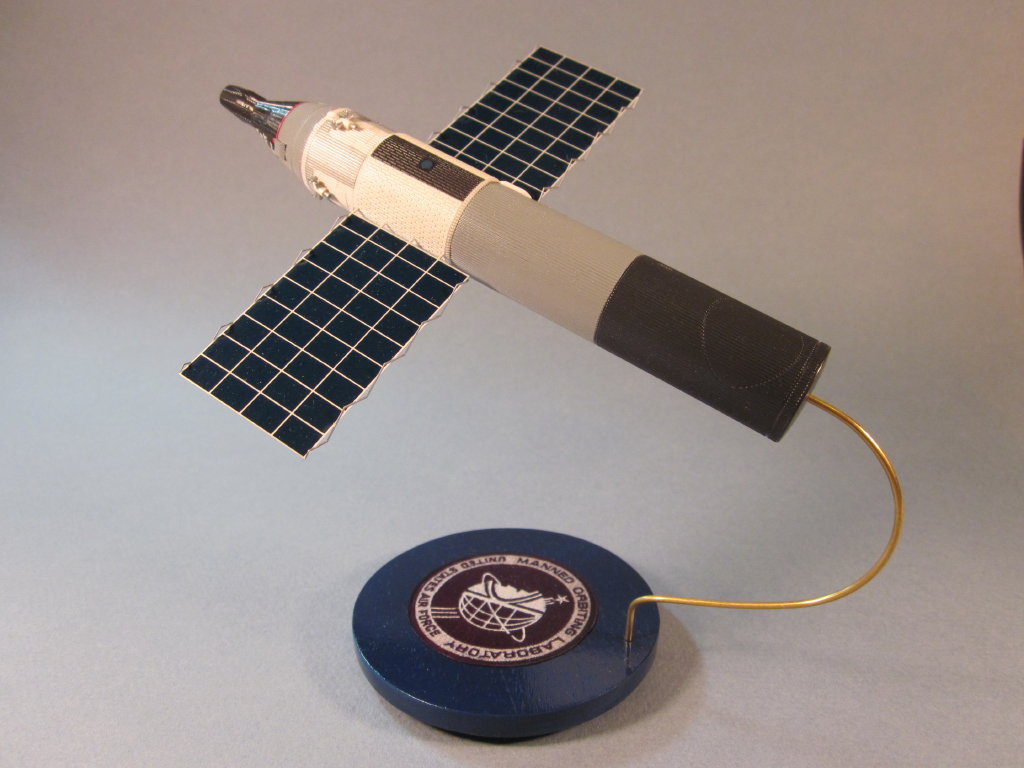
MOL design variations included a version with solar panels, which are provided in this kit in the form of photo-etched brass sheets and separate "zig-zag" deployment/support struts. The bending strength of the panels is enhanced by a fold at the attachment struts. The zig-zag segments feature a very clever, and much appreciated, centerline notch to facilitate attachment to the main solar panel sheets. The PE fret appears to be designed to facilitate easy removal of the parts; my usual process of using a curved X-Acto blade pressing against masking tape on glass, worked nicely with little post-separation cleanup required. Panel assembly, finishing, and installation is still a delicate operation given the fragility of PE parts, but all of these features are examples of thoughtful engineering that is too often lacking in model kits - particularly in the limited run genre.
Instructions are relatively straightforward for this minimal part-count kit, with a single page of part location information and assembly guidance. The back side of this page contains 5 views as a guide to painting. Since the actual vehicle never flew, some license can be applied here based on review of various 1960's artist's concepts. I chose to adopt the kit paint scheme for as good a reason as any - it looks cool.
The decals are well printed and thin, and provide small USAF markings, as well as solar panel photo-voltaic cell treatment. Duplicate decals are provided, a nice touch that alleviates a bit of stress during decal application. The decals worked fine with Micro Set and Sol treatment.
You are on your own to come up with a suitable base to display this fragile model.
Build
Construction was routine for the most part. The main cylinder has a minor pour plug that requires removal, and the smaller resin bits need some trivial cleanup. I attached the side blisters (I don't know exactly what they are but suspect they are thermal radiators) at this stage to fill small gaps and paint the white mid section as a unit.
Painting is mostly an exercise in planning ahead and masking skills, the trickiest part being the very thin circumferential red stripe on the base of the Gemini crew return capsule. After priming in white and establishing white as the overall base coat, I airbrushed the top section red for the purpose of this stripe. Very thin tape was then applied to mask the areas to remain red. The remaining progressively dark areas of gray and black (I use Floquil Weathered Black or Engine Black for this purpose, a very dark gray) were accomplished with the appropriate masking. The key when masking the subtle corrugated surface is to burnish the tape to prevent bleed-through.
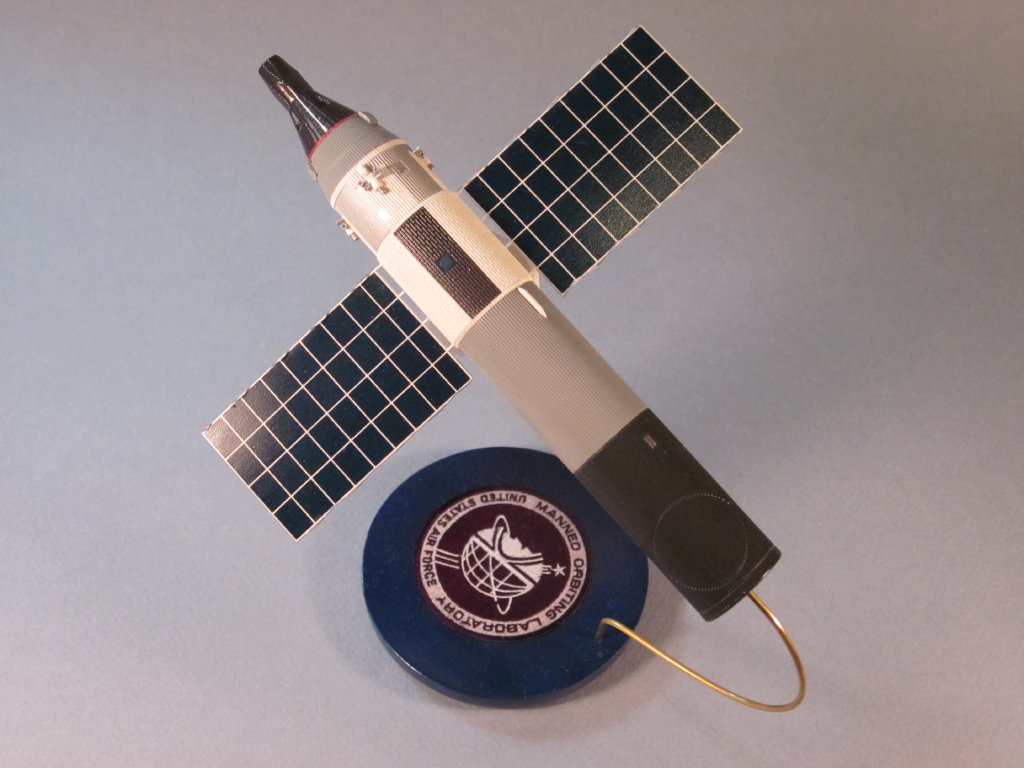
I used a punch and die set to punch "window" disks for the two small flat areas that are mid-body on each side (between the solar panels). Some illustrations show these portholes in the laboratory section, and again the "looks cool" criterion won the day. These and the Gemini windows were hand-painted a very dark blue and hand-glossed with Future at the very end of the build. (It should be noted that the small flat "porthole" area is molded on one side, but must be (carefully) ground/sanded off the other; I'm not sure why this wasn't done in the mold but perhaps it was noticed too late. Careful masking off of the appropriate small square area allows you to gently scrape away the corrugation and smooth the surface without collateral damage.)
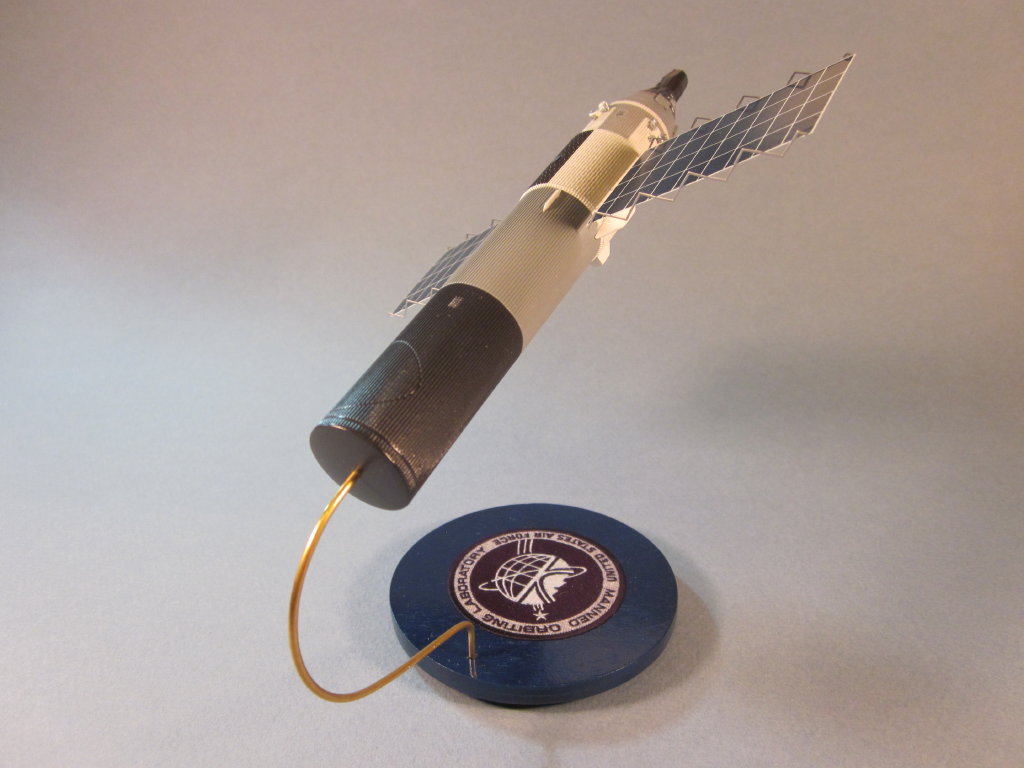
I used a couple of wooden disks that I think I bought at a Michael's craft store for the base. Some filling, sanding, smoothing, and priming, and it was ready for a USAF blue paint treatment. I found a MOL program patch image on the internet that I printed on photo paper and attached to the base. Thin brass rod, shaped to put the model at a rakish angle, connected model to base; the rod is a bit more flexible than I'd like so the model bobs undesirably if disturbed. I applied 4 rubber feet underneath for some stability.
Summary
I spent 15 enjoyable hours building the MOL and its custom base. I have other New Ware kits in the stash, have my eye on some others to order, and look forward to building these interesting and well-designed kits. My thanks to myself for purchasing this kit direct from New Ware.
I'll note that in my stash, I have the 1/144 RealSpace Titan III/MOL launch vehicle (see References). That will someday make a nice companion to this New Ware on-orbit representation of the MOL.
References
Wikipedia, Manned Orbiting Laboratory
New Ware (MOL kit NW072 details)
RealSpace Models (Titan III/MOL kit)