Eduard 1/48 49464 F-15K Interior Photo Etch Set
By Scott Hackney
I will begin this review with a disclaimer: you can’t build an F-15K cockpit with this set - #49464! The F-15K cockpit is black, and the color-etch for this set is gray. Please don’t let that stop you from reading on. This review will be applicable to the upcoming F-15E set, or to what I intend to build with this set - a Saudi Arabian F-15S. The set consists of three pieces - two sheets of photo-etched brass (one of these pre-painted), and a piece of acetate for the HUD. The set is intended for the Academy F-15 kit.
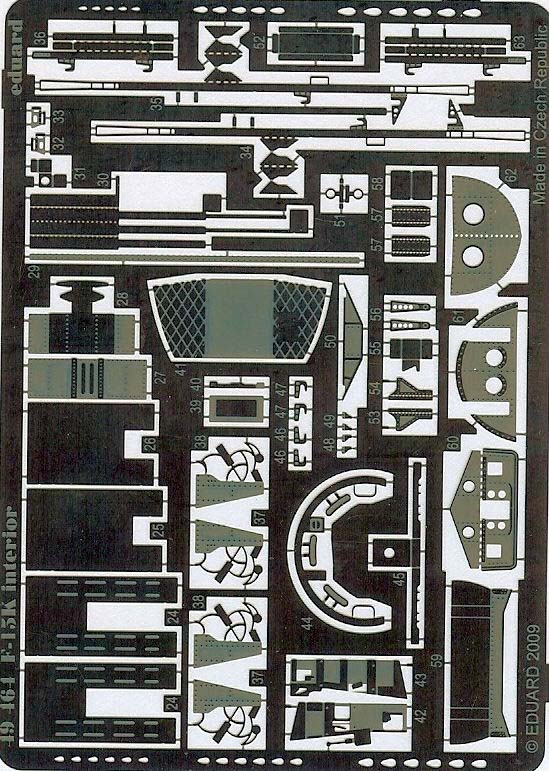
Construction starts with building a new cockpit floor that raises the floor about 3/16th of an inch. I was curious why Eduard chose to raise the floor because the tub seemed fine, and it is. The seats are the problem: they are short, especially around the headrests. Eduard raised the floor to restore the balance –nicely done.
The two p/e frets include parts to detail the tub, sidewalls, and canopy. I found that all the pieces fit very well, and I had no problem with most of them, but there were a few that were just too small. Once the tub was complete with all the metal in place I painted it with Poly-Scale Dark Ghost Gray.
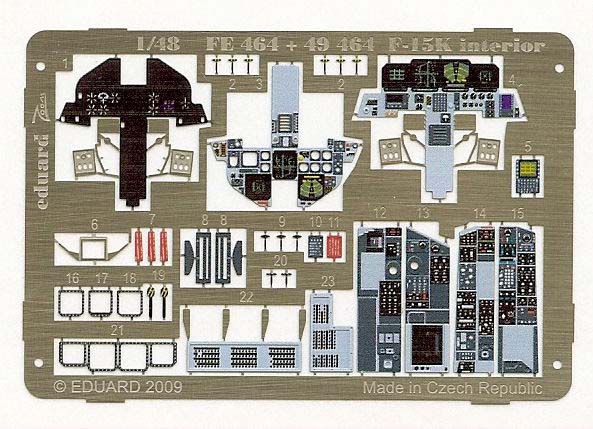
While lighter than the Dark Gull Gray of US cockpits this paint is a good match for the color-etch, most of the time. I think the F-15K etch is just a shade lighter that most sets, but everything matched well in the end. I added a dark wash to pop out the pattern in the floor and rear bulkhead before adding the color pieces.
The color etch is self-adhesive. It’s the first self-adhesive set I’ve used and I was disappointed. On some of the parts the adhesive works well, but on most pieces the adhesive was weak and I had to use glue. The color-etch is used for the instrument panels, the consoles, and some sidewall detail. Once again everything fit well and I had little trouble. I found it tricky to bend and fold the etched throttle components, so next time I’ll punch out some round pieces to add form and strength.
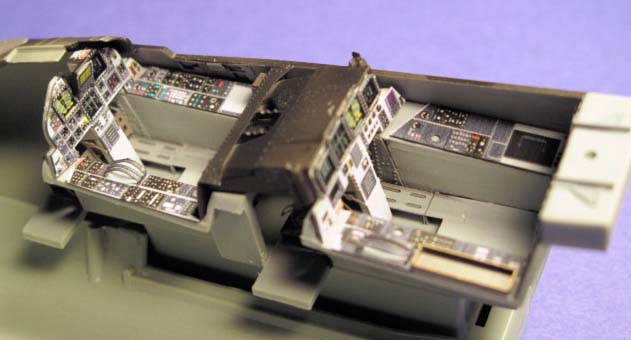
Once all the color-etch was in place I gave the tub a coat of Polly Scale Flat, which took away the sheen of the color-etch and blended everything together nicely. A drop of Future on the MFDs and instruments and I was ready to put the tub in the fuselage.
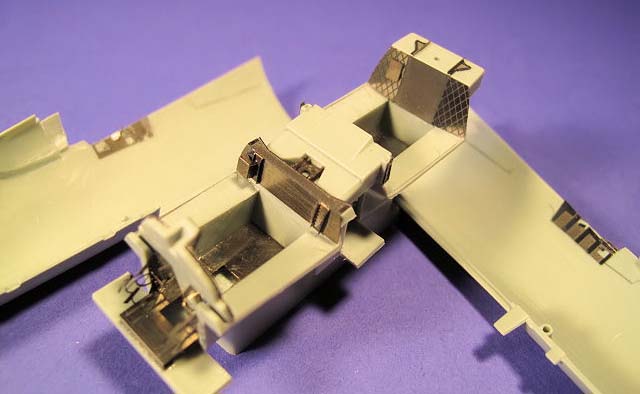
The tub attaches to the nose wheel bay and the rear cockpit floats free. I found it difficult to figure out where to position the two color-etch circuit breakers on the sidewalls in the rear cockpit. I was tempted to do something about that and I am glad I didn’t.
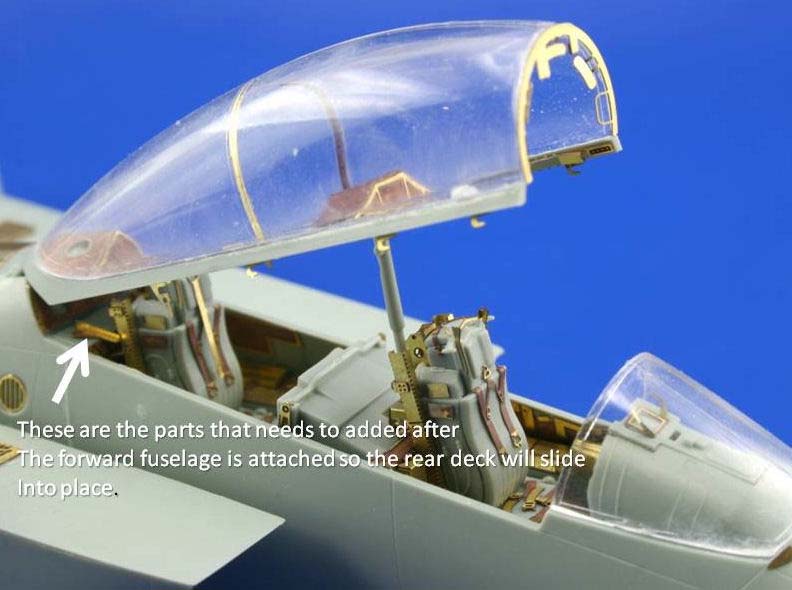
Leave the etch pieces off the rear deck until you attached the forward fuselage. The rear deck slides partially underneath when it attaches and the etch blocks the piece.
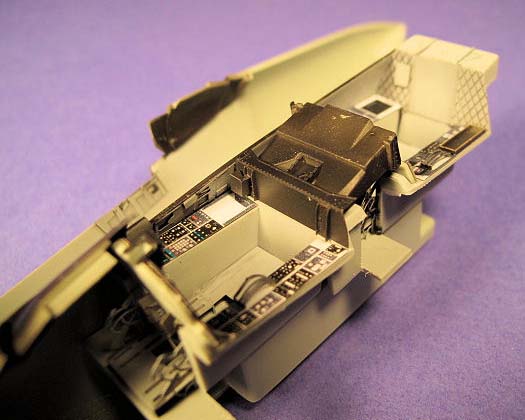
The directions look like the parts fit flush with the deck, but the images from Eduard’s website indicate that these parts protrude into the tub. The photo also gives you a preview of all the etch details available for the seats. I have that set too and that’s next on my F-15S build.
Overall, I was really impressed with fit and finish of the cockpit set. It looks great - it is just not an F-15K.
